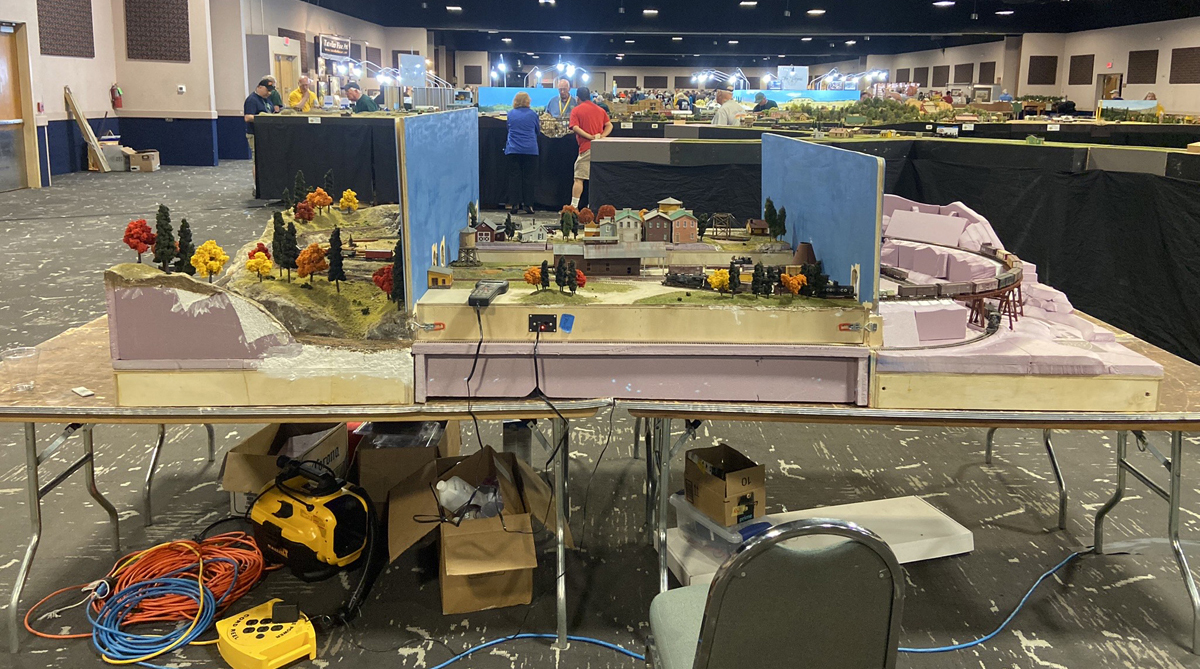
Over the first dozen or so years of of its existence, the original HO scale Milwaukee, Racine & Troy underwent many changes. Among these was the installation of a freestanding backdrop on the downtown Milwaukee section, which resulted in the scenic challenge shown below.
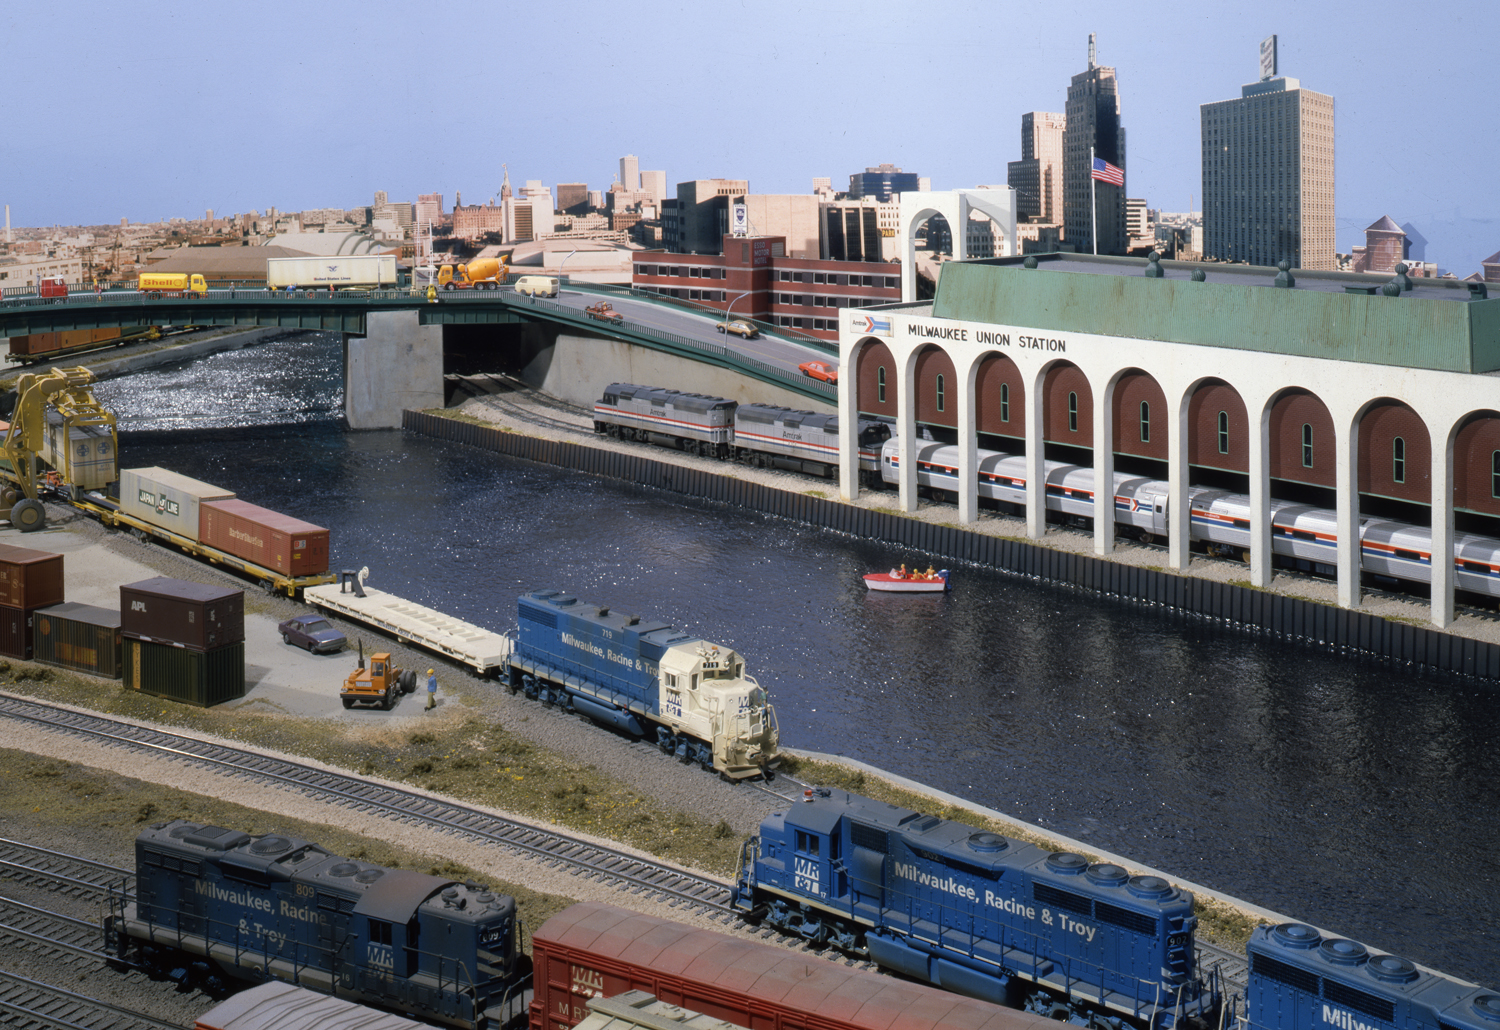
Already in place was the Port Marquette Yard, the MR&T’s eastern terminus at Milwaukee. We had also roughed in the ship channel, and the tanker Linn H. Westcott was already plying its plywood waters (sorry about that).
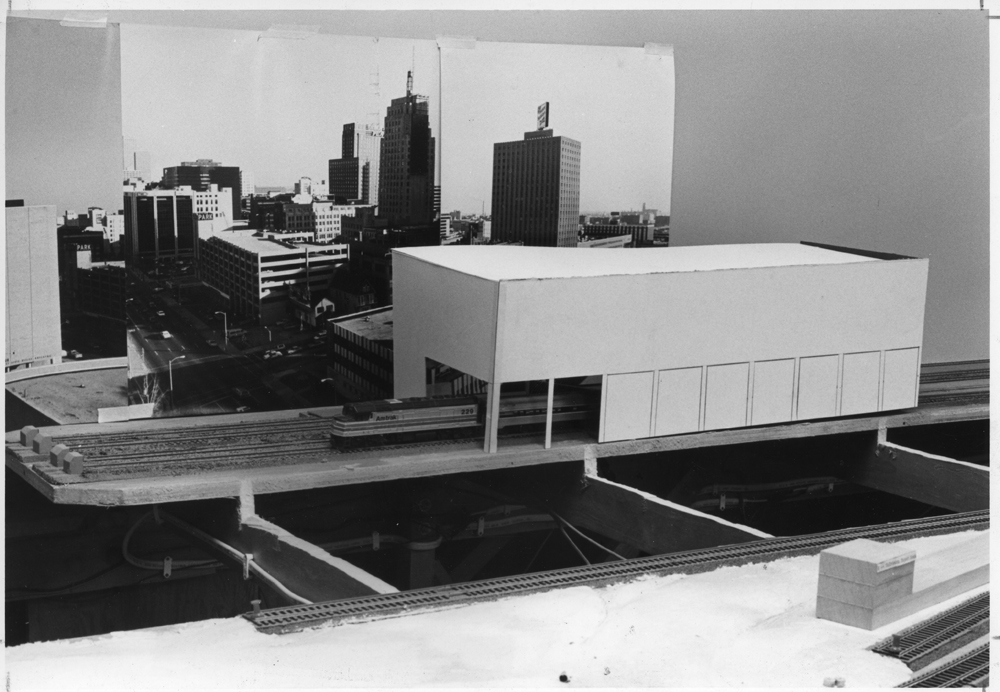
Plans called for a bridge across the end of the canal to hide its junction with the backdrop and a mirror under the bridge to make the canal look as though it continued into the distance. Erecting the backdrop left some complicated trackage on the far side of the canal inaccessible, so it had to come out. Any new track in that area would have to be very simple and 99.99 percent derailment-free. Also, club members wanted a passenger station for our Amtrak patrons. Beyond that, the sky (represented by blue-painted tempered hardboard) was the limit, just so that what we ended up with looked something like downtown Milwaukee.
The photo poster backdrop
“If it’s gonna look like Milwaukee, it oughta be Milwaukee,” I figured, so rather than use a generic city backdrop, I decided to try a blown-up photo of downtown Milwaukee itself. After trying several local photo houses and the newspaper for something appropriate, I decided to take my own skyline pictures, a job that turned out to be easier said than done.
First of all, there was considerable debate about the angle from which the backdrop photos should be taken. The layout is low, about belt-buckle high, so should I take backdrop photos that would look natural when viewing the layout, or when photographing it from low angles? This argument came up many times in club affairs, and in the end we usually compromised with something halfway between. Next time, we’d build the layout higher.
I finally decided on the higher angle and took 35mm slides from the roof of the Milwaukee Public Museum, all the while being closely supervised by a security guard. The camera was on a tripod, so I could take one picture and then swing to one side with no change in elevation or angle to take another. I took two shots at one location, then moved to the other end of the roof and took another set of two.
Frankly I was amazed at how well the resulting photos could be fitted together, particularly as I really wasn’t thinking about using them intact when I shot them. The four photos took in almost 180 degrees of the scene in front of me. If you take the same approach, you can be more conscious of where the joints between your shots will fall and get more backdrop for your money.
A few more thoughts on your photos. Obviously, you need a nice day, and you should choose a time of day when the sun will be at your back. Based on my experience, you can count on getting about 8 to 10 feet of backdrop at one location.
Finding good photo vantage points probably won’t be easy. Supervisors of tall buildings don’t want people on the roofs or shooting out open windows. (The museum ordinarily wouldn’t honor such a request, but they owed us a favor.) Your best bet might be to look for good hillside or public bridge locations.
Forced perspective
To look as though it belonged in downtown Milwaukee, our bridge across the canal needed to be substantial and support four lanes of busy traffic. I could have run it straight across and into the backdrop, but that would have pulled a viewer’s eyes right into a wall. More and more I’m coming to believe that butting anything, even the shallowest flat, directly against the wall spoils the illusion. It’s much better to allow some space, even if only a fraction of an inch.
I decided then that once the street crossed the canal it should turn right and go behind the station. But this presented a problem. If the station were to be wide enough to look right, then only about 5″ of space would be available behind it for the street. To solve this, I made a street that narrowed as it receded toward the backdrop, using cardboard mock-ups to establish the angles. Also, I made the drawbridge control tower near the front of the layout larger than the one to the rear and the arms on the crossing gates longer than those on the far ones.
“Aha,” some readers will think, “the old forced-perspective trick.” Our visitors, though, never comment on the narrowing street, which I take as a sign of success. Such tricks aren’t working if they call attention to themselves.
Speaking of tricks, I’d never tried the old John Allen mirror trick before, and it worked great. We love the way the canal and the railroad appear to curve off alongside one another into the distance. Ours is just an ordinary mirror; if we’d used a front-surface mirror, the joint between the water and the mirror would be even less noticeable and the effect even better.
Click here to see more of the original Milwaukee, Racine & Troy layout.