


When I cut a hole in the living room wall in order to expand my N scale railroad into the hallway beyond, I thought that was as large a model railroad as I would ever own. I was just happy that my wife agreed to my bizarre suggestion (see “Harlowton, Montana, in N scale,” Model Railroader, Oct. 1999). But within a couple years, what I had only dreamed about became a reality, and I acquired a basement (with a nice home on top).
The transition from a shelf railroad to a basement empire meant not only the expansion of territory, but also the expansion of my concept of model railroading. In retrospect, I have no regrets about the order of things. Working initially within a confined space enabled me to develop my skills as a modeler without the complexities of a large model railroad. Still, I read about such things. I wasn’t an armchair railroader, because I had a layout, but I definitely was an armchair railroad empire builder.
During this time, I was also operating on several other layouts, which helped me decide my own preferences. So when I acquired the basement, I knew exactly what I wanted. I had ideas about layout height (50″ or more), a sincere track plan (trains running through scenes only once), a single level (helixes aren’t for me), and open staging (no beneath-the-layout yards). I had enough experience in operation to know that these factors should be part of the up-front planning, not shoehorned into the layout after it was built. I also knew that I preferred medium length trains with plenty of on-line switching. Most importantly, I had decided on a prototype and an era – the North Montana Line of the Milwaukee Road in the early 1950s.
A humble beginning
My layout has evolved over the years from a shelf railroad to a modest basement empire. In the late 1970s,
I began the initial shelf layout with sections 1 and 2, as marked in the diagram above. I was inspired by the creative options described in Robert Lutz’s article “Bookshelf railroads: 1” in the January 1977 Model Railroader, and I adapted one of Linn Westcott’s switching layout plans from Kalmbach’s 101 Track Plans. A decade later, after moving to a different home, I added section 3, which featured a reverse loop and provided more operating flexibility. This took up all the available space along one wall of my living room.
By the late 1990s I had decided, after much discussion with my wife, to go through the wall into the hallway with Sections 4 and 5. This setup was put in place only for operating sessions and then taken down and stored.
Not long after completing these two additional sections, I found that I would be moving again, this time to a home with a basement. At this point I began working on a track plan that would incorporate the five shelf sections into the larger scheme. I had to modify some of the track to link it to the new layout, but this approach saved me time in getting the new layout up and running, and kept my previous efforts from going to waste.
What I did right
Without the time to start over from scratch, I knew I needed to incorporate my shelf railroad sections into the new layout. It proved to be a boon that the shelf layout had been created with stub-ended yards. I could use the same towns I’d already built on the new layout by simply extending them.
By the time I was ready to lay track and wire the new layout, Digital Command Control (DCC) was on the market and growing. I was hesitant to make the change, and continued for several years to rely on the tried and true cab-control method. But as it turned out, the change from direct current to DCC took one afternoon. I simply used my selectors to divide the layout into four big blocks, and connected each block to four power districts through the 14AWG bus lines already in place. I was ready to run!
And not so right
I could have saved considerable money had I installed DCC when I started the new layout. At the time, I was quite happy with the DC block system. I knew it well, and good components were readily available. My operators were the ones to eventually nudge me into DCC, since several of the layouts in our round-robin operating group already were using it. They grew tired of turning block selector switches in the yards and along the main line, and I don’t blame them. In retrospect, I spent money on DC equipment that could have been better used buying DCC components.
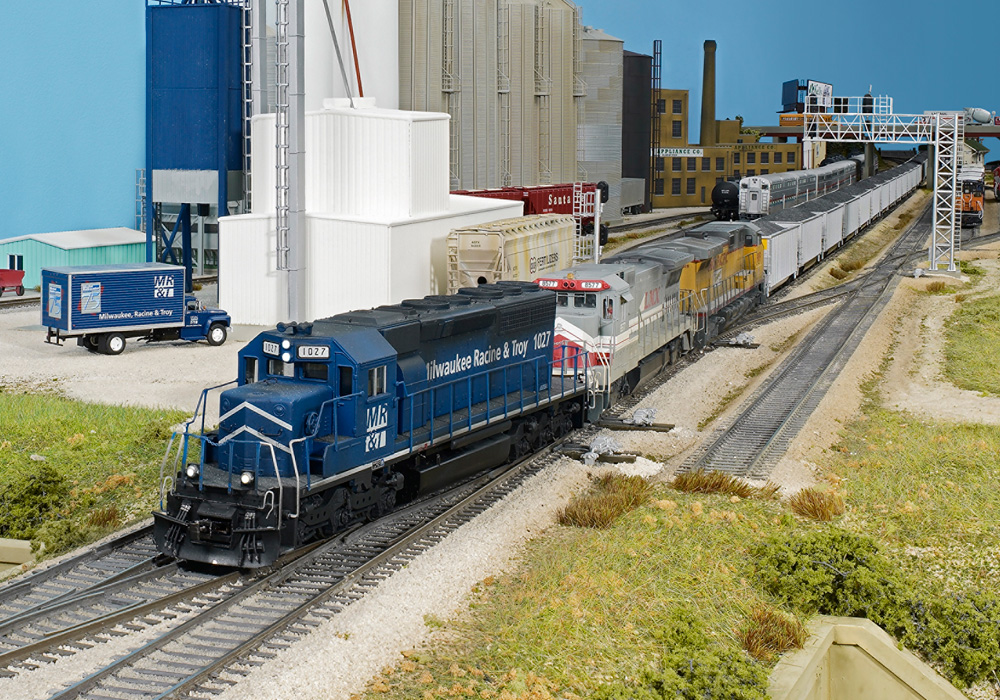
For me, the biggest surprise of transitioning to DCC was how it transformed helper service. A long 2 percent grade west out of Harlowton, as well as a 2.2 percent grade eastward, meant that the relationship between tonnage and traction out of Harlow Yard wasn’t merely cosmetic. Formerly, double-heading trains meant finding engines with similar speed characteristics. With DCC, pusher service became a regular part of the operating scheme, and the ease with which it worked surprised me.
Modeling Big Sky Country
The mountain ranges, of course, could be represented only on the backdrop, but collecting good photographic material from scenic brochures and pictorial books about Montana helped me get the colors right. Color references are important, especially in the West. The low humidity and long visual distances give distant vistas a different look than in eastern regions, where the humidity is higher and the sight lines are shorter.
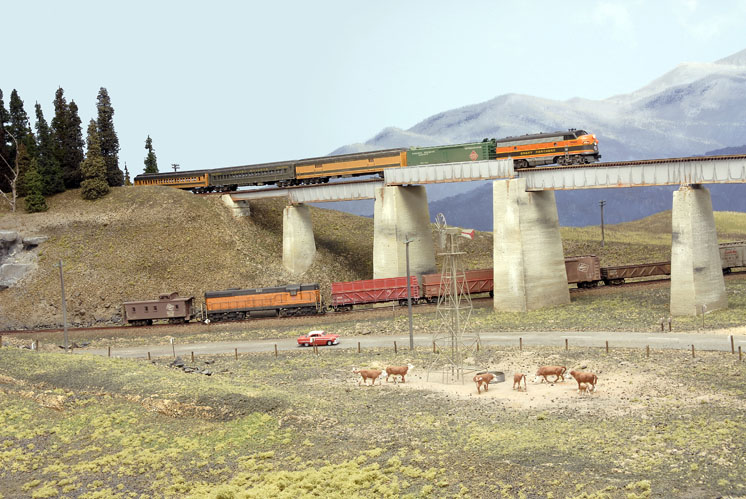
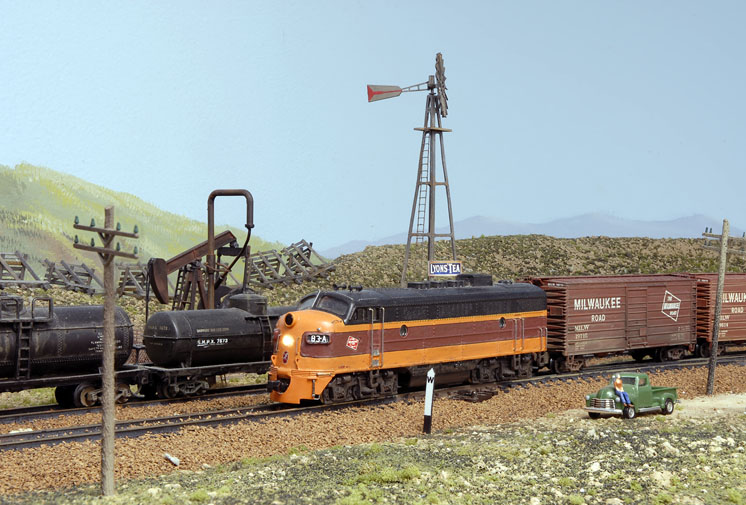
Of course, Big Sky Country is also cattle country, and on the North Montana Line, beef and sheep were major commodities. Stock corrals and stock trains were common, as were hide and fur processors. Montana still has the reputation of having about half a dozen cows for every human.
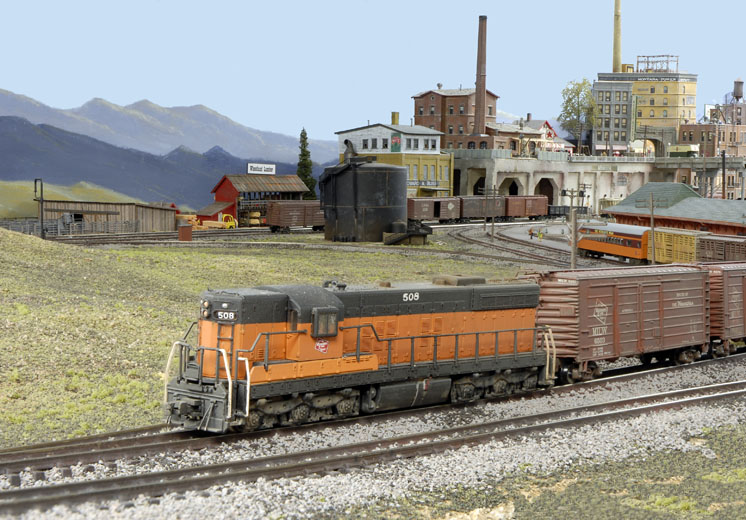
The Judith Basin was home to vast grain fields, and grain elevators were built in nearly every town. The North Montana Line had big-time operations, especially with Great Falls’ large traffic volume, and grain trains were huge revenue producers. But the line still had the character of a rural, agricultural railroad. Many of the elevators were of wood-frame crib construction.
Another operational aspect of the prototype was the interchange with the Great Northern. Around Great Falls and Lewistown, the two railroads crossed and interchanged with each other. One of the more impressive crossings was near Judith Gap, where the GN crossed the Milwaukee on a seven-span deck girder bridge.
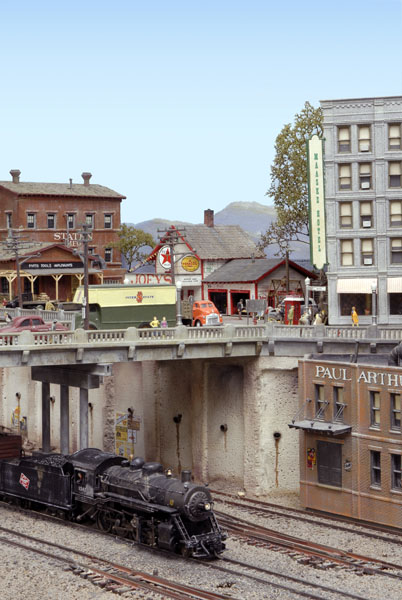
While I try to model some structures and scenes authentically, I also leave room for imagination. My Harlowton doesn’t match the real one, and I’ve taken liberties in Lewistown too. I’m trying to capture the feel of Montana, rather than create a museum piece.
Building a roster
For instance, Ed Mielke, the roundhouse foreman at Harlowton, oversaw the steam-to-diesel transition beginning in late 1953. The older L2 and L3 Mikados were nearing the end of their tenure. Though some diesel switchers – notably Electro-Motive Division NW2s, SW7s, SW9s, and SW1200s – had already been in use, the SD7s were the first road engines assigned to the Rocky Mountain Division in late 1953 and early 1954. The first freight motor to come up the NML, SD7 no. 515, came to Lewistown in tow behind a steam engine!
Others would follow. The first GP9 also came to the NML in late 1953 and would be followed by several others over the next few years. The North Montana roster was filled out by F units. One unique passenger “engine” also plied the line, motorcar 5901, nicknamed “The Bulldog.” Home-built in the MILW shops in 1948, this 85-foot car worked the line between 1948 and 1954.
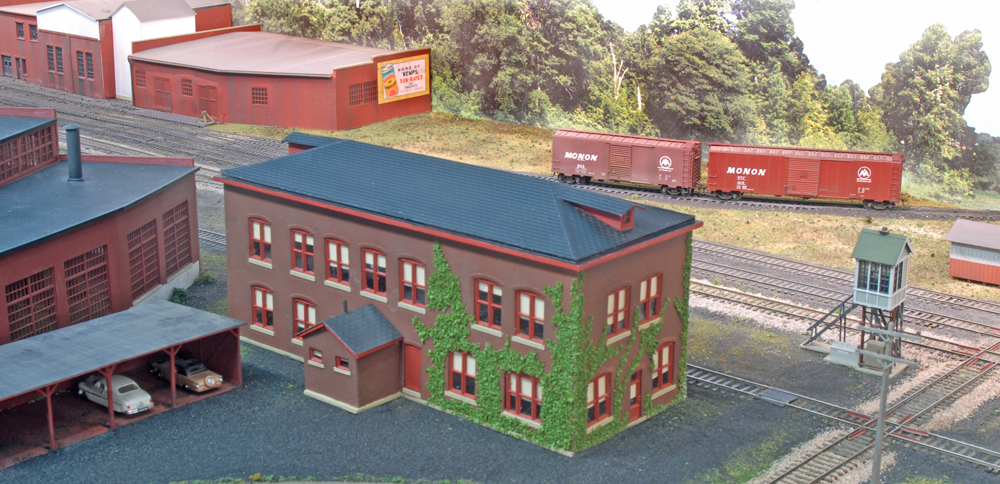
Structures
One of my favorite aspects of the hobby is building structures, both kitbashing and scratchbuilding. Some I build from period photos, so they match the prototype quite closely. For others, though, I’m unable to locate any visual references, even though I know these places existed no more than half a century ago. When exploring on foot, for instance, I discovered only foundation remnants from the Portland Cement Co. at Hanover. Hence, my version is probably not at all like the original. Some structures are entirely freelanced, like the small rural gas station at Choteau. Either way, my goal is to produce models that seem appropriate for central Montana in the early 1950s.
Plans for the future
The old railroaders who guided the North Montana Line through its transition to diesel – Ed Mielke, Red Hanley, Bob Spring, and others – are all gone now. I was privileged to interview several of them before they died (see my articles in The Milwaukee Railroader, 4th Quarter 1999 and 1st Quarter 2000), and they left an indelible impression. May they rest in peace, and may the nostalgia of the central Montana they knew and loved live on in N scale.
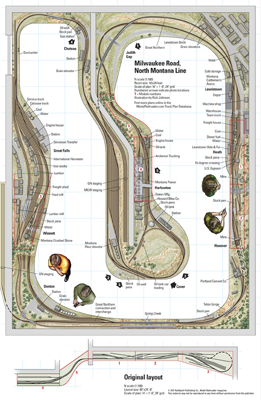
Name: North Montana Line
Scale: N (1:160)
Size: 18 x 24 feet
Prototype: Milwaukee Road
Locale: central Montana
Era: 1953-54
Style: walk-in
Mainline run: 115 feet
Minimum radius: 121⁄2″
Minimum turnout: no. 6 (main), no. 4 (industrial spurs)
Maximum grade: 2.2 percent
Benchwork: cantilevered box girders
Height: 50″ to 57″
Roadbed: cork on Homasote
Track: code 80, 70, and 55
flextrack
Scenery: plaster gauze over extruded Styrofoam
Backdrop: hand-painted drywall
Control: CVP EasyDCC with wireless throttles


Excellent article! Everyrhing looked great and what really caught my eye was the details added to the locomotives. If you don’t have a blog already, I would like to see one that goes into depth on how you added your motive power details and built your structures also. The Spring Creek Trestle article was also most impressive.Thanks