


Add depth to structures using mirrors: In working on the addition to my On30 Olympia & Sand Creek layout, I’d decided to add a building flat at one end to represent a warehouse. The flat is about 3” deep and angles away from the viewer slightly so it can sit 90-degrees to the track that serves it.
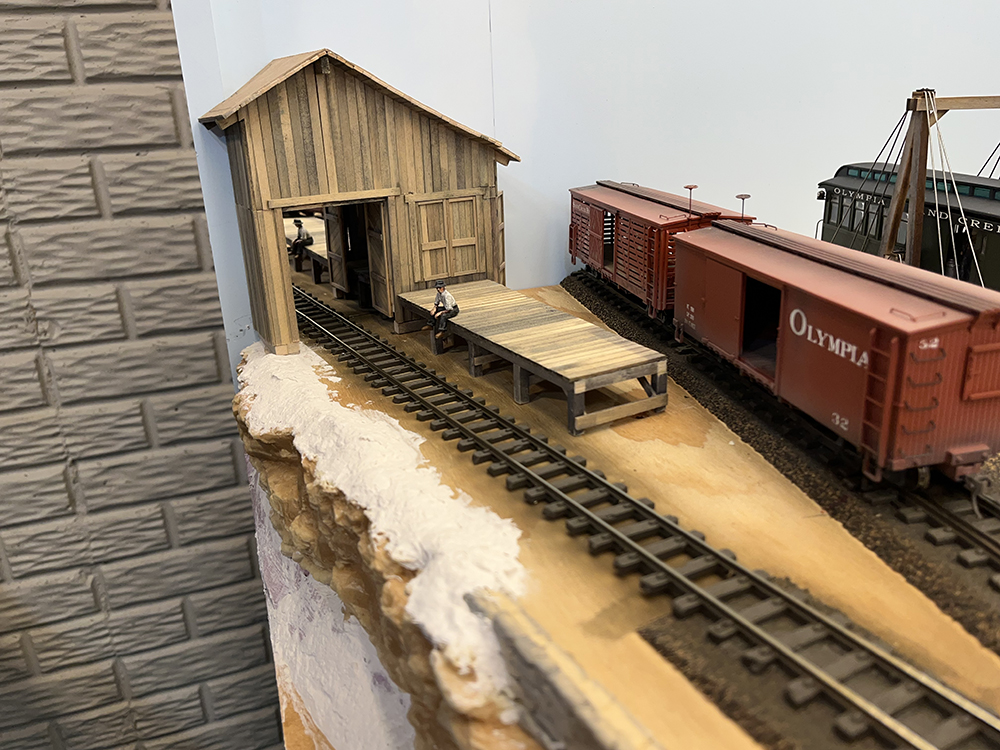
For those of you who have followed the Olympia series, you may recognize the structure. It was scratchbuilt by MR’s editor, Eric White, for the first version of Olympia, back in 2014. It’s a plain timber building, and because it was shallow to fit along the backdrop, Eric originally built it with closed doors.
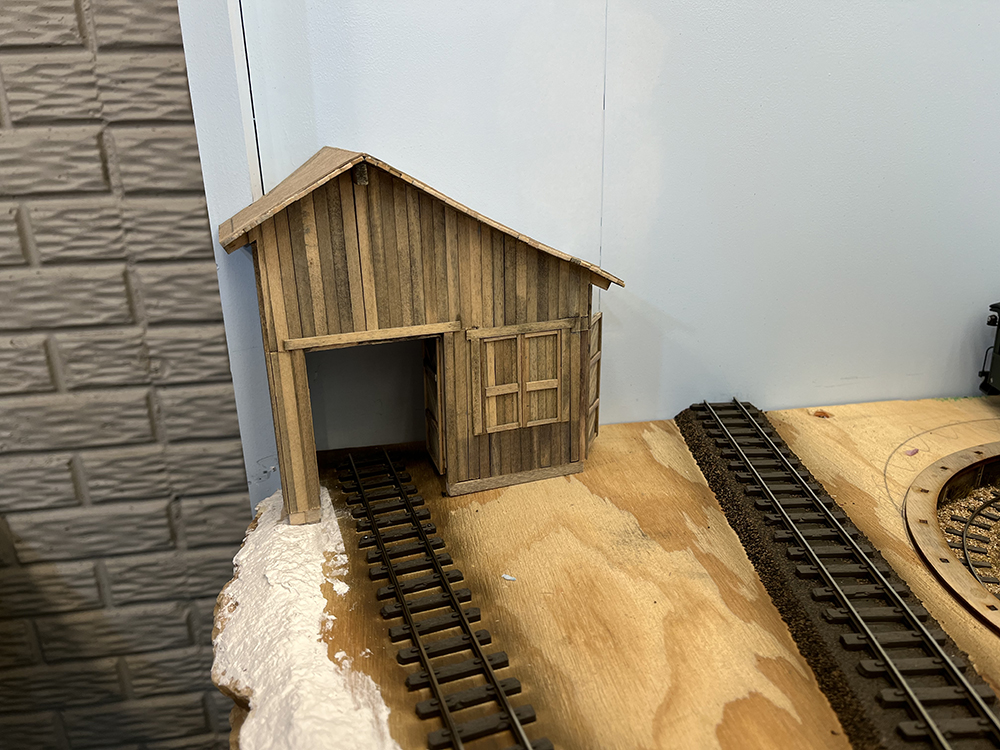
In its new location at Sand Creek, I modified the building to fit around a fascia support post and opened the doors so freight cars could be parked part way inside. However, even with the building at a slight angle, I could still easily see the backdrop through the open door.
While I’d considered painting the backdrop inside the building black, I remembered that Gerry Leone used small mirrors in various places on his Bona Vista layout, making his roads and rivers look like the continued on under bridges. John Allen had used mirrors on his Gorre & Daphetid as well, particularly to make scenes in his mountains look vast and deep. I also remembered a backdrop building we’d taken off of Jones Island on the MR&T that Art Current had built that used a small mirror inside an open door to make the flat seem deeper. After looking at what Art had done, I decided that adding a mirror to my warehouse seemed the perfect answer.
Art, Gerry, and John all used glass mirrors. Glass mirrors are heavy, thick, and difficult to cut without damaging their surface.
Looking for a different option, I found 4 x 6 inch plastic mirror tiles on Amazon.com. A pack of 16 was just $!5, so I ordered it, figuring that if this worked well, I’d want to use them in other projects. (And if it didn’t, I was only out 15 bucks.)
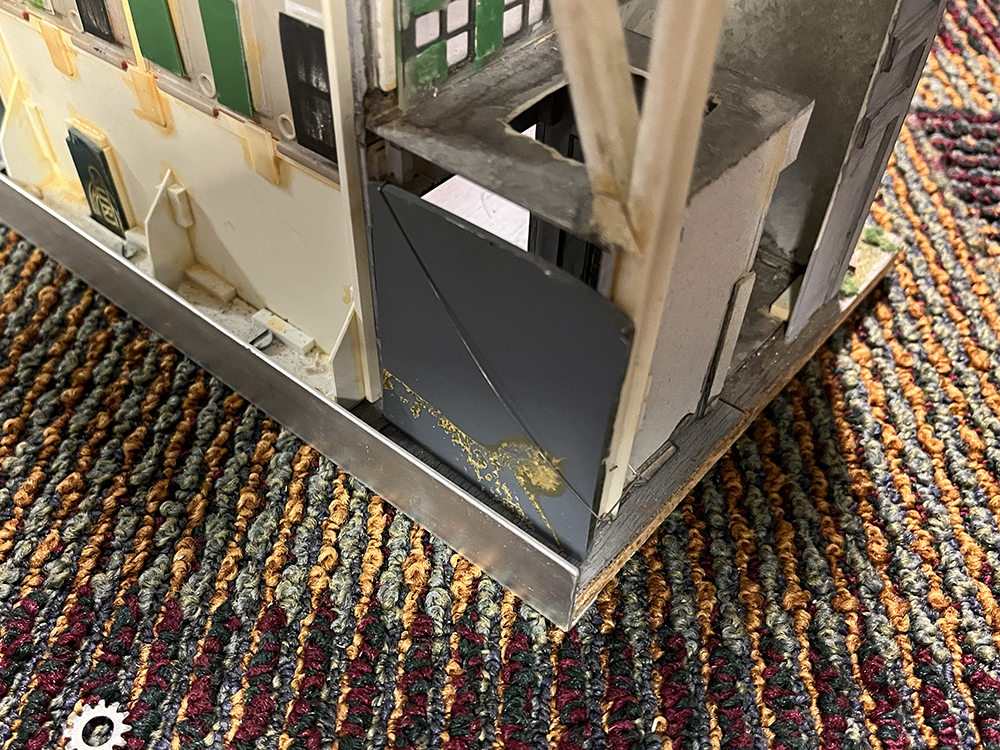
The plastic material comes with a protective plastic film on it, which is great for cutting the plastic without scratching the surface. The material is approximately .030” thick, and easy to cut using the same score-and-snap method you’d use with styrene. After cutting a 4 x 4.5 inch piece, I peeled away the blue plastic coating.
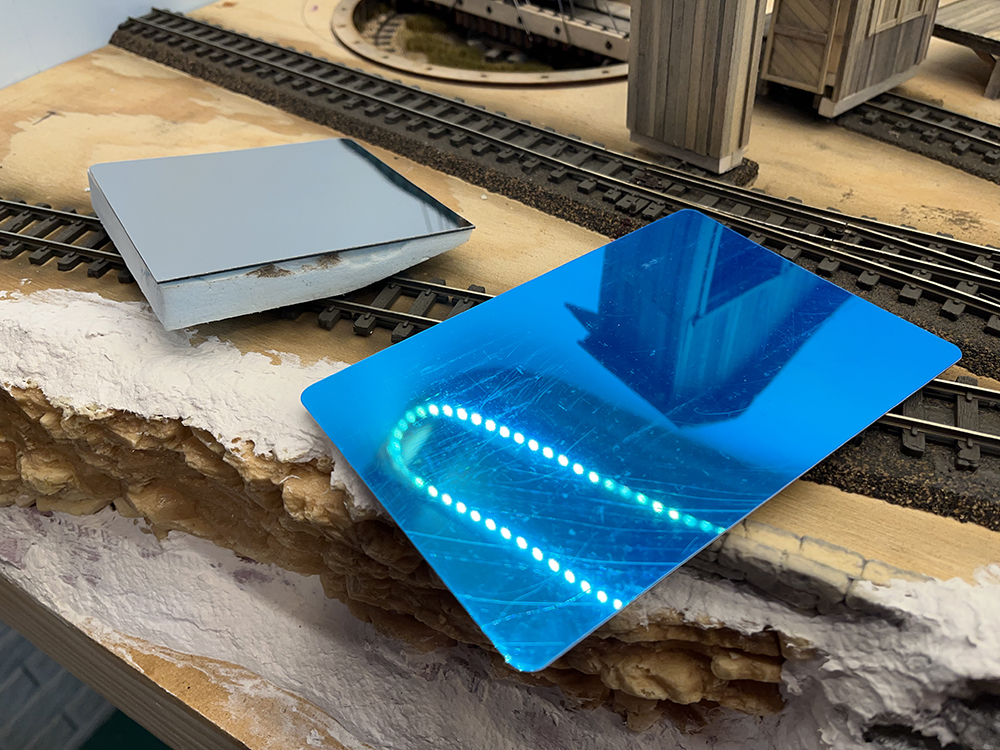
The thin plastic will stand on its own, but it’s also flexible which can distort what it reflects. If I were to mount it straight to the backdrop, this wouldn’t have been a problem, but I needed it to angle away from the backdrop to stay at a 90-degree angle to the track.
To solve this, I mounted the mirror to a piece of ½” foam insulation board, gluing it in place with clear latex caulk. I then used my hot wire foam cutter to shave off part of the foam backer and produce the correct angle for the mirror. After test-fitting everything, I then glued the foam block and mirror to the backdrop with more latex caulk.
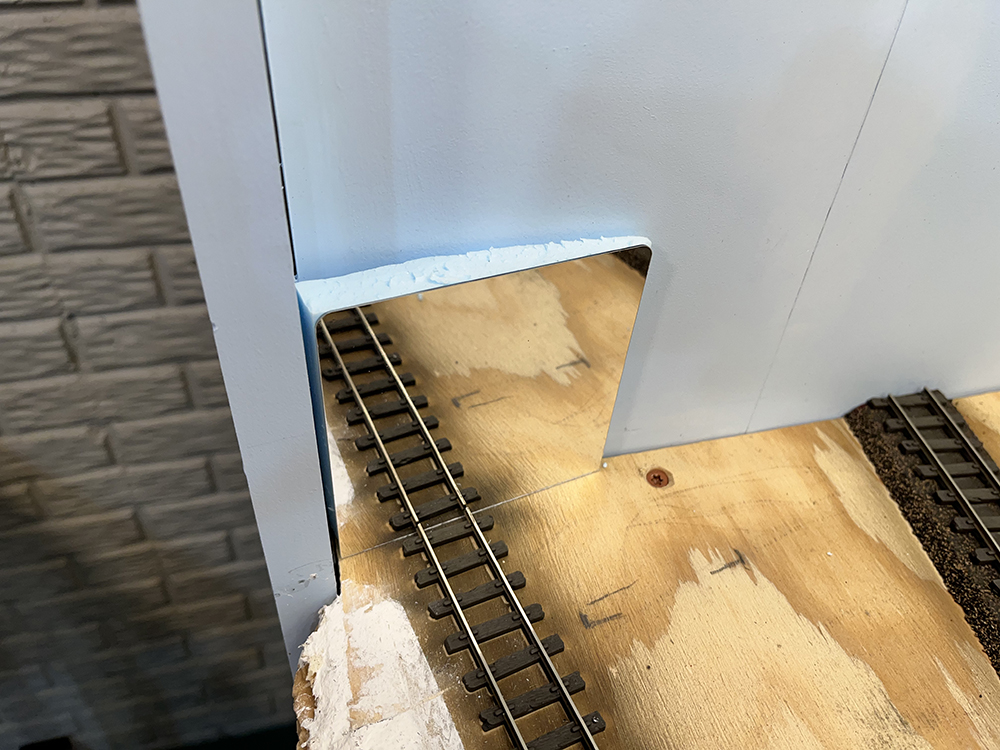

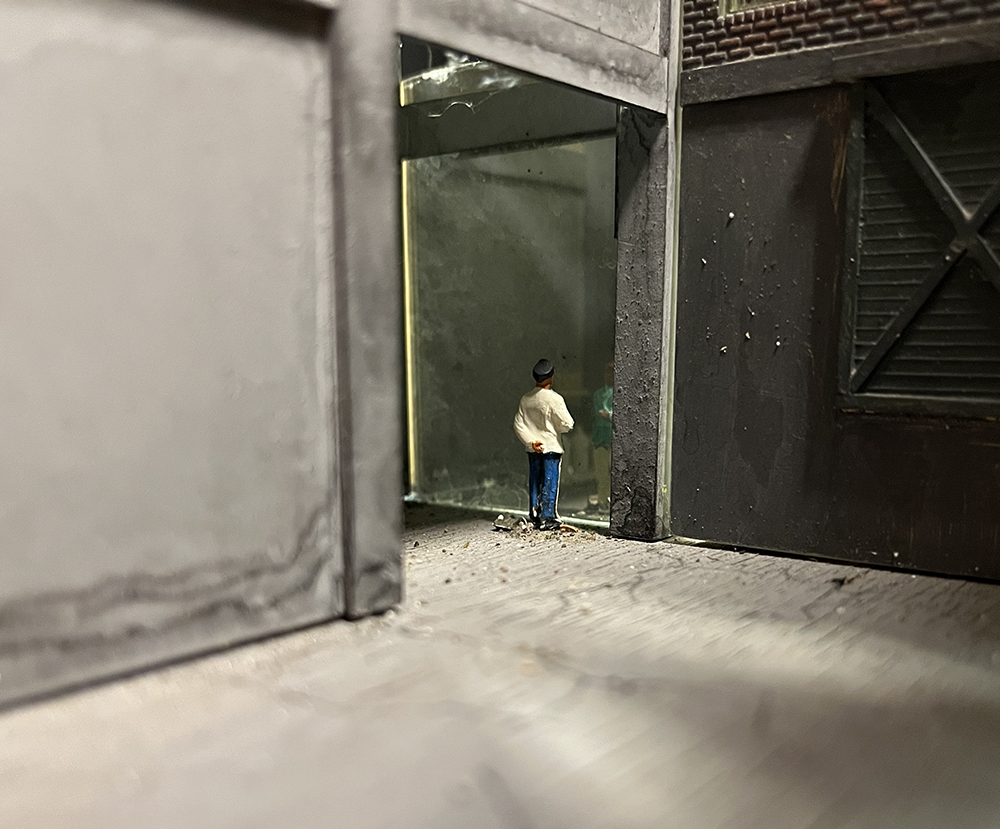
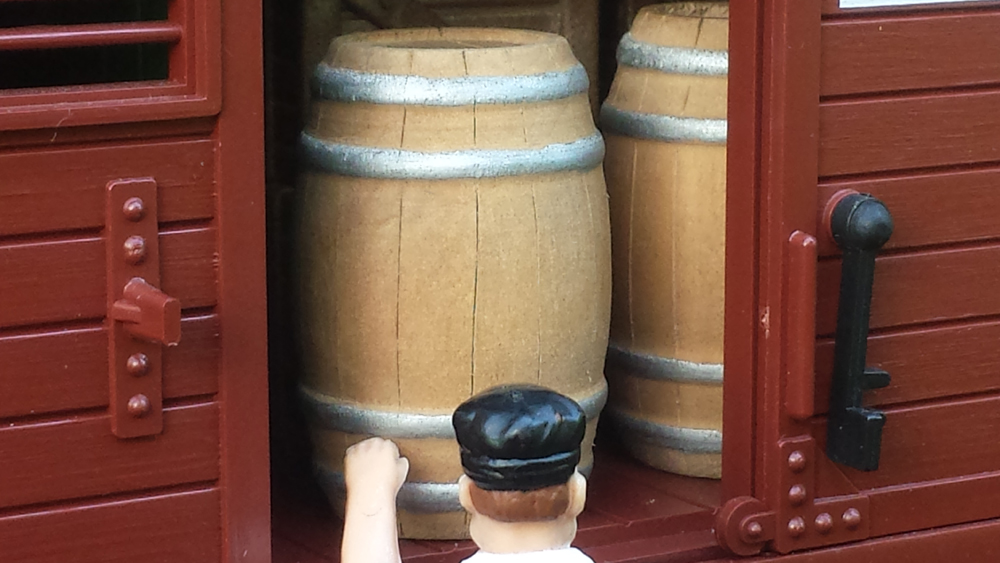
When placing the mirror, to achieve a good effect, the mirror needs to be at aligned to what it is reflecting, as well as perfectly vertical to it. For the track to look as though it extends into the mirror and through the backdrop, it needs to be at a 90-degree angle to mirror’s surface, as does the building. Before the caulk had set up, I replaced the building in the scene and found I needed to angle the mirror downward slightly to get the right reflection.

The plastic mirror material does have a few down sides. First, the mirror reflects objects that are close to it really well. However, it falls off with objects that are distant. Also, while the plastic mirror is thin enough that only a minor gap shows where the mirror and rails meet, there is still a gap. You could eliminate that gap completely by using a front-silvered mirror, but those are made from glass, are more expensive to purchase, and much more difficult to cut properly.
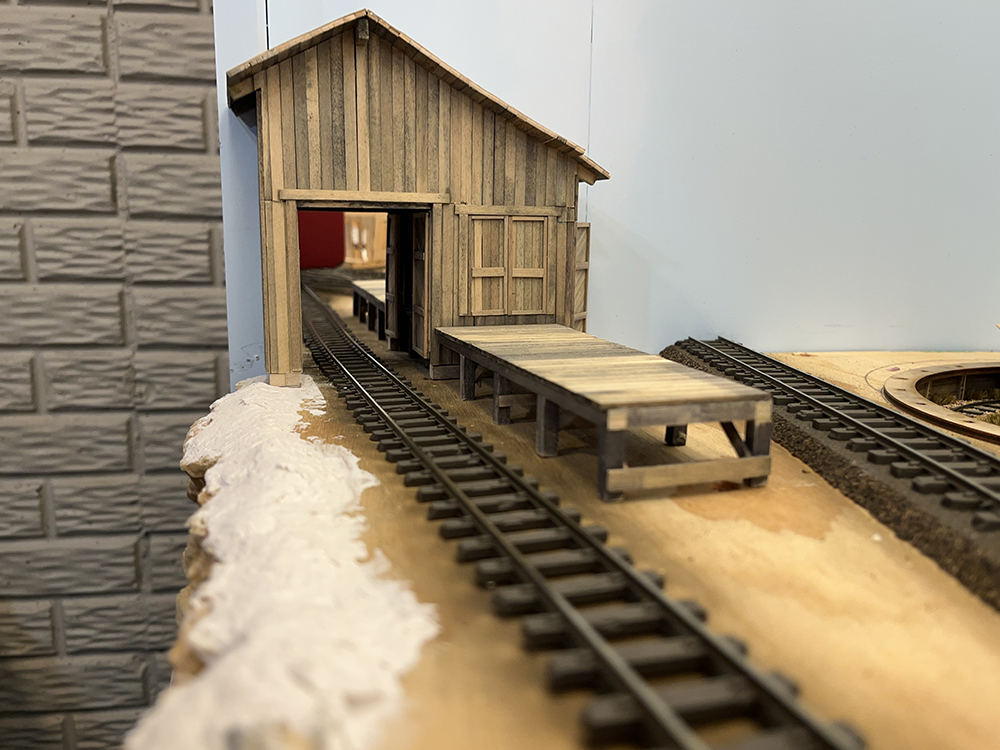
For my application, which was to make it look like something continues beyond the other side of the building flat, the plastic mirror works really well. It was easy to work with and I’m very happy with the effect. It also looks 100% better than if I’d painted the backdrop black. And with the building angled into to the layout scene, there is no chance that a viewer will ever see anything of the aisle or the people running trains.
While I will likely return to glass mirrors for applications where I need it to reflect distant object clearly, I’ll gladly look for other opportunities to use small plastic mirrors to give my building flats and modeled scenes depth. After all, I still have 15 of them left!


While I have seen mirrors used in limited circumstances, these plastic mirrors look to be a great solution for relatively small applications, such as looking into a structure. I can see using these in a two or three different spots as I build out my layout. Thanks, David!