


N-scalers have always been a clever bunch, and this was just one of the colorful and humorous terms that emerged to describe the scale’s early cosmetic flaws: oversized rivets were grapefruits, humongous molded-on grab irons were slippery ridges, and Kadee’s wheels with ultra deep flanges were pizza cutters. These were funny terms, but we weren’t laughing all that hard because they were altogether too accurate.
Meanwhile, talented craftsmen like Kent Lannert started scratchbuilding better looking and closer-to-scale handrails. Other N scalers (like me) followed their lead. Not long after, a couple of detail manufacturers offered etched-brass stanchions and handrail sets that were a big improvement.
Improving handrails remained a fussy and time-consuming business, though, one that most modelers wanted no part of. What we really wanted were better-looking handrails to begin with, and in the ’90s we started getting them, thanks mostly to Kato and extremely flexible plastics that could be molded into thin cross-section pieces that would bend but not break.
Why scratchbuild handrails? With such great-looking locomotives available today, why would anyone scratchbuild handrails? The best reason I can think of is for durability. Even with the super plastics used nowadays, occasional breakage seems inevitable and repair is basically impossible. You just can’t glue these things back together, although in many cases you can get replacement parts. In the best of all possible worlds our models would come with metal handrails – and you could expect to pay a little more for them.
The few handrails I build nowadays are replacements for railings that have broken. My solution is to build brass replacements, and I only replace what’s broken. As long as you use a wire size that’s in the ballpark, a viewer will never notice. After all, you can only see one side of a repaired locomotive at a time.
How big should a handrail be? Typical handrails on modern diesels are 11⁄4″ in diameter. In N scale this would be just under .008″. Detail Associates offers brass wire that size, but I wouldn’t use it because I think it would look too small. I realize that doesn’t make a whole lot of sense, but when it comes to models, I think looking right is usually better than being right. This is because many other details are a little larger than prototype and some things, like the thickness of cab walls and steps, are invariably a bit thick.
The .010″ wire that I use scales out to 1.6″ (the math for that is easy!), and to me looks right. I use .020″ wire to make the stanchions and I think they look just fine. Probably the Gold Medal etched stanchions would look better, and I really owe it to myself to try them next time around.
And as I said earlier, I replace only what’s broken, so choosing a wire size that approximates the original part is more important than being faithful to scale. The important thing is to get the handrail dead straight, and building the railing at the workbench makes that much easier.
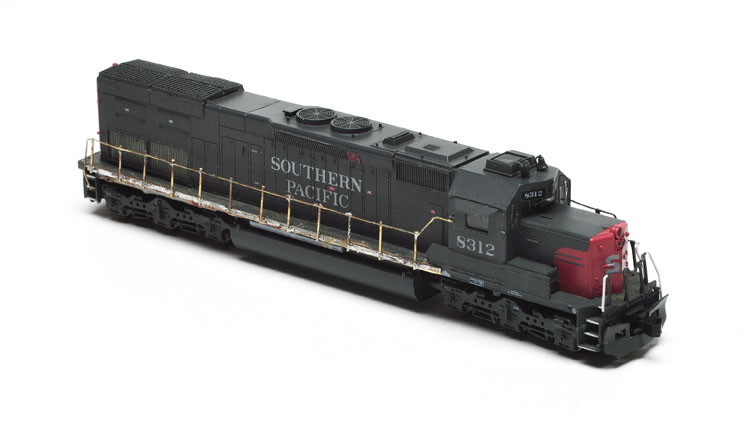
The handrail replacement at left was for the right side of an InterMountain tunnel motor diesel. This was in the first run of these engines InterMountain made, back in the late ’90s, and they had some problems InterMountain corrected in the many runs made since.
Among these problems were the handrails in general and those on the right-side in particular. All the handrails were touchy, but the ones on the right side would pop off if you just looked at them wrong, which David Popp of Model Railroader Video Plus must have done once when he was shooting video at my house. Off the handrail came at the most critical time.
I ordered a new set of handrails from InterMountain, but my problems continued. When the railing came off you could put it back on easily enough, but all too soon it would be off again. Eventually it would break.
Why did the one on the left stay in place better? On the left side there’s an air duct that runs along the top of the walkway and gives the stanchions a little more support.
I laid out this replacement handrail on an old drafting board, using the InterMountain handrail for a guide and tacking parts down with masking tape. First I soldered the stanchions to a thin brass strip, cutting them long and trimming them to length after the railing was soldered on.
All these brass parts were tinned in their entirety to make assembly easy. Just touch with a small soldering iron anywhere you want to complete joints. I attached the assembly to the sill of the locomotive with Walthers Goo.
I’ve built handrails on other locomotives by drilling holes for the stanchions in the plastic sidesills, and certainly that is preferable. Unfortunately there just wasn’t enough material on this model to do that successfully.
One side rail takes me about 1-1⁄2 hours, but it’s an exasperating problem solved once and for all.


Nice Job Jim. Can you tell me what the wire part numbers were that you used for the brass wire and stanchions?? Would sure like to give it a try. I have 4 of these Intermountain SD40's and the handrails are a real pain in the ___ :):) as you said. Thanks Jim.
Thanks Jim, I've got a few engines with just that problem. A few photos along the way or a short video of the process would be helpful.