


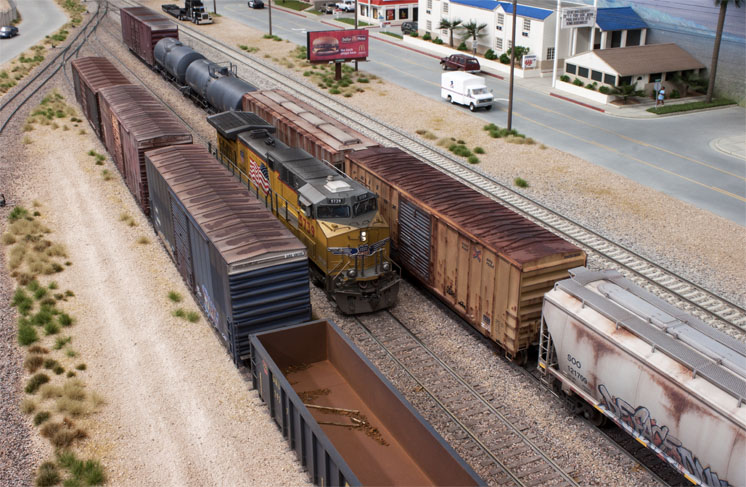
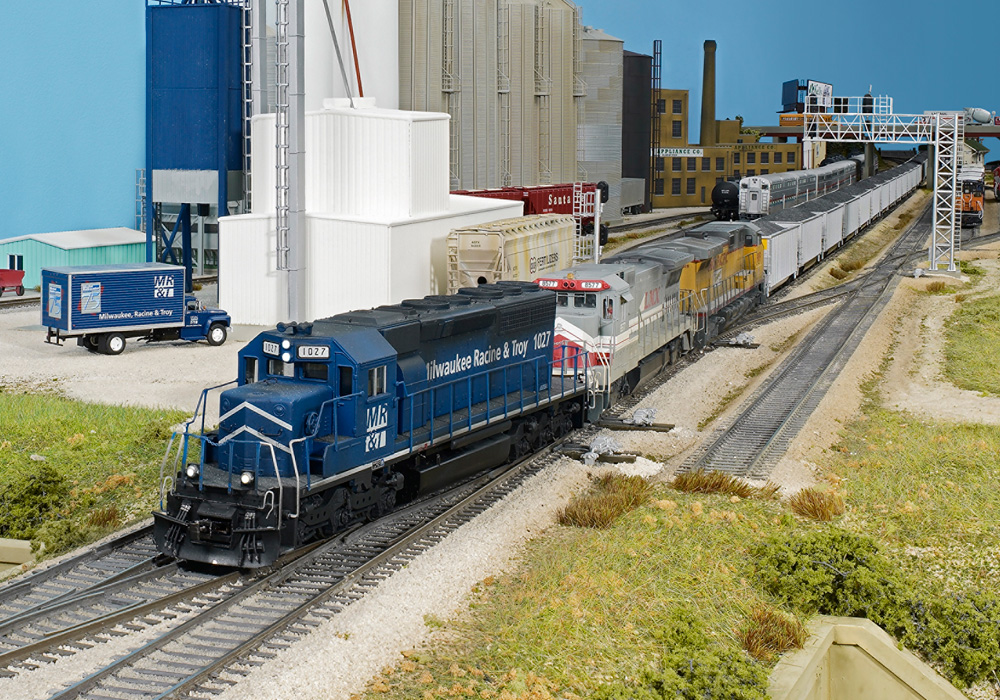
Boxcars and covered hoppers
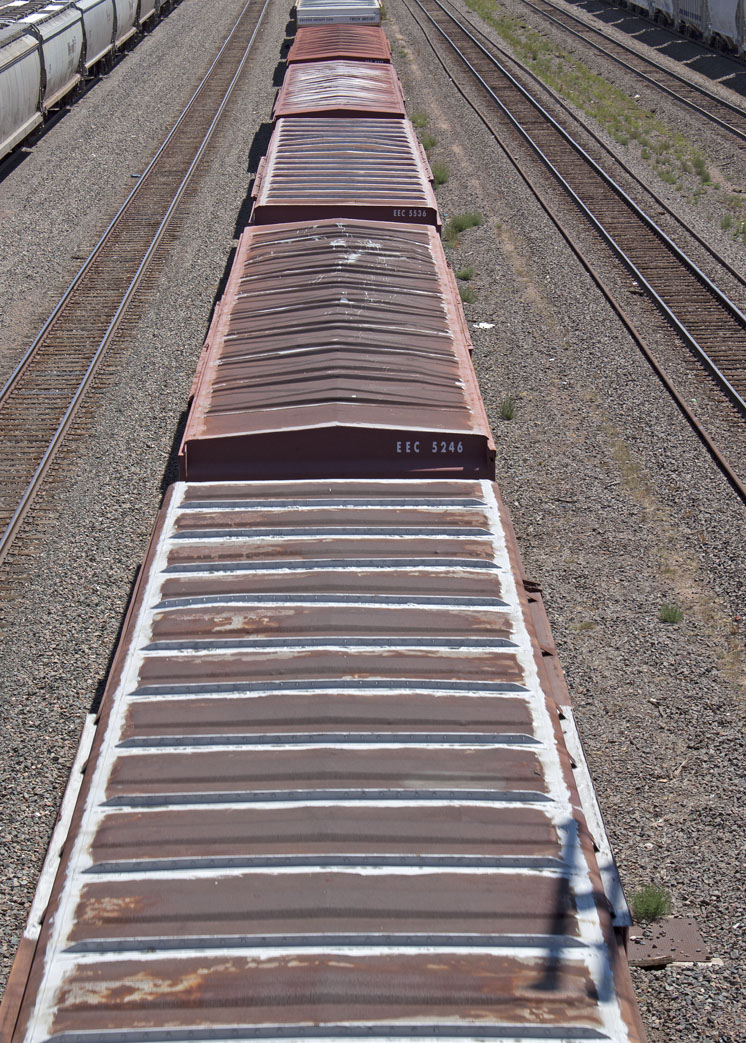
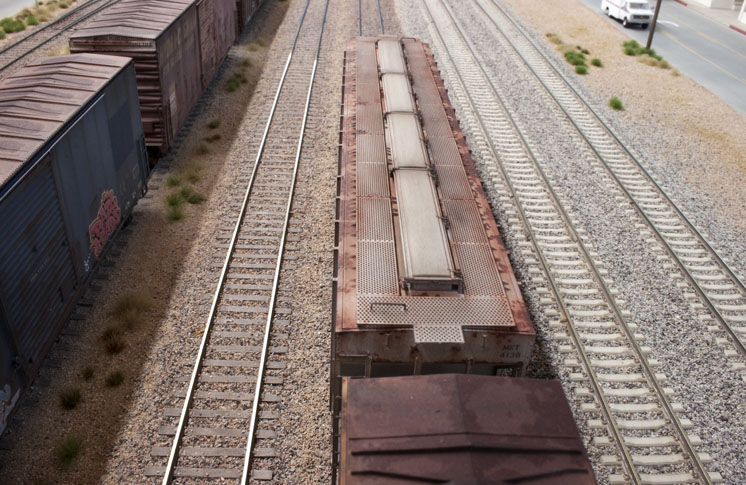
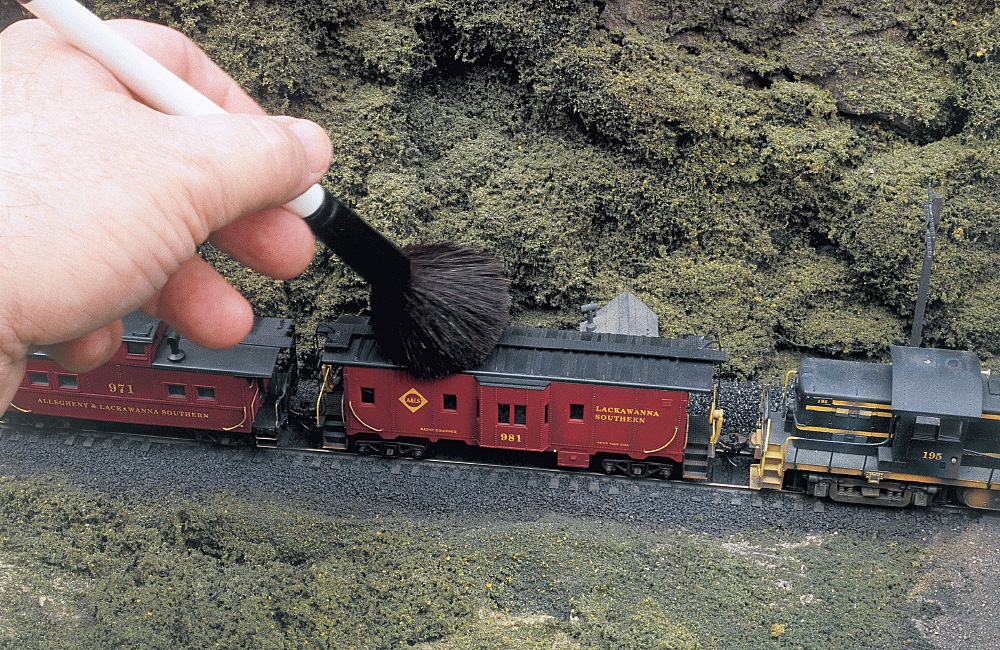
The corrugated steel roofs on prototype boxcars rust in a variety of patterns. In addition to rusty metal, boxcar roofs may have paint overspray and sealant patches to prevent leaks.
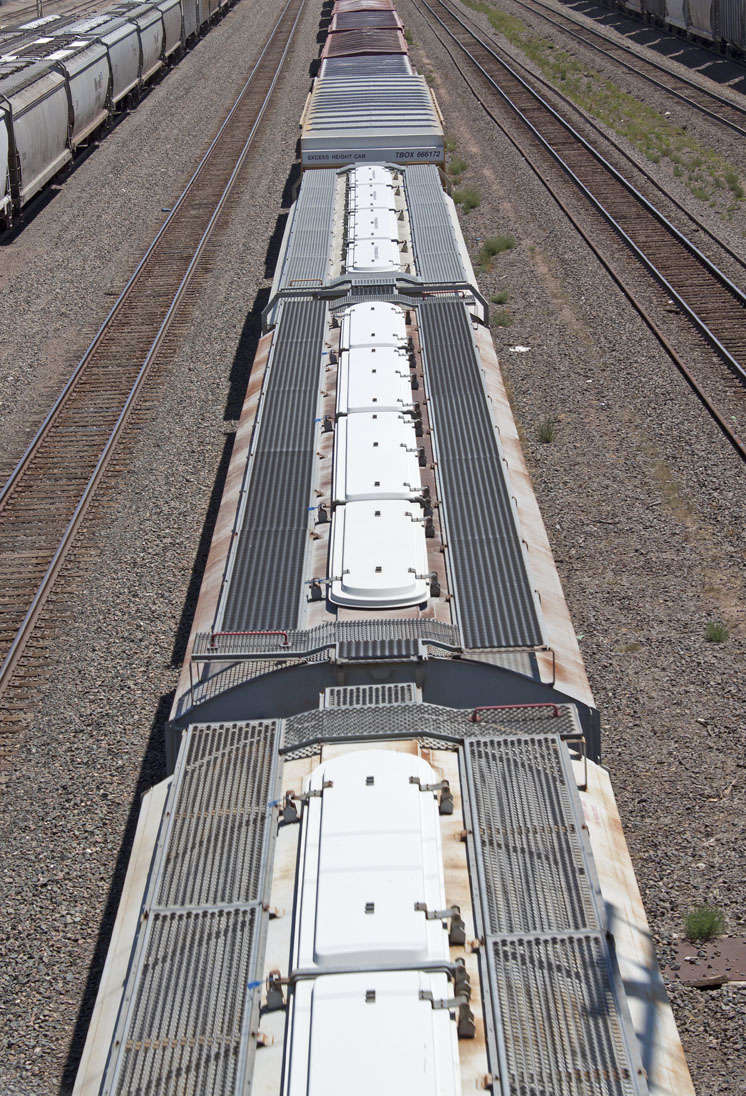
Covered hoppers are also prone to rust. What sets hoppers apart from boxcars are the occasional spilled (and sometimes growing) grain on the roof and the rust-free hatch covers. The covers used on most new hoppers are Fiberglas or aluminum, so at most they have a layer of grain dust and road grime.
Two-step weathering
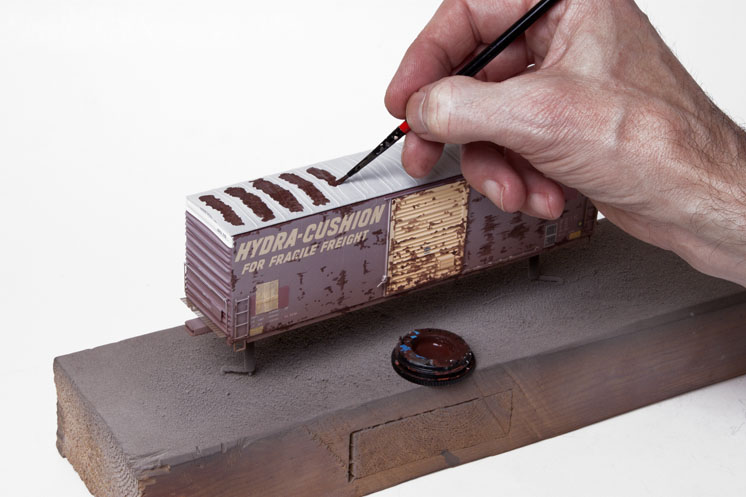
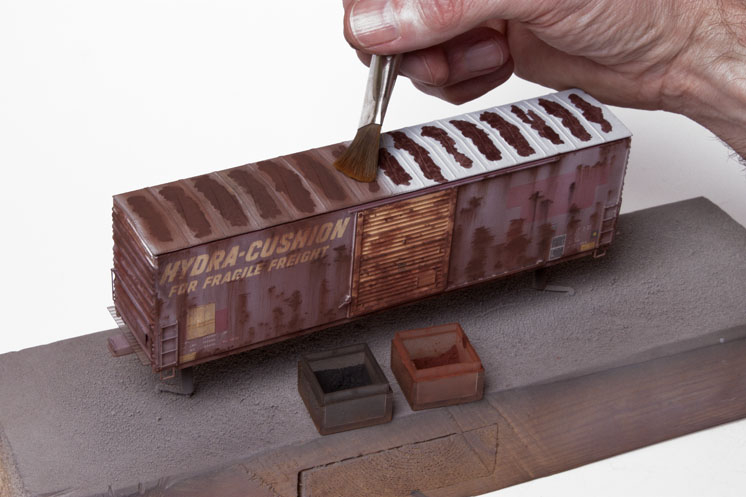
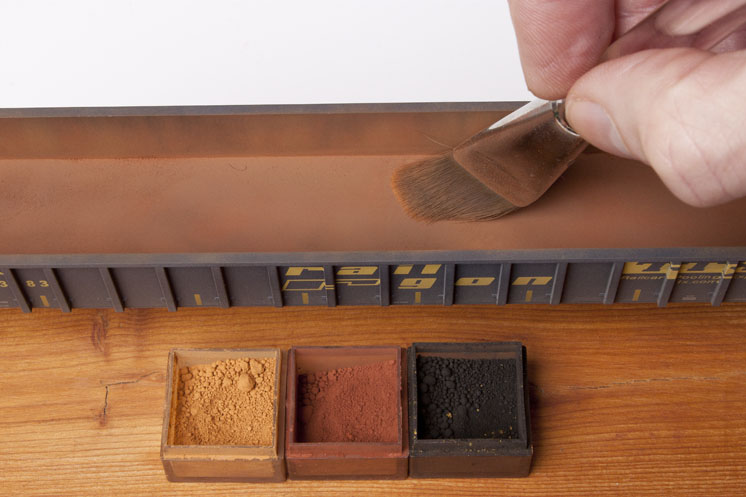
I used a two-step system to add rust to the roofs of my HO scale freight cars. First, I added rust brown powdered pastels and a little black powdered pastels to a clear flat varnish, mixed everything together, and applied the rust paste on the roof in a random pattern.
Then I applied the same two shades of powdered pastels on top of the painted areas. I used a wide, soft brush to distribute the pastels. I sealed the weathering with a coat of clear flat varnish applied with an airbrush.
I used the same techniques on covered hoppers. The hatch covers have a bit of dust and grime on them, but no rust.
Not-so-empty gondolas
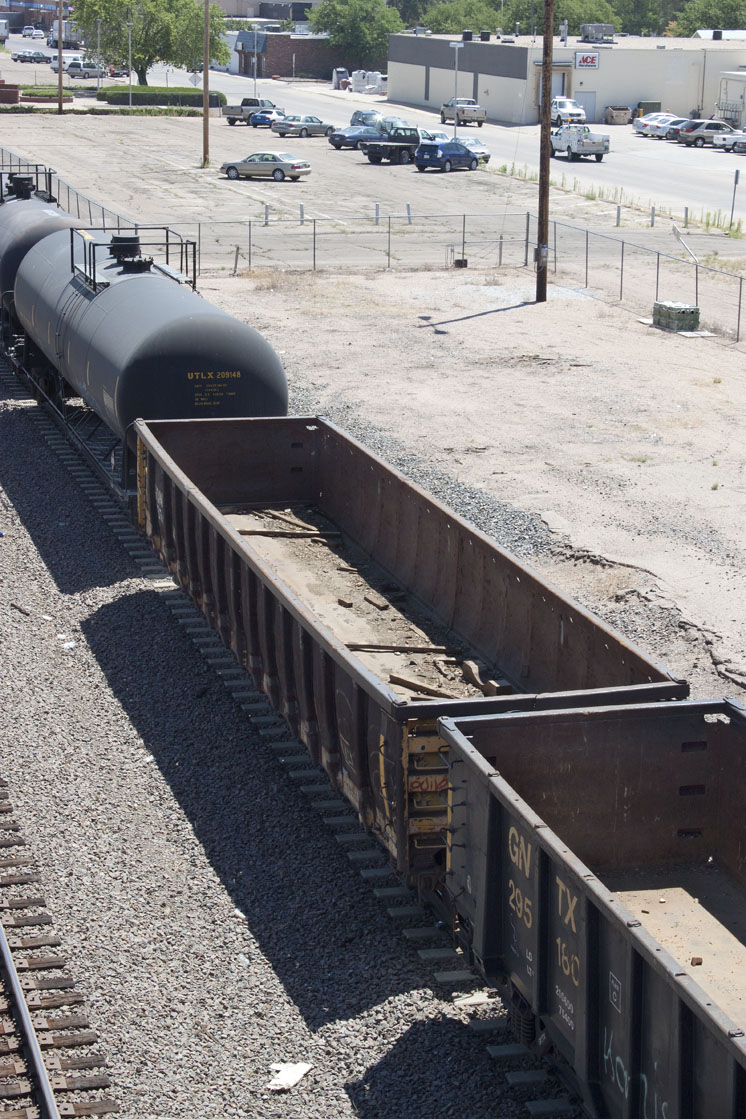
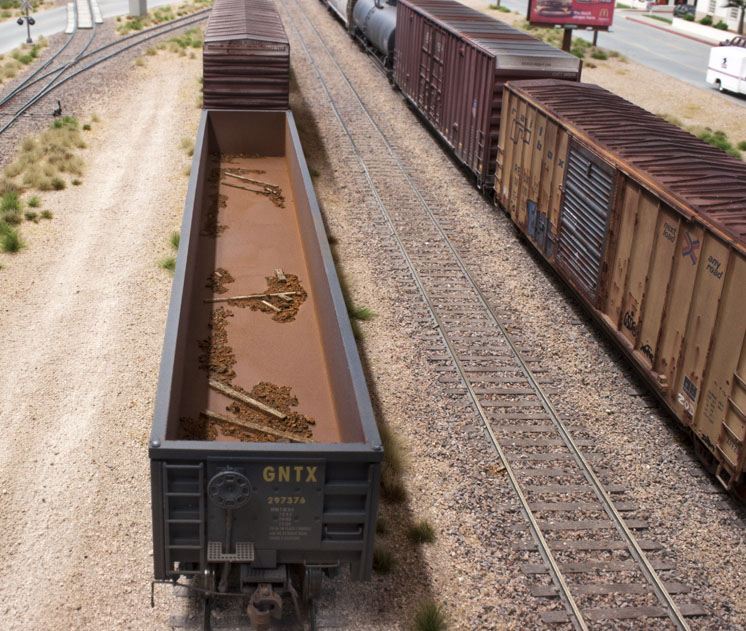
On a recent trip to the Midwest, I discovered unloaded gondolas aren’t always completely empty. While photographing trains from a bridge, I noticed several gondolas with debris from previous loads. Wood, dirt, and non-magnetic metals were common sights.
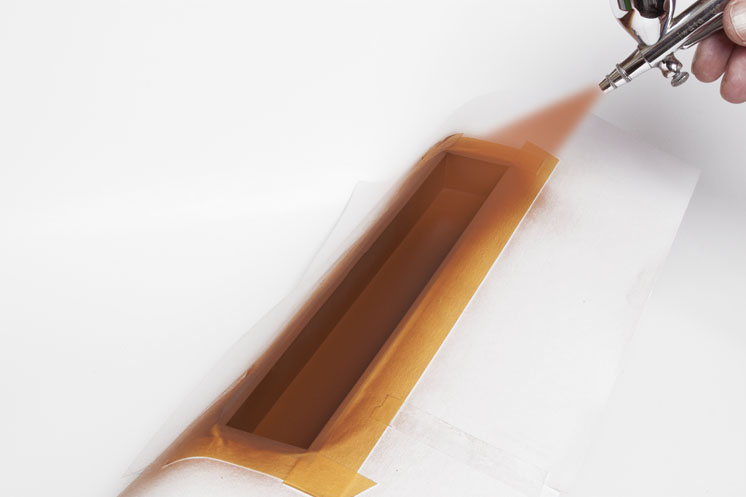
To re-create this look, I masked the sides and ends of the gondola and sprayed the interior with Model Master Leather. After the paint dried, I broke up the interior’s uniform appearance by applying light rust, medium rust, and black powdered pastels with assorted brushes. After sealing the weathering with a clear, flat varnish, I randomly applied blotches of white glue thinned with water to the car’s floor. I placed pieces of stained stripwood into the wet glue, and then sprinkled in real crushed rust flakes. When the glue had dried, I shook out the loose material.
While this article focused on weathering roofs, I of course weathered the rest of each model. You can learn more about my techniques in the January 2009 Model Railroader.


Tamiya and Mig and Ammo and Vallejo are others that have the colors and pigments in small bottles.
All quality MR material should be read several times. I always pickup something I missed before. Pelle’s material is of that quality and he is a master of the art. Excellent writing and photo’s. Thank you from Canada.
just starting to wearher (physically and on my models)! Thanks for the great article
@ Michael from Arizona – this is quite correct. But:
It looks like Pelle uses "AIM" brand pigments which have an added bonus of being mixed with a powdered adhesive so has a degree of adhesion that regular pastels or chalks do not have. They have also been ground to a very fine consistency that you wont always be able to achieve sanding them yourself. The final benefit of these powders is you get a large quantity of a colour that exactly matches the task at hand – around $7 for 28 gm which is not a big outlay for something that will last forever. The physical quantity is around the size of two/three bottles of Floquil
Plus they come pre-packed so you wont be throwing out unused product or sneezing it across the room.
If you wish to purchase pastels you can get individual sticks at craft stores, a better variety of colours than you get in the cheap sets where you might only use a few key colours.
I'm not sure if AIM pigments have a better colourfastness under an overcoat than basic pastels – anyone?
Pelle uses AIM powders, Model Master Light Gray and Dark Skin Tone to age paint and dirty up lower care areas, and seals them with Vallejo Matte Varnish. He's the Man! FYI, the AIM powders are available in a four pack for ~$10.
Always great to read a Pelle article on just about anything…Fabulous videos too.. This one is very opportune since I will be reworking my freight cars for new layout… Sometimes to get that "flakie" rust patterns I use streaks of ACC and immediately dust with brown and reddish brown pastels. Dust around them when dried and have a nice rendition of used.. A lot of military modelers use this technique on their war weary armoured vehicles.. Thanks for the article…
You can go to just about any craft store and get a set of pastel chalks for $5-$10. Then sand them down to powder. That is the least expensive way.
What is the source/brand name for the weathering powders?
I'm always looking for good weathering tips. Thanks