


Packing up a model train layout: There are many reasons for packing up a model train layout. For John Lehnan of Pewaukee, Wis., the reason was to rebuild. His first layout had reached a point that the best way to improve it was to replace it, so the old layout had to come down. One of the improvements was to get rid of duckunders and gates. Although they worked well when they were first installed, John had two connections from his island-style layout to additions that ran along the walls so that the crew could move freely around the basement, removing the duckunder and swing gate was the first order of business.
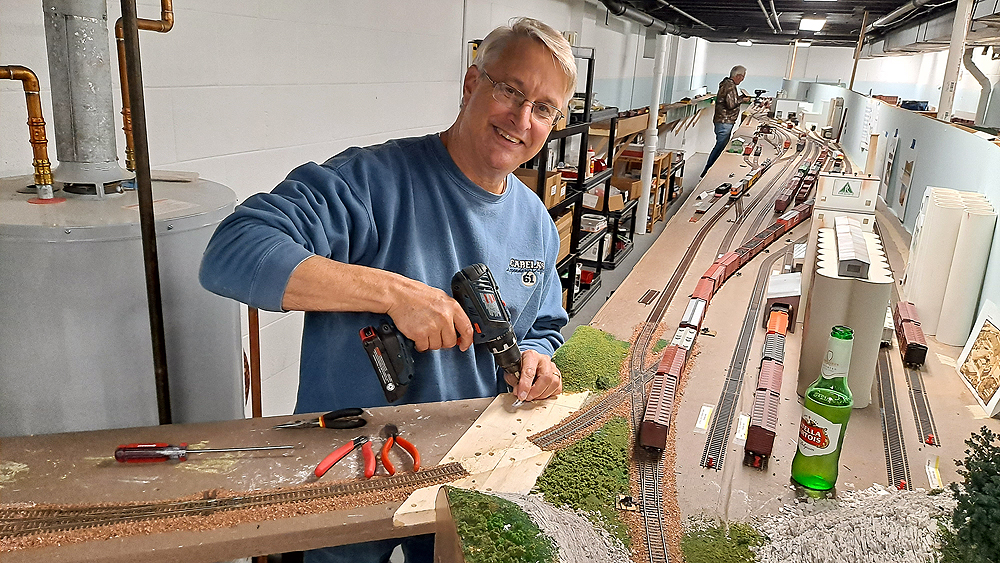
I was part of the crew that helped John, and the fact that he works in logistics made the experience go smoothly. Since we were mostly the crew who has worked on and operated his layout for the past few years, it was also fun. Here are a few things to consider when you are faced with packing up a layout, even if it isn’t for as exciting a reason as replacing it with an all-new version.
You’re going to want help
The first thing to do is to find a crew of helpers. If you’ve had helpers to build and operate the layout, then you probably won’t have trouble with this.
If you’re packing up a layout for someone who’s gone, family and non-modeler friends can chip in. Nothing we were doing was modeling specific in the grand scheme of things, but it did help that we knew what we were working with. That could be useful if part of the goal is to dispose of unwanted equipment. Local hobby shops and model railroad clubs are other good places to look for help.
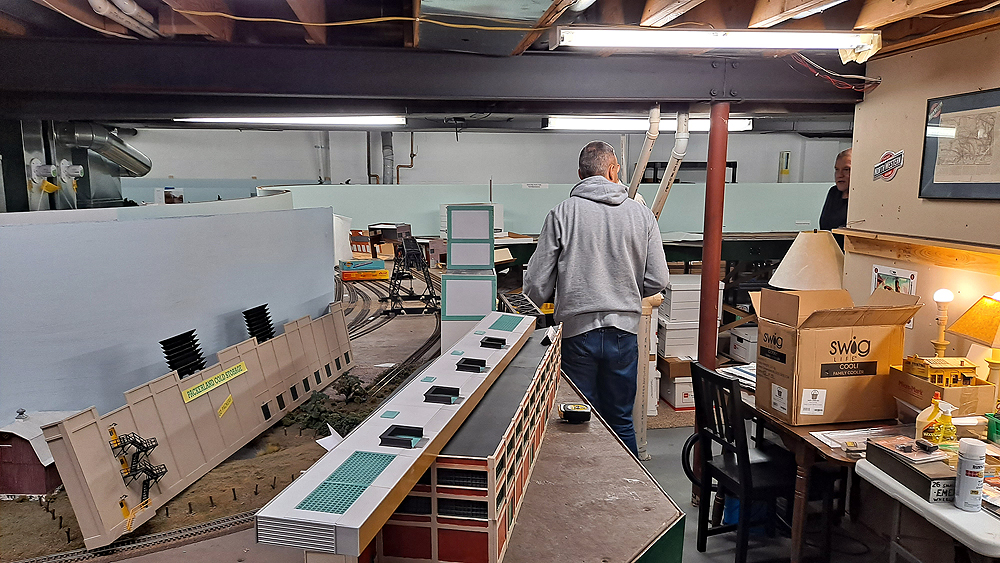
The first task was to get everything off the layout that wasn’t attached to it. The biggest task was packing up all of the rolling stock and locomotives. John’s layout was and will be fairly large, so there are hundreds of freight cars to pack away.
Organization is key
An important part of making this process go smoothly was John’s preparedness and record keeping – just what you’d expect from a logistics guy. If you’re trying to decide if you should keep the boxes all of your rolling stock came in, John’s experience is a strong vote for YES. Just about everything on the layout had a box to go back into when it came time to come off the layout.
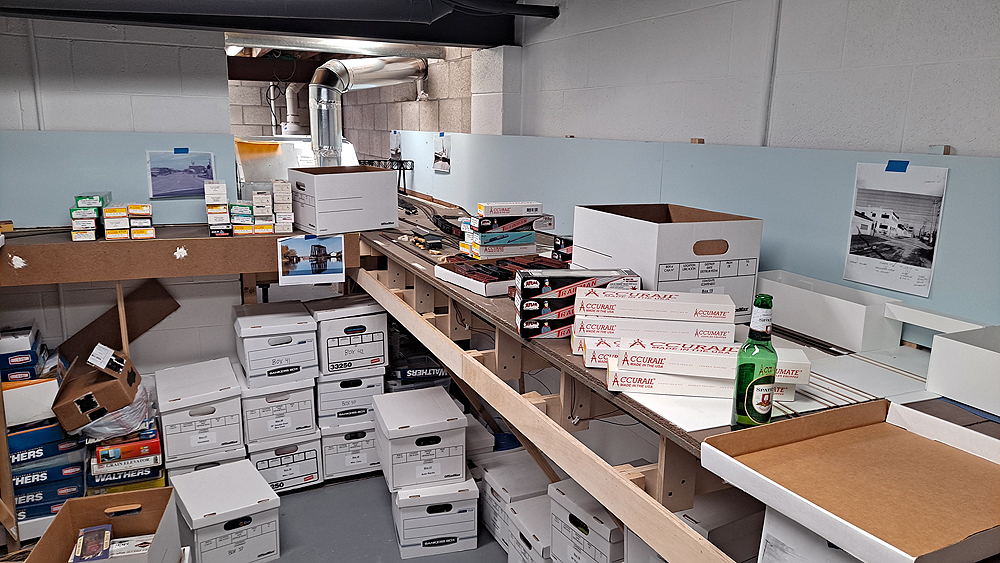
John had stored all of the empty rolling stock and locomotive boxes in cardboard banker boxes he kept under part of his layout. Each box was numbered and labeled, and John had spreadsheets listing what freight car or locomotive boxes were in each banker box. He’s a big fan of freight cars, so for him this was a bit of a labor of love. The crew could pull a freight car box out of its banker box and ask “What’s CNW 4041?” and John could offer a description of color, special markings, and a short story about how he came to acquire the car. It became a running joke. Having a crew of people familiar with each other made the project at least pleasant, and often fun, which is good if you want the crew to return!
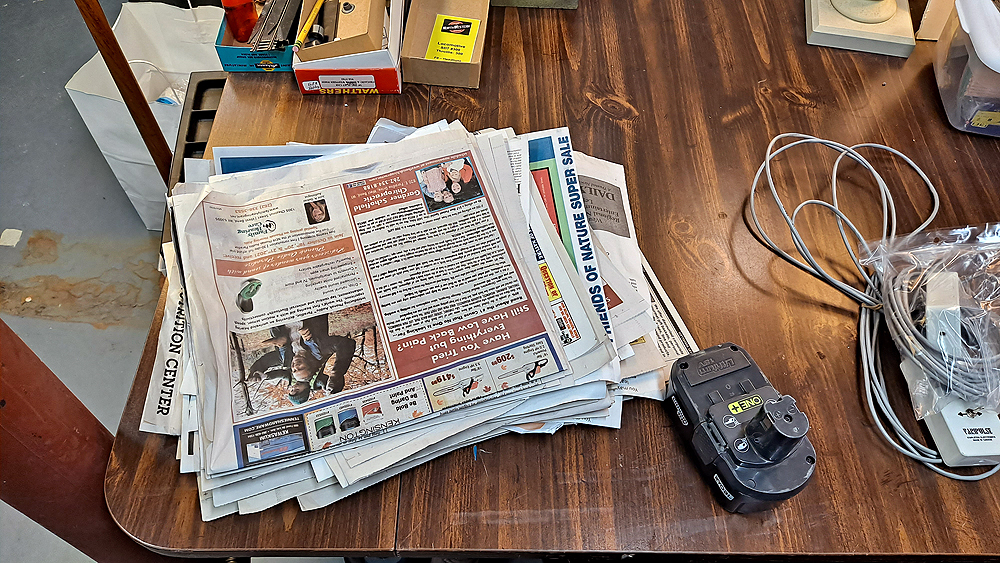
With four to six guys showing up each time, we had the layout cleared of rolling stock in about two and a half sessions. Some cars either didn’t fit back into their boxes – Accurail double- and triple-deck auto racks were slightly too long with their couplers attached, for example – so John had been saving newspaper. Everything went back into its appropriate banker box so we could find everything when it was time to repopulate the layout.
Even if you’re going to be selling or otherwise disposing of the contents of the layout, it’s good to know what kinds of rolling stock you have as it’s the easiest equipment to sell or otherwise find a new home for.
But wait, there’s more!
The rolling stock was the most easily damaged stuff on the layout we knew we wanted to save as we were packing up a model train layout, but there were other things to be put away. John uses NCE Digital Command Control, and we wanted to save and reuse the system on the new layout. This is also an item with reasonable resale value.

Along with removing rolling stock, we also collected the few vehicles and figures John had on the layout for reuse. Scenery was about 40 percent complete, but there weren’t a lot of details applied yet. We collected the structures that weren’t embedded in the scenery, and some of the commercial trees that would withstand being plucked out of the scenery.
John had plastic totes and a large collection of cardboard boxes for storing items he wanted to keep for the new layout. Grocery and liquor stores are great sources for sturdy moving boxes for everyone’s favorite price, free! Plastic totes also are always handy to have around the house.
What else?
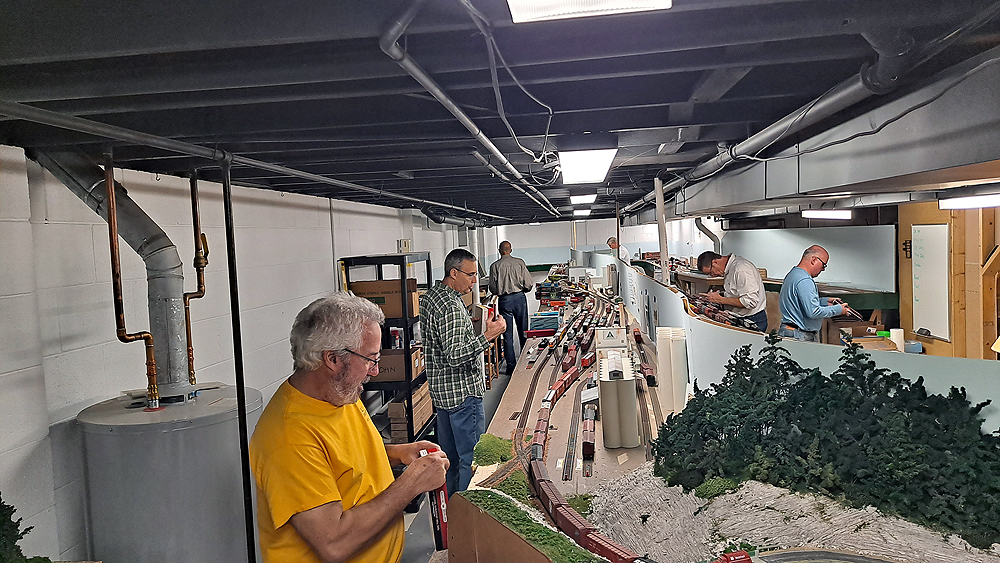
We had a large crew, so we split up the jobs to keep out of each others’ way. While some of the crew was packing rolling stock, others removed items from the layout fascia, such as car card boxes and plug panels for John’s DCC system. Everyone has their own job while packing up a model train layout.
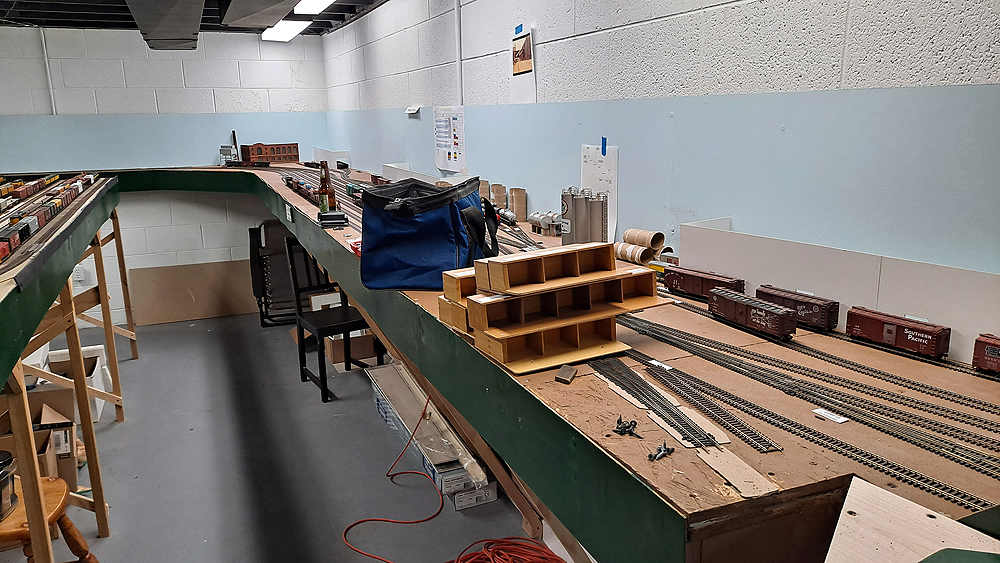
Getting things off the fascia made it easier to move around the layout room with boxes full of freight cars. As with any packing project, things were piled temporarily in an out-of-the-way spot, until they were in the way, then moved to another out-of-the-way spot to await being moved again. The ultimate goal was to clear everything out of the basement in preparation for the new layout.
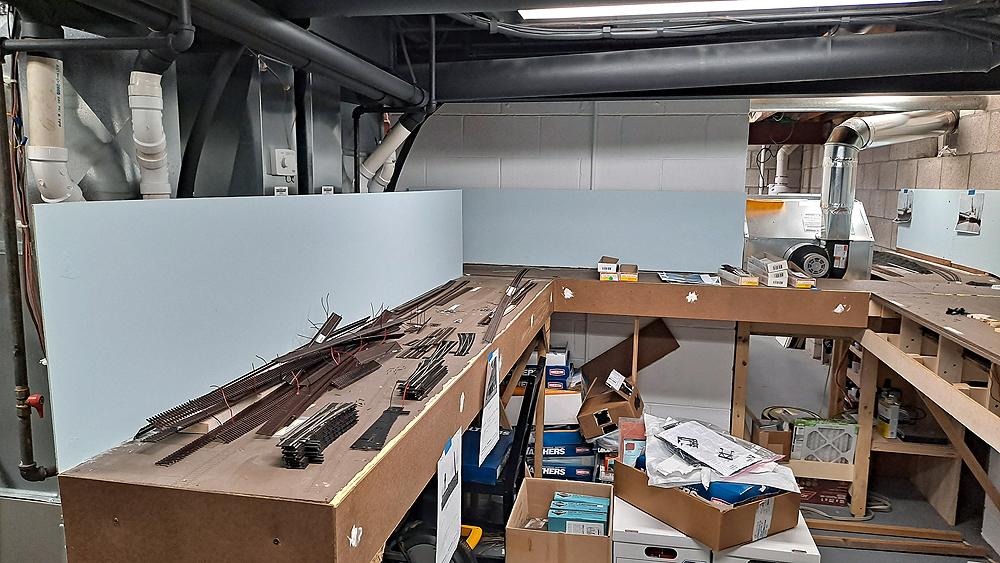
Saving track
More than half of John’s layout hadn’t had its track ballasted yet, so John wanted to save as much track as possible. The goal was to salvage all of the turnouts that weren’t ballasted, and any reasonably long pieces of flex track. We found small diagonal wire cutters made the best tool to remove track nails – John had nailed his track to either cork roadbed or sheet Homasote. The wire cutters were also used to snip track feeders as we pulled the track up.
Take care salvaging turnouts as they can be fragile. To remove turnouts from ballasted areas, we used a spray bottle to wet the ballast, then used a thin spackle knife to slide under the turnout and lift it free after pulling any track nails we could see. Running water and an old toothbrush will remove the rest of the ballast as long as it was secured with water-based glues.
Some of the track was soldered, so a soldering iron was a good tool to have as well. We sorted what we salvaged by turnout type and length of track.
Most of the track sections had feeder wires soldered to them. When we had a section of benchwork cleared, one of the crew used a soldering iron to heat and remove the feeders from the track. The cleaner you can make the track, the easier it will be to reuse it.
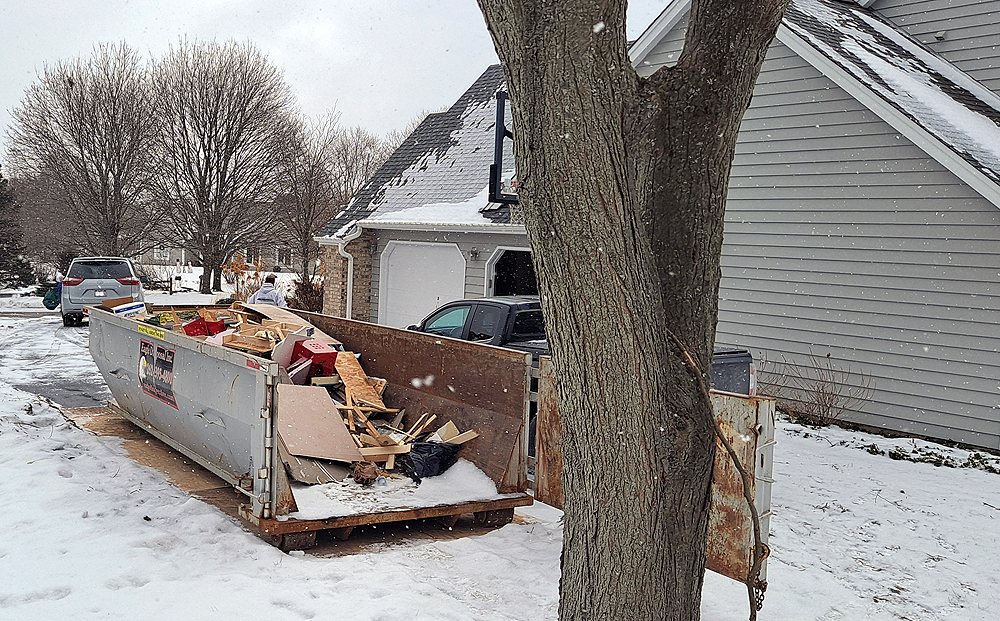
Final cleanup
With everything salvageable off the layout, it was time for demolition. Except for a few spots, most of the surface of the layout was destined for a Dumpster. John’s layout was open grid construction with an oriented strand board (OSB) surface covered with Homasote. OSB doesn’t save well, but most of the layout was built using drywall screws, so everyone brought their battery-powered drills and Phillips-head bits, which made disassembly quick.
Any dimensional lumber that was in good shape was saved, even odd-shaped scraps as those are useful for blocking and risers. All of the wiring – buses, feeders, anything that was soldered or attached to suitcase/insulation displacement/Scotchlok connectors – was trashed. Avoid the temptation to use odd bits of wire to build your layout and you’ll find troubleshooting much easier in the future. We kept the bus cables for the DCC system as it all plugs together and could be salvaged in one piece.
A new start
We couldn’t actually clear the basement, but we were able to make manageable piles and get some open space to work in. Just like when we were taking down the layout, the construction phase continues the theme of putting stuff out of the way, until it gets in the way again and needs to be moved.
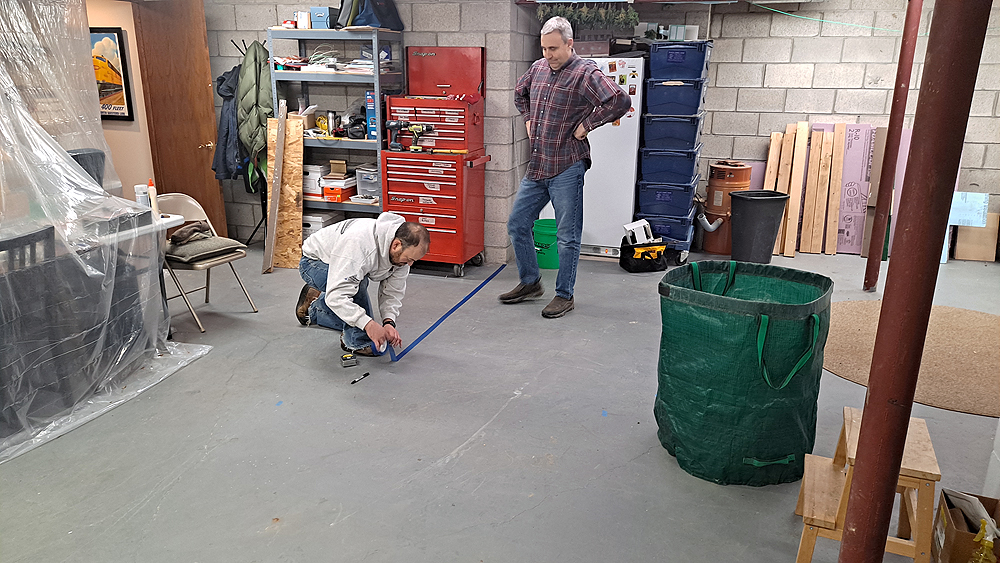
We used blue masking tape to mark out areas of John’s new layout plan and see if we liked where everything was going to go. One large change we made during this process was to move the helix partially under the staircase, clearing the way for a longer peninsula. As I’m writing this, the helix has completed its first loop and a short train has run up to the end of the track.
The demo project started in November 2021, and the basement was cleared by mid-January 2022. John’s goal is to have the layout back in operation at the one-year anniversary of its last operating session. With a bit of planning, that just might happen!
For more information on moving a layout, read the 5 tips for moving a layout.


An update on John’s layout: we’re hoping to have track completed and wired around the layout in the next couple of months. It’s not outside the realm of possibility that there could be an operating session in November of 2024, so we’re only about 2 years behind our rather ambitious schedule.
YEs, thank you! An interesting article. One thing not mentioned in your article was the need for Stella Artois to help ease the pain (as seen in the first photo)
Great article, sad to see the old one go. Anxious to see the new arise out of the “ashes” so to speak. Thanks Eric for writing about something not often discussed. I had the opportunity/privilege to be one of the operators on the old layout, hope to be a regular on the new one!