


Build a 1950s O scale freight car from Athearn: One day a few months ago, I opened my email to find a message from David Popp of Trains.com. David asked if I would be interested in building an O scale freight car from Athearn. He indicated that the staff of Model Railroader’s sister publication, Classic Toy Trains, needed it for a future installment of Collectable Classics. Not really knowing anything about what lay ahead, I agreed to build the car and write about it. Within a couple of weeks, the car arrived.
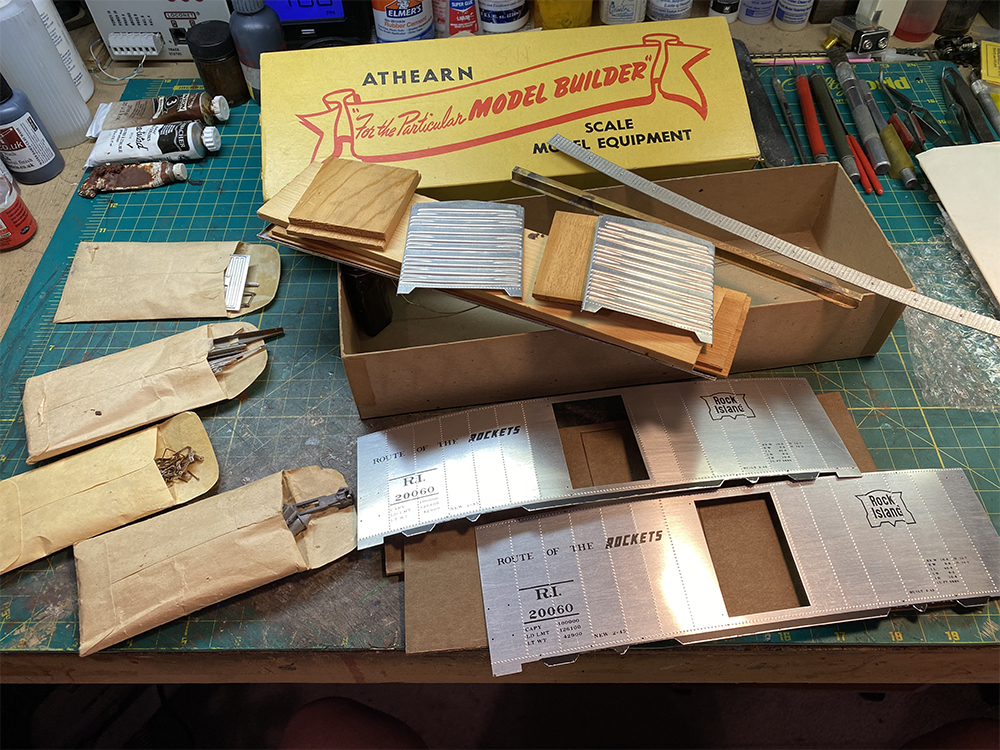
When I opened the box, I was surprised to find that it was indeed a kit, but nothing like what I expected. This wasn’t your traditional Athearn plastic car kit. Instead, it’s basically a wood core wrapped with stamped metal parts that you nailed (yes, I said nailed) together. I had never seen nor heard of anything like it.
I did a little internet research and found that the kit probably dated from the 1950’s. My research also revealed that these types of kits were how Irv Athearn got his start manufacturing model trains. I’ve always known that O-scale was quite popular in the 30s and 40s, so it all made sense to me. Eventually Mr. Athearn branched out into HO scale and started producing the popular blue box plastic kits that I grew up with, but this wasn’t one of those kits.
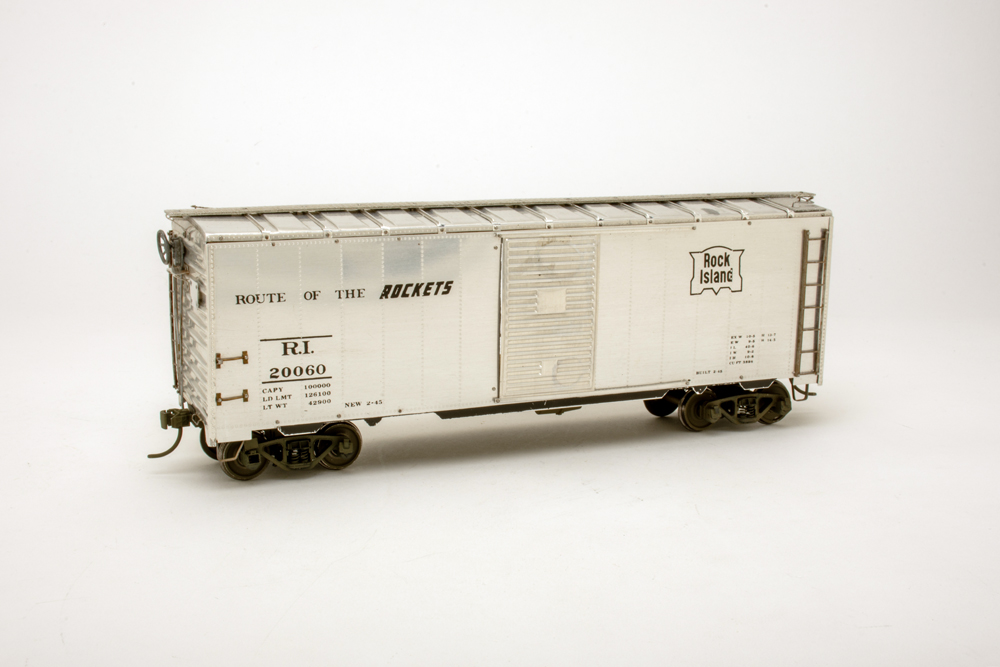
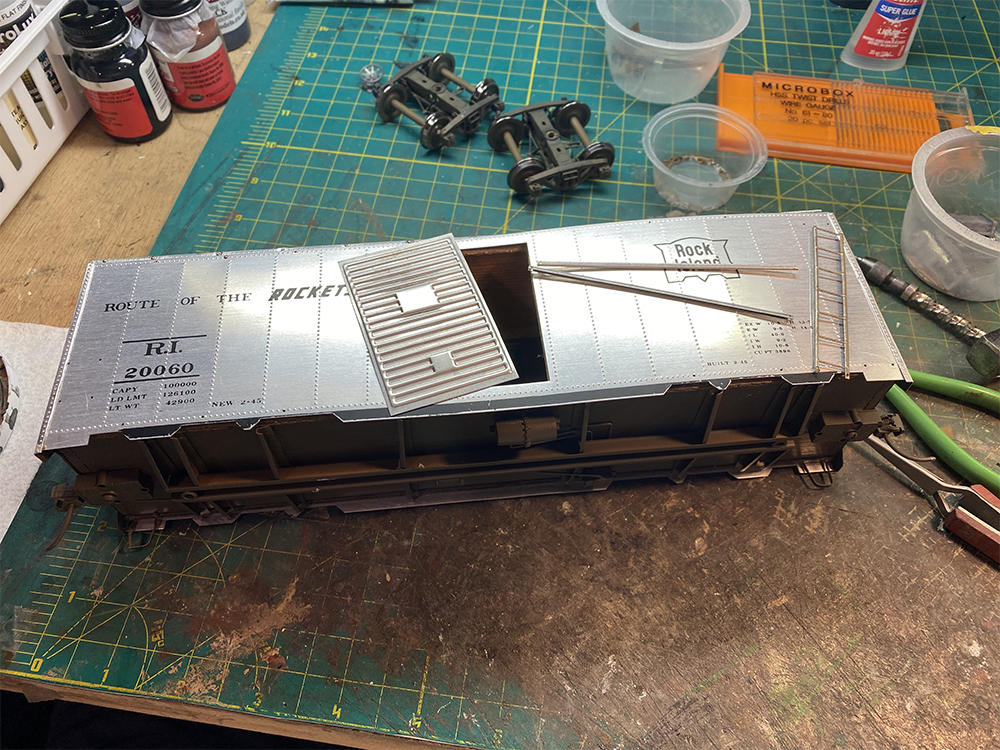
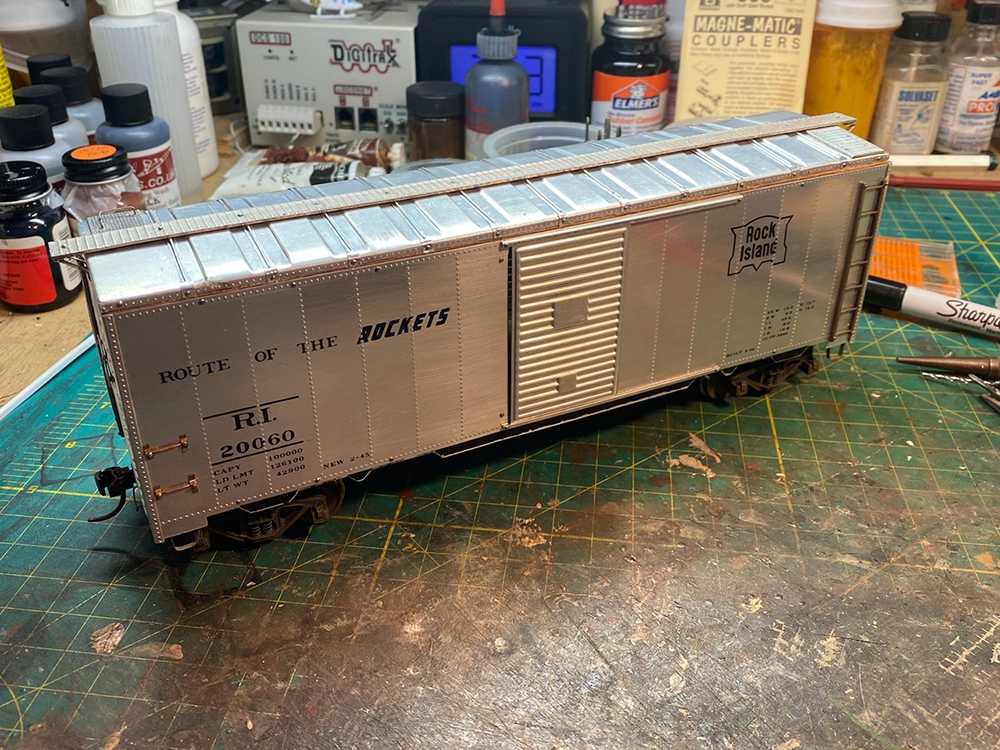
The model is a 40-foot boxcar based upon a prototype designed by Reynolds Metals and built by the Mount Vernon Car Co. in 1945. The Rock Island purchased 10 of the light-weight aluminum cars for express service on some of its passenger trains, and eventually moved them into general freight use. As they were the Rock Island’s only all-aluminum car at the time, they were considered an oddball, and all were out of service and scrapped by 1972.
As shown in the photo above, the kit contained wood and stamped-metal parts. It also included four small envelopes with nails, formed wire grab irons, cast metal couplers, and assorted detail parts. The instruction sheet was a 2-sided piece of paper that had scale drawings and 5 short paragraphs of assembly instructions. Athearn left a lot up to the modeler, as I would discover later.
Building the core
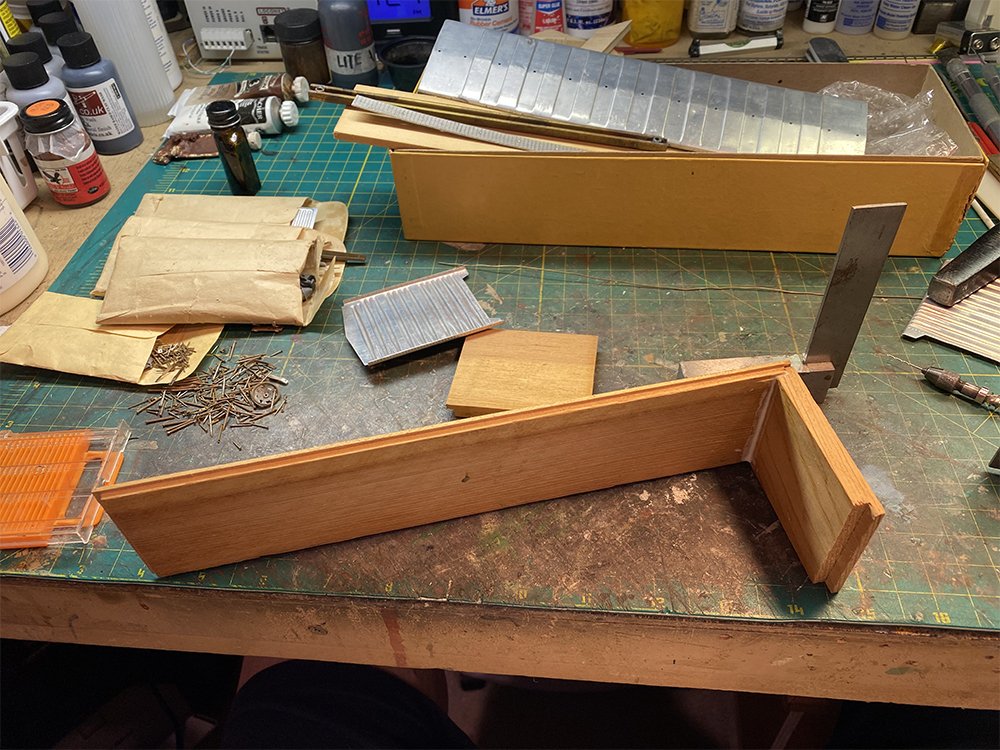
I assembled the wood core first. This included the roof, floor and the two ends. The instructions indicated that you should nail the ends to the floor piece, then add the roof. Just to be safe, I decided to also glue those joints at the same time to add some strength. I used Elmer’s wood glue on these parts.
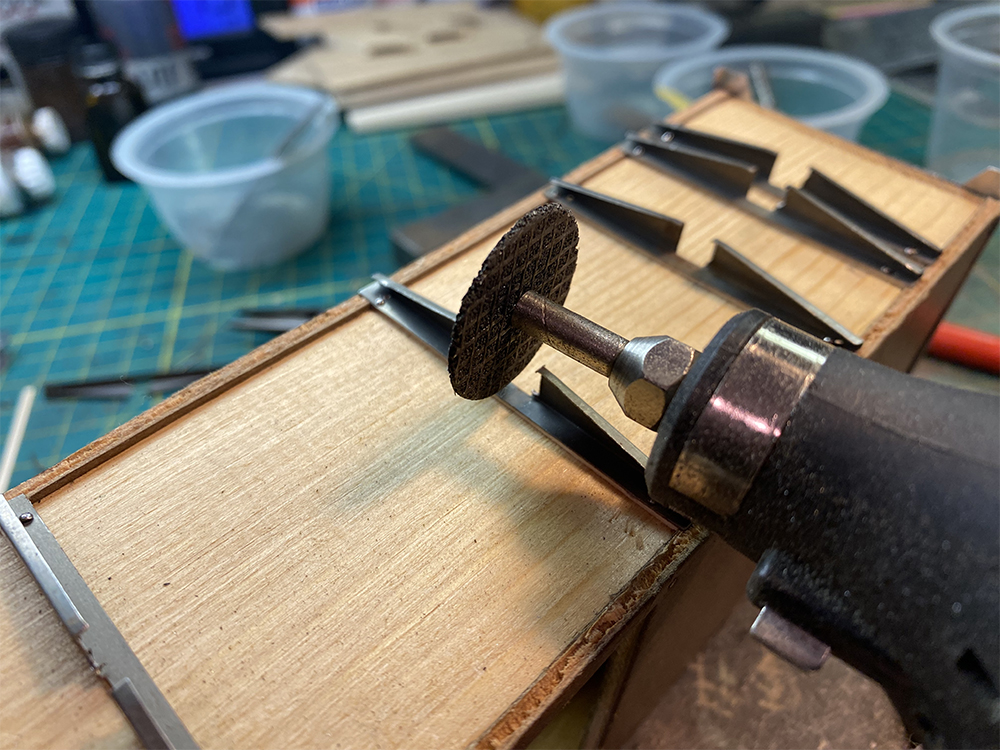
Next came the core sides. The sides were made from tempered hardboard, which is a kind of fiberboard with a hard, smooth surface. Before I could attach the sides, I had to cut out the door openings, following the provided directions. If you didn’t want the doors to open, you could skip this step, but since the doors had working tracks, I decided to cut the openings.
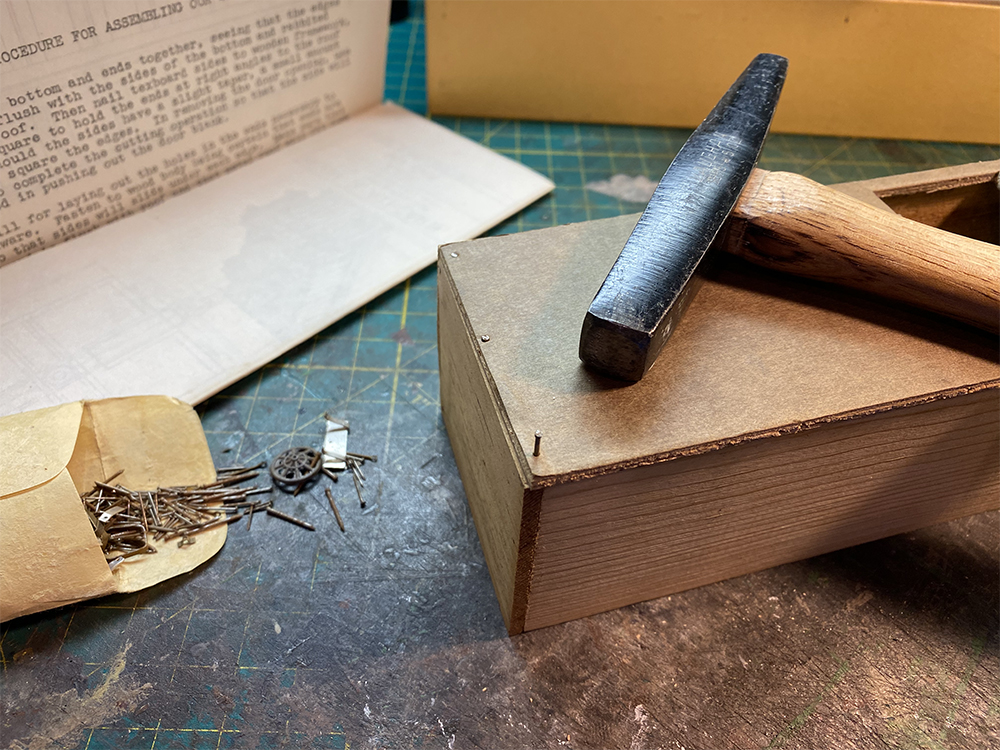
Like the rest of the core, the two sides were also nailed in place. After applying wood glue to the part, I positioned it on the core, then used a small drill bit in my pin vise to drill starter holes in the smooth hardboard top. This keeps the material from deforming when driving in the small brads. I used a tack hammer which gave me good control and did not put undue stress on the kit parts.
Metal details
Like most of the rest of the model, the metal skin is applied with nails. I started with the stamped-metal ends, and I applied the detail parts for them at the same time.
Most of detail parts included in the kit were also made of metal. Like everything else, these were attached with small nails. I found that many of the parts needed to be bent slightly to fit. Some of them were easier to modify than others, but it all worked out.
While most of the parts had their locating holes pre-drilled, I still cleared them with a no. 68 drill bit in a pin vise to keep from deforming the metal by trying to drive a nail through a hole that was too small for it. This process also had the benefit of making it much easier to nail the parts in position.
I also found that I needed to clean up some of the parts from minor rust that had accumulated over time. This is supposed to be an all-aluminum constructed car, so the components shouldn’t appear rusty. I used a wire wheel in a motor tool operated on low speed to remove the rust as best as I could.
Roof parts
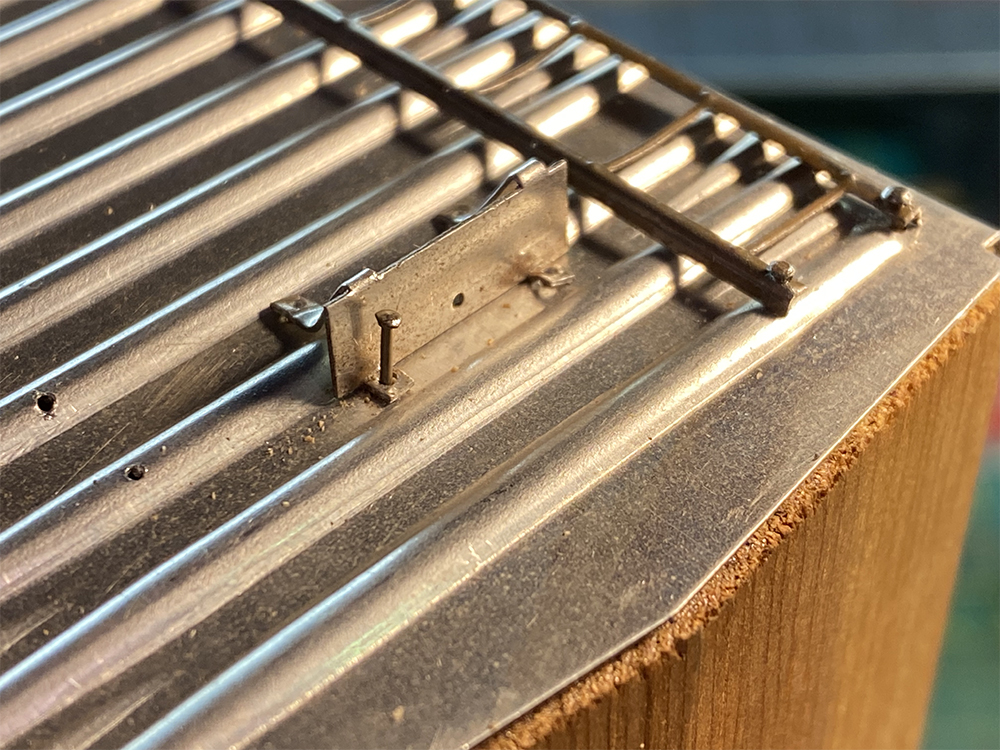
With the stamped metal ends and their detail parts attached, it was time for the roof. The roof was another stamped metal piece that overlapped the top of the car’s ends. It is held in place by the separate roof ribs, as well as by the running board. Both items use more nails. As an item of note, I wish the instructions had been a bit clearer. I’d installed the running board before the ribs, only to figure out after I’d done so that the ribs should have come first.
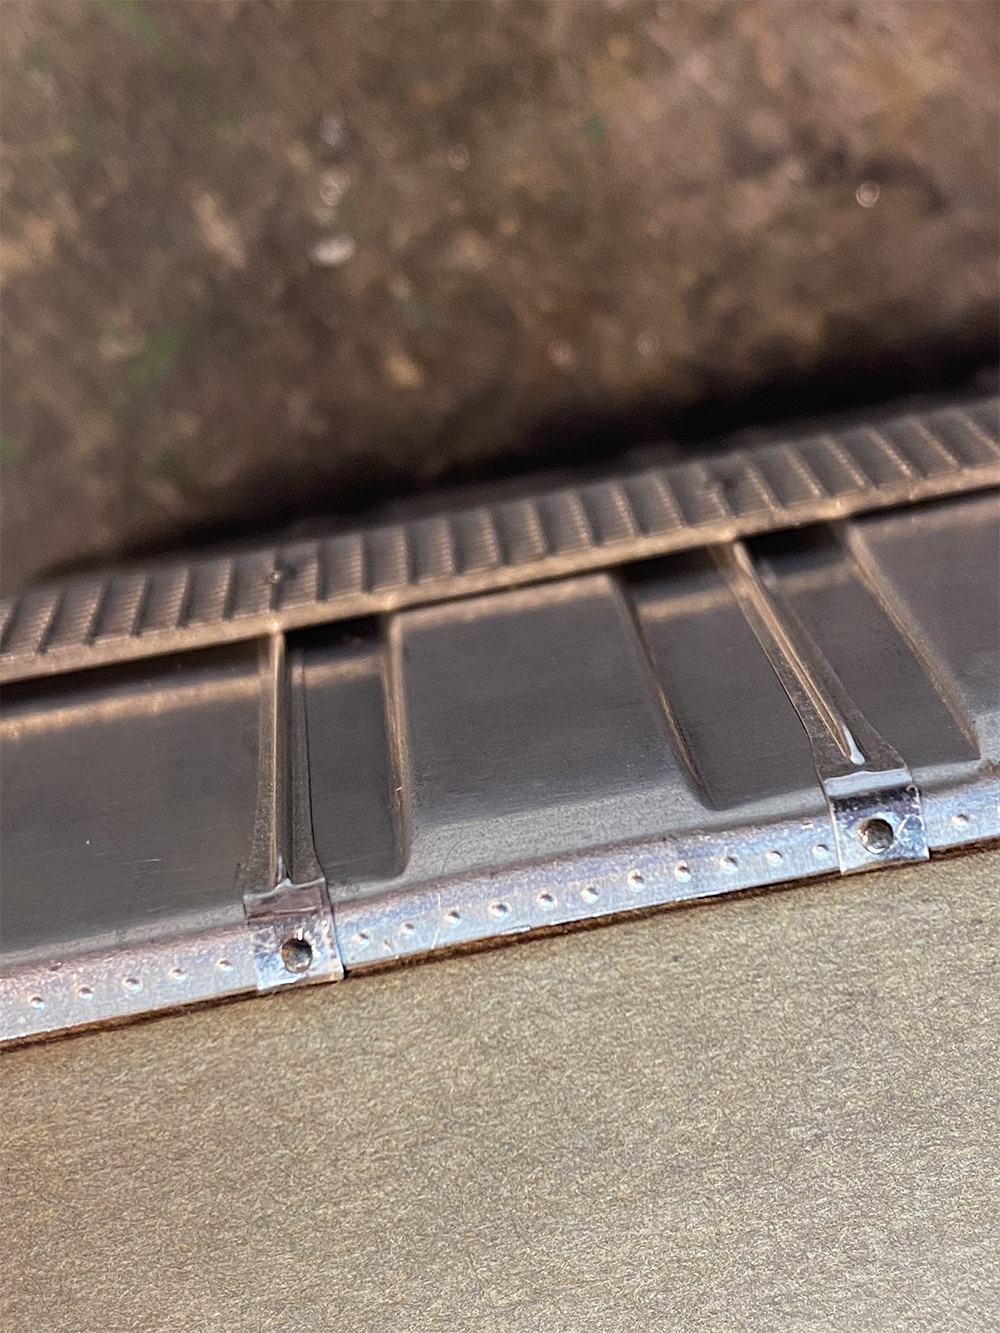
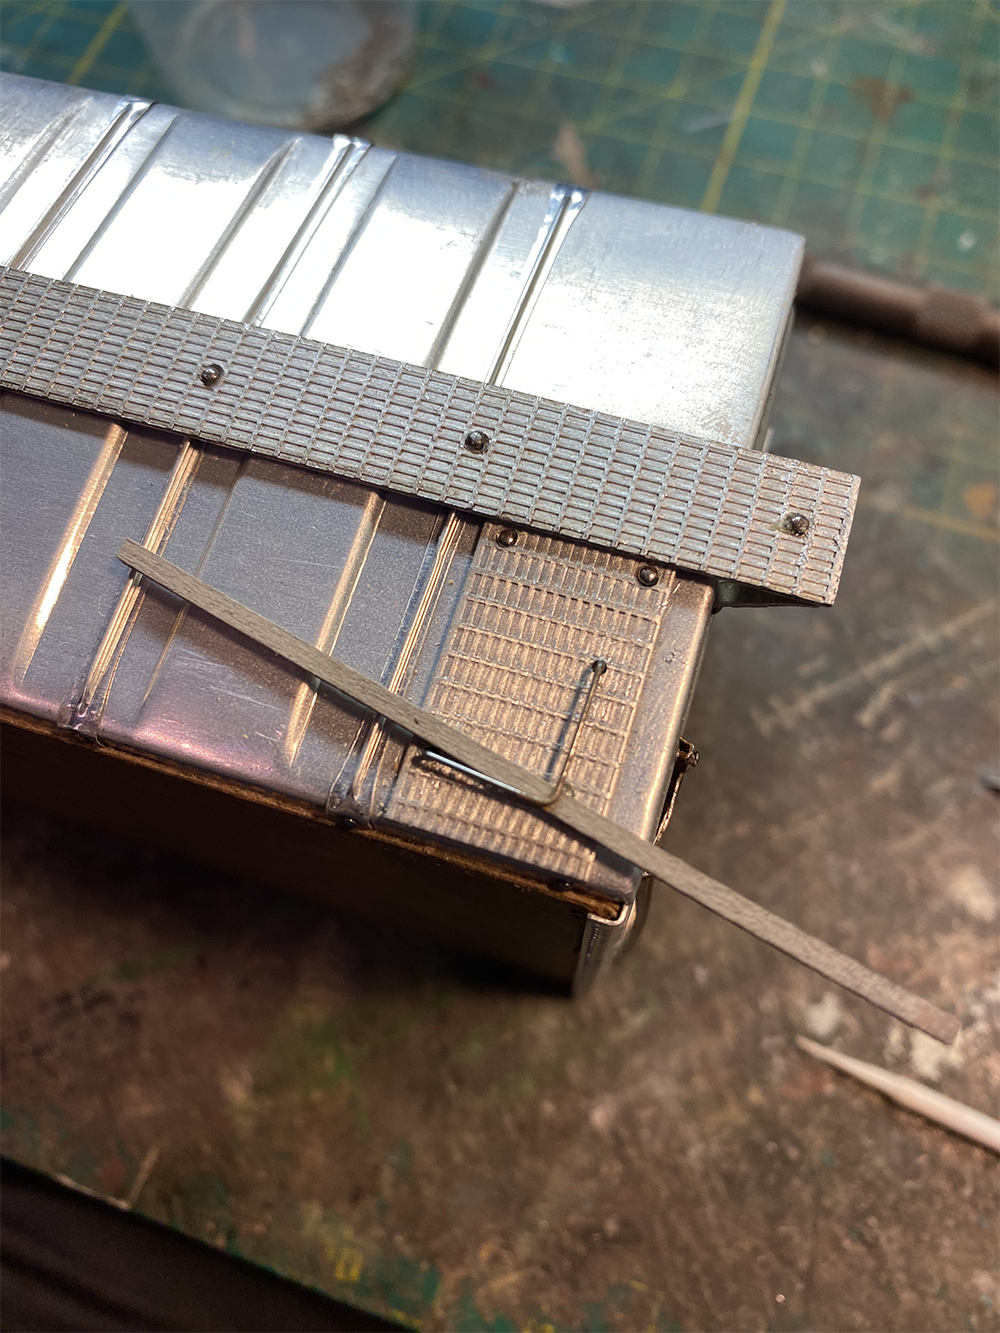
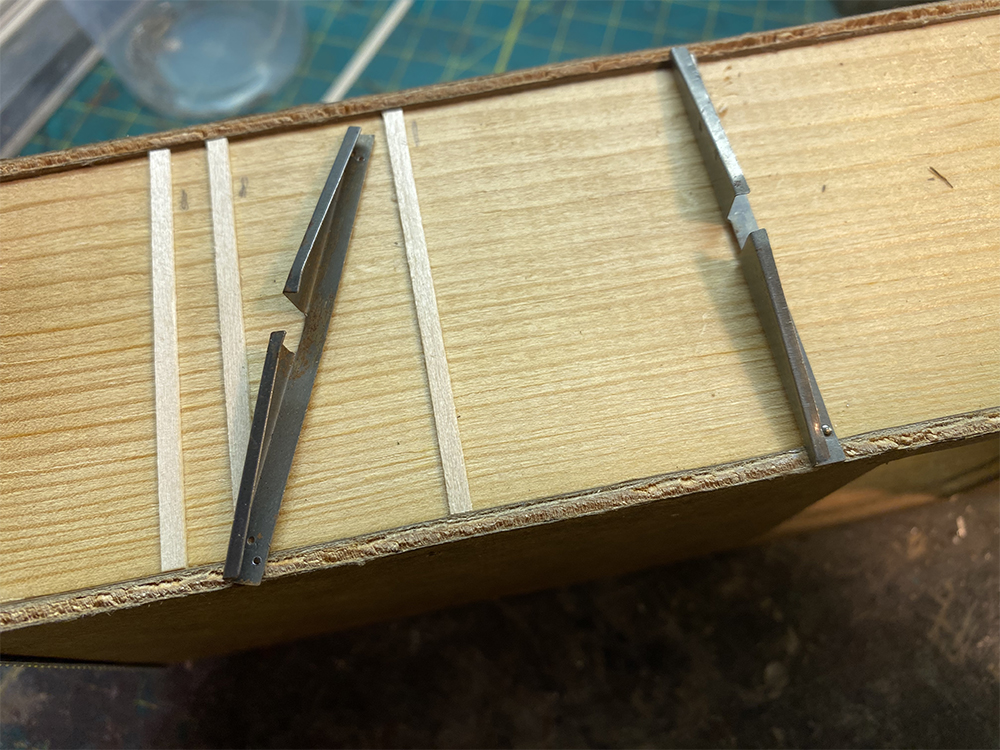
To get the ribs attached to the car, I had to split them in half, then push them under the running board to get them into position. Between the nails for the running board and for the ribs, all the parts still attached firmly to the car, even with the error in assembly. Once that was complete, I added the wire grabs for the roof end platforms using CA to hold them. As shown in the photo, I used a piece of stripwood to maintain the spacing for the grab until the CA set.
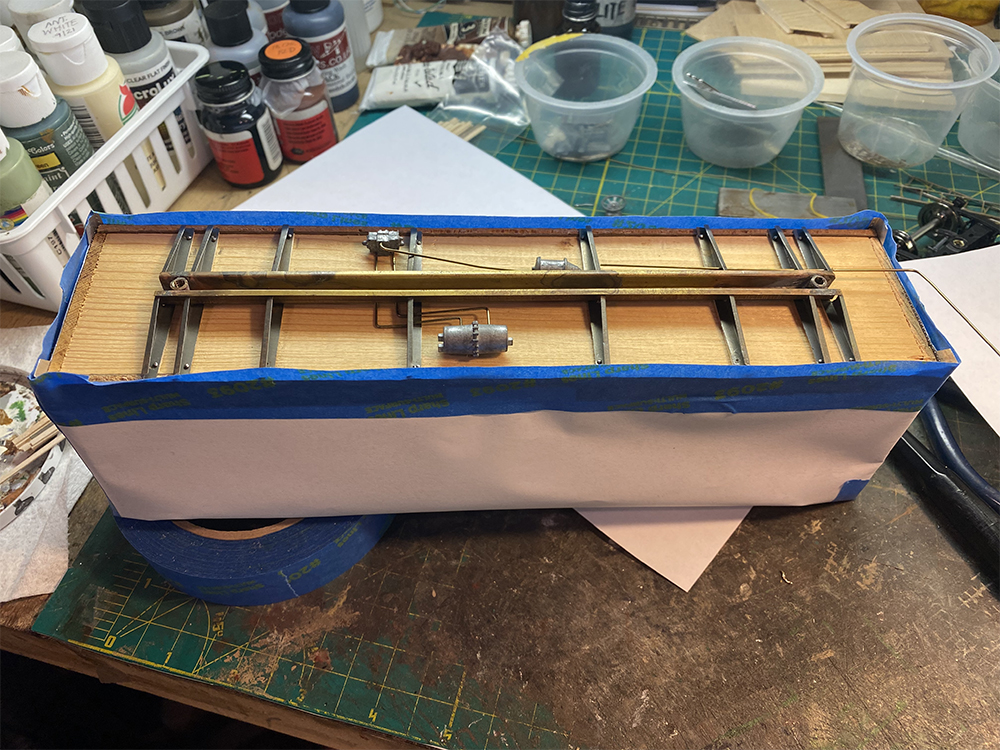
Underframe work
Now it was time to flip the car over to attach the frame members. These were more stamped metal parts that needed to be placed carefully so they match the car sides correctly. This is particularly tricky since the car sides are not yet attached to the model. I used the scale drawings in the instruction sheet to mark their position.
I found I needed to add a piece of HO scale 2 x 8 stripwood under the formed-metal frame sections so they would sit properly on the bottom of the wood core. Once these were installed (again with nails), I then added the frame’s center beam – or at least I attempted to add it.
At first, I had some trouble fitting the part into the notches cut into frame members. No matter how I tried to get it to slip into place properly, it was just a little too tight. Using my motor tool and a cutoff wheel, I widened the frame openings just enough for the center beam to slip into the notches. The beam is held place with a couple of nails.

Next, I added the AB brake details. These were white-metal castings that came with the kit. I decided to improve the look of the brake gear by adding the some of the air lines as well, using some brass wire I had handy. This wasn’t part of the kit, but I thought it would improve the look of the model.
A bit of paint work
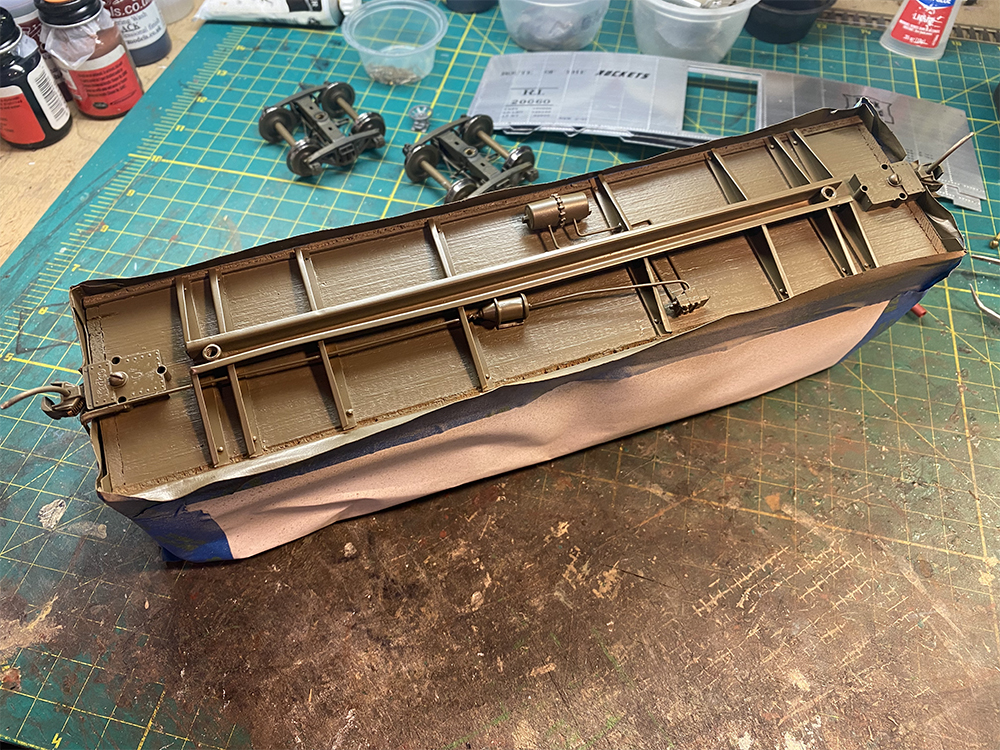
The kit came with cast-metal dummy couplers, but David left it up to me to install whatever couplers I wanted to. I substituted Kadee no. 805 O scale couplers and installed them on the car.
I felt the underside of the car needed a paint job, so I masked the entire upper portion of the car body using blue painter’s tape and plain white paper. I used Rust-Oleum Painters Touch 2X Gray primer as the first coat.
Once the primer was thoroughly dry, I airbrushed the entire underbody with Rail Brown (MicroMark MircoLux no. 29001) I used the MicroLux paint that is formulated for airbrushing, however, MicroMark also offers it in a thicker form for brush painting. The Rail Brown toned down the starkness of the metal and wood underbody parts and gave the finished model a more realistic appearance.
Metal sides
Like the rest of the car, the sides are stamped metal parts that were already decorated in Rock Island lettering. I couldn’t find much online about these cars, so I got in touch with David. He had access to the Morning Sun book, Rock Island Color Guide to Freight and Passenger Equipment, by Steve Hile, David Hickcox, and Todd Miller. On page 33, it showed one of these cars in service. As the model depicts, these cars were all bare aluminum with black lettering, although the one in the photo was quite dirty. The car’s number is accurate based on the information David found in the book.
Like much of the rest of the kit, the sides and detail parts were held in place with small nails. The door includes two tracks, and it can be slid into position for being open or closed, so I was glad I’d cut out the door openings in the hardboard core sides.
Finishing up
The kit did not include any trucks. The prototype car ran on Barber S-4 swing hanger trucks, and David and I both knew we’d have a hard time finding accurate trucks for the model. As a compromise, I used standard 70-ton freight trucks from American Scale Models. Despite not being the correct trucks, the American Scale Models trucks are very, very nice. I gave a misting coat of the MicroMark rail brown so they would look somewhat weathered.
I have to admit, it was fun building this old model kit. I won’t lie; at times I was sometimes frustrated by the instructions. They were very basic and would not help an inexperienced modeler. Fortunately, I’ve been building craftsman-type kits for years, and could work through the project carefully, really only making the one mistake with the roof.
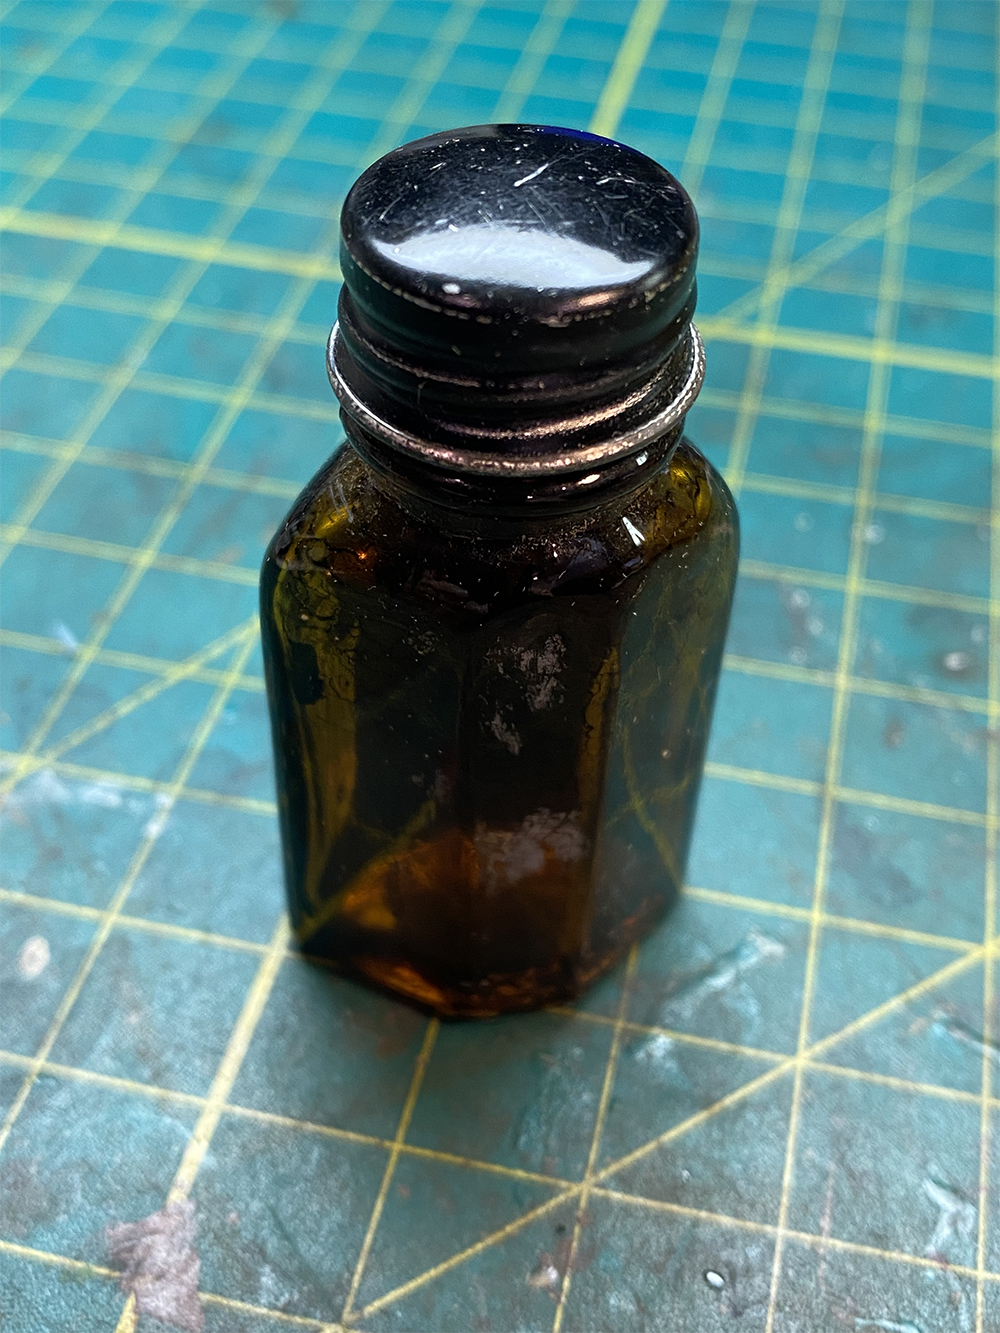
One final curious item was the small brown bottle included in the kit box. The instructions made no mention of it, and it had no label. I can only assume from the residue that rattled around inside it that at one time it contained either adhesive or paint. Whatever it was, it dried up years ago and remains a mystery.
In total, I probably spent about 25 hours on the build. Was that too much or too little? I don’t know, but I will say that for a model that has spent the last 70-plus years as a collection of wood and metal pieces in its original box, it assembled into a very nice O scale model. I enjoyed the process and feel it was time well spent!


Other than being an Athearn kit, it looked very similar to an All Nation kit I purchased more than 50 years ago and recently finished building, don’t ask why! Like the Athearn kit, the only painted items were the car sides, everything else needed to be painted Cascade Green (a Great Northern color) and it looks great sitting with my Lionel Pennsy GG-1 and other cars.
I actually enjoy building some of the old school kits. During Covid, I found out Labelle is still in business and is making the old Silver Streak cars. I bought and built a P&LE boxcar from them. I do want to pick up another one or two as well. Even though I really have too many plain red boxcars for my 3’-6” by 6’-8” layout
As Anthony Cassone wrote, Athearn also had metal-sided HO kits in the 1950s, and I built a few of them while in college. My recollection is that the kits didn’t use nails for assembly, but whether or not they did, I used cement. Due to my lack of experience at the time, they didn’t come out as well as the O scale one shown here. Seventy years later, some of them are still in use on my current railroad.
I have built a few of this type kit both in HO and O. I generally them get off of auction sites. I really find them enjoyable to build and as you mentioned the instructions are always very vague. Spending the time on them always produces a great model.