


Airbrushing is a facet of the hobby I really enjoy. I’m sure some of my interest in painting is because my father and grandfather were auto body repairmen. I grew up around paint and paint equipment. One of the many lessons I learned from them was to take care of your tools. That’s true whether it’s a spray gun that’s used on cars or an airbrush used on model trains. Paint comes in contact with many surfaces as it travels from the color cup or jar to the nozzle. Thoroughly cleaning these parts after a painting session is critical if you want to keep your airbrush in good operating condition.
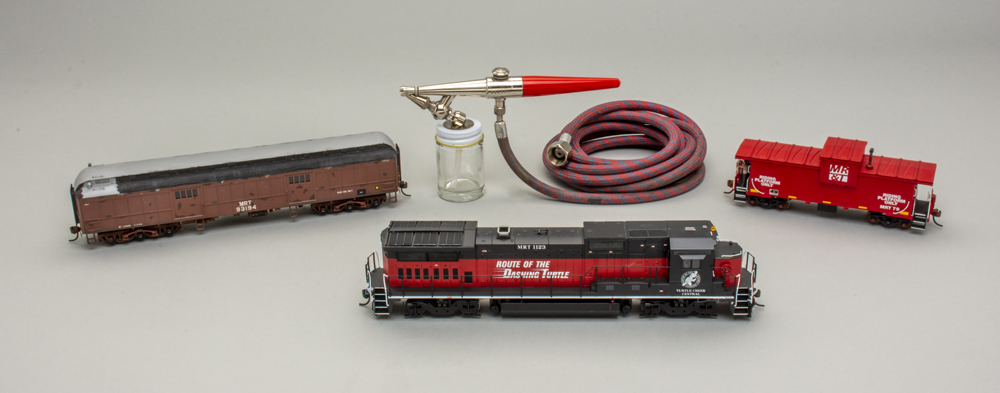
Disassembling an airbrush may sound like a lot of work, but it’s not. A thorough cleaning can be accomplished in about 10-15 minutes, depending on the complexity of the airbrush. For this article, I’ll walk you through the steps of cleaning a Paasche H single-action external-mix airbrush after using acrylic paints.
The initial rinse
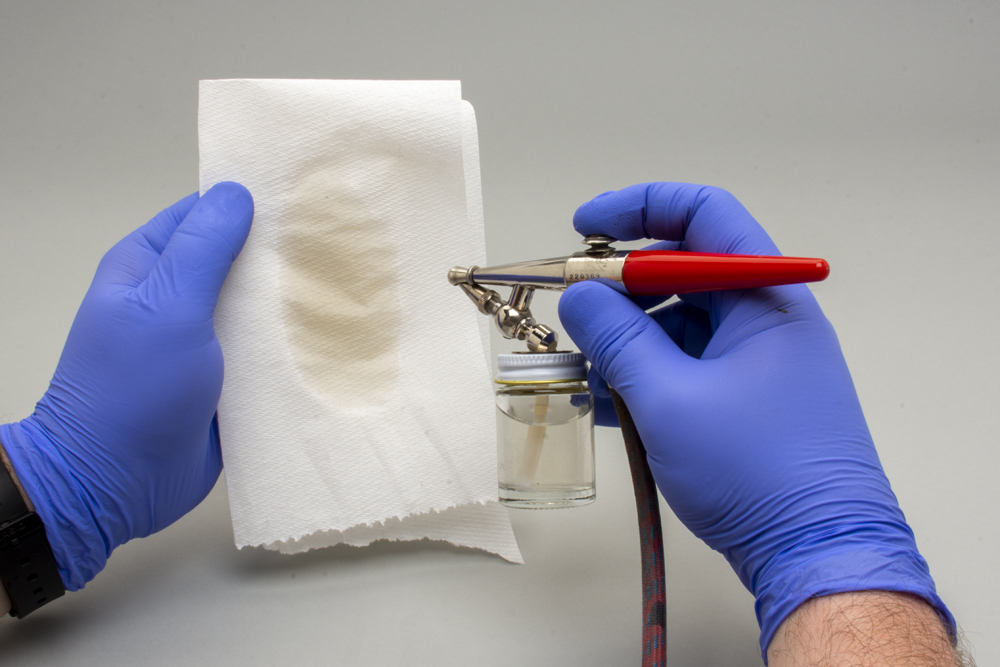
Though the Paasche H includes a gravity color cup, I use the company’s color bottle assembly (part H-1-OZ) for airbrushing. After the painting session is complete, I pour any unused paint into a waste container and rinse out the bottle. Then I fill the bottle with warm water and spray it through the airbrush at 20-30 psi for several seconds. I check the spray on a piece of paper towel until it comes through clear.
Cleaning the color bottle assembly
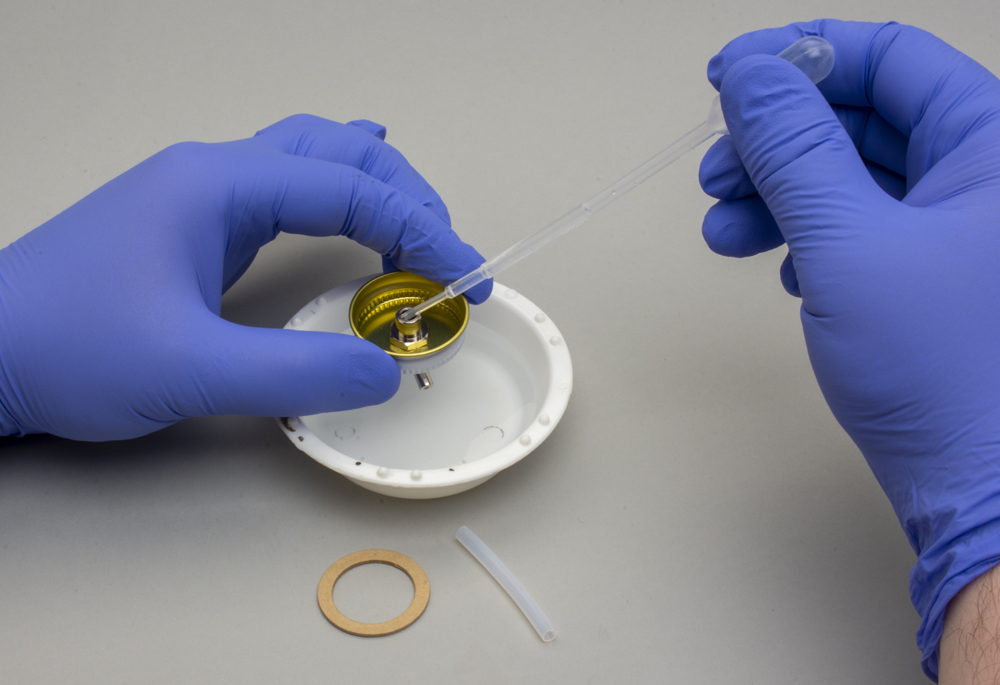
Now it’s time to begin the disassembly process. The Paasche color bottle assembly consists of a metal lid with a siphon, a siphon tube, and a gasket. After removing the siphon tube and gasket, I use a pipette to squeeze warm water through the siphon. Then I use nylon airbrush cleaning brushes, such as those produced by Green Stuff World, to remove any stubborn paint inside the siphon. Pipe cleaners can be used in place of the cleaning brushes if you’d prefer. I follow that with a secondary rinse to clean out any loose bits of paint.
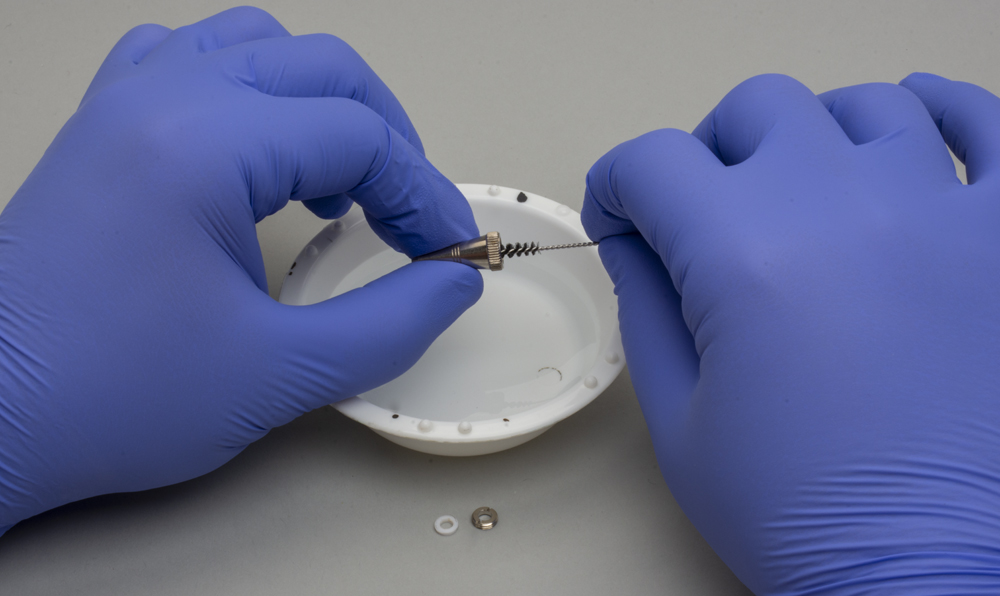
I also use the nylon brushes to clean the inside of the siphon tube. Cotton swabs work well for cleaning the tight spots on the bottom of the metal lid as well as the gasket. Make sure all of the parts are dry before reassembling the color bottle assembly.
Needle and tip
The Paasche H features metal tip (nozzle) that threads onto a metal needle. First, I separate the two parts. Then, using a flat-blade screwdriver, I carefully remove the packing nut and packing from inside the tip. I use a pipette to squeeze warm water through the nozzle and clean the inside with nylon cleaning brushes. Do this carefully so you don’t distort or crack the small opening on the tip.
I use cotton swabs and warm water to clean the packing nut and packing. After I dry all of the parts, I reinstall the packing and packing nut.
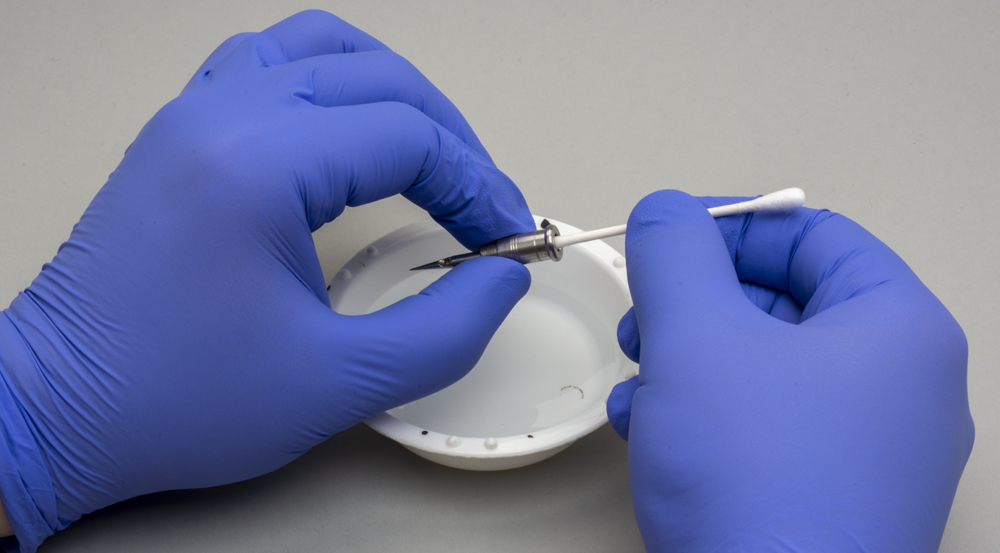
Next, I work on the needle. This is an extremely delicate part, so handle it with care. As before, I use a pipette to irrigate the inside of the needle. Since the needle’s interior is stepped, I use a combination of nylon brushes and cotton swabs to clean it.
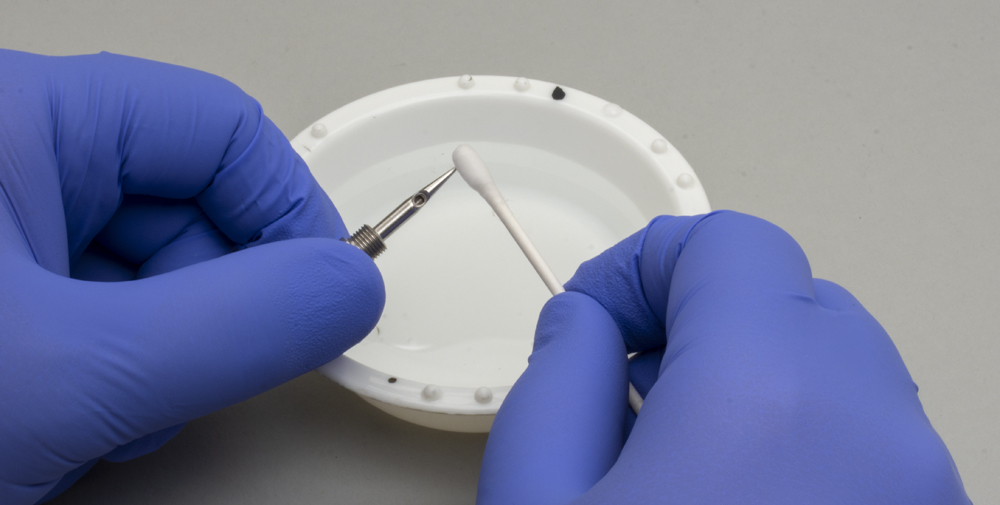
Paint also accumulates on the tip of the needle, especially if you use acrylics. I use a damp cotton swab to gently clean the tip (a paper towel could be used instead). I inspect the tip carefully to make sure all traces of paint have been removed. Any stubborn paint can be removed with paint thinner.
Aircap
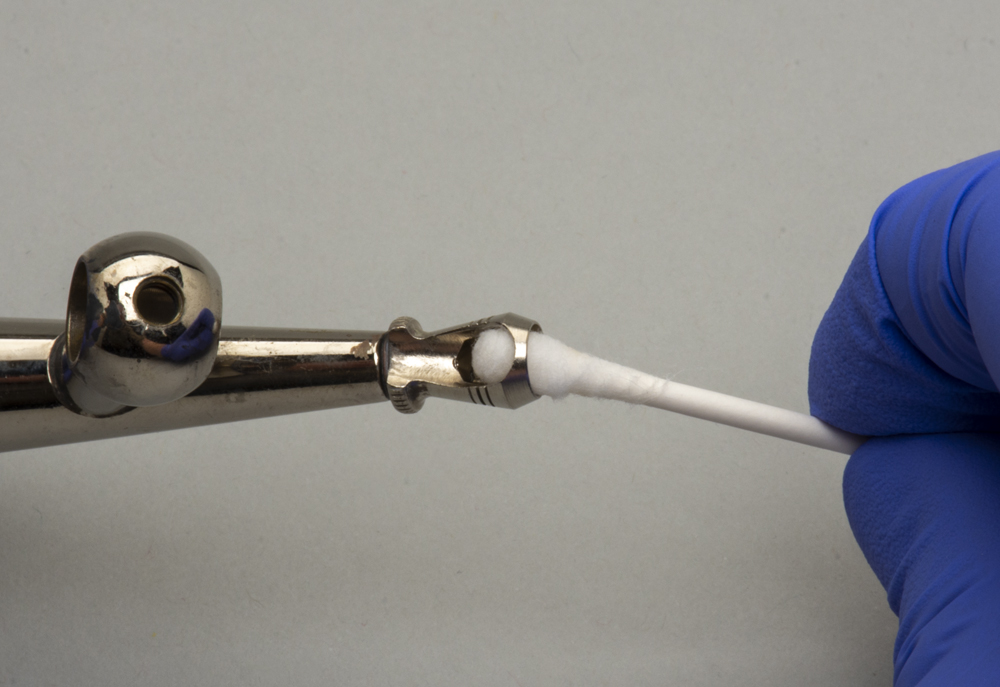
The aircap is probably the easiest part to clean. I like to use a damp cotton swab, as its can easily be swirled around the inside of the aircap. Squeeze the trigger a couple of times to remove any water from the airway.
Off-the-shelf kits
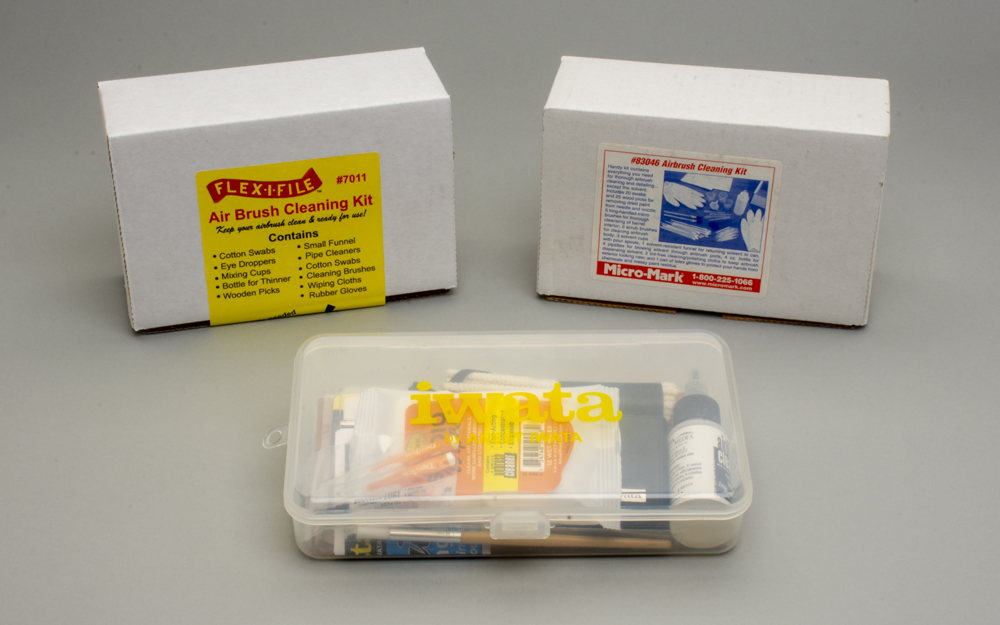
If you were to ask me what a basic airbrush cleaning kit should include, I’d say nylon airbrush cleaning brushes, cotton swabs, pipe cleaners, pipettes, and a reusable cup or water dish. Most veteran airbrush users keep these items in their paint kits.
However, if you’re just starting out, off-the-shelf airbrush cleaning kits will get you into the game quicker. Iwata, Micro-Mark, and Profile Accessories Inc. are three companies that sell cleaning kits. The contents vary slightly between manufacturers, so find the set that works best for you.
Spare parts
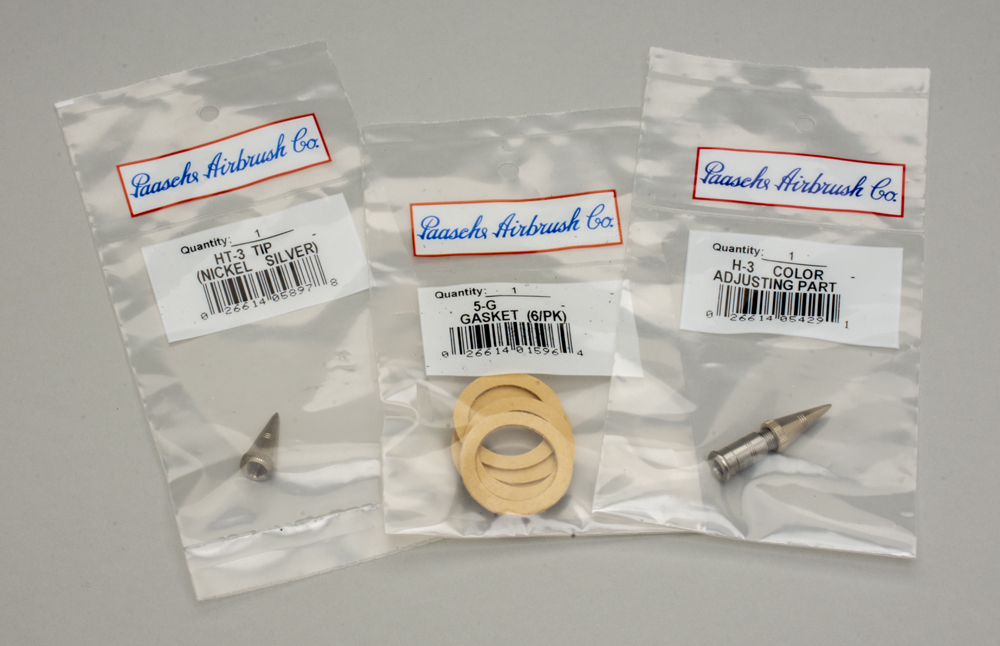
No matter how careful you are, accidents will happen when you’re cleaning an airbrush. That’s why it’s good to have spare parts on hand. Though Paasche sells needles and tips individually, you can save a few bucks by purchasing head combos.
In addition, other parts may wear out or accidently get lost while cleaning, like the gasket on the color bottle assembly, the packing in the tip, and the O-ring between the aircap and shell.
Cleaning products and safety
Though water works well for cleaning acrylics out of an airbrush, some modelers use window cleaner, such as Windex. If the cleaner has an ammonia base, use it sparingly as it can damage the brass components found in some airbrushes.
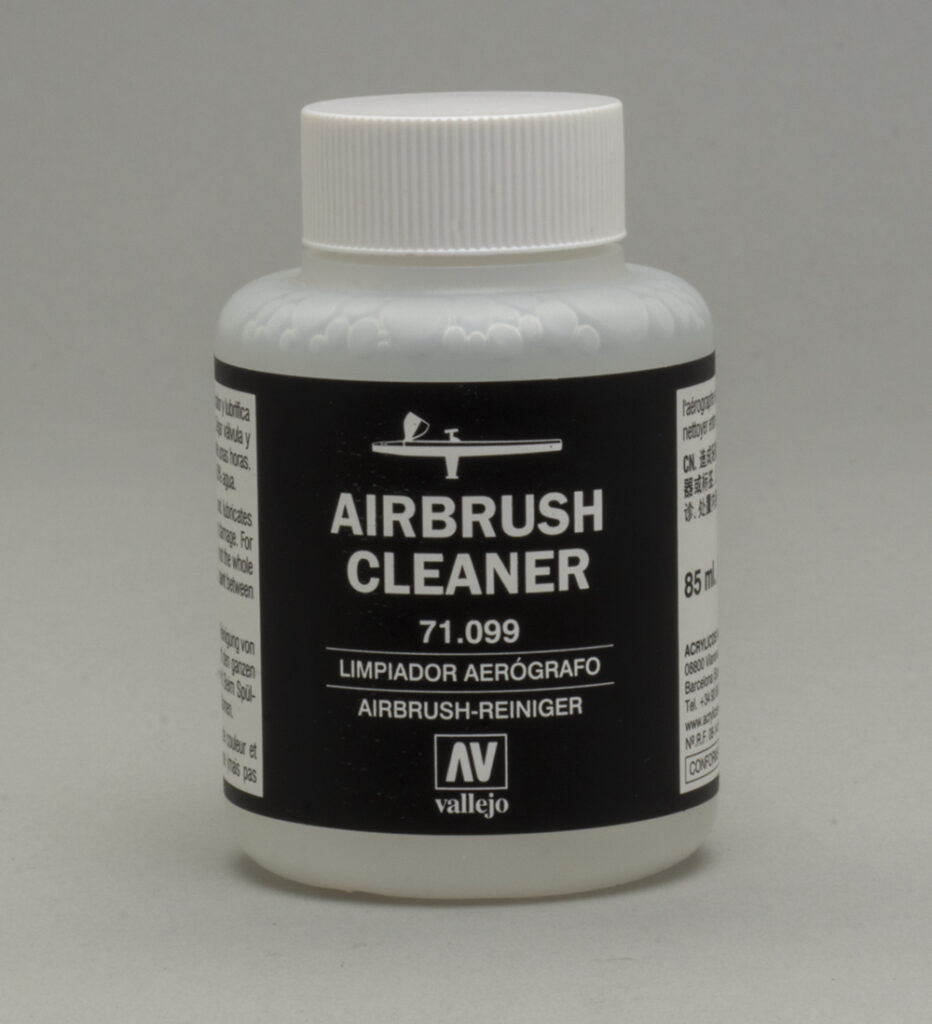
Acrylicos Vallejo and Iwata-Medea offer ready-to-use airbrush cleaner. Both firms offer the cleaner in multiple bottle sizes.
If you spray organic, solvent-based paints, use enamel or lacquer thinner as appropriate to clean your airbrush. Thinner makes quick work of paint, so you don’t need as much to clean your airbrush.
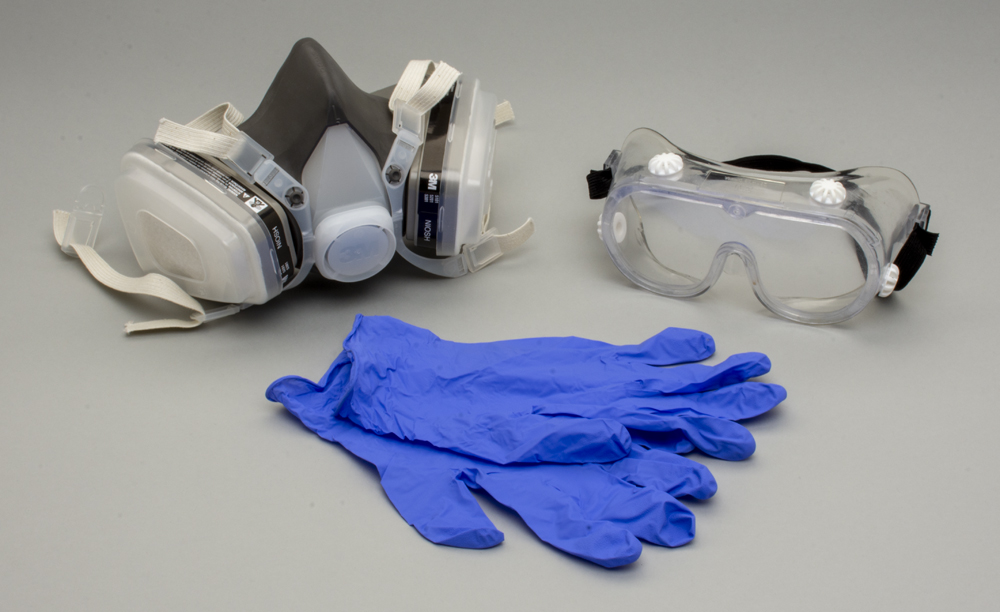
Finally, a word about safety. Whether you’re dealing with acrylics or organic, solvent-based paints, work in a well-ventilated area and wear a respirator (not a dust mask), nitrile gloves, and eye protection. Follow all printed instructions and warnings on the materials that you’re using.
With properly cleaning and maintenance, your airbrush will last you many years. Now that you know how to take care of your airbrush, find a model and some paint, head over to the spray booth, and start painting.


Cody, you are very correct is the steps you are showing – thorough and meticulous care must be taken when cleaning the airbrush after use. I do deviate from your tutorial a bit ….. I use Berryman’s B-12 Chemtool (a carburetor cleaning fluid) to clean out my airbrush. WARNING, it has an odor that may be too strong for some, and it MUST be used in a well ventilated area.
I had to store my airbrush (Binks Wren B tip, external mix) for several years due to a combination of professional and personal reasons. I made sure the airbrush was clean before storing and when I got it back out, I put a little in the siphon cup, sprayed it out unti, thoroughly dry. it painted flawlessly with the first batch of paint.
BTW, the first batch was somewhat of an experiment as I had very poor results with the initial water based/acrylic model railroad paints clogging both the Wren and a Badger Model 200, even using the [original] Badger paints developed specifically for their airbrushes.
I watched a couple of videos of a model car builder airbrushing his models using inexpensive acrylic craft paint mixed (approximately) 50-50 with cheap(!), blue windshield washer fluid to about the consistency of 2% milk. To get an initial glossy finish, he substituted acrylic floor polish (Mop & Glo, etc.) in lieu of the windshield washer fluid, again getting the consistency of 2% milk. His final gloss coat was straight acrylic floor polish. It really does work well; and doesn’t dry out in the airbrush as my initial experience.
Main drawback, the Walmart/Hobby Lobby/Michaels/etc. craft paints do not come in convenient “railroad” colors. Still with a little practice and patience and experience, color matching can be accomplished …..
And as one fellow MoPac modler once told me – “you want MoPac ‘Jinks Blue?’ Well, I’ll ask you this – hoa long has it been out of the paint shop; how well has it been maintained; has it been in the milder climate of the Mississippi Valley area, or has it been working the T&P lines from Fort Worth to El Paso? Bottom line, what COLOR is the locomotive you’re [actually] trying to model?”
OK, I’ve rattled on quite a bit and strayed from the original topic, but I will get back in line with this – I buy Berryman’s B-12 Chemtool by the gallon at the local O’Reilly’s Auto Parts store and it cleans my airbrush back to factory new regardless of the medium I have just sprayed.
Great tutorial!!
BTW – I got my Binks airbrush in the late 70s and still works great; just finished another paint job yesterday 😉