


Modelers David Popp, Brian Schmidt, and Bryson Sleppy continue the scenery process on their T-TRAK modules by adding gravel, ground foam, and static grass in an attempt to make them look more like the prairies of Colorado. T-TRAK is a modular N scale railroading system that uses foot-wide boxes plugged together to build tabletop layouts. In this seventh installment, the three modelers explain the basic steps for applying gravel driveways, as well as ground foam and static grass finished scenery.
Brian: The waiting is finally over and we’re heading into the part of this project I like the best — the finished scenery!
Bryson: Yes, David selected a variety of scenery materials that we will all use to replicate the summer months in the Colorado Plains.
Brian: Part of what will help our T-TRAK modules blend together and look like a complete layout is the fact that we will all use the same basic scenery materials. That way, the look and color of the gravel, turf, and grass will match between all modules.
Bryson: But what’s cool is that we’ll still get to do our own things as well. My grain elevator scene will be completely different than David’s warehouse or Brian’s small-town modules.
Brian: David’s off working on the next installment of this series, so Bryson and I will walk you through the scenery process.
David: I’m right over here if you need me.
Brian: We don’t, but thanks. Last time, we finished things up by painting the surface of everything, including the fascia, with flat tan latex house paint.
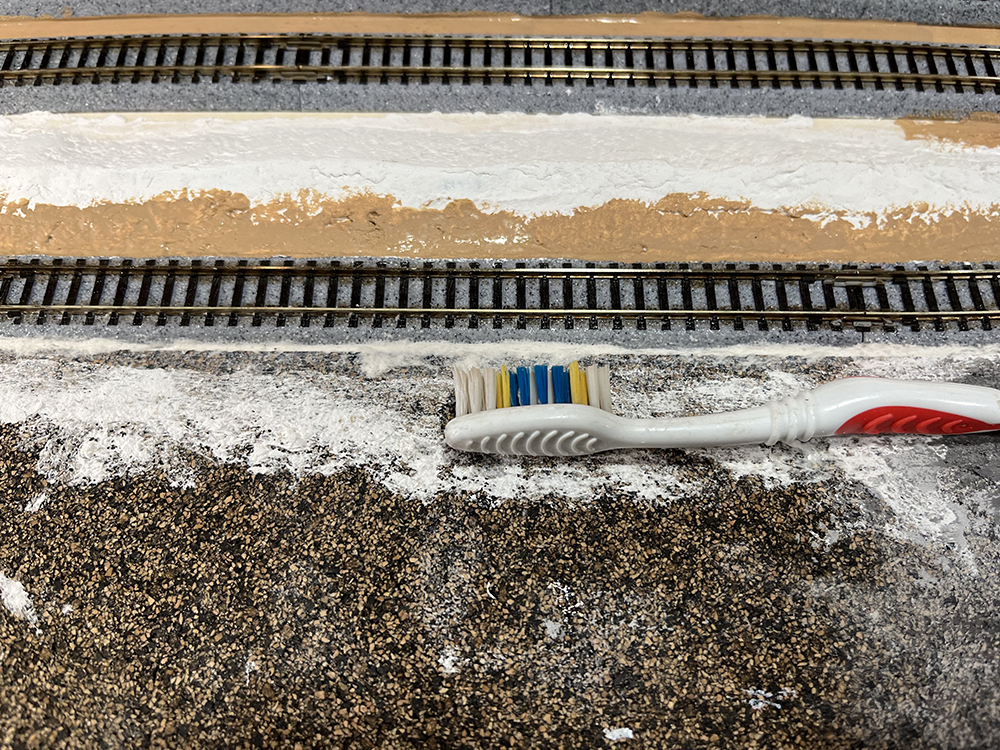
Bryson: Everything except the Kato track, that is. That’s when we noticed that in some places we had Sculptamold to clean off the track’s plastic roadbed.
Brian: Fortunately, this was an easy job. Using a little water and an old toothbrush, it’s easy to moisten the dry Sculptamold and scrub it away.
Bryson: Scenery works best in layers, just like nature. So, we’ll start with the bottom layer, which includes dirt and gravel on our modules.
Brian: We began by spreading full-strength white glue along the shoulders of the road, as well as in front of the metal shed to form a gravel driveway. We sifted Woodland Scenics Fine Gray Gravel (C1286) into the wet glue. Although you could use a shaker bottle, we used a plastic spoon to sift the gravel onto the scenery, as it provides more control. We vacuumed up the excess to make a smooth, level surface.
Bryson: This product comes with two parts – the gravel and a fine powder to represent dirt. After you apply the gravel, you can make the surface look weathered by brushing on the powder and soaking it all with more Scenery Cement, which we’ll get to in a bit.
Brian: As shown in the photo above, after applying the gravel around the road and driveway, we decided to also installed Kato ballast (24-039) between the two mainline tracks.
Bryson: But ballast doesn’t usually go on the bottom layer of scenery, does it?
Brian: True, this was actually David’s idea. Before applying the scenery that surrounds the gravel areas, we needed to let the glue dry for a bit so the gravel would hold. By working on the ballast between the tracks, we were able to fill some of the waiting time with other work.
Bryson: Clever.
David: (From the background) Thanks, Bryson.
Brian: Careful what you say. David said he was working on other things, but I think he’s still listening.
David: I heard that.
Brian: I know. That was the point. You hear everything!
After the gravel had a bit to dry, we brushed full-strength white glue onto the surrounding scenery and applied the next lowest layer, Woodland Scenics Earth Blend Fine Blended Turf (T1350). Again, we sifted it into the glue with a spoon.
Bryson: Actually, we didn’t technically use full-strength glue. Sculptamold is difficult to work perfectly smooth, making it a challenge to completely coat with paint or glue.
Brian: Periodically, we dipped the glue paintbrush into water first, then back into the glue. This thins the material just enough to make it easier to work the glue into the irregular parts of the scenery’s surface.
After applying the ground foam to the wet glue, we used the vacuum to remove the excess material, which provides a uniform layer.
Bryson: We used the vacuum a lot in this process. Doesn’t that waste material?
Brian: Not as much as you might think. If you’re careful about how much ground foam you apply, you can prevent excessive waste easily enough. Note, too, in the photo below, at this point, David applied some of the fine powder to the driveway that came with the gravel kit.
Bryson: It looks kind of blotchy.
Brian: Once everything dries, you can even it out by lightly sanding the surface.
Bryson: I have a lot of gravel driveways to do on my own modules. I’ll have to remember that.
Bryson: The white glue is a good starting point for holding fine materials, particularly to the slopes of hillsides. But it won’t hold all the material you’ve applied if just left to dry this way.
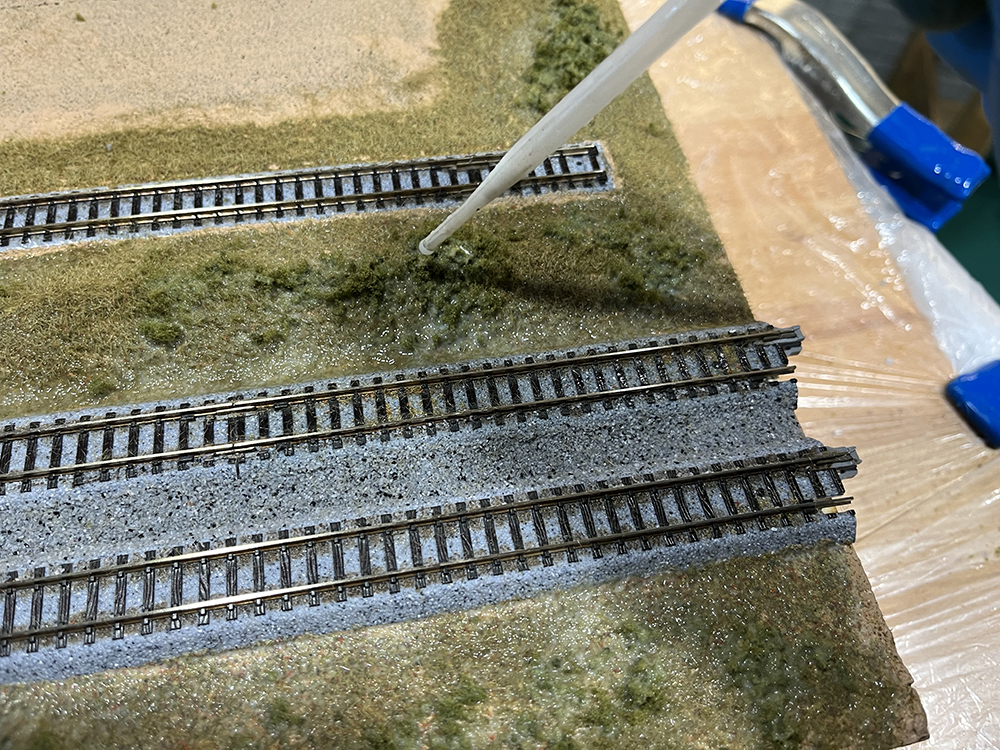
Brian: No. We have two steps yet to ensure the ground foam and gravel stay put. The first is to apply a wetting agent. David uses 70% isopropyl alcohol for this step and applies it with a plastic pipette. Alcohol is thinner than water and will wick its way into the gravel and ground foam easily without disturbing those materials or beading up on the surface.
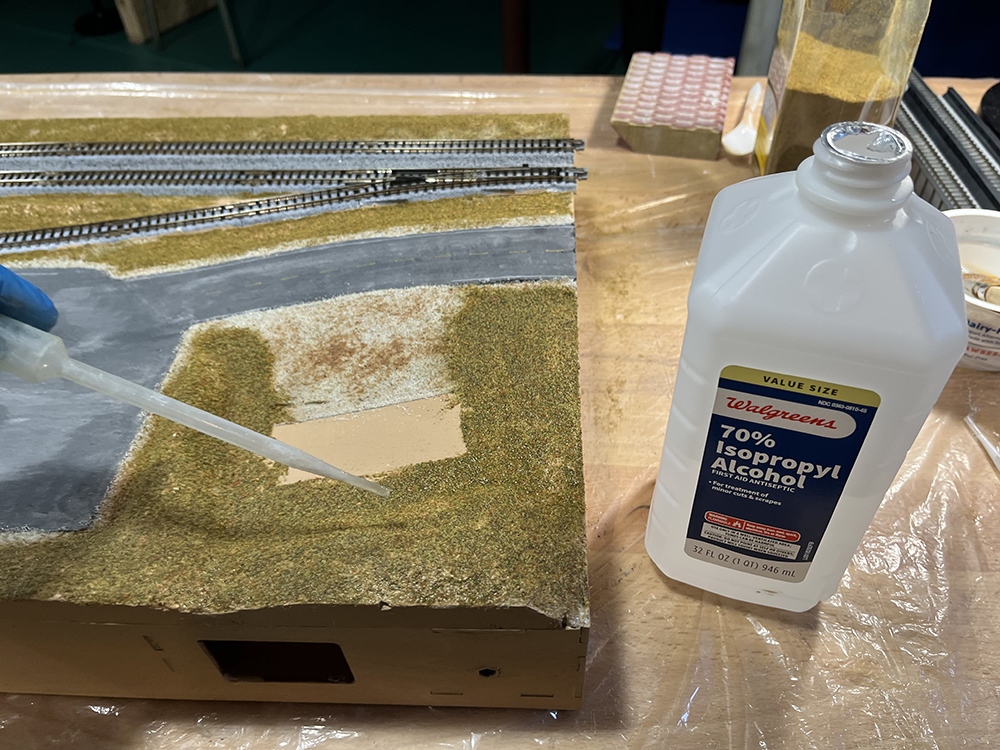
Bryson: I’ve always wondered if we really need this step, particularly since we’re going to apply thinned white glue next anyway.
Brian: Basically, the wetting agent allows us to apply the thinned glue, such as Woodland Scenics Scenery Cement (S191), without it beading up on the surface and displacing the scenery material. You can also use white glue thinned 50% with water and a drop of dish soap.
Bryson: Oh yeah, you use dish soap when making “wet water” too, which is a wetting agent substitute if you don’t want to use alcohol.
Brian: The dish soap helps break the surface tension of the diluted white glue and allows it to soak in well.
Bryson: So why does David prefer alcohol over wet water? Wet water is a lot cheaper.
Brian: David prefers the faster evaporation time of the alcohol. Wet water combined with diluted white glue takes a long time to dry, and it tends to pool in low spots, causing the scenery materials to float around.
Bryson: Makes sense.
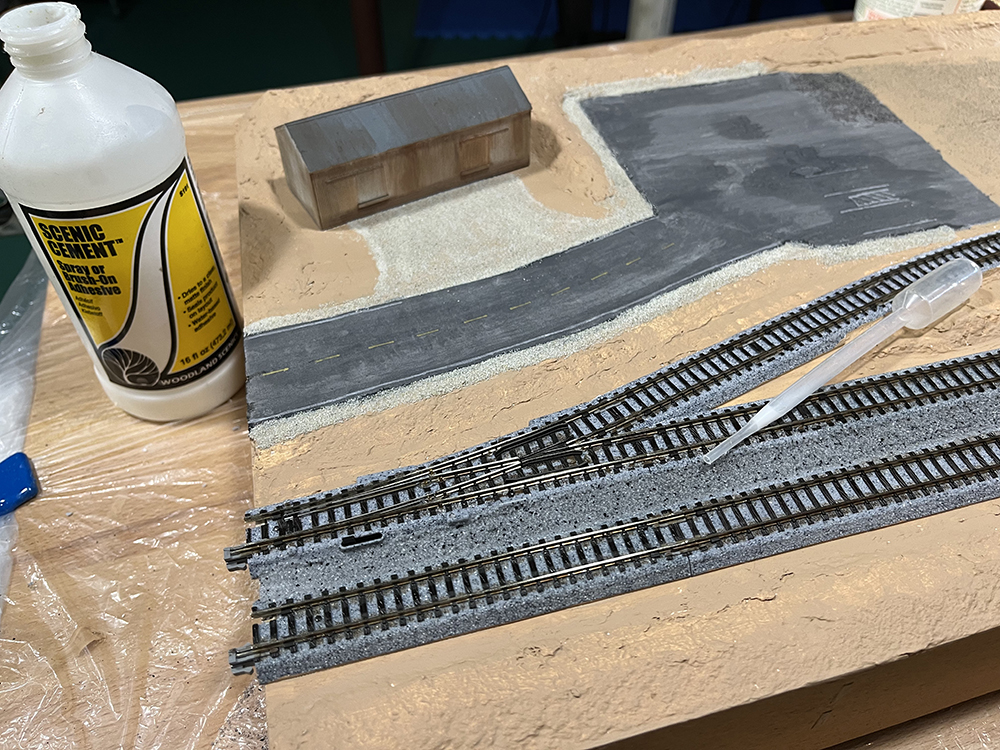
Brian: Once the alcohol has soaked into the surface, we applied the diluted glue – or in our case, Scenic Cement.
Bryson: At this point, we can then do a lot of other things to the scenery.
Brian: Yes. For example, around the farmhouse on another module, David sifted fine green ground foam into the wet glue in places to represent the shorter grass found in lawns.
Bryson: But for many of our other modules, this is the point where we will apply static grass.
Bryson: Static grass is totally cool, and it will help capture the look of Colorado well.
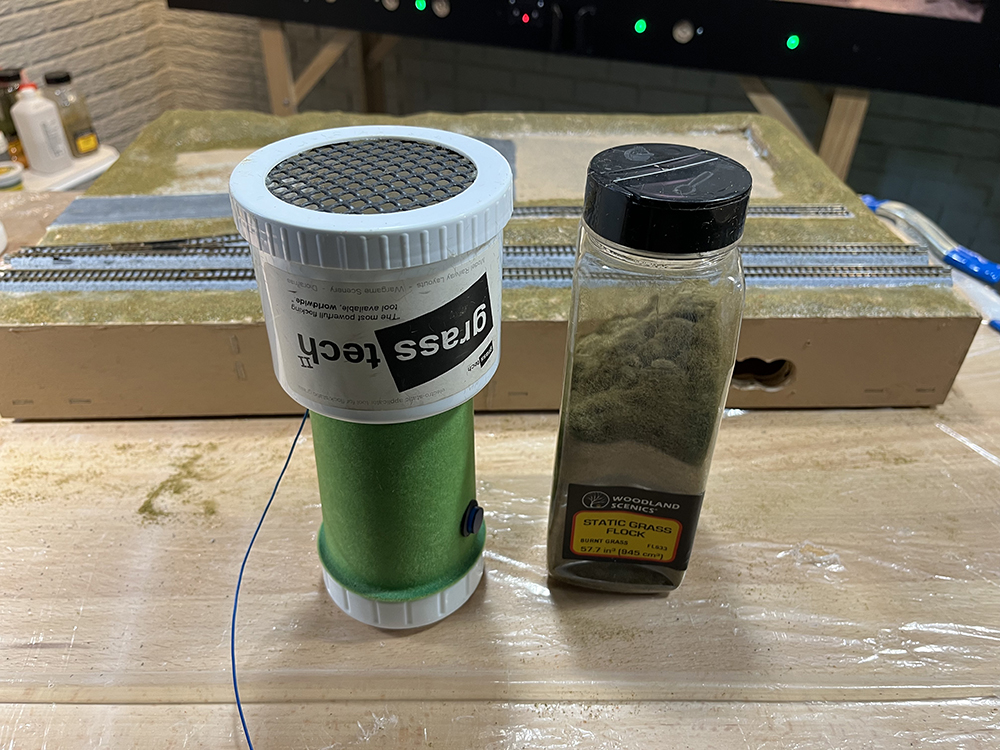
Brian: Since we’re working in N scale, we needed a short-fiber grass, so we used Woodland Scenics Burnt Grass Static Flock (FL633). This produces knee-high prairie grass when compared to N scale figures.
Bryson: There are a lot of static applicators out there. David owns an older model from Grass Tech, and it works using a 9V battery.
Brian: Around the workshop, we have static grass applicators from Noch, Woodlands Scenics, and Peco.
Bryson: The track people in the UK?
Brian: The very same. Most all applicators work the same way.
Bryson: First, load the applicator with your choice of static grass and attach the sifting screen.
Brian: Most have several different sized screens. Remember, the smaller the fibers, the tighter the mesh you want on the screen.
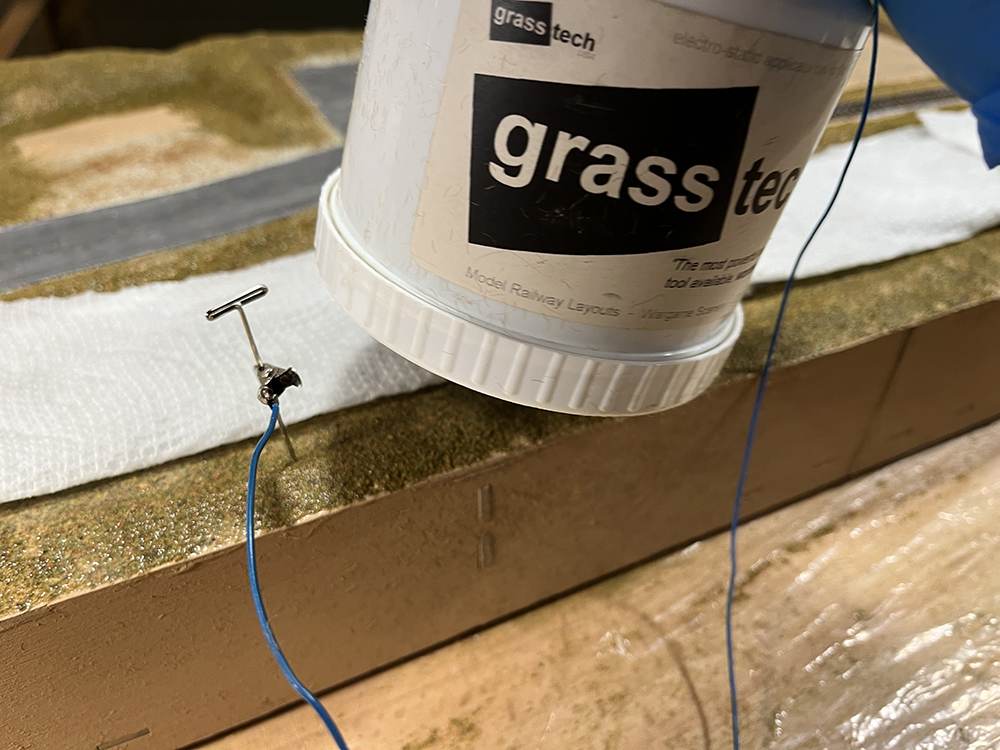
Bryson: Next, attach the grounding lead to your wet scenery. As shown here, a metal T pin works well for this.
Brian: This is very important, for without the grounding lead, you won’t have a complete charge, and the grass won’t stand on end.
Bryson: It’s also really important to protect anything you don’t want covered in static grass.
Brian: As shown in the photo, a damp paper towel is all you need for this. We covered the tracks, the gravel driveway, and the road’s shoulders to keep the grass off of those things.
Bryson: With that, turn on the power switch and hold the applicator close to the surface without touching it. Tapping the side of the applicator gently with your finger helps to apply the static fibers evenly.
Brian: And you can make multiple passes, creating as thick a coating of static grass as you wish.
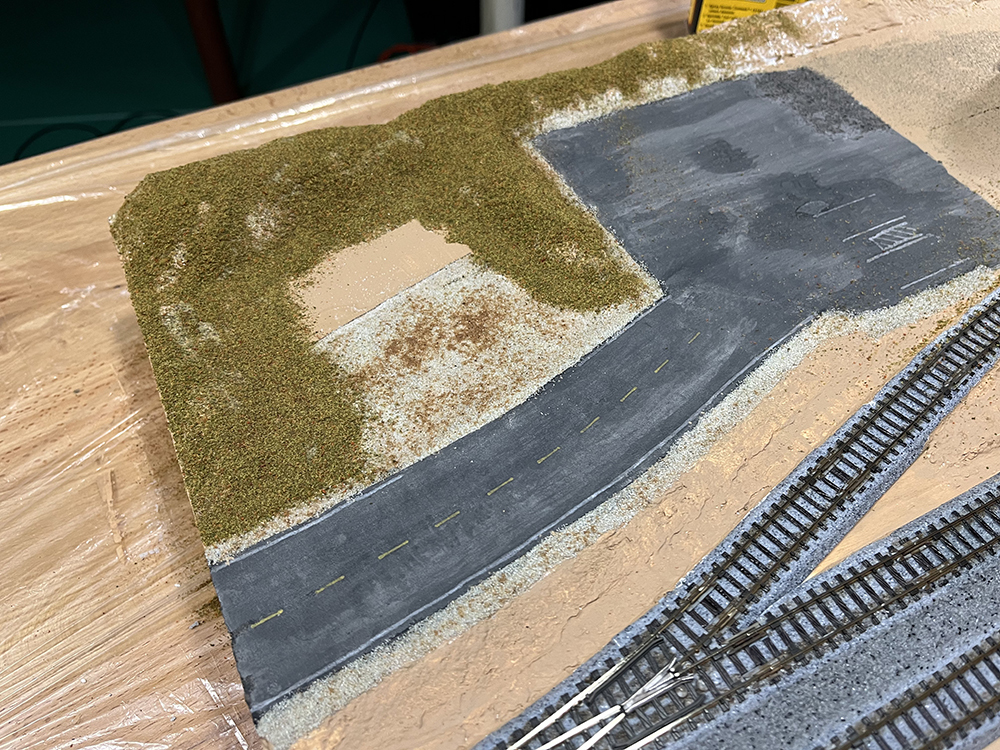
Brian: The finished result is a nice, even coating of static grass. Once the glue dries, the grass is quite resilient to damage.
Bryson: We could’ve left the scenery at this level if we wanted to, but it looked pretty uniform.
Brian: Even wild prairie lands have other things growing in them besides grass.
Bryson: Next, we used Woodland Scenics Burnt Grass Coarse Turf (T1362) to represent other types of plants growing in the open spaces.
Brian: This loose material is just as it sounds, and the burnt grass color works nicely with the color of static grass we chose.
Bryson: Simply apply small clumps of this material in the wild spaces of the scenery. Gently distribute the coarse turf on top of the static fibers and drip a bit of Scenic Cement on top to glue it all together.
Brian: I really like how the coarse turf sits up on top of the grass fibers. It looks like other prairie plants have grown up above the grass.
Bryson: With the scenery completely soaking in glue, it was a good time to get the buildings planted into the scene.
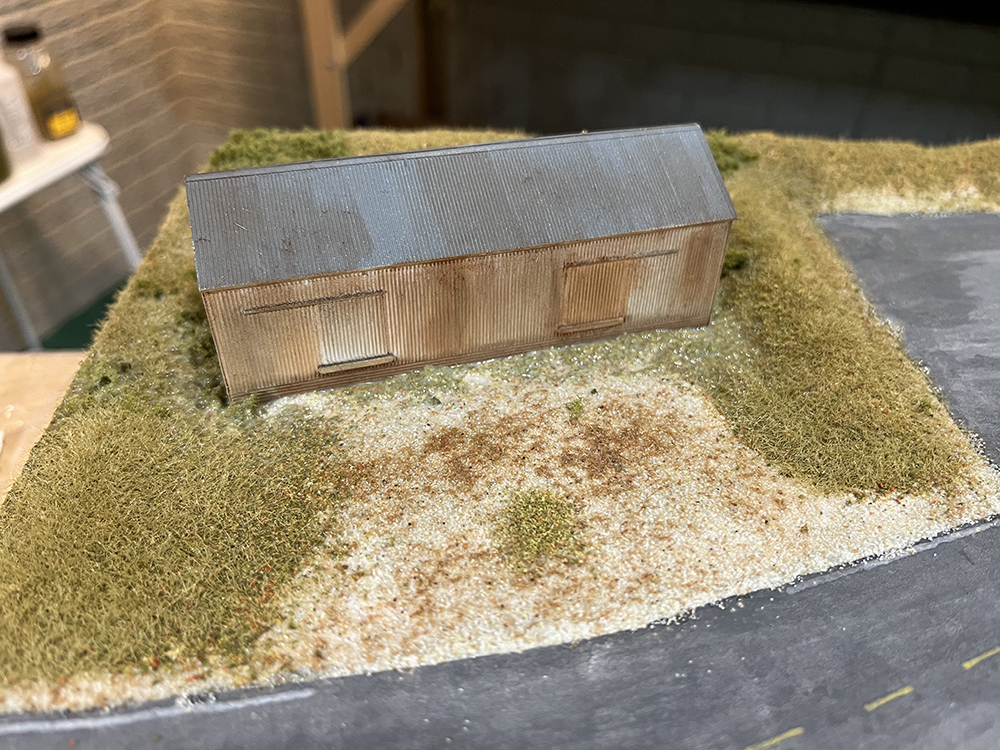
Brian: There’s nothing worse than seeing buildings on a highly detailed model railroad that appear to be floating above the ground. Starting with the shed by the gravel driveway, we applied white glue to the base, then pressed it into the wet scenery.
Bryson: Unfortunately, the shed didn’t displace enough gravel, and left a gap under the front edge. To fix this, David carefully sifted more gravel along the base, as well as more earth blend ground foam, then soaked the area with more Scenic Cement.
Brian: The shed was built by former MR associate editor Gordon Odegard. It had been on his home layout, and then it was used on one of our previous T-TRAK modules, as well.
Bryson: Great to have a bit of Gordy, known for the Clinchfield, in our project too.
Bryson: Since the factory was larger, we used clear latex caulk to glue it to the cork scenery base. We then filled in the scenery around it.
Brian: At this point, all we had left to do was install a few trees and bushes.
Bryson: We’re using two types of trees on this layout. Noch assorted deciduous trees (24603) and Grand Central Gems small pine trees (295-T3).
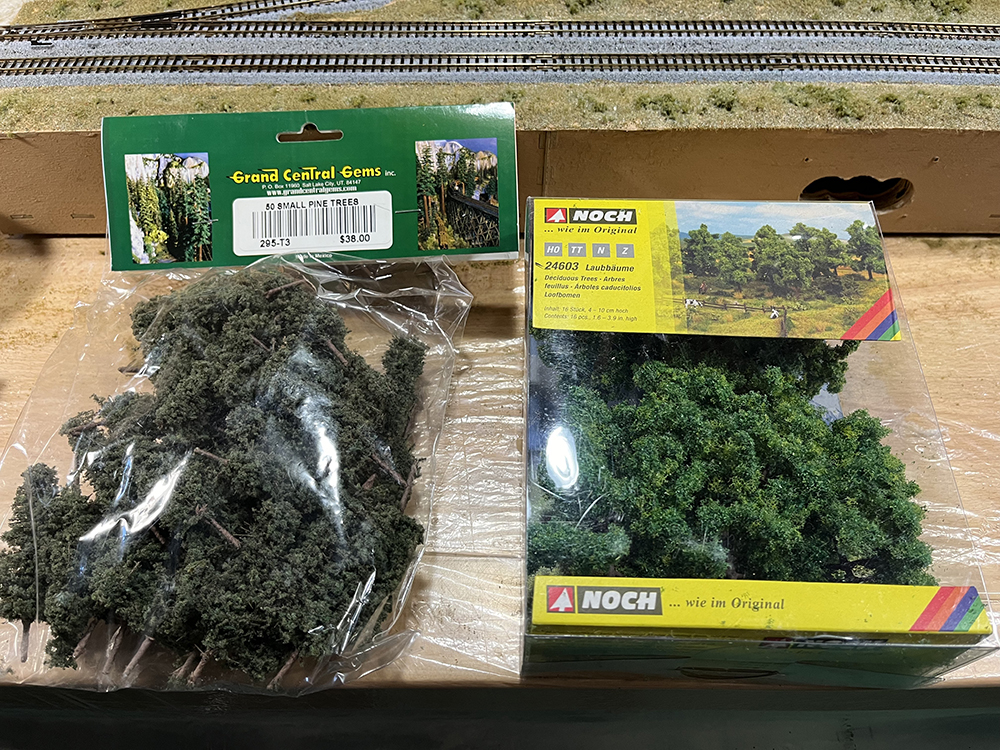
Brian: We don’t need a lot of trees for this part of the U.S. In fact, unless it is around homes or businesses, there are not a lot of trees out in the open here at all.
Bryson: We’re using the pines for trees that have been planted as landscaping. A few small clumps or single lone deciduous trees are more appropriate for our open scenery.
Brian: Planting trees is easy. Make a hole in the module, clip the mounting base off the tree (if it has one), dip the tree in glue, and plunk it into the hole.

Bryson: While we were planting trees, we added some bushes as well, using Woodland Scenics Medium Green Clump Foliage (FC683). We used some of the leftover glue from the scenery process to apply a bit to the bottom of the clumps and glue them into the scene.
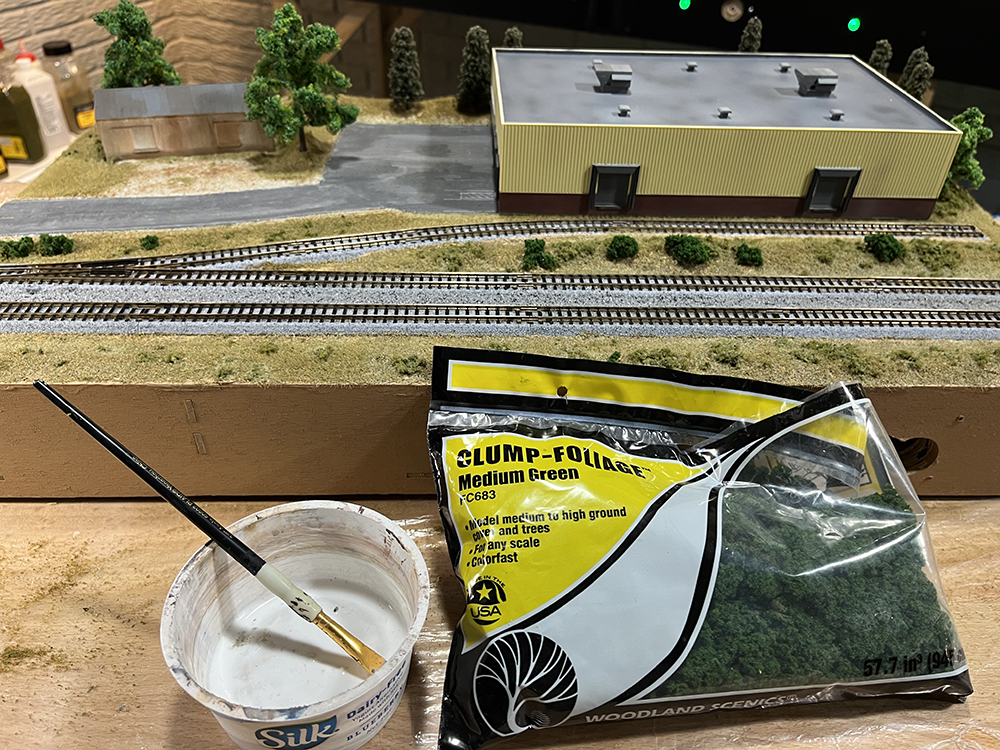
Brian: The darker color contrast nicely with the olive greens and browns of the rest of the scenery materials, adding some well-needed variety for the eye.
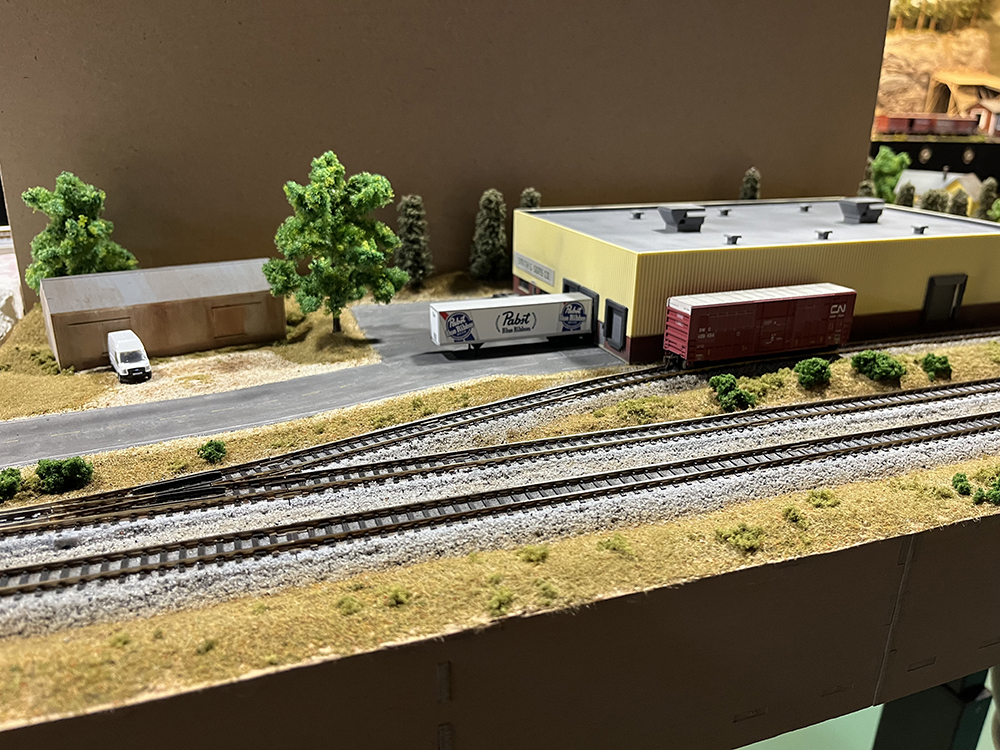
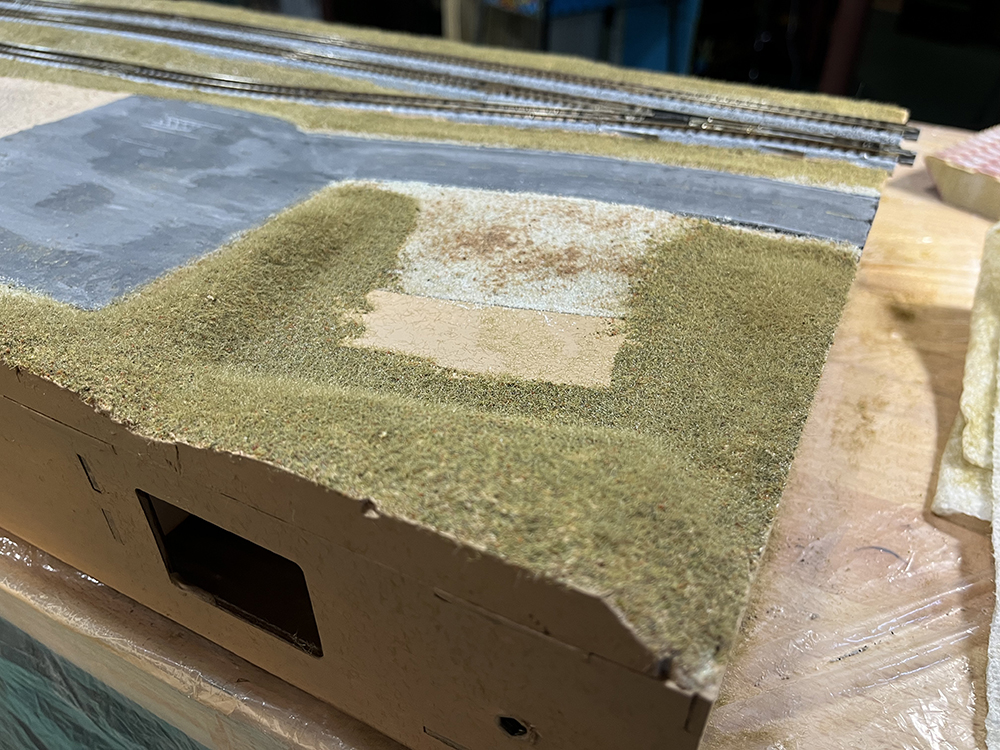
Bryson: It could probably use a few more, especially along the railroad tracks. The photo below shows the nearly finished module.
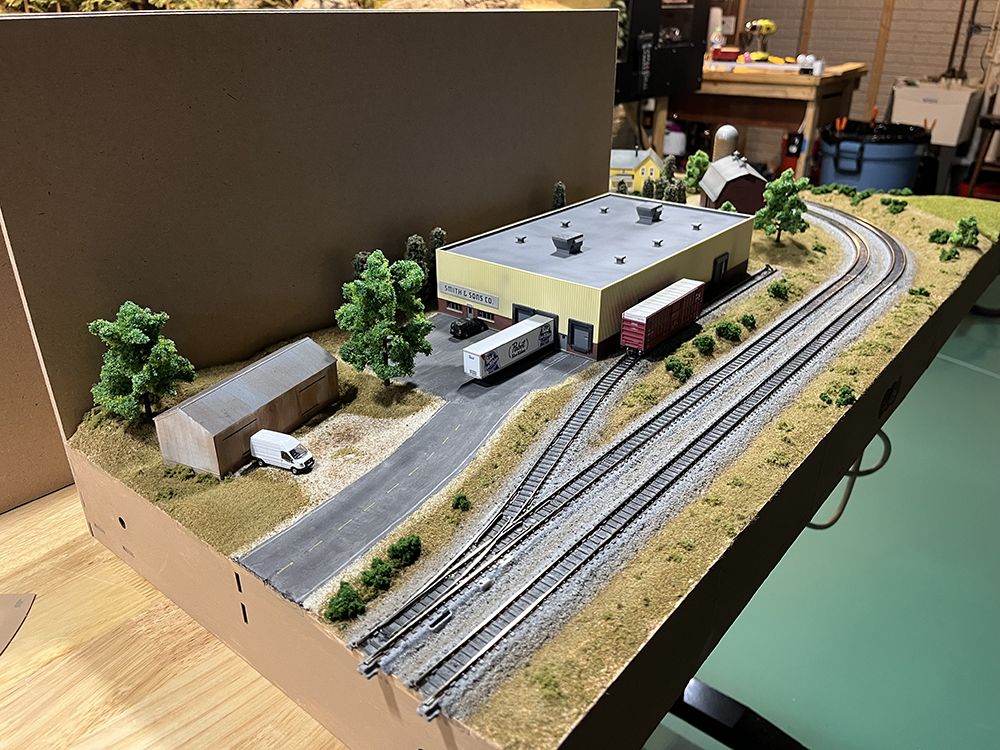
Brian: That looks really good, but how did the ballast get finished?
Bryson: And check out the backdrop board. Where did that come from?
Brian: And now it has vehicles too!
David: I told you I was working on the next part of the series while you guys handled the scenery work. We’ll cover ballast, backdrops, and more in the next installment of our T-TRAK Project.
Bryson: This is going to be so cool!
Click here to read the next installment of the T-Trak project series!
Click here to read the previous installment of the T-Trak project series!


