Modelers David Popp, Brian Schmidt, and Bryson Sleppy continue the scenery process on their T-TRAK modules in an attempt to make them look more like the prairies of Colorado. T-TRAK is a modular N scale railroading system that uses foot-wide boxes plugged together to build tabletop layouts. In this eighth installment of the T-TRAK series, the three modelers explain the techniques they used for adding ballast to the track, installing and painting backdrops, and modeling a riverbed.
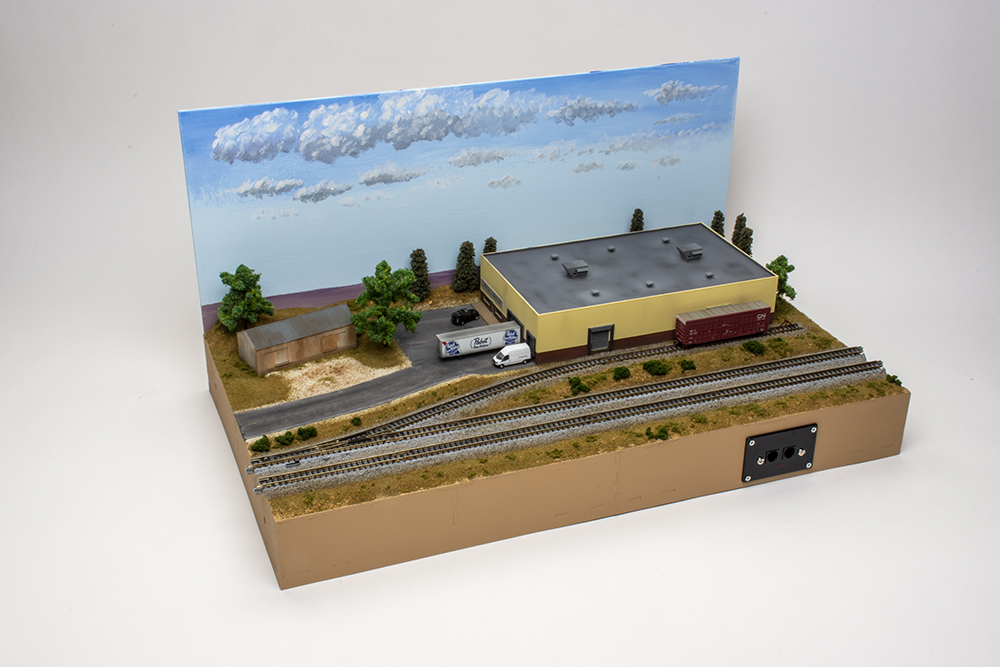
Bryson: OK, from the photo above, I’m really excited about finishing up the scenery work on our T-TRAK modules. The bridge and station scenes look great!
Brian: I’m amazed at how good the Kato Unitrack looks once it has been ballasted.
Bryson: And who did you get to paint the clouds on the skyboard? I want mine to look like that.
David: I take it you approve of the additions to the modules. Actually, these are all easy things to do, and you can use them on your modules as well. Let’s take it in order, starting with the ballast.
Bryson: I know the Kato Unitrack is molded to look like it’s ballasted, but it doesn’t quite fit in with the rest of the scenery if left alone, does it? Especially the ruler-straight edges.
Brian: Kato makes ballast that comes really close to matching the colors used on the molded-plastic track sections. We used it on our last T-TRAK modules, but we couldn’t get it to blend in all that well.
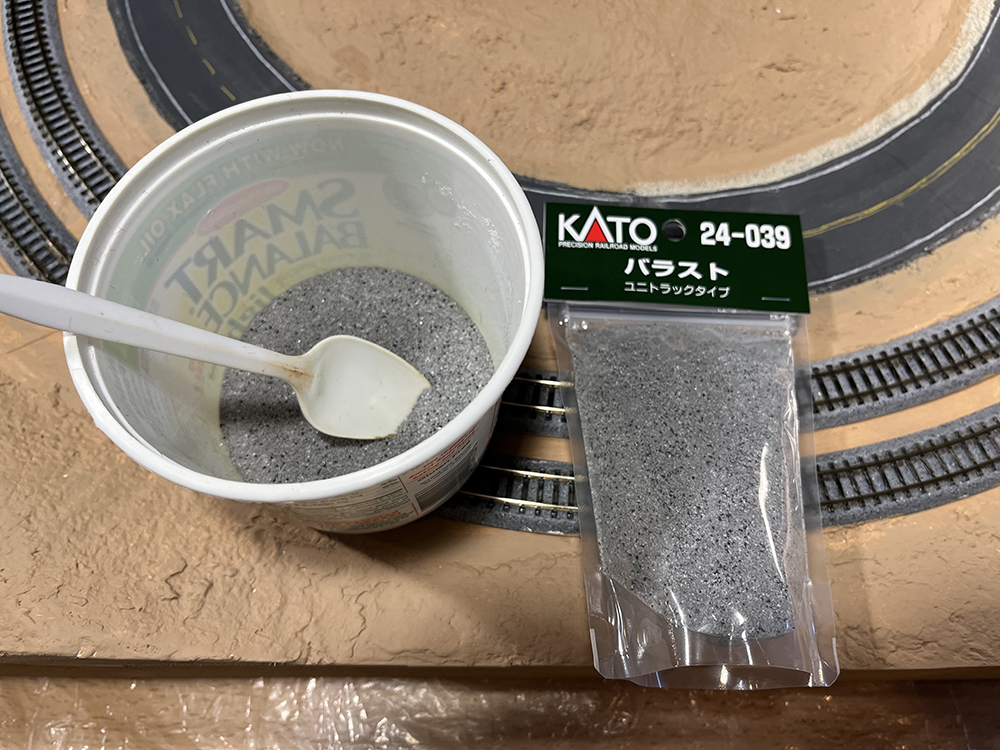
David: I agree with you both. As Brian mentioned, the ballast helped hide the hard, straight edges of the Kato track sections, but it never quite looked right – that was until I saw what Cody and Pelle Soeborg had done with their modules in the first T-TRAK series – they weathered the ballast and track using an airbrush.
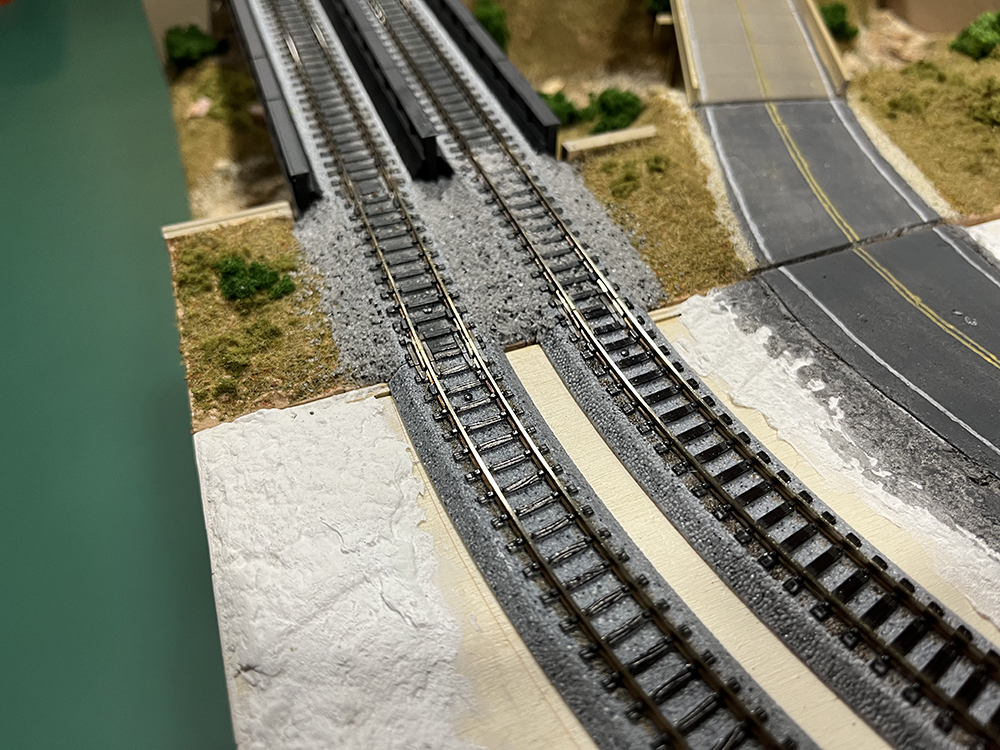
Bryson: Although we didn’t use Unitrack on the Free-Mo project for MR last year, we did the same thing with the ballast, and it really looks great.
David: And I used the same technique on all my other layouts, so I’m surprised I didn’t think of it here either until I saw what Cody had done. But we’re getting ahead of ourselves and will cover the weathering step in a bit.
Bryson: OK, so how much ballasting did you do to the Unitrack?
David: Quite a bit, as it turns out. After the rest of the surrounding scenery was complete, I applied full-strength white glue along the edge of the Unitrack sections all the way up to the top. I did the same thing for the area between the two tracks as well. I then sifted the ballast into the wet glue using a plastic spoon.
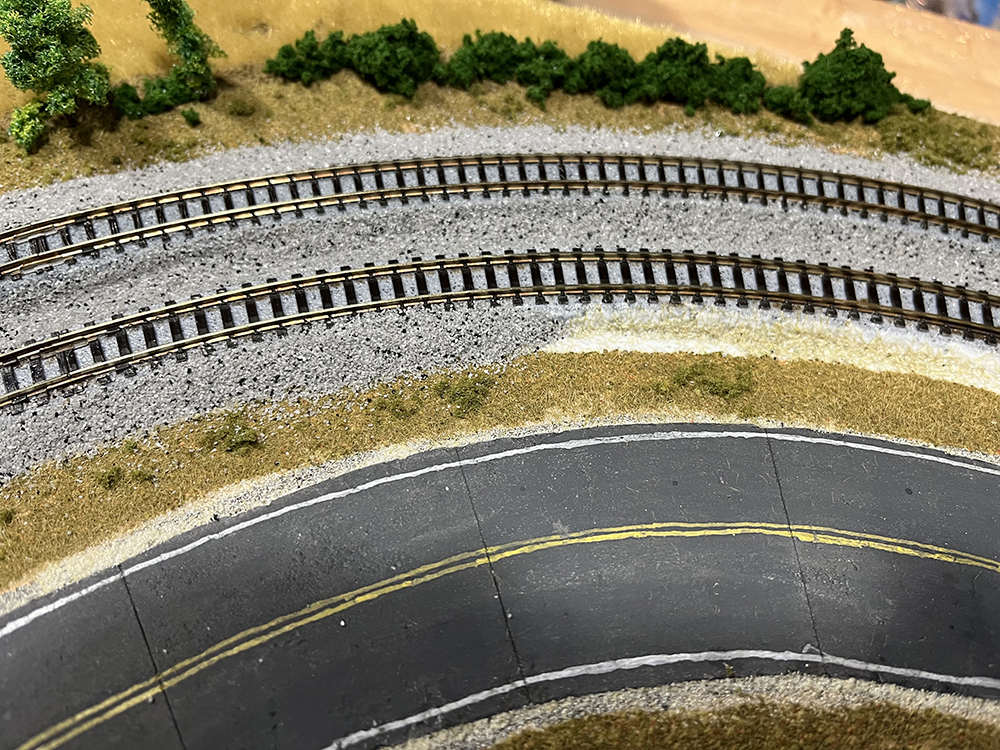
Bryson: But how did you get it to look so even?
David: I borrowed another trick from Cody – a foam paint brush. Using the beveled edge of a 1” foam brush, I shaped the ballast and leveled it with the top edge of the roadbed on the Kato track. It was a bit harder to shape the ballast in between the two main lines, but after some experimenting, I got the hang of it.
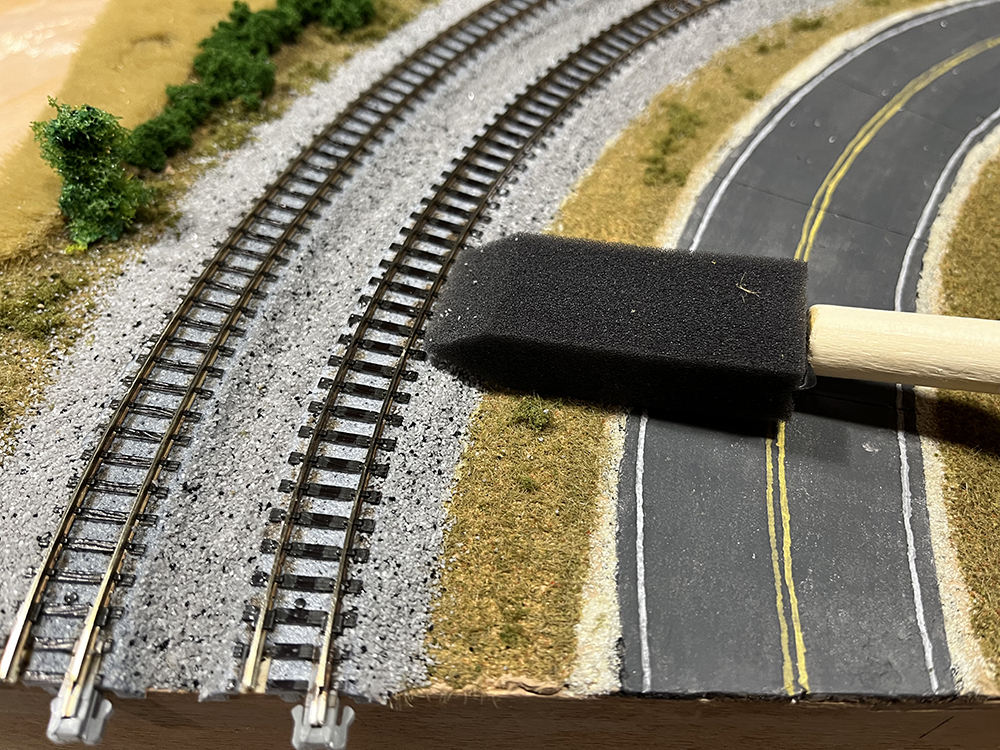
David: Unfortunately, I didn’t use enough ballast on the first module I worked on – the farm module. It’s really noticeable where the ballast doesn’t come all the way to the top of the roadbed. My later efforts, particularly the warehouse and bridge modules, turned out great. The key is to make sure the ballast on the sides of the track extends all the way to the top edge of the roadbed.
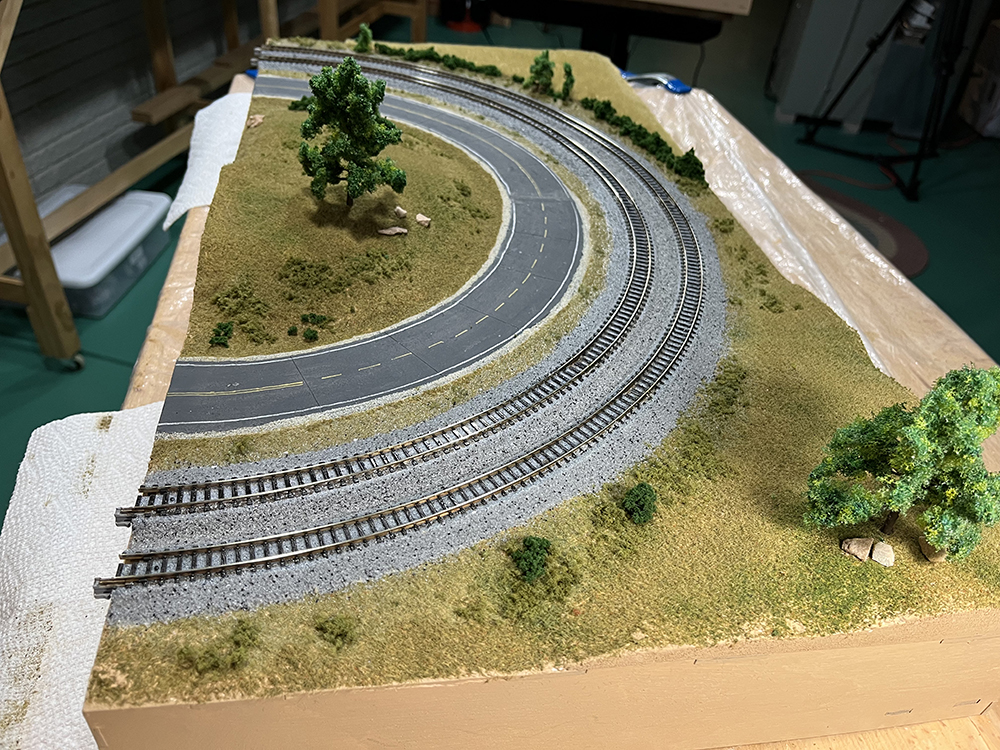
Brian: You know, we could have saved ourselves some work, as well as some ballast if we’d used the Kato double track sections for most of the railroad.
Bryson: Do the double-track sections use the same track spacing as the T-TRAK modules?
Brian: Yes, they do. It’s all part of the Kato track geometry standard.
David: Brian is correct. It all lines up so you can use double-track sections on T-TRAK modules. However, since we wanted a few turnouts along the main line, we’d have had to do some additional scenery work to get them to blend together with the double-track pieces. Besides, when I started this project, I was just building three single modules by myself, remember?
Bryson: You really think it would have been satisfied building three modules and not being able to run a train?
David: Fair point.
Brian: How did you glue the loose ballast in place? More Scenic Cement?
David: Yes, after the ballast was in position, I carefully soaked it with 70% isopropyl alcohol, then applied Woodland Scenics Scenic Cement. Pretty much it is the same technique you guys used on the surrounding scenery.
Bryson: I’m assuming you weathered the track after everything was dry.
David: The weathering coat is used to blend it all together, so you don’t want to airbrush the track until you’ve finished all of the surrounding scenery work, including grade crossings. Once all those things were completed, I took the modules one at a time into the spray booth at Kalmbach and airbrushed the track and ballast.
Brian: The ballast between the rails on most railroads is pretty grimy.
David: And that’s a good starting point. For the grime between the rails, I used Vallejo acrylic Model Air 71.057 Black and mixed 1 part paint to 5 parts thinner.
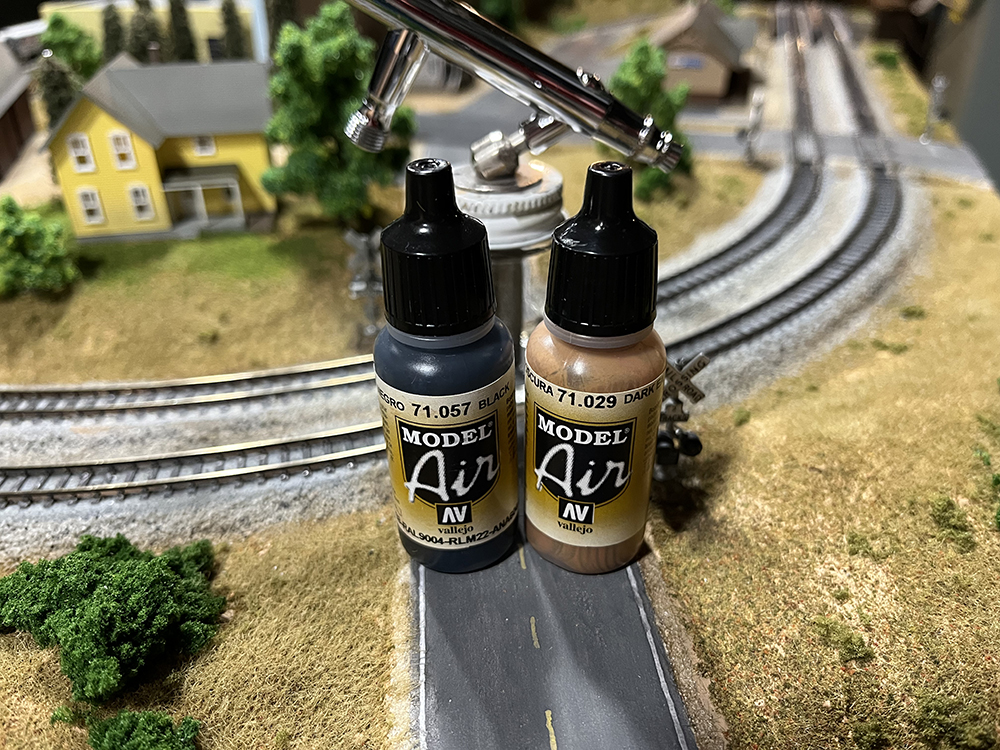
Bryson: When weathering anything with an airbrush, it is best to work with thinned paint and build up layers, so I supposed it works for track as well.
David: It does, especially since I can’t easily change it if it gets too dark. I airbrushed the thinned black down the center of both tracks using a couple of light passes. While I was at it, I weathered the grade crossings, the signals, and the streets.
Brian: I thought the streets were finished with the last weathering wash of diluted craft paint.
David: They were close, but the black sprayed down the centers of each traffic lane adds the darker areas where dirt and grime from cars and trucks collects – just like in between the rails on the track.
Bryson: I see you used an earth tone to blend the ballast into the surrounding scenery.
David: After applying the black to the track, I then mixed 1 part Vallejo 71.029 Dark Earth to 3 parts thinner and applied it to the edges of the ballast where it joins the surrounding scenery. The color is close to the original base color we used on the surrounding scenery, but it also has some of the hues of the Earth Blend Woodland Scenics fine turf we used on the ground cover.
Brian: I see you applied it between the two main lines as well.
David: Yes. Originally, I wasn’t going to spray those areas, but the gray Kato ballast between the two tracks was just too stark in contrast to all the weathered ballast. I applied the paint just in the trough between the two main lines, and I really like how it looks.
Brian: It makes sense. Dirt always collects in the low areas.
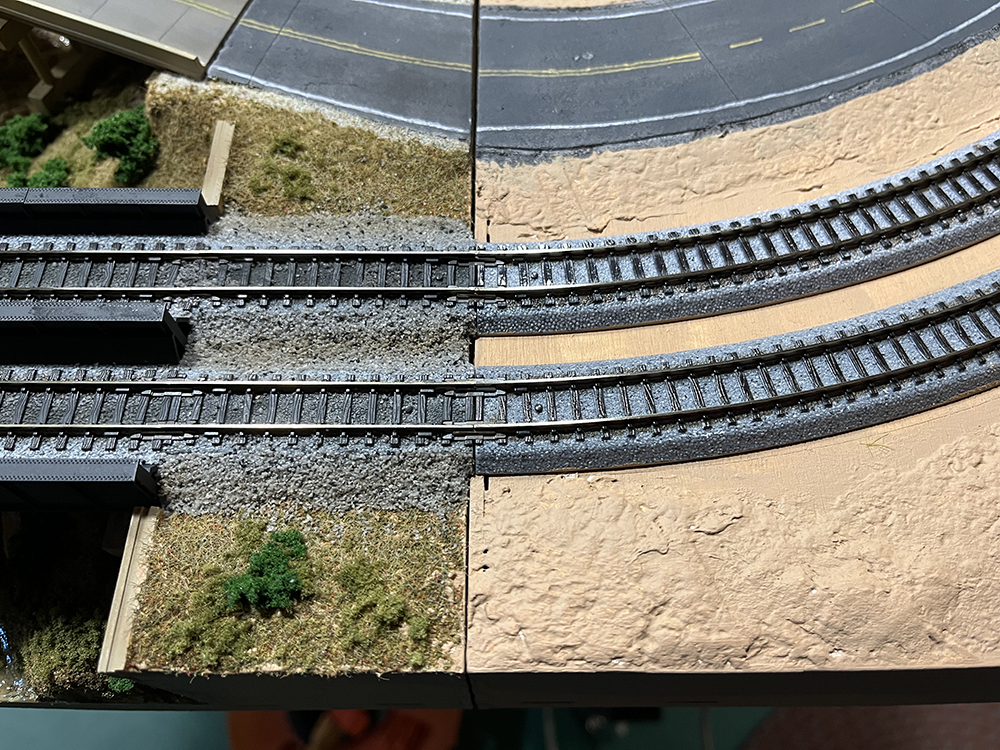
Bryson: And you think Brian and I can get the track on our modules to look that good?
David: The techniques are easy to learn and there is nothing here that you cannot do yourselves if you’re patient and take your time.
Brian: Take your time? I’ve got that down.
Bryson: Which is exactly why you’re still building module kits instead of doing scenery, Brian.
Brian: OK, but speaking of scenery, I think I’m going to have a small stream on my layout, so talk about the river next.
David: Because of layering again, I didn’t install the riverbed on the bridge module until all of the other scenery was finished.
Bryson: It’s the best way to keep static grass and ground foam out of the water.
David: You’ve got it. Also, we’d kicked around a bunch of ideas for the bridge module, so it took a bit to settle on one.
Brian: I thought putting a highway under it would have been cool.
David: That would have worked, but we already had so many roads on the modules, I didn’t want to add another one.
Bryson: So, you decided to include a dry wash. That was my idea, by the way.
David: Yes, as you can see in the photo below, that’s where I started.
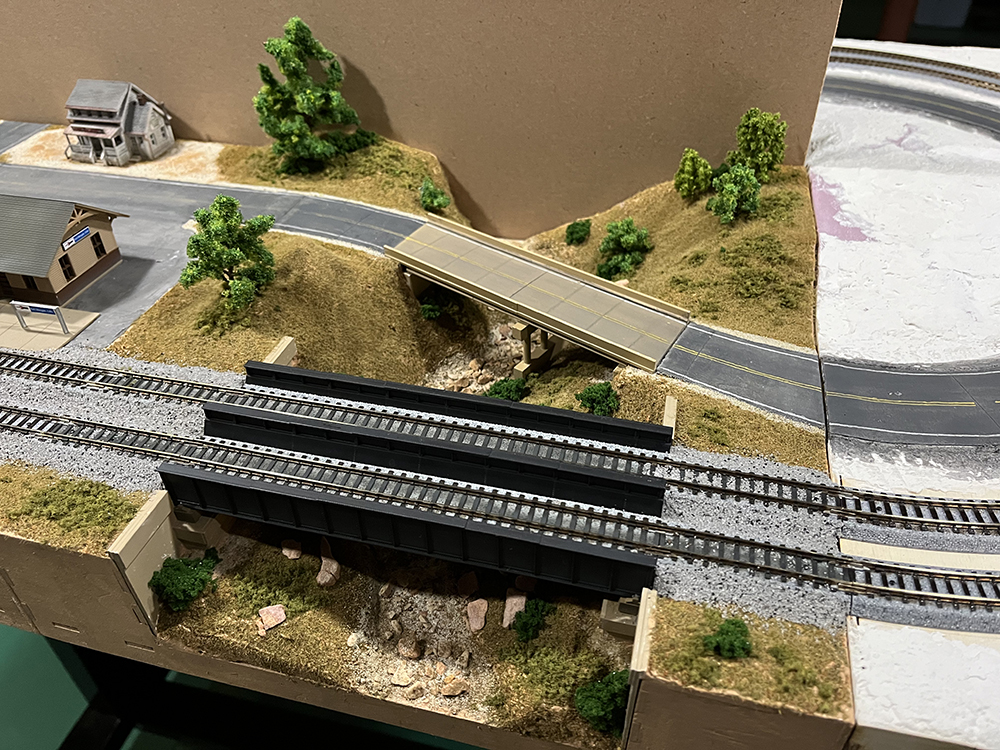
David: I made the riverbed for the wash using various gravel and stones from Woodland Scenics and Arizona Rock & Mineral.
Bryson: I liked it that way.
David: Well, in hindsight, I probably should’ve left it that way.
Brian: But you couldn’t resist.
Bryson: He couldn’t resist.
David: I had taken the photo shown here on my trip to Colorado last summer. As you can see, this is what a dry wash looked like in July – partly wet, party dry.
Brian: Actually, it’s likely runoff from winter that fills the washes in the spring and early summer.
David: Yes, thank you. You were the one who looked up that information for the project. And that’s what I’d hoped to achieve.
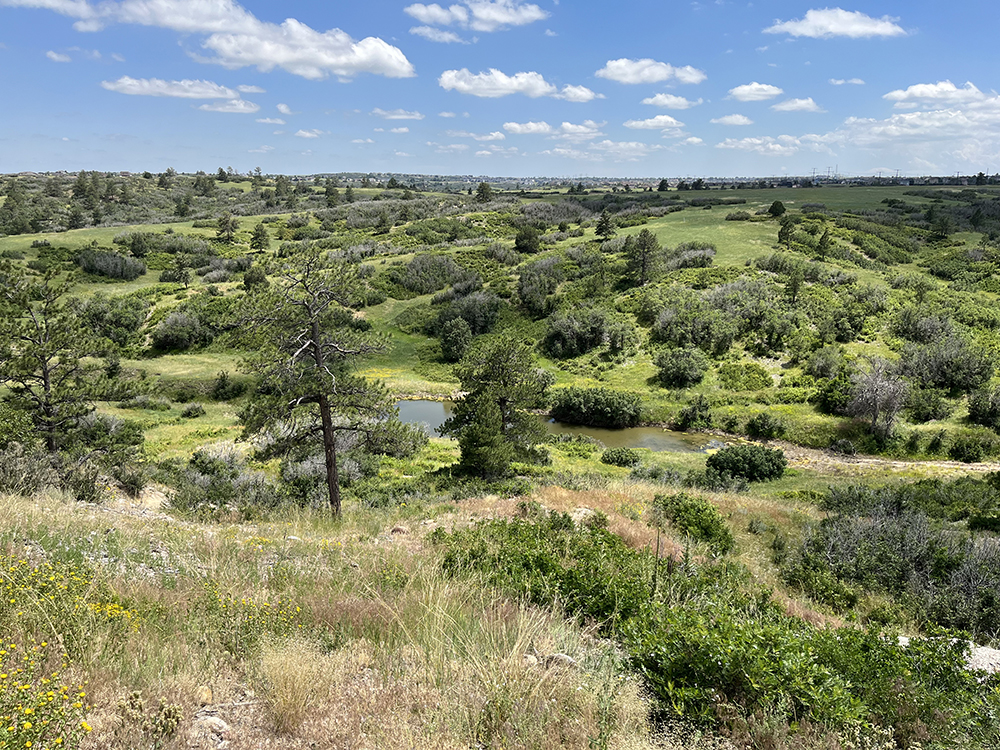
Brian: I see the problem – it’s the water’s color, isn’t it?
David: Yes. The remaining water has the murky green standing water look.
Bryson: More like a pond.
David: The water in the photo had been pooled for some time.
Bryson: No problem, mix up some Woodland Scenics Deep Pour Murky resin water and you are good to go.
Brian: But that’s not what you did.
David: That’s not what I did. It had been a while since I’d used Woodland Scenics Realistic Water. I like the product because it is just one part. Dam the ends of the waterway with some scrap styrene sheet and a little silicone caulk, pour in the resin, and let it harden overnight.
Brian: That stuff dries clear.
David: Yes, and you cannot tint it.
Brian: Bummer.
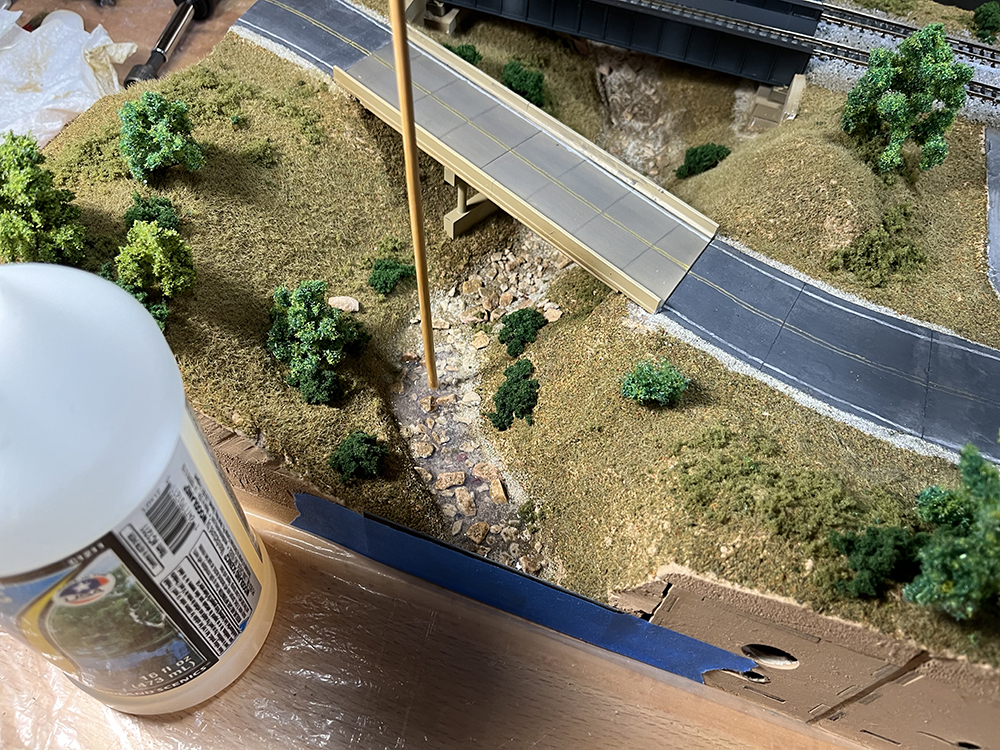
David: Pouring just small pools looked like a mistake. The second coat was so thin, you really couldn’t tell what was covered in water and what wasn’t. The third coat made it too deep for the effect I was after.
Bryson: And you could still see the bottom easily.
David: Bingo. Don’t get me wrong – the Realistic Water is a great product, it just dries crystal clear, It just wasn’t going to work in this application.
Brian: You’re the one who says you can fix any scenery mistake by starting over.
David: By this point both bridges were glued down and I was happy with all the surrounding scenery. I didn’t want to start over, so I compromised.
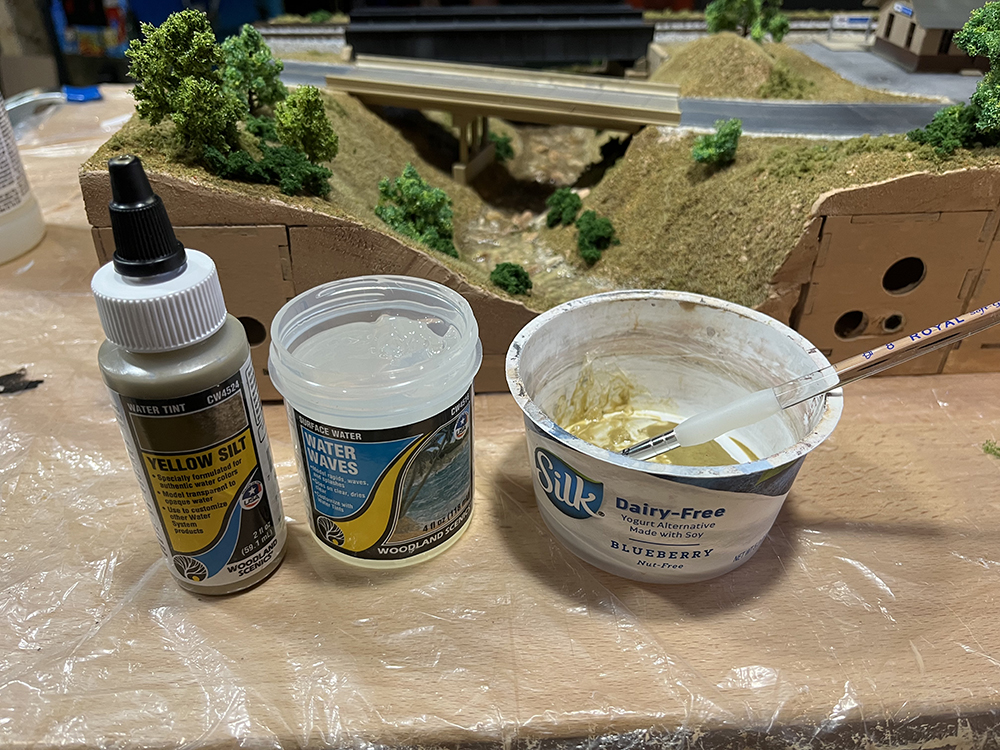
David: To muddy up the river a bit, I mixed some Woodland Scenics Water Waves clear gel with some of the firm’s Yellow Silt water tint in a small plastic cup. I then applied the concoction over the top of the clear water. I’m not even sure if Woodland Scenics recommends doing this, but I thought it was worth a shot.
Bryson: You could always tear it out if it didn’t work.
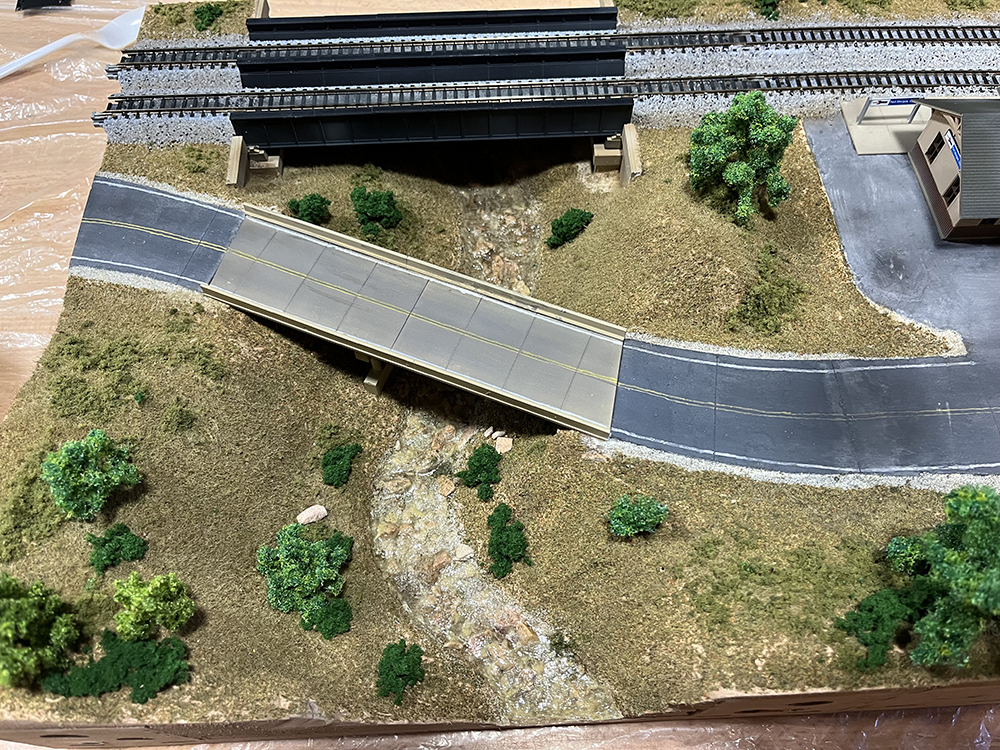
Brian: Well, it’s more water than you wanted, but it appears to have worked. At least it isn’t completely clear any longer.
David: Thankfully no. I’m still not entirely happy with it, but at least it’s now good enough to allow me to move onto other things.
Bryson: Speaking of other things, tell us about the backdrop.
Brian: One of the things I liked about RS Laser Kits’ modules was that you could purchase skyboards for them. These come as a simple little kit, with a thin 1/16” piece of hardboard pre-cut and drilled to fit a standard single straight module. They even include the mounting hardware.
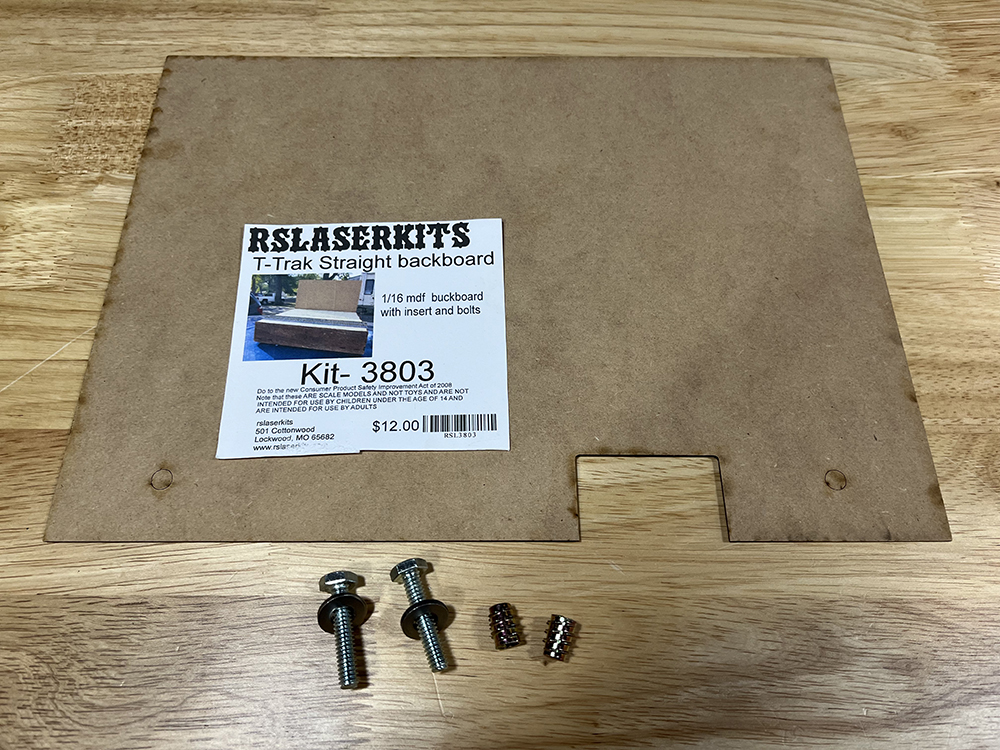
Bryson: We bought enough of these to do our first batch of modules.
Brian: Which would have worked great until some people decided to start making doubles and triples.
Bryson: Or quadruples.
Brian: Or quadruples. I only have space for single modules at the moment.
David: The RS Laser skyboards were nice – and I’m still using the hardware that came with them for my doubles and Bryson’s quad, but I figured the skyboards (backdrops) would be easier to paint as single pieces, so I cut two doubles for myself and one quad for Bryson from a sheet of ¼” MDF.
Brian: I may end up using the single skyboards on my modules, but don’t be surprised if I ask you to make me a couple of doubles instead. The important thing to keep in mind is to cut the opening for the wiring in the back.
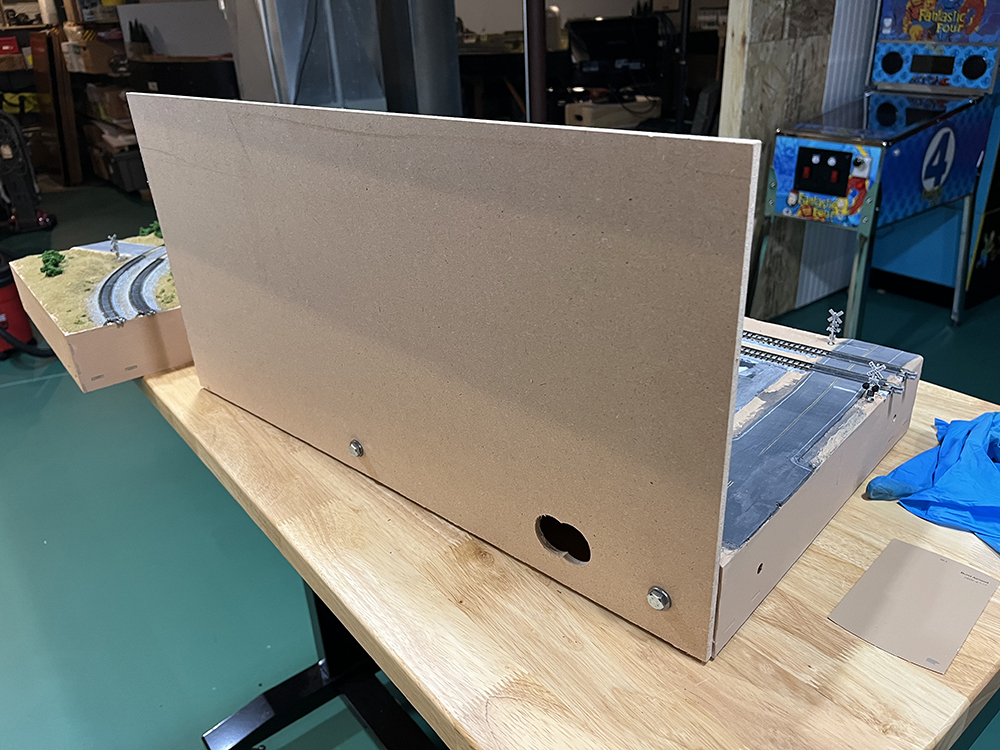
David: Because we’re using our corner modules in pairs, there isn’t a lot of space between the straight modules when placed back-to-back. With the thicker backdrop board, I had to offset the mounting bolts on the straight modules to keep them from interfering with each other.
Bryson: Is there going to be room for the wiring bus between the modules?
David: Unfortunately, no. We’ll have to keep all that under the modules when we set up the layout.
Brian: It’s a good thing they have those adjustable feet on them.
Bryson: That should easily give us enough clearance. OK, so how did you paint the sky?
David: I made a whole video about it, which you can watch on Trains.com. But in a nutshell, I started by painting the skyboard blue using a flat latex house paint. It’s the same color I used on the Olympia layout, in fact.
Brian: It has that good hazy quality you get near the horizon.
David: Yes, it does, but it needed to be darker at the top, so I pulled out my collection of acrylic craft paints and cut a piece of cardboard out of a box for a palette, then set to work.
Bryson: Craft paint like those you can get at Michaels or Hobby Lobby?
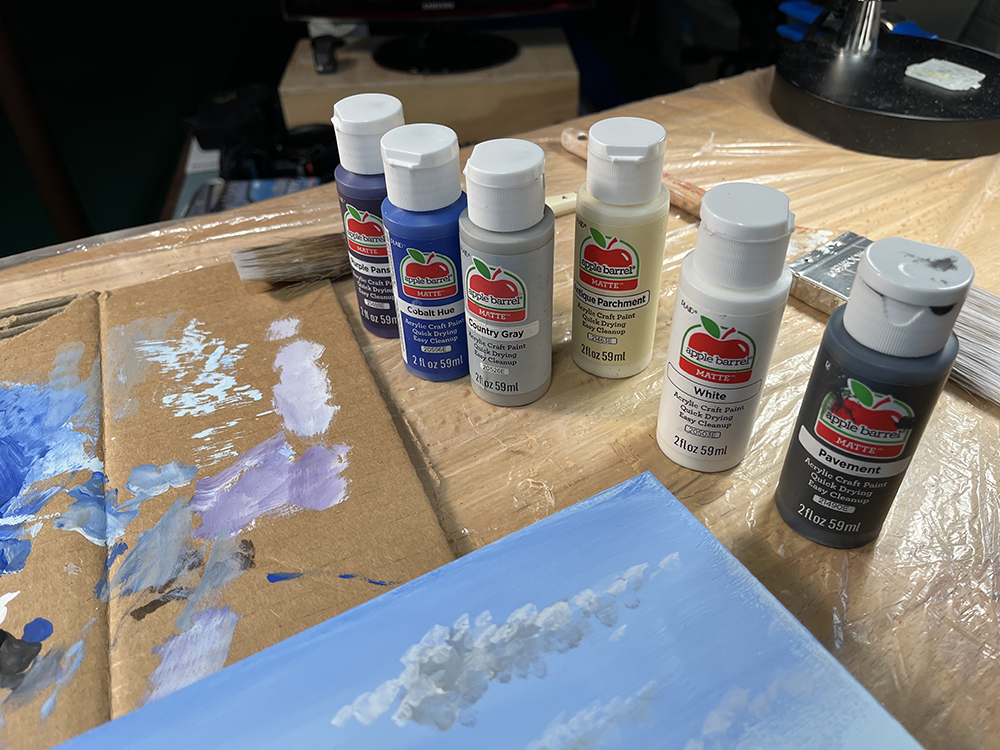
David: The very same kind, though mine originally came from Walmart. While the sky paint was still wet, I brushed in some Apple Barrel 20596E Cobalt Blue. I simply applied a few drops to the cardboard palette, then used a wide paint brush dipped in a bit of water to mix it into the sky-blue paint right on the surface of the backdrop.
Brian: Did you go to school for that?
David: Nope. I watched Bob Ross on PBS do this years ago.
Brian: “Happy clouds” guy!
David: In fact, if you want to paint more detailed backdrops, Bob’s landscape painting videos are a perfect classroom for it and you can find them on YouTube.
Bryson: I know what I’m doing in the evenings this week.
David: With the paint still wet, I started on the clouds. Clouds are all water vapor and shadows, so starting with white (20503E) and small cup of water, as well as looking at some of my Colorado photos, I started placing the rough shapes of clouds on the backdrop using thinned white paint and ½” artist’s brush. The thing to remember is that clouds are always bigger the higher up in the sky they appear. That’s because those are closer to you. The smaller clouds are always towards the horizon. They may be at the same altitude as the clouds right above you, but the horizon clouds are farther away.
Brian: Your clouds have shadows on the bottom, how did you do those?
David: I didn’t have the light gray color I wanted, so I mixed a bit of 20526E Country Gray with a little more Cobalt Hue and a touch of 21490E Pavement. The key to clouds is to also thin the paint with water. You want some of the sky blue to always show through them. Again, working from photos helps a lot. To give the illusion of a single light source in the sky…
Bryson: You mean like the sun?
David: Yes, Bryson, I mean the sun. I used just a hint of 21463E Antique Parchment to highlight just the leading edge of a few billows in the clouds on the left side of the sky. It’s just enough color for your eye to place the light source being up and to the left.
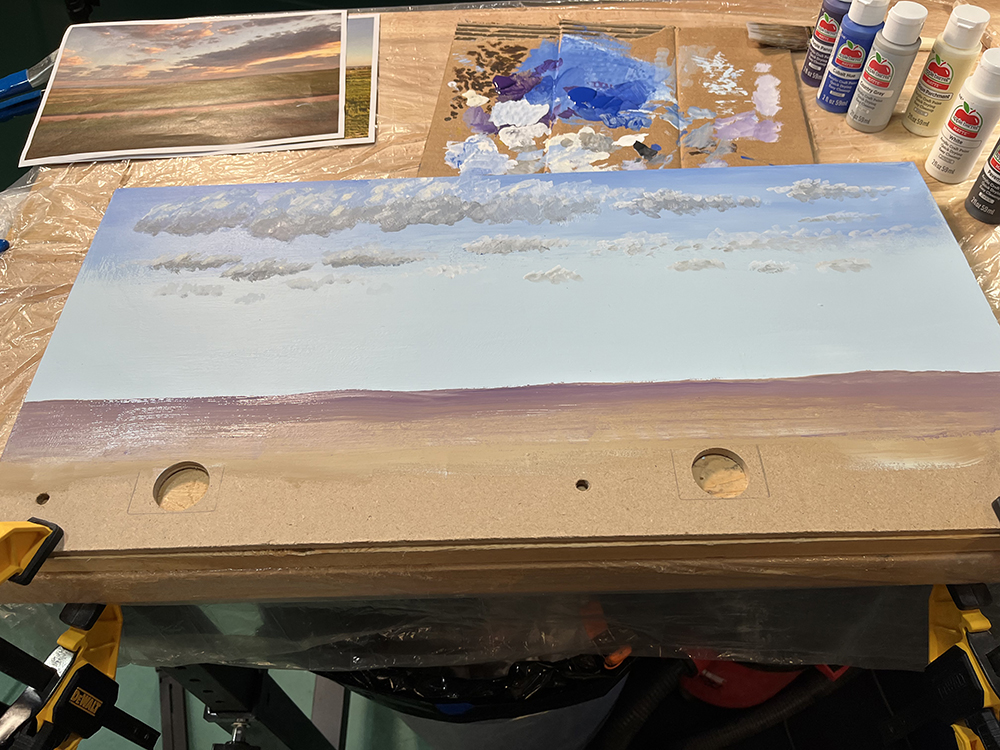
Brian: My guess is that you used the scenery base color paint as the starting point for the horizon.
David: And you would be correct. After holding the backdrop up to the warehouse module, I used a pencil to lightly mark the level of the horizon line I wanted to appear behind the modeled scene, then returned it to my workbench. I painted the bottom portion of the backdrop with more of the tan latex paint that we used for the base scenery color. I then brushed in some 21488E Purple Pansy into the top, and again using a wide brush, blended the purple into the tan. This technique provides the effect of distance.
Brian: So how long did this take you?
David: From start to finish, I had the backdrop completed in 25-30 minutes. It works best if the paint is all still wet for blending colors, so working in a small area quickly was important.
Bryson: OK, you’re painting mine.
Brian: Mine too.
David: Really, guys, this isn’t hard to do. It’s not like we’re trying to paint anything highly detailed. We haven’t even included mountains or trees. The colors and clouds are what make it eye catching.
Bryson: OK, who’s taking the next installment?
Brian: I’m still building modules.
David: I’ve got some finishing details to do, but them I’m completely finished.
Bryson: Looks like it’s my grain elevator up next.
Brian: That’s what you get for working faster that I am.
David: Finishing the race first has its own price to pay, I guess. See you next time!
Click here to read the previous installment of the T-Trak project series!


