Modelers David Popp, Brian Schmidt, and Bryson Sleppy continue the scenery process on their T-TRAK modules in an attempt to make them look more like the prairies of Colorado. T-TRAK is a modular N scale railroading system that uses foot-wide boxes plugged together to build tabletop layouts. In this sixth installment, the three modelers explain how they finished up the roads with grade crossings and stripes, painted the rails, and coated the bare plaster with acrylic housepaint.
Bryson: Well, David got a bit ahead of us last time, putting in roads, hills, and even coating everything with Sculptamold on his T-TRAK modules, which meant Brian and I had some catching up to do.
Brian: Unfortunately, I spent most of my time catching up on magazine deadlines, however, I did manage to get my next two modules built, so now I’ve got all four ready for the next step.
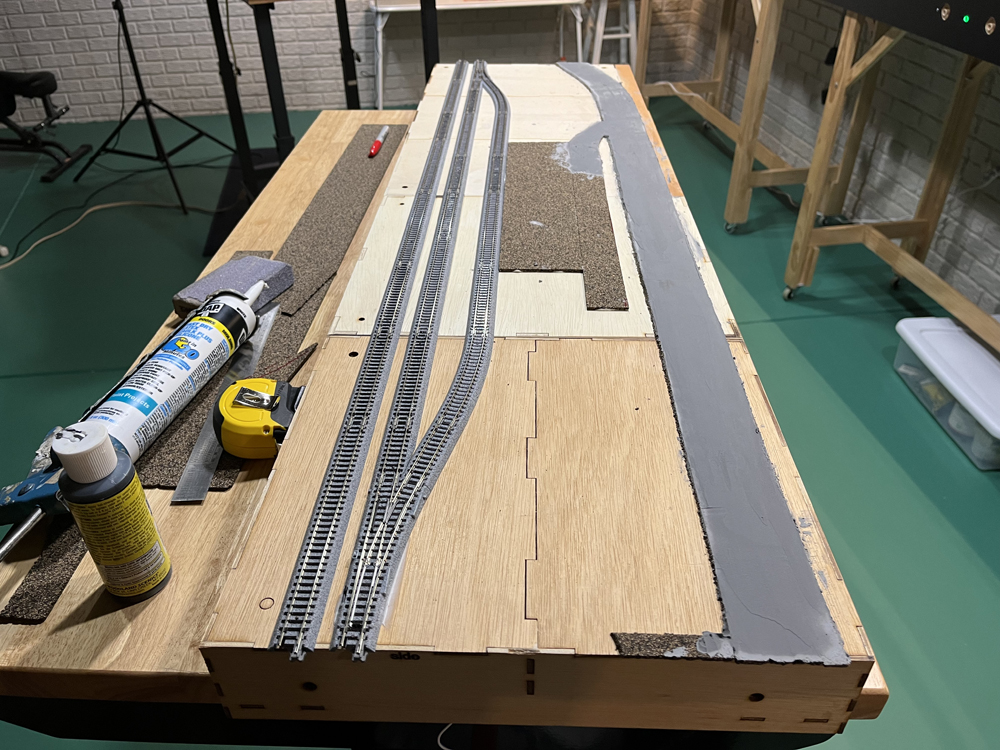
Bryson: I had some magazine and Trains.com deadlines as well, however, I got my next two modules built too. I also attached them to my double module making it a quad, which at 48” long will still fit nicely in the back seat of my truck to take to shows. While I was at it, I extended the track to the grain elevator and made it a siding.
Brian: With the addition, you should be able to get at least 6 grain cars on the spur.
Bryson: Which is a lot better than the original 2.
David: It looks like you did the same thing I did with the other trackside buildings – elevated them with cork roadbed to get them up to track level.
Brian: Bryson elevated the elevator – nice one!
Bryson: Yes, like the station and warehouse on David’s modules, I used N scale cork roadbed to get the grain elevator up to track level.
Brian: It’s looking really good.
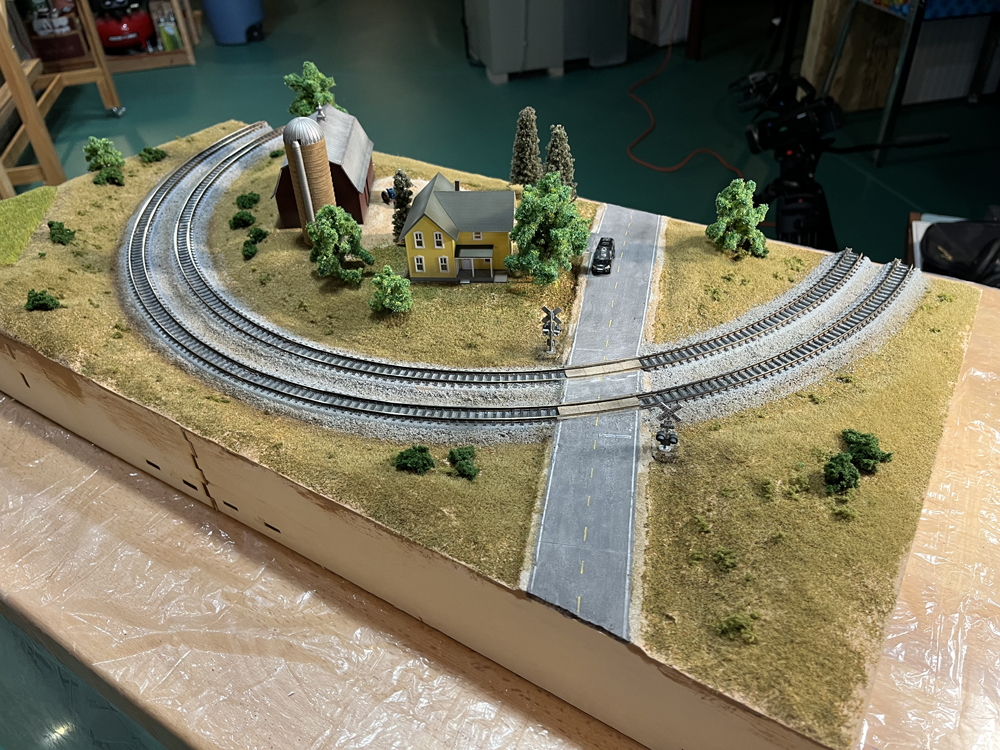
Bryson: Speaking of something that looks good, David, tell us how you finished the roads. I just started mine, and I love the striping you did on yours.
David: Once again, Woodland Scenics came to the rescue. Up to this point, I’d only used the firm’s Smooth-It for roads while working on the MR&T, and I didn’t add stripes to those.
Brian: Woodland Scenics makes paint pens for that, right?
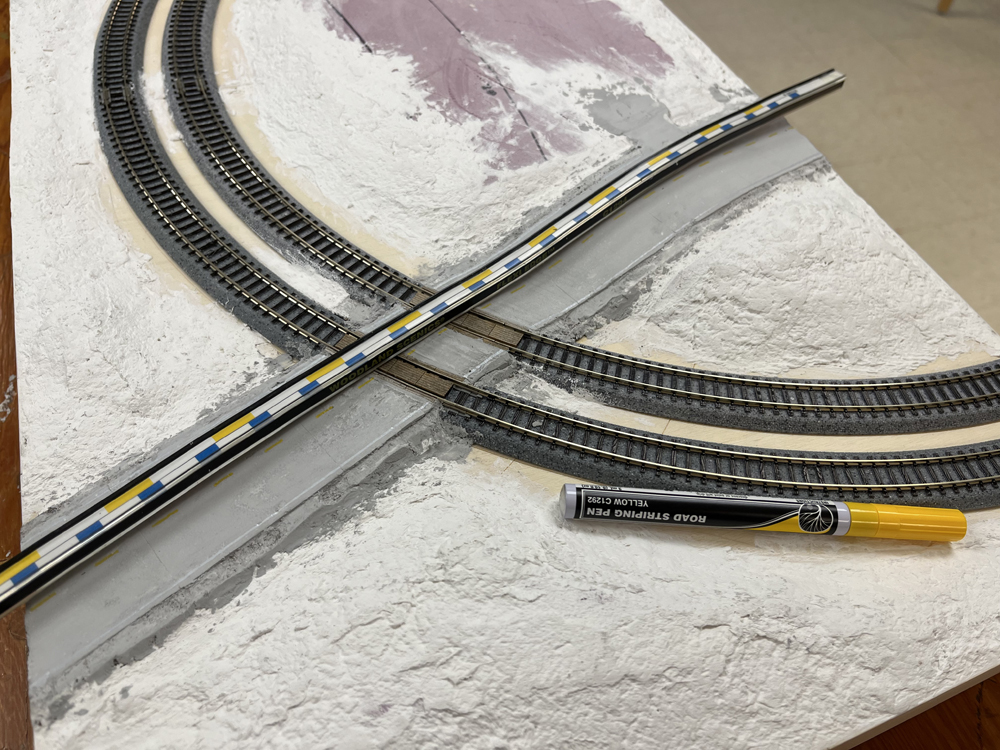
David: They do – plus a neat flexible ruler with all sorts of markings in N, HO, and O scales to make it easy to keep the dashed center lines even.
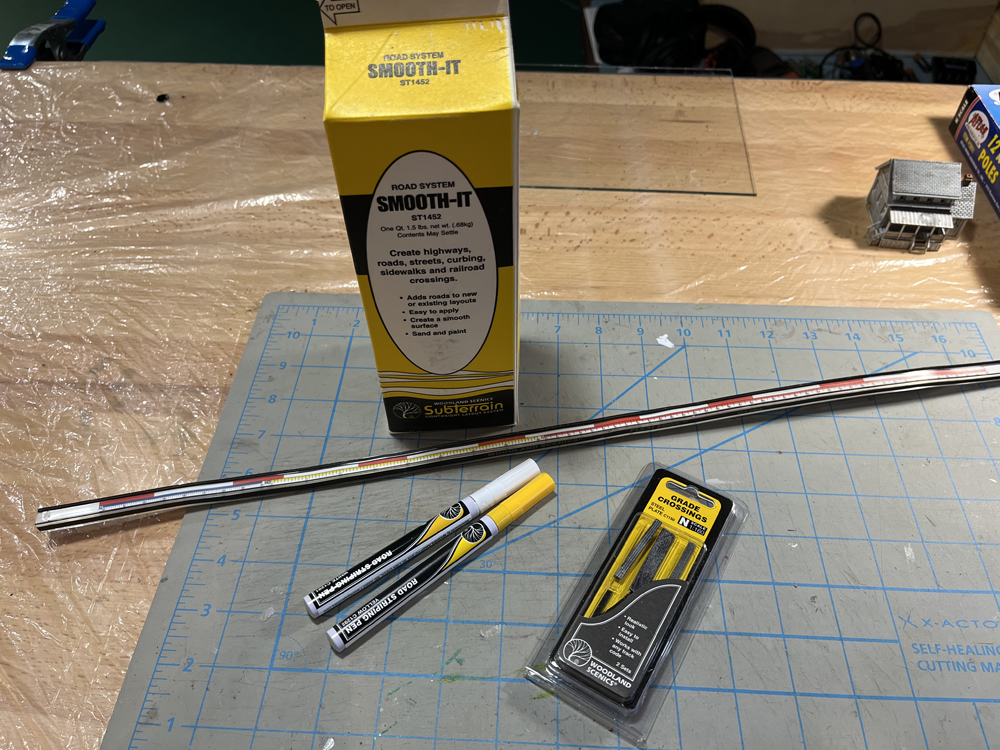
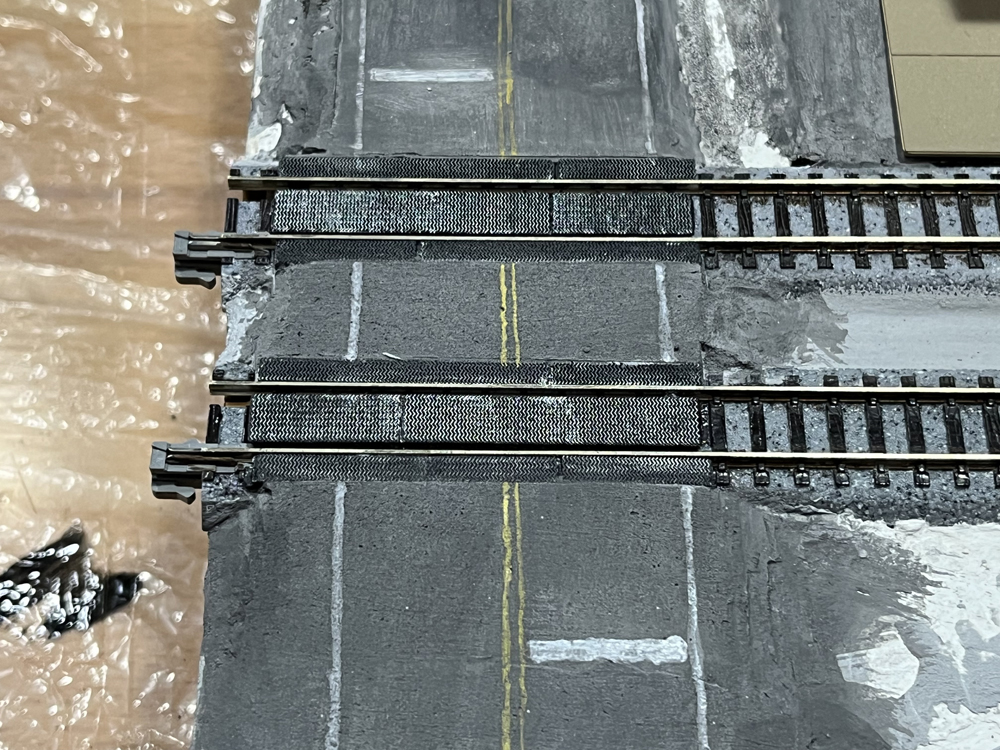
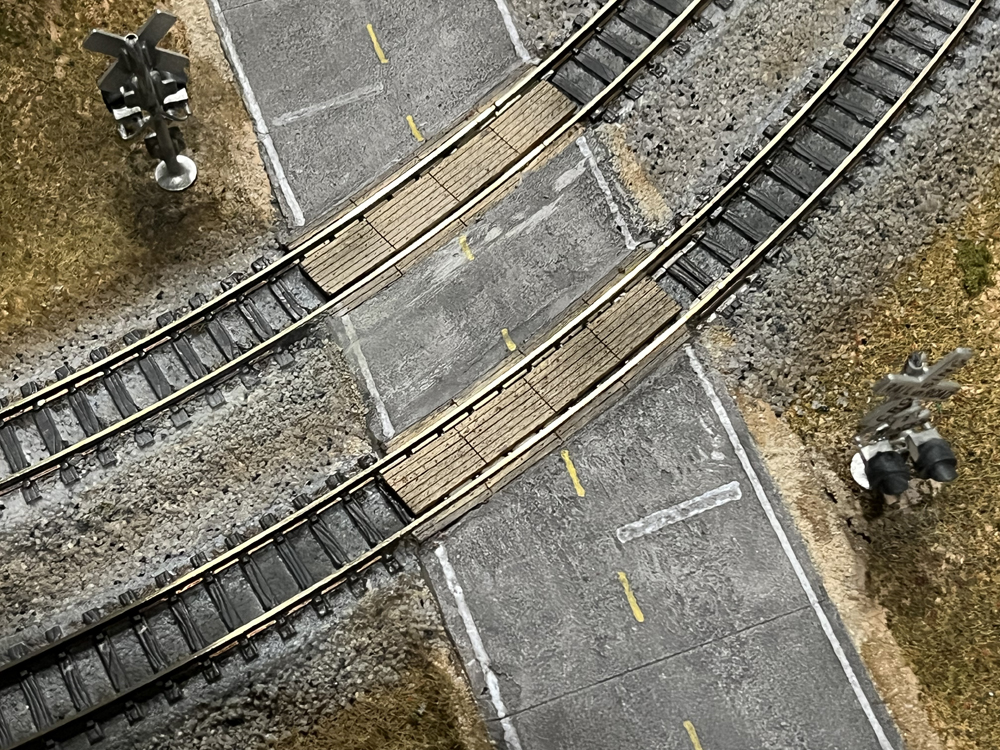
Brian: I was going to ask what you used for grade crossings, but I see from the photo you’ve got a Woodland Scenics set for that.
Bryson: I thought you used Blair Line wood crossings on the corner module?
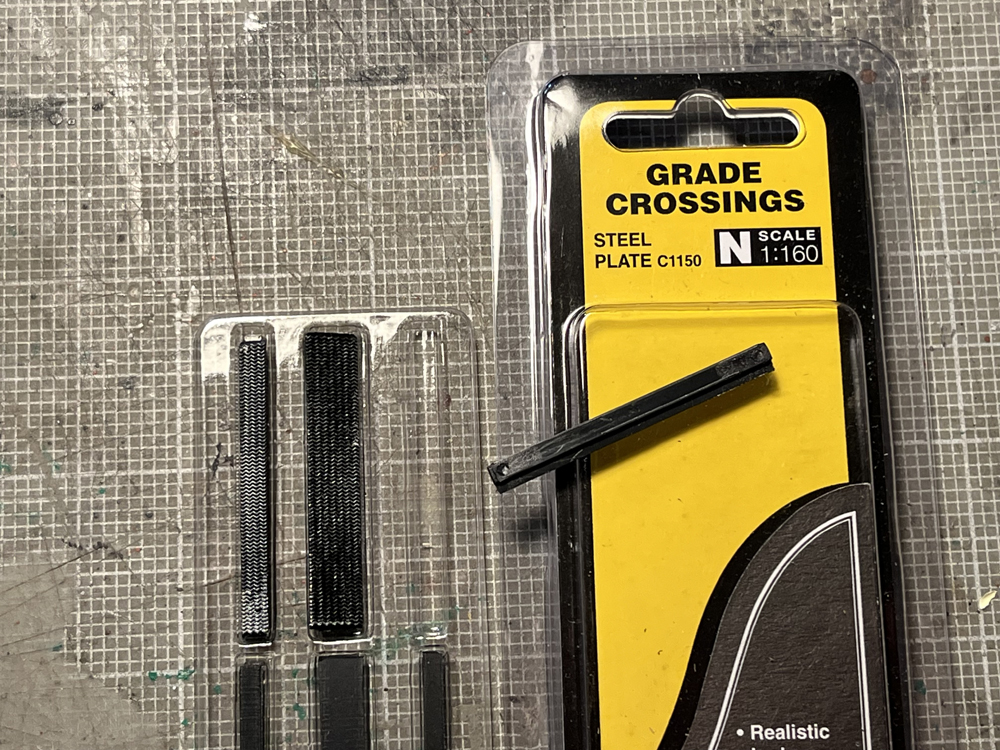
David: I used both. The Woodland scenic crossings are plastic (no. C1150), and only come in straight sections. I used those for the highway that crosses the track by the station. I did need two packages to cover the 24-foot width of our roads. Blair Line curved crossings (no. N-026) at 10”-12” radius are nearly perfect for our two radii of Kato Unitrak.
Brain: How did you get the outside pieces of the crossings to snug up next to the rails? Didn’t the tie-plate detail cause problems?
Bryson: I’ve seen the Woodland Scenics’ crossings before. They’re molded with a notch on the outer edge to fit over the tie-plate and spike detail.
David: And Woodland Scenics includes several thicknesses of styrene shims to adjust the height so they fit properly. I used the .010” strips with the Kato track.
Brian: I’ve used the Blair Line crossing as well, and those do not have notches for the tie plate details. How did you work around that?
David: On straight Blair Line crossings, I typically cut the notch into the pieces with a sharp hobby knife, however, that is much more difficult on curved sections. In this case I simply removed the tie plates from the outside sections of rail.
Brian: Doesn’t that cause the rail to move out of gauge?
David: It was loose, but the rail is already formed in a curve, so it held its shape. Once I glued the wood pieces with CA to the Kato Unitrack, the CA also held the rail tight to the roadbed.
Bryson: Besides, once you apply Smooth-It for the road, that locks everything in place so nothing can move, even if it wanted to. Did you mark the stripes before or after you painted the road?
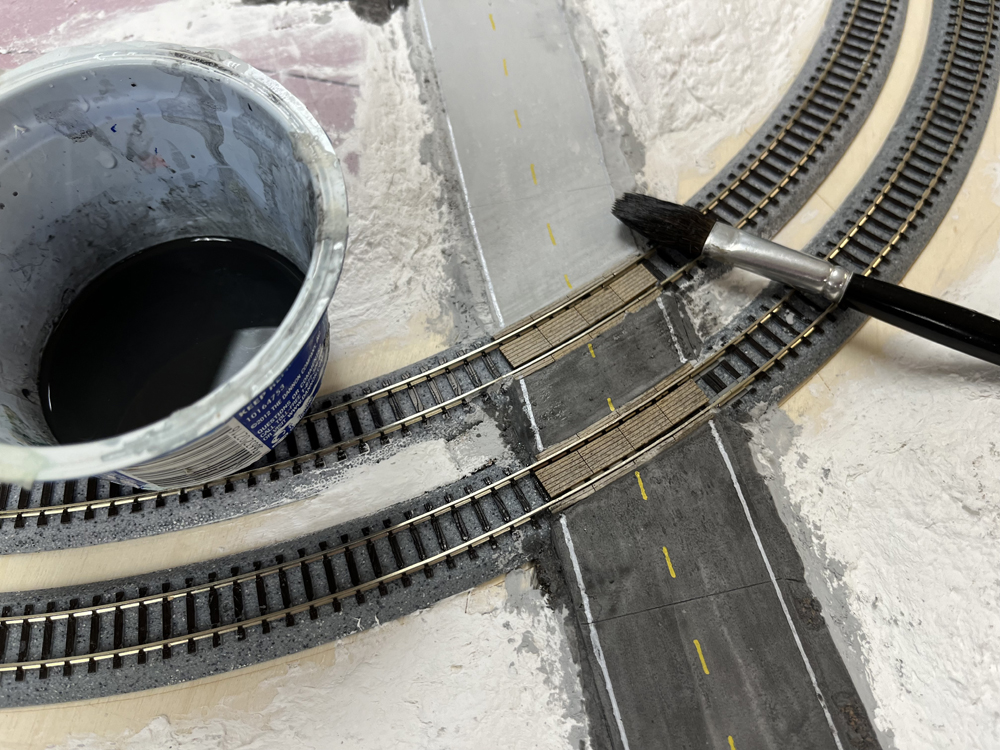
David: On my first attempt, I marked the stripes after I’d painted the road with Apple Barrel acrylic craft paint. The color is called, appropriately enough, Pavement.
Bryson: But you didn’t like that look?
David: No. The paint pen colors are very bright, and on the dark acrylic paint, they looked like the road was freshly painted – which is fine for one, but not all the roads.
Brian: I see from the photo that you ended up marking the stripes directly on the bare plaster.
David: Correct. After sanding the roads flat and vacuuming up the dust, I striped the roads using the pens on the bare plaster. Remember, I’d tinted it with black pigment, so it already looked gray. In the photo, you can barely see the markings at this point, but they’re there. Once the stripes had dried (about a half an hour), I made a diluted wash of the Apple Barrel Pavement acrylic paint cut 50% with water and brushed that over the top of everything. As shown in the photo, the stripes magically seem to appear, but they also are toned down by the paint wash.
Brian: Wait, now that I look at it, I see you also painted the rails.
Bryson: Yeah, David showed me that technique in the shop last week. He used another Woodland Scenics paint pen.
David: This one is TT4580 Steel Rail. It’s part of their Tidy Track line.
Bryson: Unlike a regular marker which comes ready to use, the paint pen’s tip needs to be primed by pressing it up and down multiple times on a piece of cardboard to get the paint flowing. Once the tip is soaked with paint, you place it into the web of the rail and paint. Two coats look much better than one.
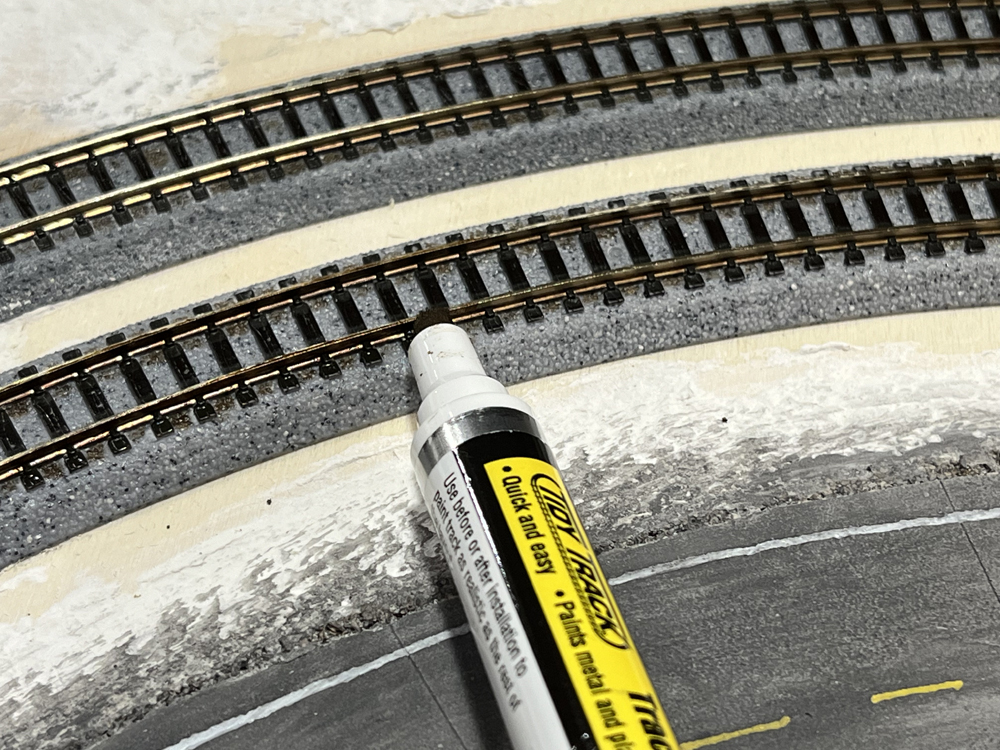
Brian: I see you got some paint on the ballast between the ties as well.
Bryson: It does tend to spread some, particularly once the tip starts to flatten out, but the finished effect looks great. In places I didn’t get even coverage, I applied a second coat. If you use a paint pen, be sure to clean the tops of the rails before the paint fully dries.
David: This is an enamel paint, and if you let it harden completely, you’ll have a lot of work to clean it off. We used a paper towel to get the wet paint off the rails.
Bryson: We then followed up with a Bright Boy track cleaner to get any of the stubborn spots. Even if we didn’t do anything else to the track, like adding ballast along the edges, painting the silver rails brown makes a big difference on the Kato track, and the paint pen makes it really easy.
Brian: Speaking of ballast, is that next?
David: Actually, we’ll do the ballast last, as it is too easy to cover it up with other scenery materials if we do that first. I have gotten one set of corner modules to that point, and after ballasting and a bit of additional airbrushing, the track looks really good.
Brian: You guys are getting pretty far ahead of me now. So, what’s next?
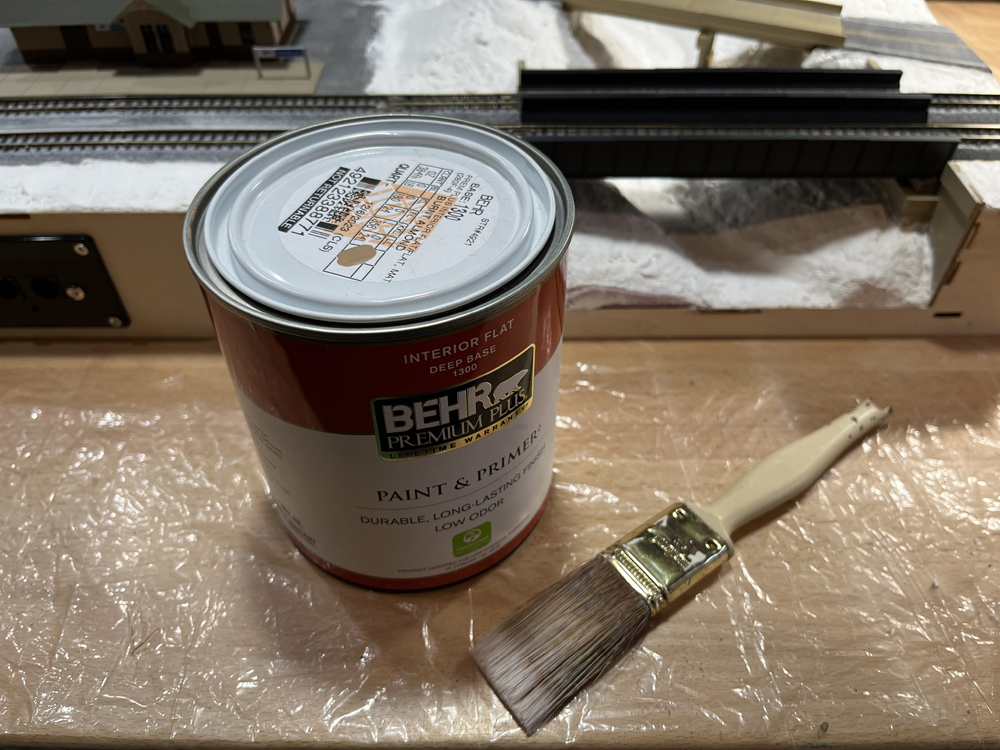
David: Before we wrap up today, I’m going to paint my remaining modules with our base scenery color.
Bryson: Colorado soil, particularly along the front range, is a sandy tan color. And since some of that soil always shows through the vegetation, we picked the color Burnt Almond in the Behr paint line from Home Depot.
David: I had a quart mixed up in their flat, interior premium paint line. At over 100 square feet of coverage, that’s all the paint we’ll need for our dozen or so modules.
Bryson: It’s best to use one or more small brushes for this, as we now have roads and track to work around.
Brian: Looks like you’ve got a 1” brush in the photo.
David: And we’ll use smaller artist’s brushes to get between the tracks, as well as into the tighter places, like around your culvert or the bridge abutments across the stream.
Bryson: I know some modelers start putting scenery down, even before the paint dries.
Brian: You can do that, but often what happens is that the scenery material picks up the color of the paint – suddenly your green ground foam grass has turned toasty almond.
Bryson: Or in this case, Burnt Almond – which is the name of the paint color, Brian.
Brian: Whatever. It’s brown. One man’s burnt is another man’s toasty…
David: We’ll get the paint onto the modules and let them dry completely first, as we have a lot of other scenery to layer on after it, and none of it should look like the ground paint – toasty, burnt, or otherwise.
Brian: You know, if you thin the paint a bit by dipping the brush into water every so often, it flows better into the plaster.
David: You are absolutely correct. I use that technique all the time – particularly when painting over Sculptamold or plaster cloth, which has a lot of irregularities in the surface.
Bryson: Speaking of paint, what are we doing for fascia color?
Brian: With how messy scenery work can get, fascia will be painted last, whatever color we pick.
David: Which gives us plenty of time to think about a color choice, as we’ve got more scenery to do. But, for now, we can seal the exposed wood on the front of the modules by painting them the base scenery color too.
Brian: More toasty-burnt almond!
Bryson: You’re not going to let that go, Brian, are you?
Brian: Nope. We’ll see you for the next T-TRAK installment.
Click here to read the next installment of the T-Trak project series!
Click here to read the previous installment of the T-Trak project series!