


If you’re planning on building a model railroad, preparing a train room should be your first step. You might be eager to get to work building benchwork and laying track, but basics like wiring and lighting your layout space and making it comfortable for your operators are a lot easier to do before there’s a layout in the way. Once you’ve picked the space where you’ll build a layout, go down this checklist for preparing a train room.
No. 1: Track planning
Some of the most important factors that must be considered when planning a model railroad are the size and shape of the train room and the placement of immovable fixtures. Some of these obstacles that must be worked around are doors, walls, windows, load-bearing walls and pillars, and appliances like sinks, laundry equipment, water heaters, and HVAC equipment.
So before you build, the first step should be to design your track plan around these obstacles. If you need to make significant additions to your train room like extra doors, peninsula-dividing partition walls, or tunnels through existing walls, you need to know where those changes will be made before pounding a single nail.
No. 2: Electrical wiring
The typical finished spare room has a few electrical outlets, but sometimes not enough, and often not in the most convenient space. And if you’re building a layout in a basement, attic room, or outbuilding, there might not be any electrical system there at all. Get a licensed electrician in to install the outlets you want where you want them. It can be convenient to have them put in just below the benchwork, at about waist level, rather than the usual height of about a foot off the ground. Some modelers like to run their train room outlets through a wall switch so they can turn the entire layout off or on at once. You might also consider having the train room put on its own circuit breaker. If you need to finish the walls, it will be a lot easier and cheaper to do this electrical work first.
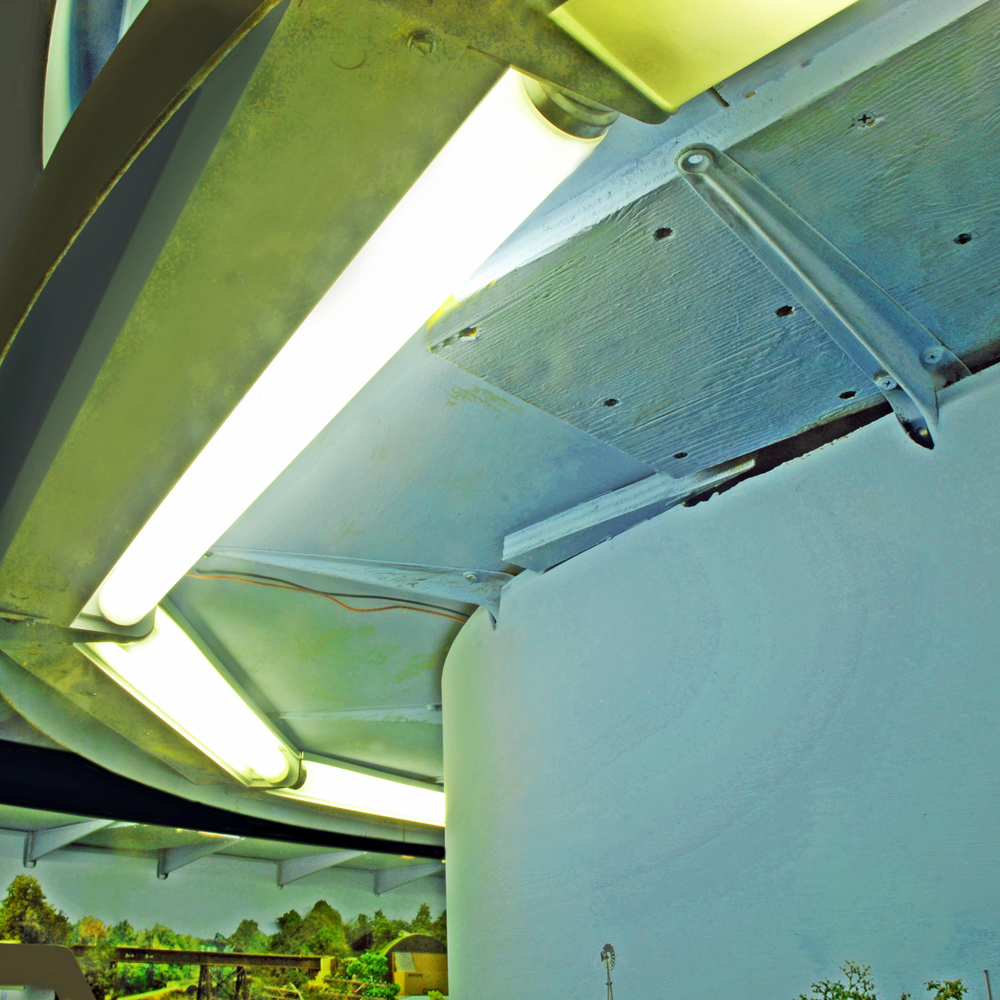
No. 3: Lighting
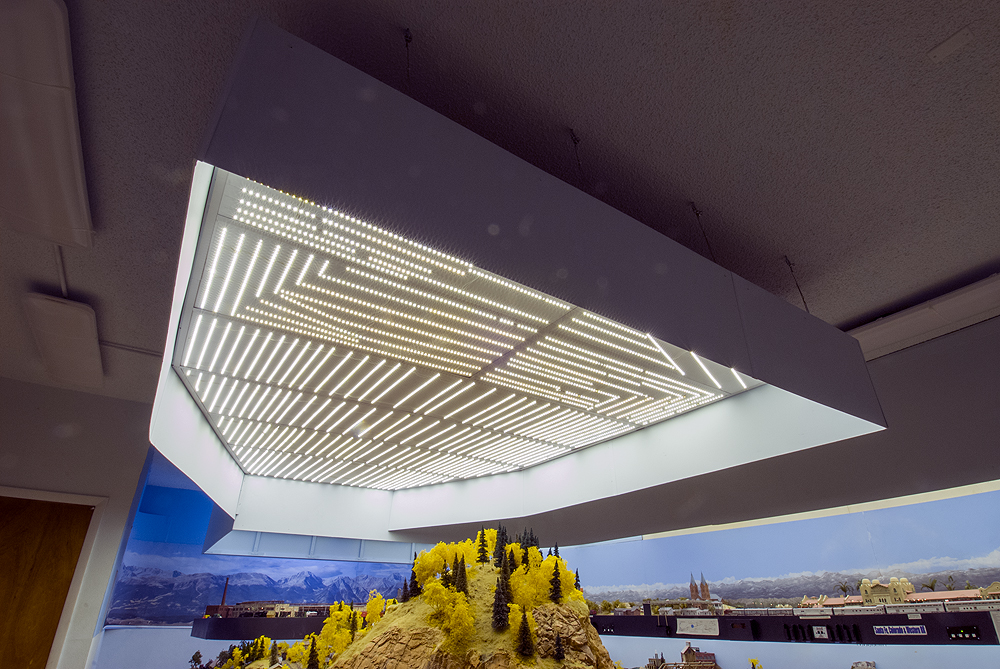
Similarly, if the ceiling isn’t yet finished, room lighting will be easier and cheaper to install before doing so. Consult your track plan and decide where you need lights and where you don’t. Today’s light-emitting-diode fixtures come in many convenient configurations — bulbs, spots, floods, tubes, ropes, flexible strips, and luminescent panels — letting you draw attention to the layout while downplaying floors, fascia, and benchwork. They use a lot less power and give off much less heat than old-fashioned incandescent, halogen, or even fluorescent bulbs. And you can get them in a variety of color temperatures to give you the most realistic lighting for photography.
Look into dimmable and color-changing LED fixtures if you think you might be interested in simulating sunrise, sunset, and nighttime on your layout.
No. 4: Climate control
Another upgrade you’ll want to make before the walls and ceiling get closed in is heating and cooling. If you’re lucky enough to have a finished spare room for your trains, you don’t have to worry about this, but depending on where you live, basements get cold, attics get hot, and garages and outbuildings do both. If you don’t want to let Mother Nature decide when you can stand to be in the train room, consult an HVAC contractor.
Ask them what it would take to add the train room to the climate-controlled area of the house, especially if you plan to close off a section of the basement or garage, altering the airflow. Depending on your situation, a few space heaters and a window air conditioning unit might do the trick, especially if you live in a milder climate. But it’s good to know before it’s too late to do anything about it.
No. 5: Walls and ceiling
Now that all the wiring and ductwork is finished, it’s time to finish the walls and ceiling. You might elect not to do this; many don’t, relying on the backdrop to disguise the basement’s cinder-block walls. Leaving them unfinished will likely save a significant amount of money. But drywalled walls and a drop ceiling will not only reduce noise and dust in the train room, but it will also make the atmosphere more attractive and inviting. And if you can add a layer of extruded-foam insulation board behind the wallboard, it will make the basement not quite so chilly.
No. 6: Doors
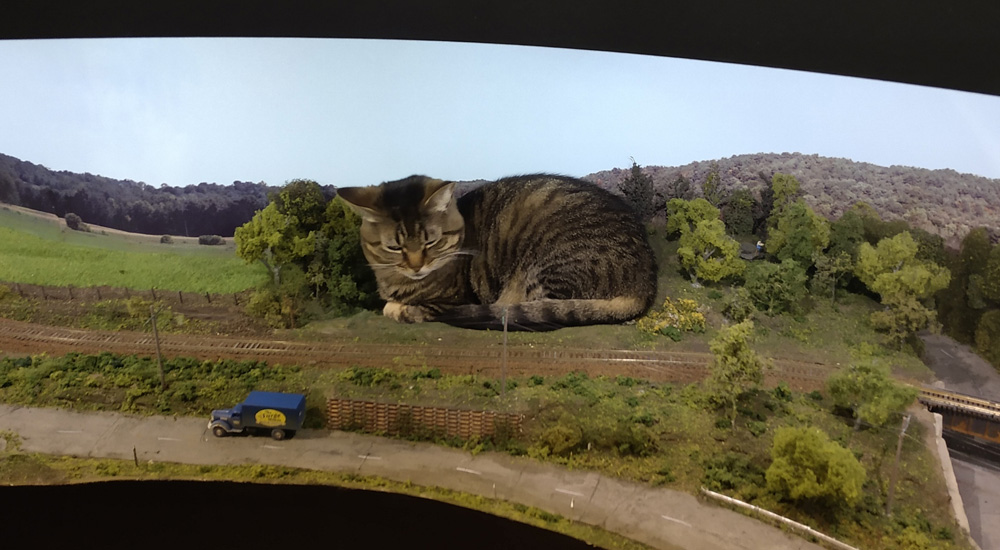
If you’re building your layout in just one part of a shared space like a family room, you don’t have a lot of choice when it comes to access. But if you have the ability to close off your layout room by adding a door, consider doing so. Trains.com Video contributing editor Gerry Leone thought he could get away with not closing off the entrance to his train room until he found his cat Irene cozily curled up on a fake-fur wetland on the layout. Even if you don’t have intrusive pets or kids at the grabby age, the ability to close up your work space at the end of a building session without having to clean up right away is worth it.
No. 7: Floor covering
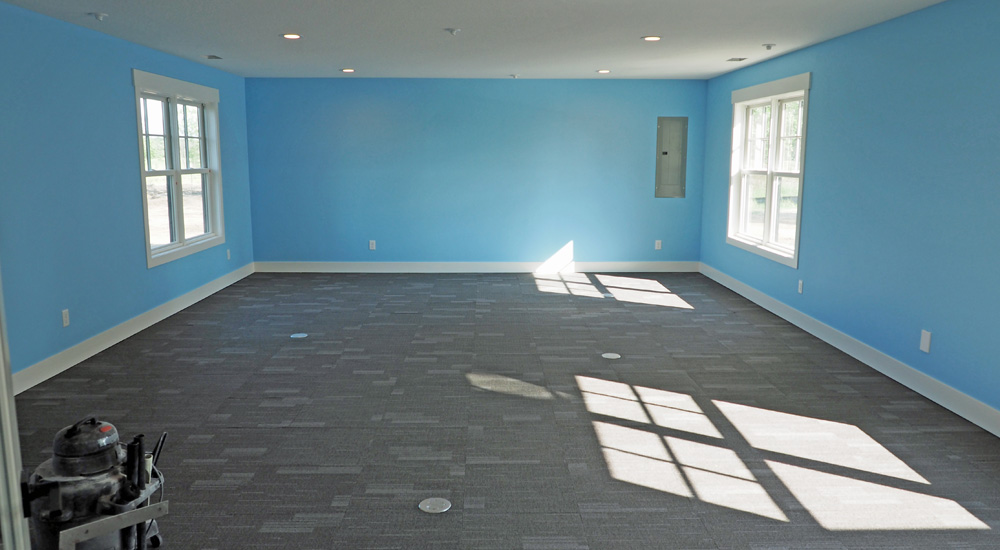
The last step of preparing a train room from top to bottom is the floor. Basements and garages have concrete floors that might seem good enough, but finishing that floor will go a long way to keeping down the dust that will inevitably settle on your layout. Consider low-pile indoor-outdoor carpeting or foam-rubber comfort mats. Concrete or tile isn’t very friendly to the feet if you’re going to be standing on it for an hours-long operating session.
This may seem like a lot, but the time and money that preparing a train room takes will be well worth it when you’re done. A comfortable, convenient, well-lighted train room is a pleasure to spend time in. And isn’t spending a pleasurable time on your model railroad what the hobby’s all about?


Anyone who has cats already knows that given the opportunity, your feline “roommate(s)” WILL find a way into the train room and he/she/they WILL find a comfy place to sir and relax. And possibly swat your trains as they go by.
It is inevitable.