


Like several other model railroaders, I lost my “right” to more layout right-of-way within our house several decades ago. Nevertheless, building a layout is perhaps the most enjoyable aspect of the hobby for me. Despite having two operating model railroads in the house, I still wanted to build more. At train shows I noticed many clubs with sectional and modular layouts. At the end of the show, these model railroads could be disassembled into individual units for ease of transport. Being a lone wolf type, I was interested in this idea but wanted my own portable model train layout.

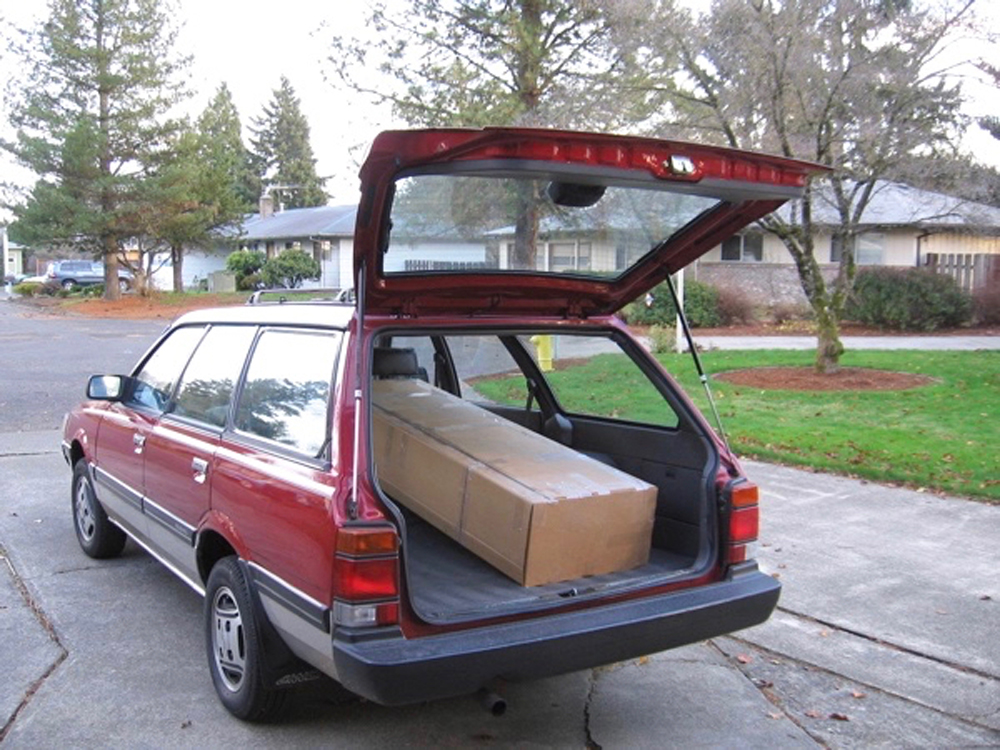
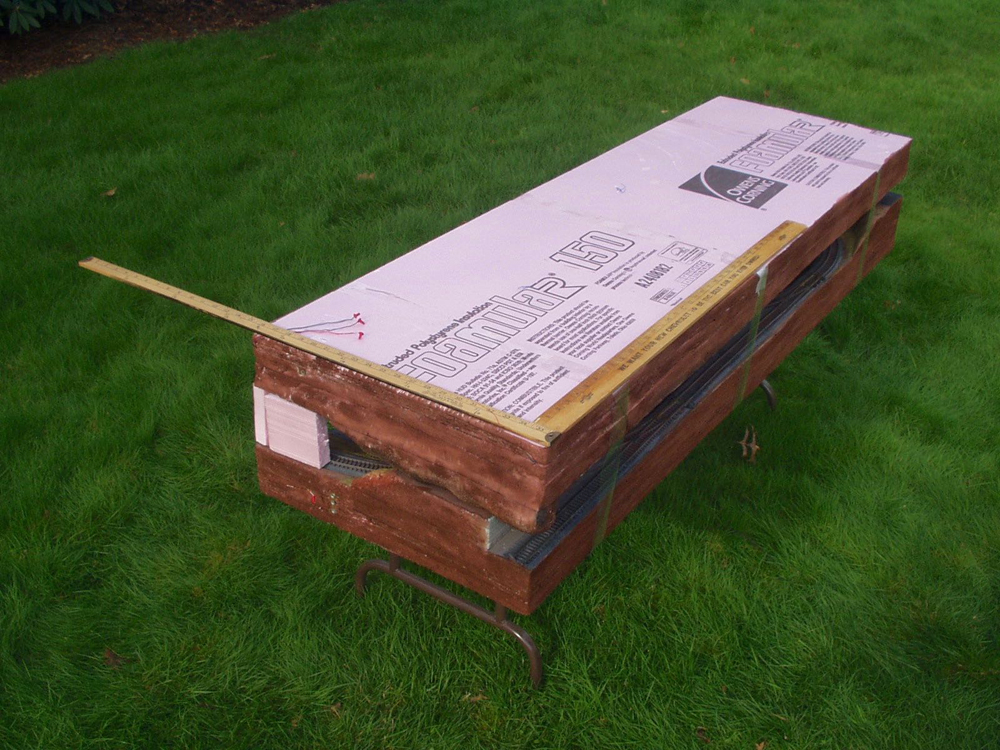
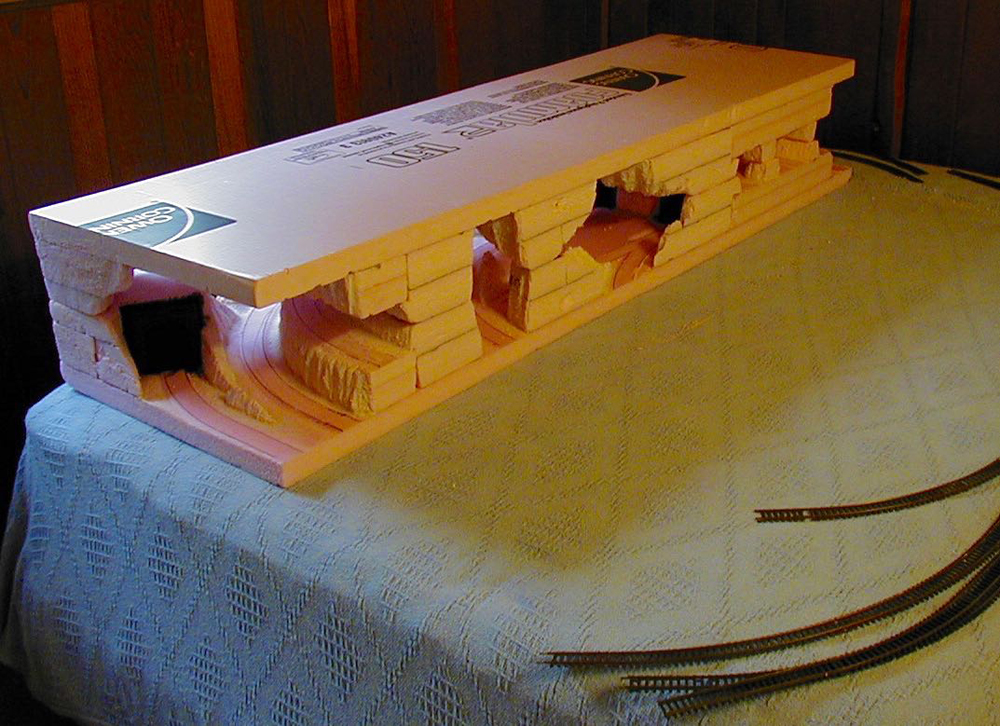
The answer came about through the use of extruded-foam insulation panels and considerable carving and shaping to create a small layout that could be transported in a single car and set up by one person. Looking at the space in my car, which was then a small station wagon, I determined that such a layout could be built from two foam panels that were either connected lengthwise or side-by-side. The pieces could be stacked one on top of the other for transport. I eventually selected the side-by-side configuration.
I also considered shipping the layout to distant train shows that I didn’t want to drive to, such as York, Pa. I researched the maximum measurements of packages that FedEx and UPS would handle. These came out to be a carton not measuring greater than 130 inches in combined length and girth before being classified as “oversize,” thus requiring a higher fee. A handy girth “cheat sheet” can be found here.
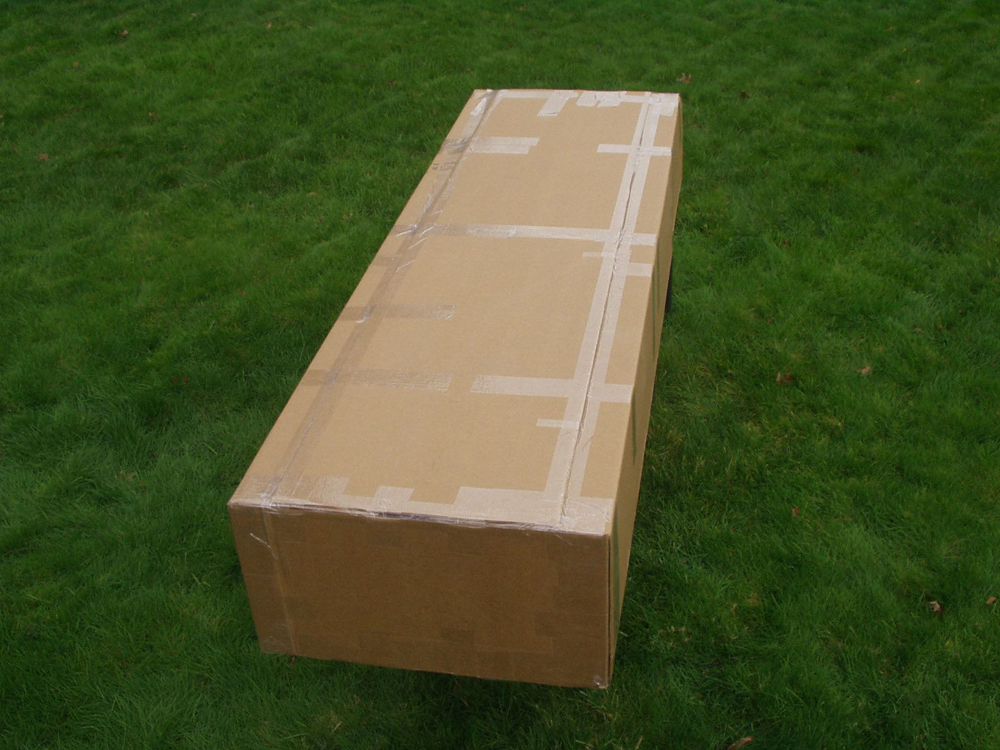
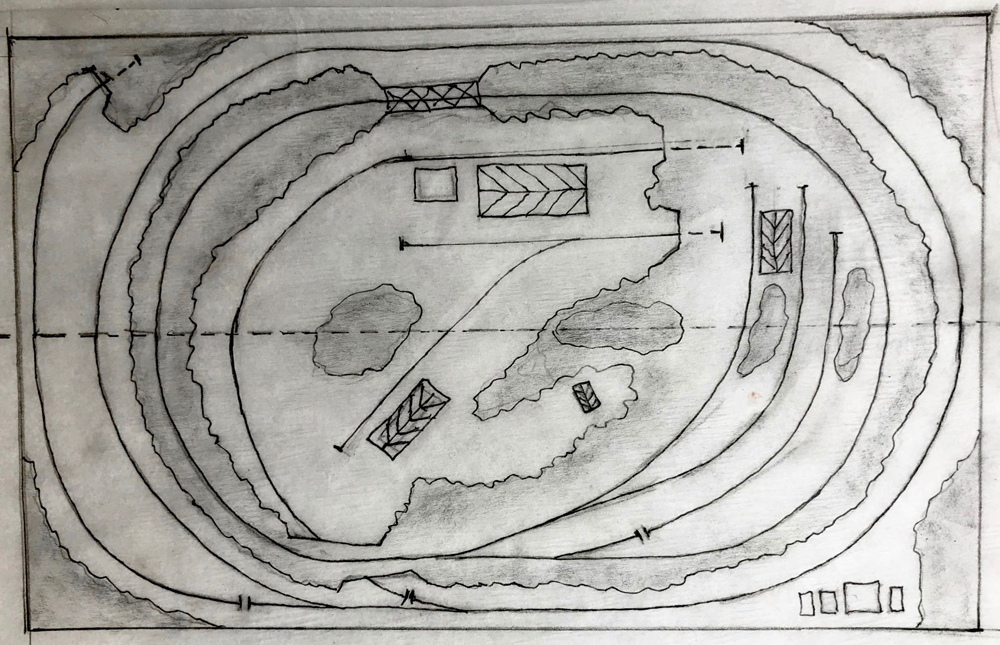
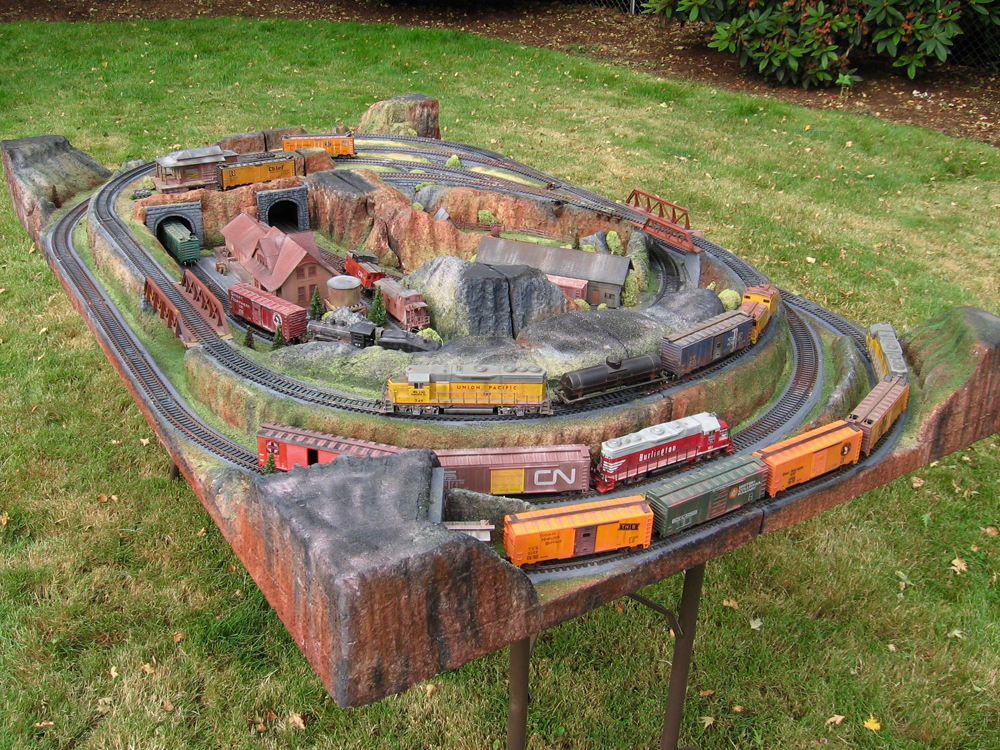
After drafting a number of HO scale track plans, I came up with two ovals, one elevated above the other. The lower level has 18” radius curves. The upper lever features 15” curves.The track plan fit on two extruded-foam insulation board panels, joined together, that measured a combined 40 inches wide by 66 inches long. These measurements allowed a total height, if stacked on top of each other, of 22 inches (or 11 inches per panel), giving a combined length and girth of 128 inches — the remaining two inches allowing just enough leeway for cardboard packaging. The UPS and FedEx weight restriction of 150 pounds didn’t pose a problem. Since I used lightweight foam, the model railroad weighs less than 25 pounds.

With the track plan and dimensions finalized, the next step was to purchase extruded-foam insulation board panels. They’re available in various thicknesses from ¾-inch to 4-inches. To allow spurs to be run off the layout’s lower-level track and pass under the upper-level track, I purchased 1-inch and 1½-inch panels. The 1-inch provides the layout’s base. I combined the 1 and 1½-inch material to elevate the upper track. I then cut out the two base panels using a hacksaw blade.
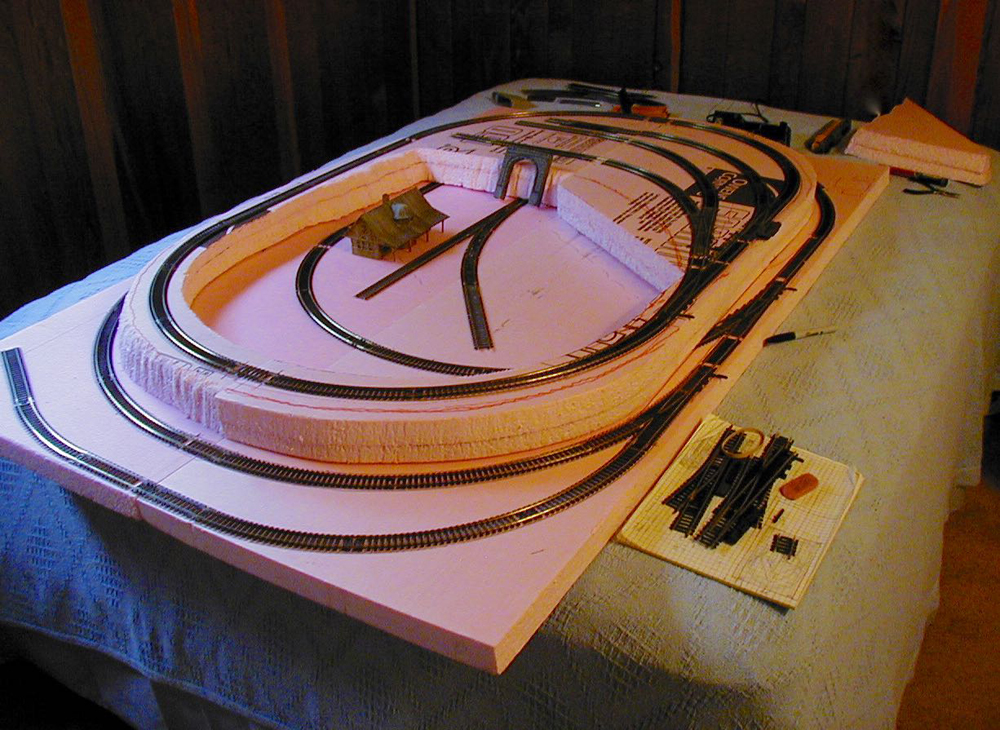
Next, I drew the track plan for the lower level on the foam, indicating where the turnouts would be positioned. Once that was completed, I constructed the upper level oval by gluing 1-inch and 1½-inch-thick panels together with Liquid Nails (0ther adhesives can be used, but make sure they’re safe to use on foam). I also marked out the track on this level, noting where bridges would be installed to cross over spurs on the lower level.
Once the oval was cut out, I realized I’d created the possibility for a second layout by using the remaining foam to support an elevated outside track and a lower inside track. This necessitated another trip to the hardware store to pick up a 1-inch-thick panel to provide a base for the new model railroad.
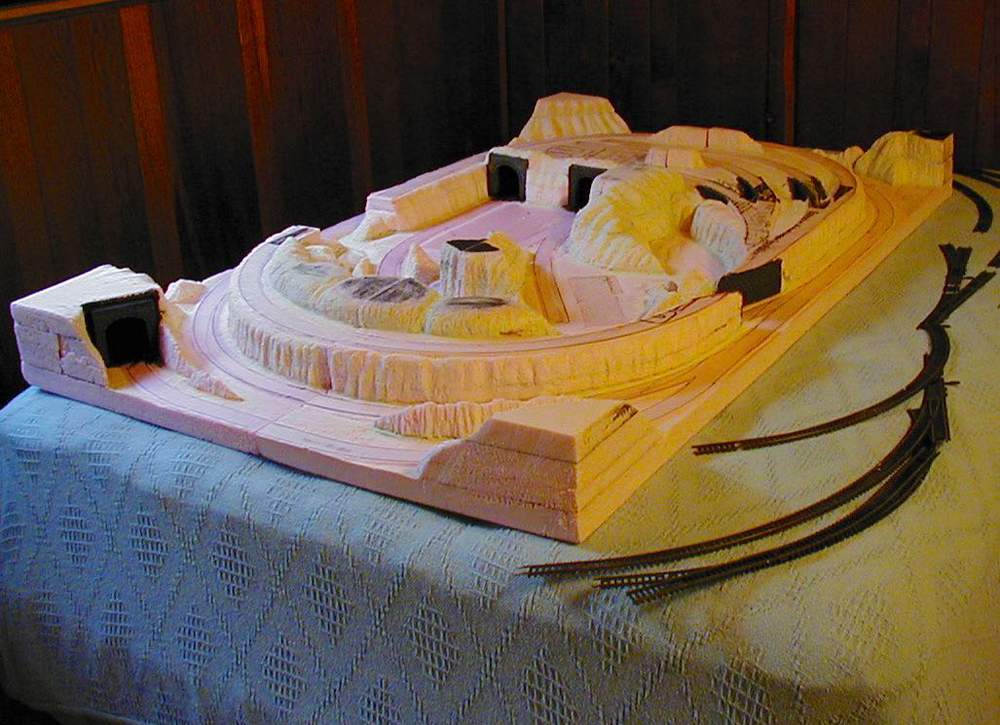
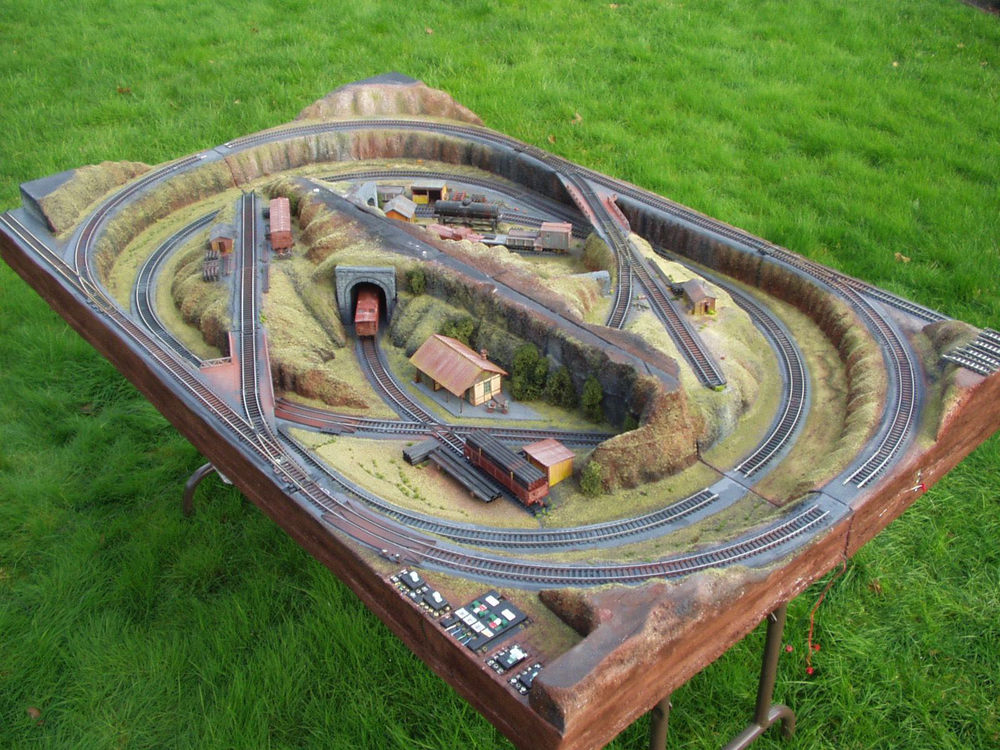
Because the two 20-inch x 66-inch panels of each layout would rest upside down on each other for storage and transport, the scenery had to incorporate several flat-topped hills where the panels would seat against each other. This dictated one at each corner and several along the centerline.
Once these locations were established, I carved the foam into hills using an electric drill fitted with a conical wire brush. I used a shop vacuum to minimize the amount foam dust. It’s a good idea to do this in a well-ventilated area and wear personal protective equipment.
Both track plans called for several spurs and non–connected tracks that terminated in tunnels. Keeping with my lightweight theme, I used a hobby knife to fashion the tunnel portals out of foam.
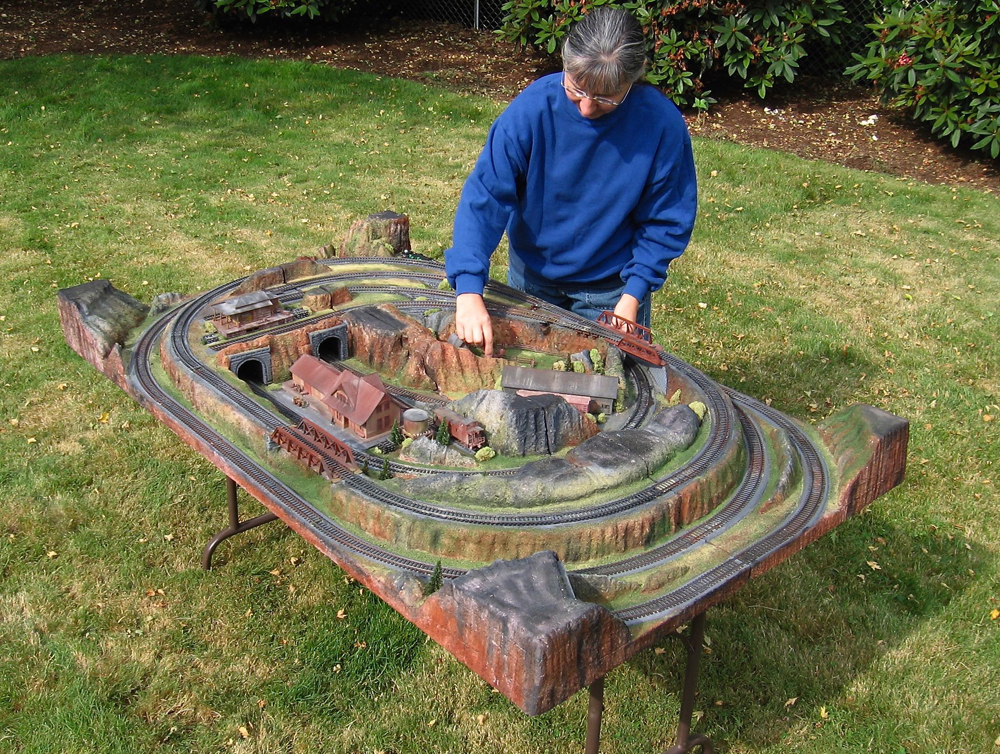
I used a hobby knife to shape the roadbed. I cut a 45-degree slope down from the track edges, and a much shallower angle in the opposite direction. This blended the resulting ditch into the scenery. After the various hills were carved, I used Liquid Nails to bond them to the foam base panels and to attach the finished tunnel portals to the hills.
Then I painted both layouts with latex paint. With the paint still wet, I applied Woodland Scenics fine turf. I used adhesive to secure the track to the foam. Because of the considerable handling the model railroads would be subjected to, I didn’t ballast to the track.
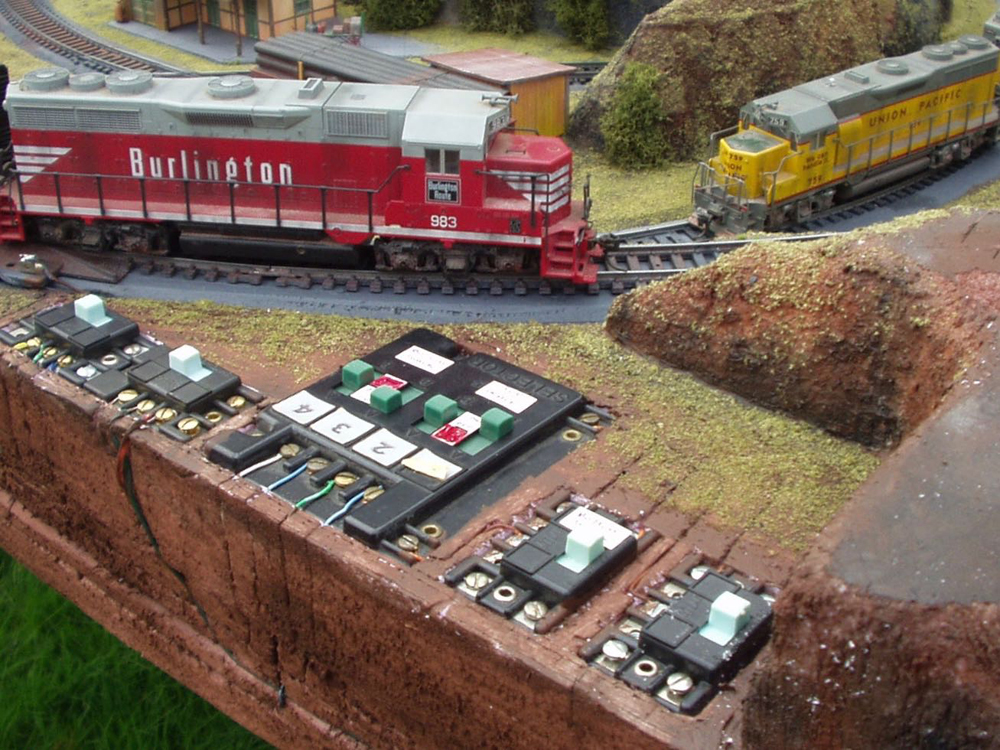
I installed an Atlas No. 215 selector and several Atlas No. 56 controllers into one corner of the layout. These are used to power the spurs and operate the turnouts. Wiring was accomplished by tracing the required wire routes on the foam, cutting slits along the lines with a hobby knife, and then pushing the wire into the slits to both hold and hide it.
I run trains with two Model Rectifier Corp. Tech II cab control units that I picked up at a train show. Both are powered by a 90-watt Lionel 1033 transformer.
When the layouts are on display, I join the two panels together with short sections of Atlas track. This is usually sufficient to keep the panels together, but small wood or plastic connectors can be used instead.
I find that viewer interest is enhanced when two trains are running at once. The various spurs allow switching to be demonstrated. Although exhibition at model train shows was the original goal for these layouts, I’ve found that antique, toy, and craft shows also welcome their display, particularly during Christmas. The wider audience introduces the hobby to new people.
When the show is over, I simply put the layouts into the cardboard carton. I can carry the model railroads back to the car without a dolly or hand truck.
For more on portable model railroads, watch this video of Greg Albert’s N scale portable steel mill. His track plan can be found here.


Excellent use of diorama-style non-connected dead tracks to fool the viewer into thinking there was far more than the two loops! I’d not thought of that as I’d always made all of my trackwork part of the operating layout. I’ll definietly be adding that to my design tricks list!