Adobe Photoshop Lightroom
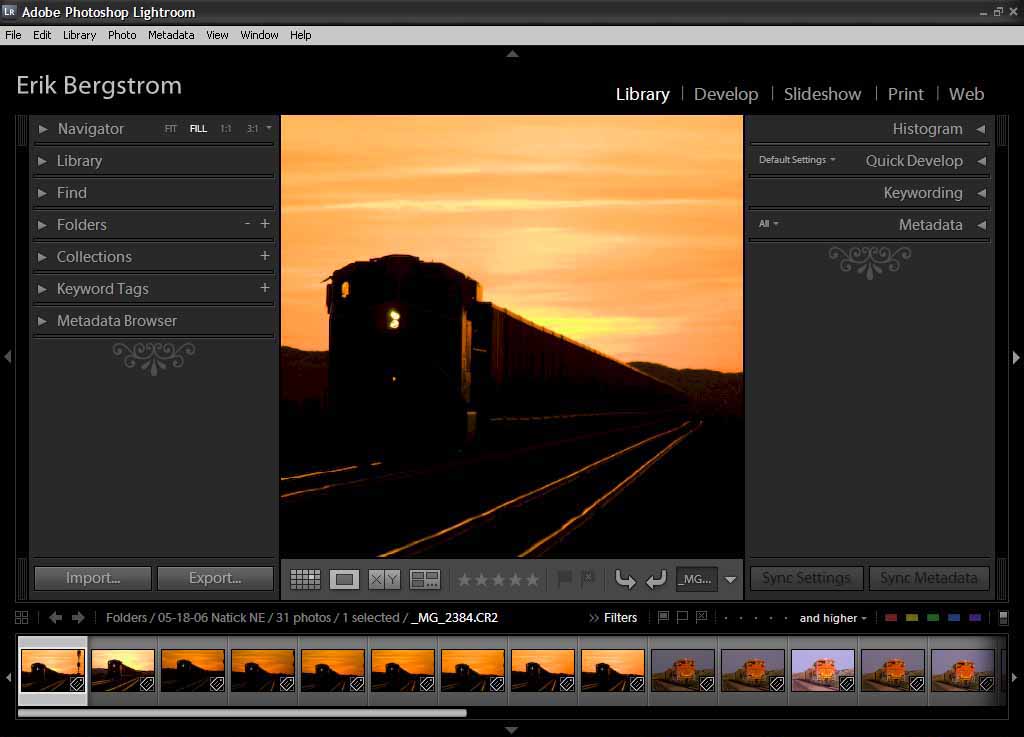
The view from the Library module of Abobe’s powerful digital image organization and editing software, Photoshop Lightroom. Recognizing the popularity of digital photography and the need to keep collections organized, Adobe released Photoshop Lightroom in early 2007. This software offers a user-friendly interface that lets you store, locate, sort, and edit your digital photos in one place. Below are some highlights of Photoshop Lightroom.
Photoshop Lightroom combines the power of a database with photo editing tools for correcting white balance, exposure, tone curves, lens distortion, and color casts. In addition, you can seamlessly move photos to Adobe Photoshop software (sold separately) for advanced editing.
Lightroom features five modules designed for different tasks. Each module Library, Develop, Slideshow, Print, and Web, is highlighted below. But first, let’s cover some common terms.
- Metadata is information about data. Within Abobe Lightroom, each image file includes exposure and processing information, camera EXIF data (the settings of your camera during the shot, including exposure, aperture setting, etc.), and customizable information like your copyright information, shot location, etc.
- Camera Raw The raw file format is the digital version of a film negative. When you shoot JPEG images, your camera makes processing decisions for you and compresses the file. Raw files contain complete image information and give you greater control over the file image results. Photoshop Lightroom recommends you shoot photos in raw format, and I completely agree. A raw image file contains more information and allows you to change color balance, overcome poor exposures, recover blown highlights, and other details that would otherwise be lost when shooting compressed JPEG photos. With raw files you can correct the exposure of your image by several stops (either up or down) during processing.
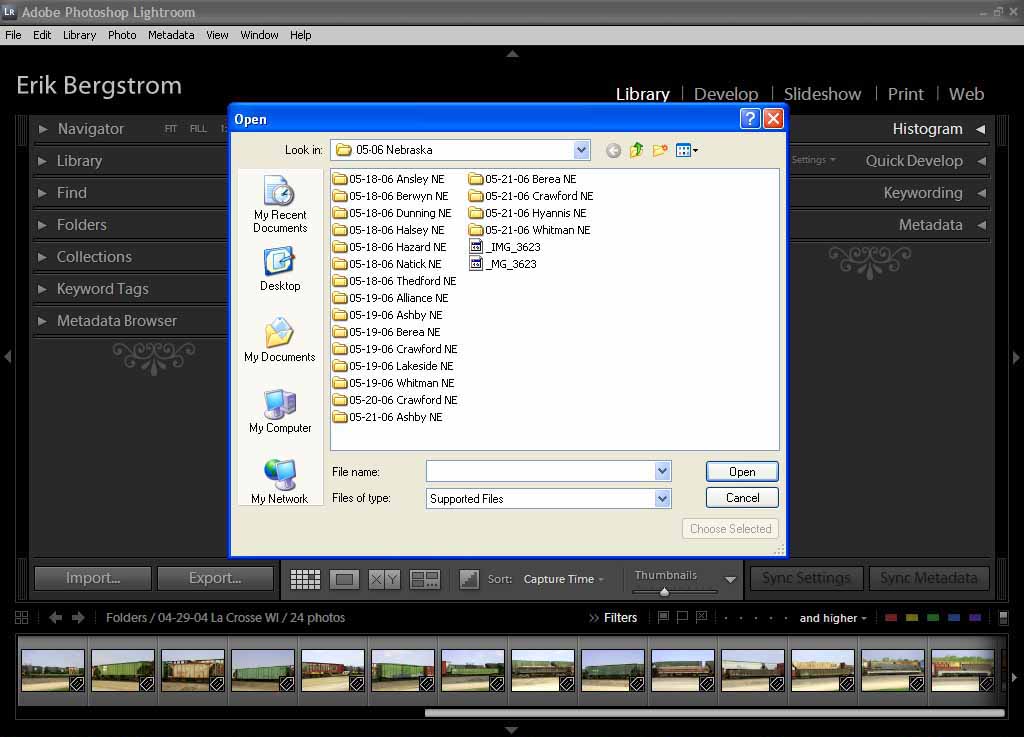
Importing
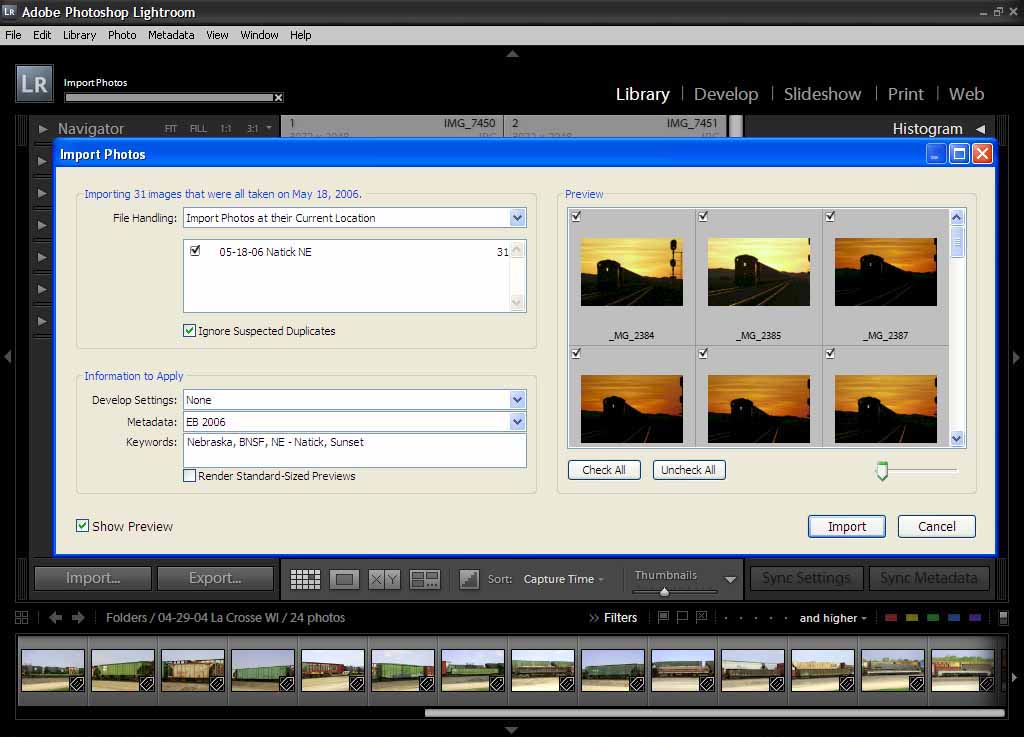
Abobe Photoshop Lightroom’s Import Photos dialog box.
Managing your photos with Abobe Lightroom starts at the importing phase, where you can back-up your photos, rename photos as they’re imported (if you wish), apply exposure presets, and add metadata and keywords. The metadata menu during the import phase lets you create a preset that can be applied to all images you’re currently importing.
This makes it easy to apply your copyright information and other information like the city, state, and country where your photos were shot. Similarly, if all the images in your current import were taken at sunset (for example), you could apply the keyword “sunset” to all images during import.
There are four ways to handle your imported photos: Import photos at the current location; Copy photos to new location and import; move photos to a new location and import; and copy photos as Digital Negative (DNG) and import. The choice is yours, depending on your personal preference.
Now, to the modules of Abobe Photoshop Lightroom…
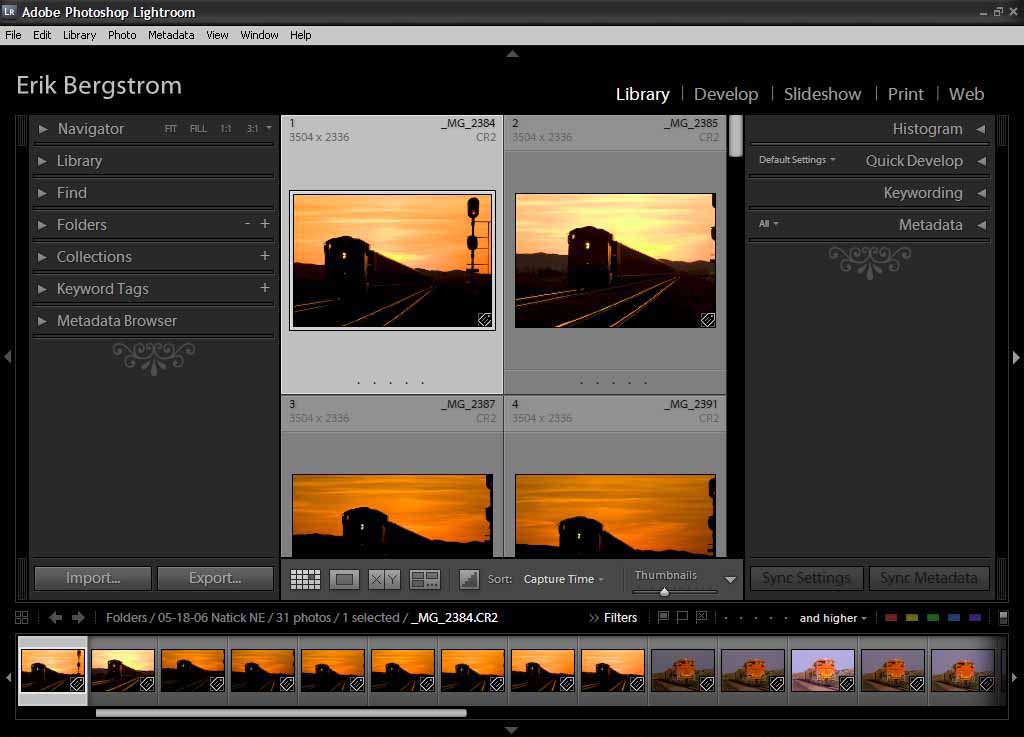
Library module
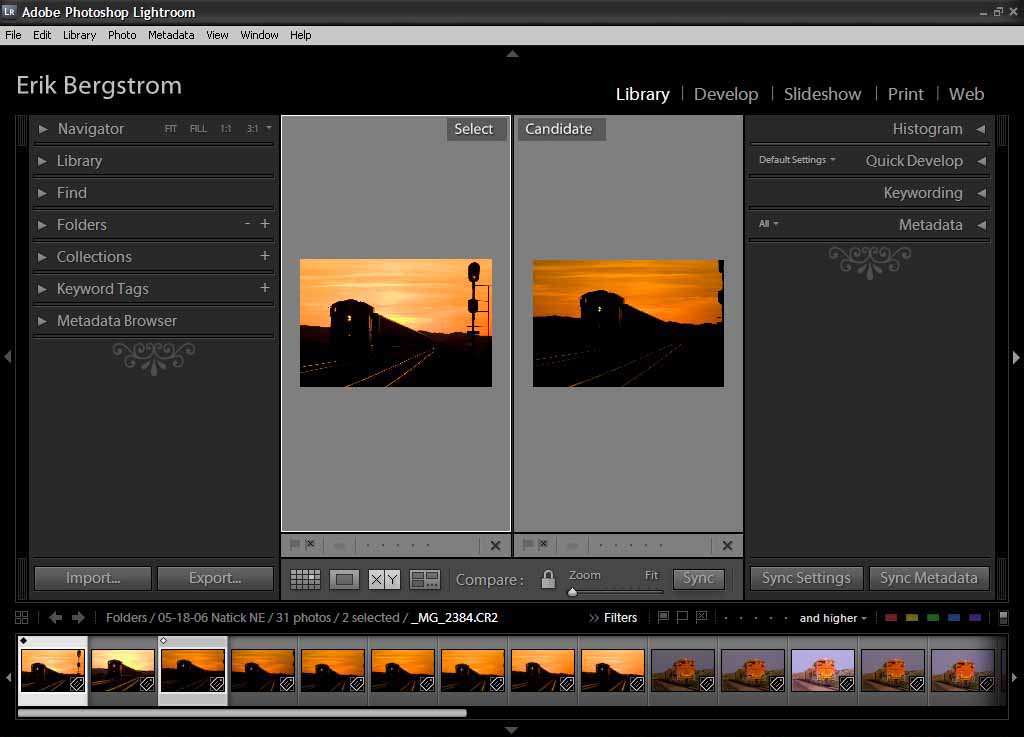
Abobe Photoshop Lightroom Library module Compare view.
Once your import is complete, you’re moved to the Library module. Here you can organize your photos into collections, browse, evaluate, and compare images. You can go into each individual image or a group of images to apply more specific keywords (locomotive type, railroad name, etc.) and additional metadata (including a photo caption) that may not have been added during import. You can also add a star rating (1 to 5) to each photo to help you find your best photos in the future.
Within the Library module of Lightroom you can view your images in three manners: Grid view shows groups of images as thumbnails; Loupe view shows a single image; and Compare view lets you select two or more images to compare side by side.
The left panel of Photoshop Lightroom includes features to help you find the images with your Library. You can easily perform text searches, view the folders where your images where imported, create collections of similar photos (say a collection of sunset photos), or find images with the keywords or metadata you’ve assigned.
The highlights are as follows:
- Find: The find panel lets you perform text-base searches across the images in your Library using several moderators, including capture date range.
- Folders: The folders panel displays a hierarchal view of the location of images based on where you chose to import your photos.
- Collections: Collections let you group images from your Library in one place for easy viewing. Images can be a part of more than one collection, and adding photos to an existing Collection is as easy as dragging an image onto the Collection name.
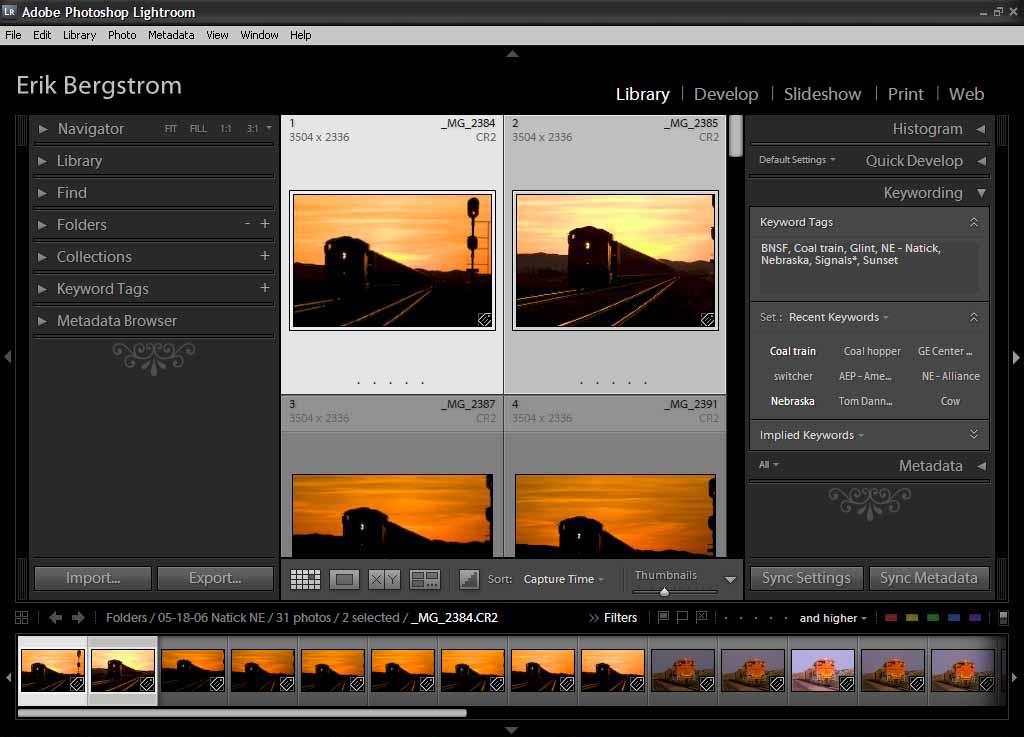
Abobe Photoshop Lightroom Library module keyword tags (gray box on right side of image… click image to enlarge).
- Keyword Tags: View the list of keywords of all images in your Library by opening Keyword Tags. Click on a keyword to view all images from your Library that you’ve assigned that particular keyword to.
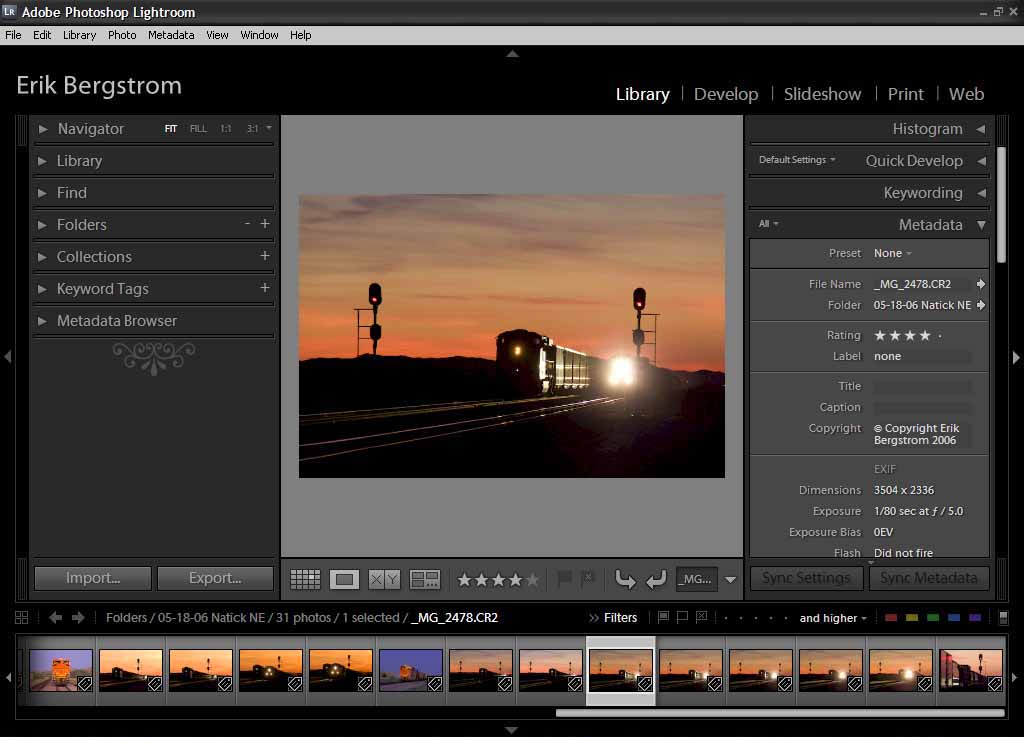
Abobe Photoshop Lightroom Library module Metadata (gray box on right side of image… click image to enlarge).
- Metadata Browser: Similarly, view all the metadata applied to the images in your Library by opening the Metadata Browser. Click on any highlighted metadata to find all images in your Library containing that data.
Within the right panel of the Library you can make changes to the current group of photos selected from the left panel. Adjust keywords, metadata, or basic photo enhancements like white balance. You can work on one image at a time, or apply changes to multiple images simultaneously.
Develop module
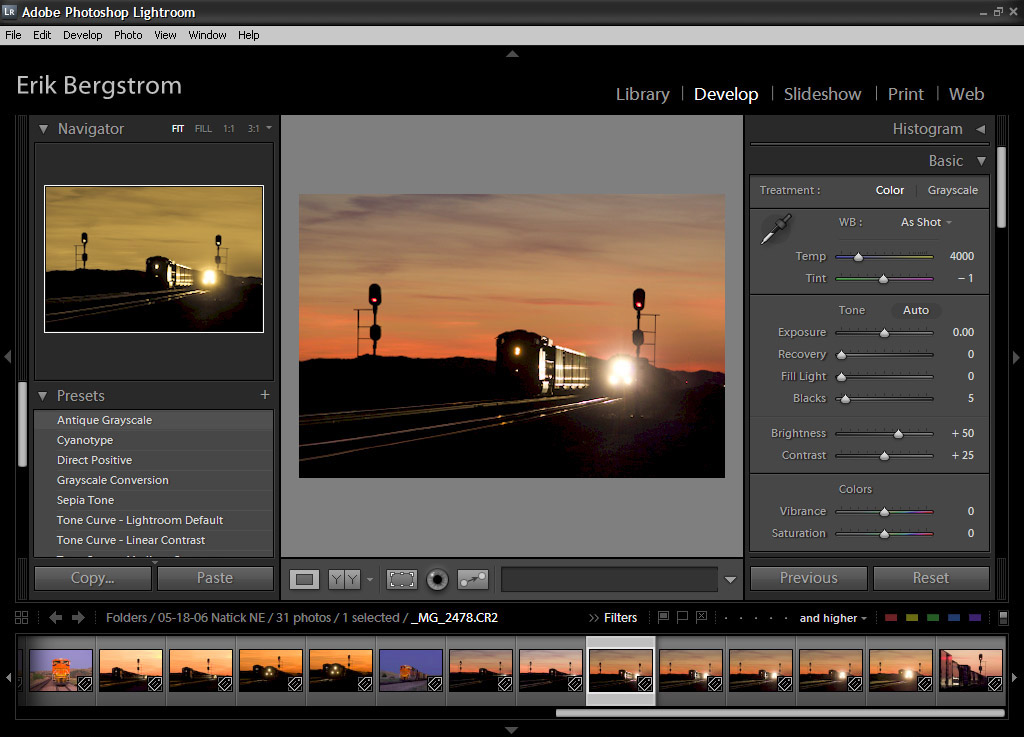
Abobe Photoshop Lightroom’s Develop module and its basic image adjustment tools (gray box, right side of image).
The Develop module is full of tools to help you enhance your images. In addition to basic tools like cropping, rotating, red eye removal, and spot removal, Adobe Lightroom offers full control over the following:
- Brightness and contrast
- White balance — adjusted manually with Temp and Tint sliders or via the nine pre-programmed choices (daylight, flash, tungsten, etc.)
- Tone — adjustments include sliders to correct exposure, blown highlights, fill light, and black tones
- Image vibrance, which controls saturation
- Grayscale conversion to change a color photo to black and white
In addition, a Lens Vignetting tool helps remove unwanted darkening in the corner of certain wide-angle shots.
You also have the ability to seamlessly move photos to Adobe Photoshop software (sold separately) for advanced editing. If you own Photoshop and use it to edit your photos, you see the changes you’ve made within your Lightroom library when you’re finished.
Once you’ve made an edit to a single image in the Develop mode, you can move back to the Library mode and apply your processing instructions to multiple images simply by clicking the Synch Settings button.
Slideshow module
Going to a railroad slideshow with some buddies? Lightroom offers a cool way to wow the crowd. Simply take a selection of photos (“Collections” can easily be made on the fly) from your Photoshop Lightroom Library and move into the Slideshow module. Here you can create a digital slideshow that can be exported as an Adobe PDF. You can then use that PDF and a computer equipped with a projector to do a modern-day slide show of your best railroad photos.
Whether you’re going to a slideshow presentation or just want to share a collection of your photos with a colleague via e-mail, the ability to export a universally accepted document like an Adobe PDF is a great feature of Abode Photoshop Lightroom.
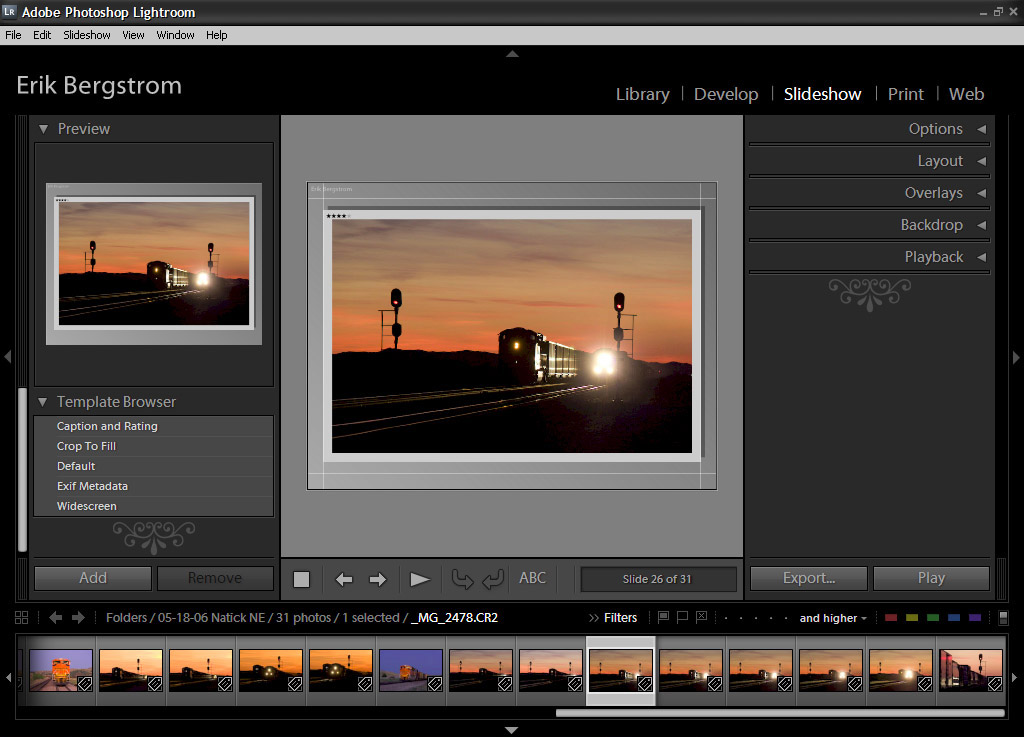
Control the look of your slideshow with the following features (highlighted in the right column of the image to the right):
- Options: Apply a border and drop shadow to the images in your slideshow.
- Layout: Control where your images will display on the slideshow screen.
- Overlays: You can choose whether or not to have your Identity Plate and Rating Stars appear on your slideshow screen. The Identity Plate is a customizable label for your Lightroom window. If you enlarge the image to the right, you’ll notice my Identity Plate reading Erik Bergstrom in the upper left corner. You can choose whether or not you’d like that embedded within your slideshow.
- Backdrop: Set the color of your slideshow screen as well as the background color directly behind the image. In the photo to the right, my slideshow screen is dark gray, while my background is light gray. You can choose a full spectrum of colors to customize your slideshow.
- Playback: Set your slideshow to music, control the duration of how long each image is displayed, and add fades between each image.
Print module

The Print module lets you quickly print small or medium-resolution images on contact sheets or proofs. In the left column of the Print module, you can see a preview of your layout plus choose from a number of layout templates. (Enlarge the photo to the right.) In the right column you control the output of the following settings:
- Image settings: Control how the images will be shown on the printout, including zooming to fill the frame, automatically rotating images to fit a layout, and adding a border.
- Layout: Set margins, the page grid, cell spacing, and cell size.
- Overlays: Similar to the overlays in the Slideshow module, you can control what’s printed on your page in addition to your images (your Identity Plate, page numbers, crop marks, and photo information, like the filename).
- Print Job: Choose your print resolution, print sharpening, and color management.
Web module
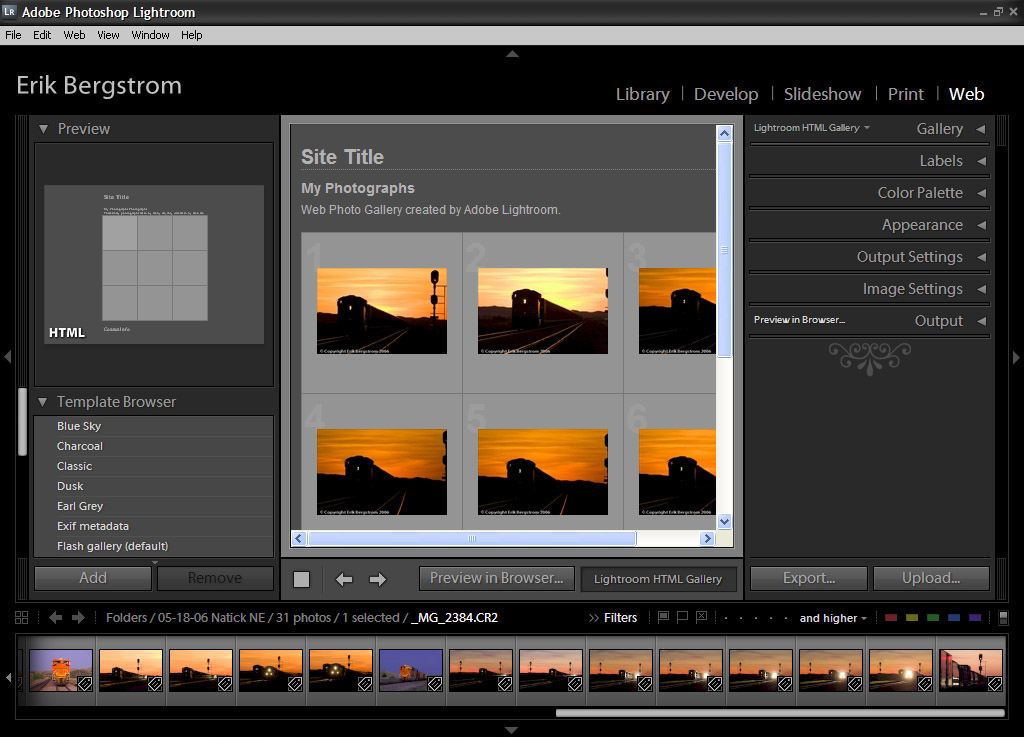
Abobe Photoshop Lightroom’s Web module.
Create photo galleries for your Web site within Photoshop Lightroom’s Web module. In the left column of the Web module, you can see a preview of your layout plus choose from a number of layout templates. (Enlarge the photo to the right.) In the right column you can customize the following settings for your site:
- Gallery: Choose from either an HTLM gallery or Flash.
- Labels: Set your site title, collection title, collection description, contract information, and Web and e-mail address.
- Color Palette: Set the colors for text, background, and cells.
- Appearance: Set the layout of rows and columns, choose whether or not to display your Identity Plate, and add your URL or e-mail link.
- Output settings: Tell Lightroom what pixel size to make the JPEG images that will be output and their level of quality. Also apply a copyright watermark if you wish.
- Image settings: Choose whether to display the title and caption assigned to each image (in the Metadata area of the Library mode).
- Output: Designate what FTP server to send the images to and whether to add them to a subfolder.
I hope you find this outline of features of Adobe Photoshop Lightroom to be helpful. I can say with confidence that Lightroom has done more for my railroad photo collection than any other software I’ve ever purchased. By combining organization and editing tools, Adobe has developed a masterful resource that any train photographer will appreciate.