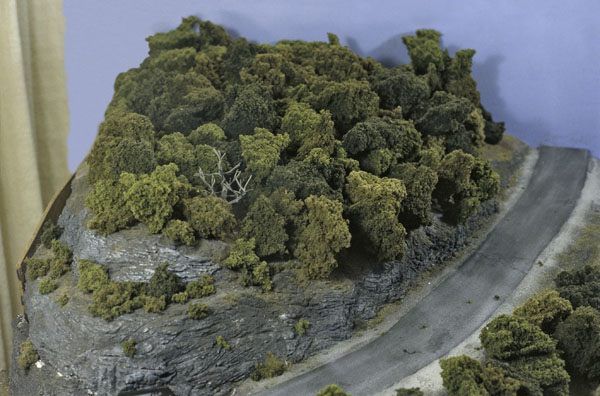
No muss! No fuss! Just add the ingredients, mix thoroughly, and pour yourself a hillside full of trees. Believe it or not, it really can be just about that simple.
I came up with my scrambled-trees technique when I wanted to model deciduous forests on my N scale Midwestern layout. The thought of making all the trees I would need individually seemed like a lot of work. But when I noticed how real deciduous forests looked, I realized that during summer and early fall it’s mostly the leafy tree canopy that’s visible rather than the branches and trunks.
Many people have modeled this look effectively by making puffball trees, gluing poly-fiber balls to their scenery and covering them with ground foam. However, I wanted something that had more variety and was quicker to complete. While my finished method still uses a few fully modeled trees, the bulk of my forested areas are made with Woodland Scenics clump foliage.
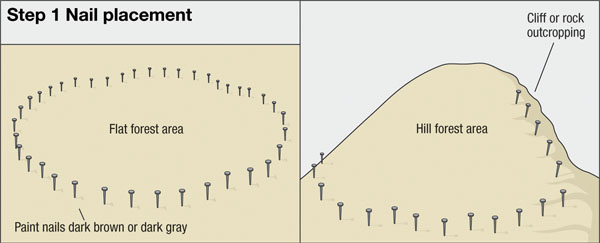
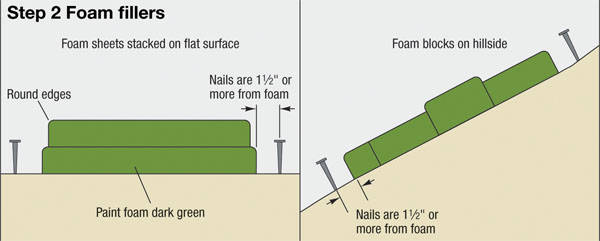
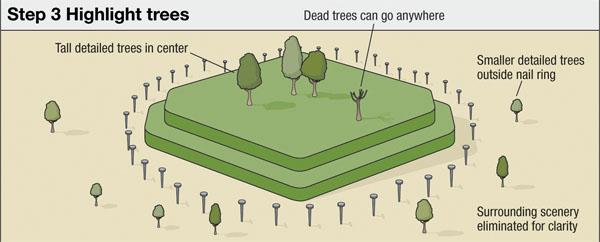
My forest-making technique has just a handful of steps. As shown in step 1, I begin by determining the area to be covered with trees and creating a boundary for the forest using nails. These can be just about any type of 11/2″ to 2″ nail, but you’ll want to paint them a dark color to simulate tree trunks. Hardware stores and home centers sell painted paneling nails in a variety of colors and lengths that would work well for this application.
Space the nails about 1″ to 2″ apart. For flat areas, you’ll need to completely ring the space. On hillsides, however, as shown in step 1, you need to place the nails only at the bottom of the slope and on the sides where rock outcroppings or cliffs will show through. If you use foam scenery like I do, you can simply press the nails in place. Otherwise, you may need to glue them to get them to stand straight.
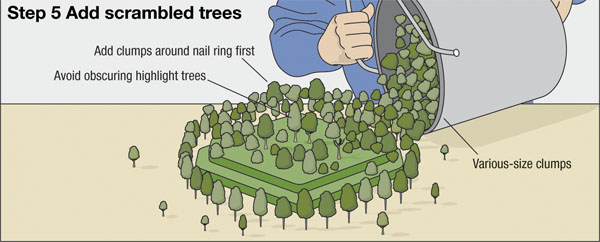
To make the numerous treetops needed to finish the project, I use foliage clusters, made by Woodland Scenics. The firm offers this material in three different shades of green (light, medium, and dark), and I use equal portions of each for my summer trees. The clusters tend to interlock in the package, forming a solid foam brick, so you need to break them into pieces.
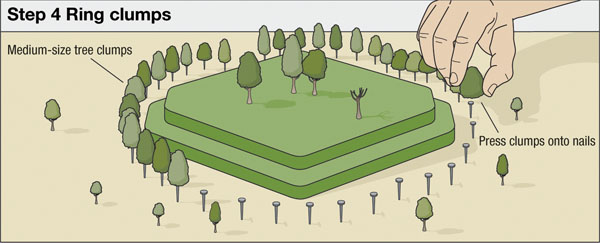
After making some medium-size tree clusters, I press these clumps onto the tops of the nails along the outer border, as shown in step 4. I randomly choose the colors as I go, to avoid making any patterns. You shouldn’t need to glue the clusters to the nails.
Since the forest is a pliable mass, it’s easily modified. You could change your hillsides to reflect autumn by taking out the green clumps and replacing them with those in fall colors. You could do something similar for spring as well with the light- and medium-green clumps representing new leaves. And, should you eventually decide to replace the scrambled clumps with modeled trees, you can use the foliage clusters to make the new trees.
Now that my forests are done, I wish I could find some way to make my towns as easily!