


Scenic base
A layout’s scenic base is the foundation for all of its scenery, including roads, grass, trees, and rocks. An inexpensive scenery base can be made using a lightweight support structure, such as cardboard strips glued together, covered with layers of plaster-soaked gauze or paper towels. Another type of base you can use is made from screen wire formed to make hills and valleys and covered with plaster.
A layout’s scenic base is the foundation for all of its scenery, including roads, grass, trees, and rocks. An inexpensive scenery base can be made using a lightweight support structure, such as cardboard strips glued together, covered with layers of plaster-soaked gauze or paper towels. Another type of base you can use is made from screen wire formed to make hills and valleys and covered with plaster.
A more recent approach to making scenery bases uses one or more layers of foam insulation board glued together and carved to a desired shape.
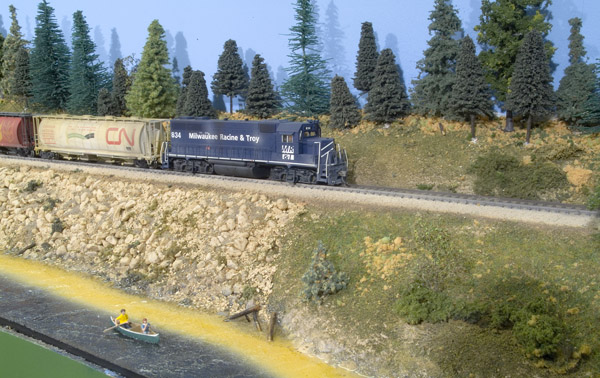
Fig. 6. Ground foam. This trackside hill on the Milwaukee, Racine & Troy has several layers of ground foam on it. Not how the different colors and sizes of foam give detail and texture to the surface, adding realism.
Ground foam
Ground foam is a material used to represent grass, leaves, soil, weeds, and other foliage. Manufacturers make it by grinding up foam rubber and dying it various colors to represent grass and soil. Ground foam is typically one of the first layers of scenery to be installed after the scenery base is complete. The scene in fig. 6 uses a variety of sizes.
Ground foam is a material used to represent grass, leaves, soil, weeds, and other foliage. Manufacturers make it by grinding up foam rubber and dying it various colors to represent grass and soil. Ground foam is typically one of the first layers of scenery to be installed after the scenery base is complete. The scene in fig. 6 uses a variety of sizes.
Rock molds
You can make your own highly detailed rock formations by using rubber rock molds and Hydrocal plaster or plaster of paris. Rock molds are offered by many manufacturers, come in a variety of sizes, and are easy to use. Simply fill the mold with plaster and then remove the rock casting when the plaster has set. After the plaster has dried, glue the casting to the layout and paint it.


Just throwing my two-cents in – I'm an amature to model rail-roading, but I've been making scenery for dioramas, and war-gaming for a long time. A couple of tips I could throw out there – go to a building supply store (Menards, Home Depot, etc), and buy the big framing size sheets of pink foam – it comes in 4×8 ft. sheets, and has varying thicknesses, from 1/2" to several inches thick. Glue it down to your plywood base, and stack to form hills, mountains, rocks, etc. Then file and cut (Woodland Scenic sells wonderful hot wire foam cutters for precision) to sculpt your terrain.
Paint the pink foam a base color (black, green, brown, your choice – DO NOT use spray paint, it will melt your foam) – I recomend getting a small paint sprayer, such as a wagner, and using house paint to save money). Then start flocking using your terrain types – grass, static grass, sand, rock. I recomend doing this with putting down a good layer of dilluted white glue, flocking – allow to dry, blow off the access (into a container of some sort to save the excess), then putting down a layer of 50/50 glue to water, and maybe a little dish soap.
For rocky outcroppings and models, I recomend coating your foam in a plaster of some kind – I haven't used hydrocal yet (I'm going to after reading your comments), but I've actually had a lot of luck with grout putty – it comes in a sand type form, in multiple earth type colors – you add water to gain a desidered consistency, such as a thick, somewhat runny paste, and apply. After a coat or two your can sand, chisel, scratch, and sand to get your look and textures right, and then paint.
I've also used Durhams' water putty, and had a lot of success with it, but it's more pricey. HOpefully this helps someone!
Most building supply stores do not know what hydrocal is. I buy mine from the local pottery supply store at $30.00 per 50 lbs bag.
Great stuff foam seems to make a real nice base for rock cuts. A word of caution though, wait for a few hours before even trying to cut the foam. I learned it the hard way by ruining a knife.
they make a heat gun that melts the foam makes it look reall i made my mountain of dry wall and thin used a wire brush to give it a rock look
you can build mountains out of foam, thats what i am doing on my layout.
Is there a listing of tools that would be usefull for carving foam on this forum? Techniques would be of great help for a newby too.
Now that I've made several hydrocal rocks from rubber molds I'm looking for any advice on making latex rubber molds themselves.
Hydrocal is the way to go, but can be expensive when purchased in a small box. You can get a 50lb bag of it from your local building supplier and save yourself a lot of $$
Was just missing something
what about mountains?