


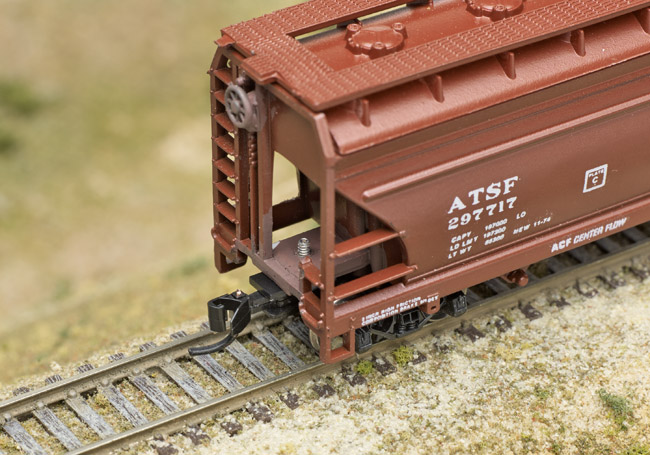
Boxcars, reefers, and the like are fairly easy to convert, because they have floors that couplers can be mounted to. The challenges come with other car types, such as hoppers and tank cars, where sometimes there’s simply no structure to mount the couplers to.
I’ve been converting cars by the dozen lately, and have put in considerable sweat and even some blood, due to slipping knife blades. I’d like to share tips for body mounting couplers which I have gained from my experience.
I use Magne-Matic couplers on everything. Micro-Trains has been making these things since the early ’70s, and they have a broad line of couplers to suit different situations. The company also has a sample pack of couplers you can use to decide which kind works best for your project. Sometimes, for example, you might need a short coupler box so the end of the box will be clear of an axle. Micro-Trains has one.
With Micro-Trains trucks, you can cut off the truck-mounted coupler box with a jeweler’s saw and body-mount it. I do so when I can to save money.
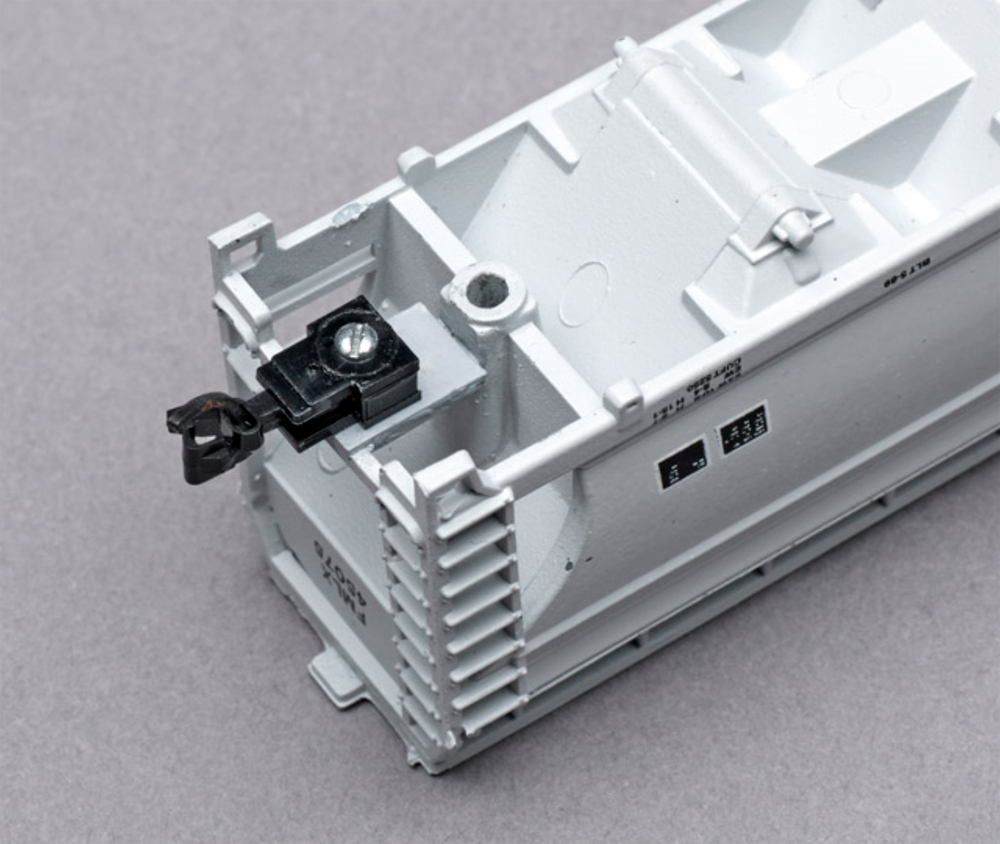
I always mount couplers with screws per the Micro-Trains instructions. In the long run, glue just won’t cut it. (Though I do place a tiny drop of Walthers Goo near the back of the box to keep it from pivoting on the screw as the car runs through curves.) Also if you break a coupler, it’s easier to remove, disassemble, and repair if it’s screw-mounted.
To body-mount couplers you’ll need the right size bits and tap. Micro-Trains offers those, too. The couplers must also be at the correct height, and Micro- Trains will happily sell you a gauge.
You can buy the couplers already assembled or save money by buying kits. I roll my own. Assembly isn’t easy, but Micro-Trains offers a jig for that, and you’ll get better at it with time.
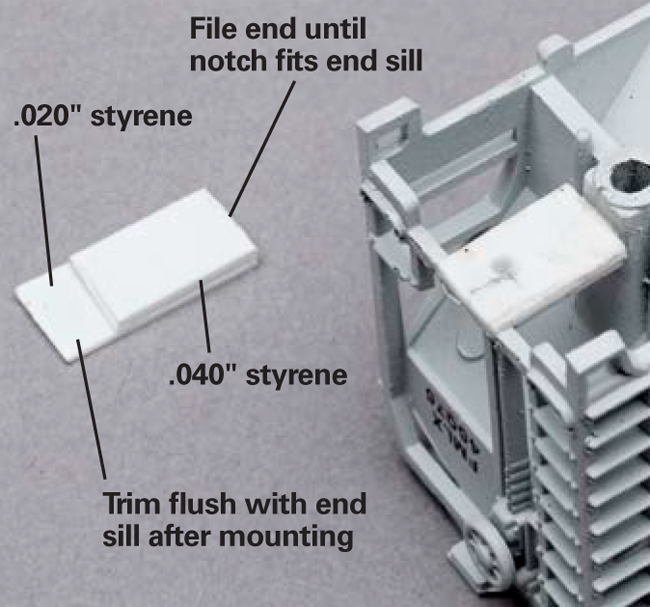
The photos show how I built a mounting platform on a 1990s Atlas hopper car using styrene strips. You need a mount the same width as your coupler box, but no wider, or it might restrict the wheels. This strip should be deep enough to get your mounting surface to the proper height, yet be strong enough to stand up in service. I think the mount should be no shallower than .040″. If this makes the mounting surface too low (as it often does), you can raise the car body with a washer. If it’s way too low, you can use underset couplers.
In most cases, you’ll be butting one end of the strip against some part of the car body, almost always the bolster post. The other end you’ll mount to the frame at the end of the car. Often this frame is quite flimsy, especially on the far more delicate models that are available today. In those cases, it’s a good idea to reinforce the frame with a styrene strip. Sometimes, you have to trade appearance for strength and performance.
A few final words of advice: If you’re doing a bunch of cars of the same type, finish one test car and run it thoroughly before moving on. Finish one end, then test it before doing the other. It’s easy to just forge on ahead after doing the first one, but it’s best not to.
I’ve learned this lesson the hard way. While converting three Athearn 33,000-gallon tank cars, I got ahead of myself and went into mass production too soon. The cars couldn’t negotiate my 18″-radius mainline curves, let alone the 10″ curve on the refinery spur. The coupler mounting strips were too wide and the wheel flanges were hitting them. Trying to cut off those strips without damaging the cars seemed impossible, so I painstakingly filed them down. I paid a heavy price for not testing first. Hopefully, with my tips for body mounting couplers, you can avoid these pitfalls.
This column originally appeared in the July 2014 issue of Model Railroader – Ed.


Great article Jim! Do you have a trick to determine the proper height of the coupler? When you have the trucks removed, it is hard to use the micro trains coupler height gauge.