


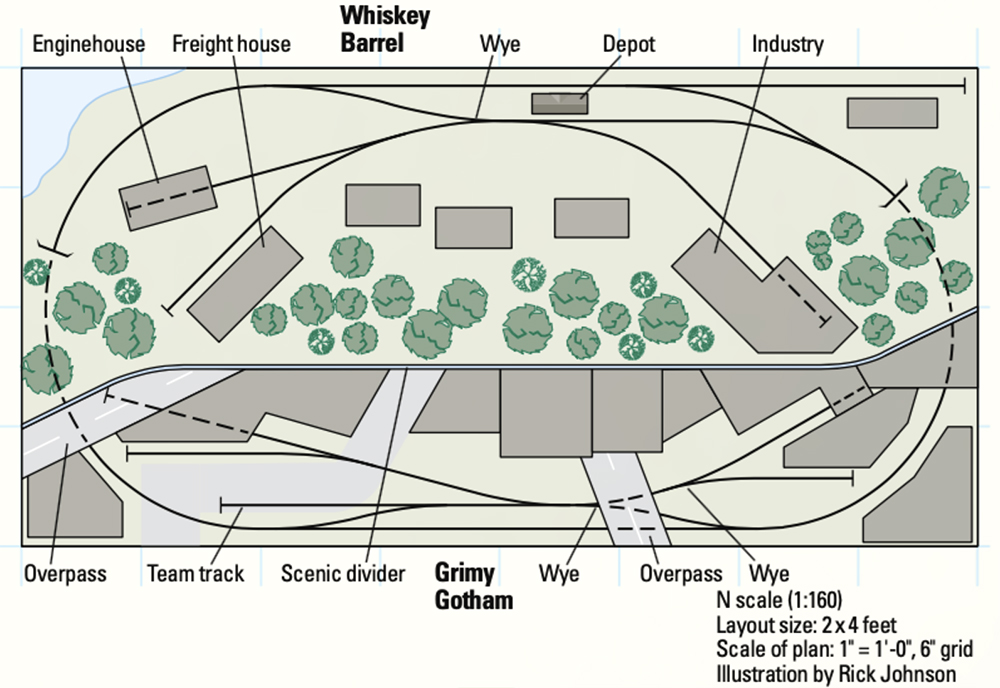
Built by Others is an article series showcasing layouts constructed by modelers using plans and projects from the pages of Model Railroader magazine. Neil Maldeis built the small N scale layout here to be able to take it to shows. It is based upon the Whiskey Barrel & Grimy Gotham N scale plan that appeared in the September 2012 issue of MR in an article on small layout design by M.C. Fujiwara. – Ed.
Built by Others: Neil Maldeis’s N Scale Whiskey Barrel & Grimy Gotham Layout
By Neil Maldeis – photos by the author
Being recently retired, I’ve been able engage more in National Model Railroad Association (NMRA) activities. I’ve been a member since 1986, and I’ve completed the Master Model Railroader program. I’m currently serving as vice president of the Thousand Lakes Region (TLR).

I was looking to build a small, durable layout I could take to NMRA events when I came across the Whiskey Barrel & Grimy Gotham N scale plan in the Model Railroader archives. The plan was from an article by M.C. Fujiwara ran in the September 2012 issue of MR. It was for a compact layout with a lot of industries built on a simple 2 x 4-foot piece of plywood.
The plan seemed perfect for portability and had a lot of switching opportunities. I wanted to be able to let others operate the layout at shows and conventions, so I wanted something that would be interesting to run, and this plan was a good fit.
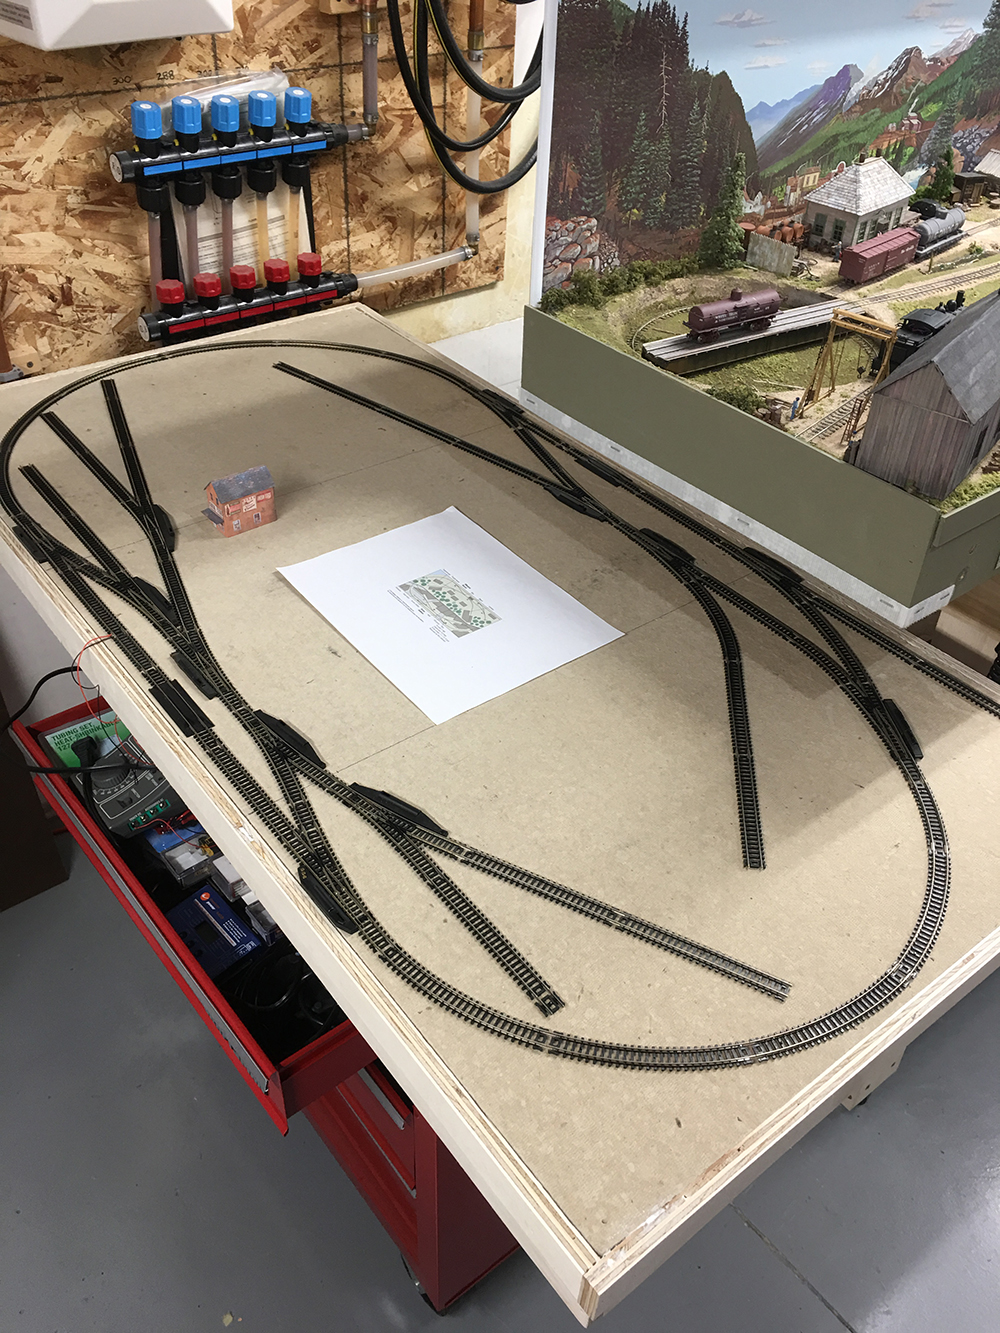
As shown in the illustration, the original plan featured a self-contained oval with a backdrop to divide the two towns. To aid with operation, I added a removable staging yard to one of the sidings so I can set up trains without interfering while others are running the layout. The staging yard has two tracks and is supported by a single angle bracket. I used Atlas N scale sectional track and manual switches that I was able to find used at train shows and swap meets to keep costs down.
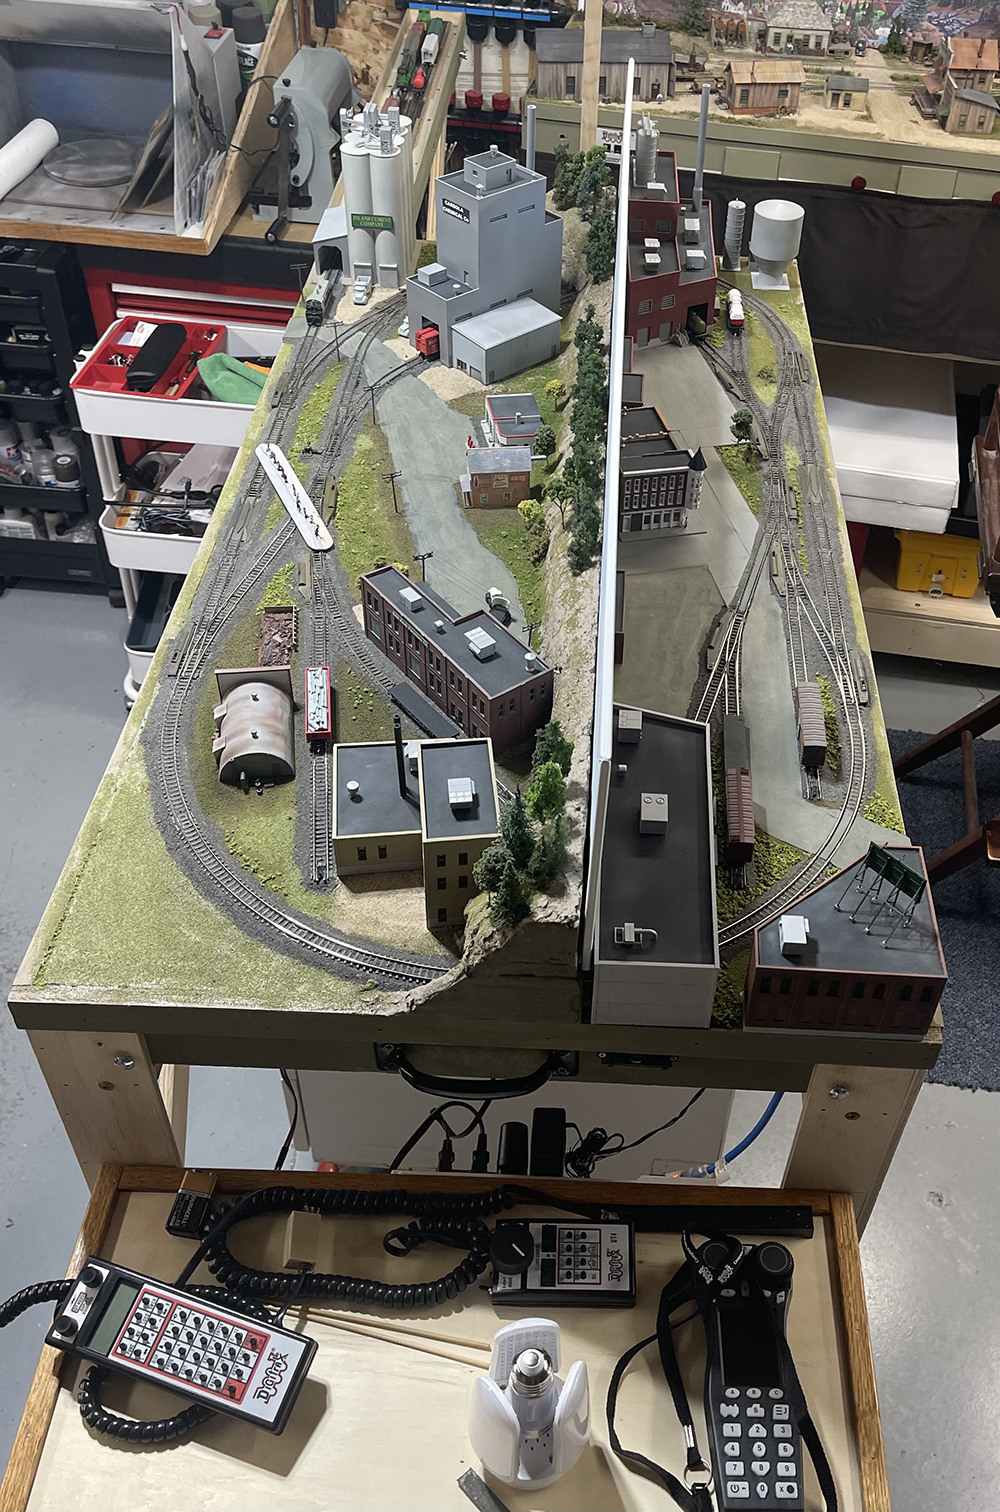
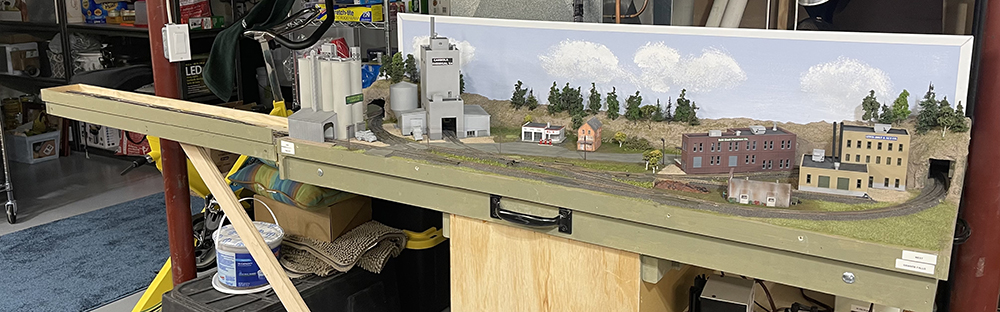
I used Walthers and DPM plastic kits throughout the layout, and I’ve kitbashed many of them to fit the space. I turned a Walthers paper mill kit into two different businesses, Durable Box Co. for Grimy Gotham and Carbola Chemical Co. for the Whiskey Barrel side. Then, I scratchbuilt the Air-O-Flex Co. from sheet plastic and various evergreen strips I had in my scrap box. Finally, I finished the buildings with details from Walthers, including HVAC units, stacks, and chimneys.
To add some prototype character to the layout, the industry names are actual companies that existed in the Midwest in the late 60’s early 70’s. I found a neat database on the internet that has business names, locations, years of operation, and rail service information. I picked a few that had interesting names and worked for my layout.
The backdrop flats were constructed using an N Scale building backdrop I got from TracksideFlats.com. To add some variety and depth, I cut some of the building out and glued them to different thicknesses of poster board. The other building flats were made from left over wall sections from my kitbashing projects.

The scenery is almost finished and just needs a few final details and a couple of tweaks. My goal wasn’t to build a contest quality layout. I wanted scenery that would travel well, since I built the layout to be portable.
I have the finished layout set up to operate using JMRI Operations Pro. This is an operating program for model railroads which allows you to schedule trains and forward cars from one destination to the next. Once everything is loaded into the computer, Operations Pro provides endless switch lists. [For more information on Operations Pro, see the State Line Route video series, episodes 24-26 on Trains.com/vid – Ed.]
In addition to conventions, I’ve run operating sessions on the layout at home as well. Those sessions tend to run 30 – 60 minutes. I think it’s a perfect amount of time for others to learn what operating a model railroad is all about.
I’ve been amazed at how much railroad action the track plan provides in such a small space. I built the layout over the course of a couple of years, but it could be completed in a much shorter time if it had been my only dedicated project. In addition, I have an HO basement layout as well.
I tried to be as economical as possible and built the layout by using train swap meet finds. Realistically, excluding locomotives and rolling stock, you could build it for around $500-$750.
I’d like to point out that I do limit car lengths to 50 feet, and I use 4 axle locomotives due to the lengths of the sidings and the smaller switches. Larger equipment doesn’t perform as well on the tight curves and clearances.
I took the railroad to the 2022 Thousand Lakes Region Convention last May, and I plan to do so again this year. Participants at the convention had a great time operating the layout and gave me a few tips on how to improve it. The biggest change was to put taller legs on it, as it sat too low just by placing it on a tabletop. It now has its own legs, as well as a small workbench to use as a desk and a storage cabinet to hold the trains and supplies.
I built the layout to be shared and hopefully inspire others to try building a railroad of their own. I think this is a great example that you don’t need a lot of space to make your own layout. So far, the layout has performed well and has handled the rigors of use. Despite its small size, this 2 x 4 N scale layout has provided many hours of enjoyment for me and other operators!


I’m very impressed with this layout and the potential for continuous running or switching challenges. Do you have a list of the Atlas track products you used so I know what pieces to order?
Hi John,
Here is the list of track that the layout plan designer (Fujiwara) provide and some notes:
I designed the layout with Atlas Code 80 sectional track & short turnouts.
Here’s a list of sections, with the last number the quantity:
2500, N Atlas Code 80 2500. Flex 2 1/64″. 1
2501, N Atlas Code 80 2501. Straight 4 7/8″. 19
2509-2½, N Atlas Code 80 2509-2½. Straight 2 7/16″. 9
2509-5/8, N Atlas Code 80 2509-5/8. Straight 39/64″. 5
2510, N Atlas Code 80 2510. Curve radius 9 51/64″, angle 30º 6
2511, N Atlas Code 80 2510. Curve radius 9 51/64″, angle 15º 5
2515, N Atlas Code 80 2515. Curve radius 11 7/64″, angle 30º (bulk) 4
2521, N Atlas Code 80 2521. Curve radius 11 7/64″, angle 15º 2
2702, N Atlas Code 80 2702. Left turnout 4 7/8″. (manual) 5
2703, N Atlas Code 80 2703. Right turnout 4 7/8″. (manual) 5
2709, N Atlas Code 80 2709. Wye turnout 4 7/8″. (manual) 3
That first piece of flextrack is actually just a straight cut down to that size, to fit between the right-hand straight and wye turnouts at the upper left.
I do not recommend using the surface remote switch machines, as 1) they look like coffins and 2) the track comes very close to the edge of the layout.
If you must go machine, under-surface-mount machines like the Atlas or Tortoise will be better, though a layout this size with no reach issues is a prime candidate for manual throws.
Remember that Atlas C80 turnouts have a plastic (“dead”) frog, and so smaller steam and some short diesels have stalling issues through them.
One way to slightly increase the size of the layout is to add a frame of 1″x3″s or 1″x4″s to the outside edges of the 2’x4′ panel: this will add 1 1/2″ all way round, providing enough room for more scenery / buffer and even Kato Unitrack and their longer turnouts.
Great job. I also used this plan to make my own portable layout. It’s kinda neat to see someone else’s take on the same plan.
http://www.westviewsantafe.com
This looks great, Neil! Wonderful work!
Great layout that packs a lot of operation and scenery for the small size and this layout can even be at up in a house or apartment with small spaces Also a great idea to operate smaller size equipment both cars and locos on the layout. Smaller size equipment always works better and like a real railroad that has to operate on tight curves and smaller area this is very realistic too. Thank you for bringing the hobby of model railroading to all with this operating display and layout. This should encourage folks who are limited for space or on a tight budget to get into the hobby. For a small switching layout all you need is one locomotive and several freight cars which can easily be purchased even as second hand at many hobby shops flea markets and swap mementos as well as EBay. Joseph C. Markfelder
Nice article. Fun to see what it looked like when it was under construction. Looking forward to seeing you again at the convention next week!
Nice little layout you have there. Very cool that you take it to NMRA events and let others operate on it. Well done!