A question many readers want an answer to is how to color bricks. Structures have been built with brick for millennia and material was very popular from the start of the industrial revolution through the advent of structural steel and reinforced concrete construction. Most railroads will pass by and serve multiple brick-built factories and warehouses, not to mention homes, apartments, offices, and restaurants in urban and rural areas.
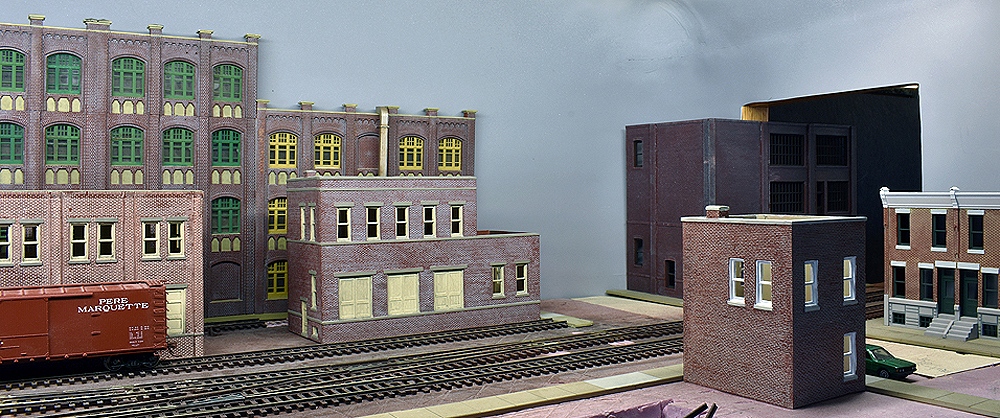
My Pennsylvania RR Washington Avenue Branch runs through a veritable canyon of brick, so I knew I’d be replicating the material on most of the buildings for my little layout set in South Philadelphia. If you look at a brick streetscape, you’ll notice variation not only from building to building, but within individual structures. It’s that variation that I wanted to capture, so I chose to use a few different methods for coloring the bricks, and for creating the effect of mortar between the bricks.
What is “brick red”?
“Brick red” is something like boxcar red. We all know what it is, but there’s no agreement on which one is exactly right. The good news is that we can use that to our advantage.
One of the simplest and most economical ways to color the red on our brick structures is with spray paint, specifically paint labeled as red oxide. I use a few different brands to get a variety of colors. Most modern spray paints are compatible with plastic, which is the most common material for our models’ brick walls. But there are also kits molded in plaster and resin, or you may decide to create your own brick by carving plaster or using a laser engraver on specialty boards. Spray paint will work on all of these materials, though you may want to consider stains on plaster to get more interesting effects. You can find tips for using this method in the July 2013 issue of Model Railroader.
Besides red primer, other colors can be used. Big box stores often have a wide variety of spray paints available. Anything from rust red through a nearly brown-red will work. Brick colors can be indicators of the region being modeled. Milwaukee is known as the Cream City because of the color of many of the brick buildings in the area. Different methods of forming and firing the brick also result in different colors, which are sometimes used to create specific effects the architects or builders are looking for. As with everything, looking at prototype photos or visiting the area you’re modeling is a great help. If you can’t reach an area, Google Street View may be the answer. Brick buildings last a long time, so even if you’re modeling the turn of the last century, some of those structures might still be standing, even if they’ve been repurposed.
What comes first, brick or mortar color?
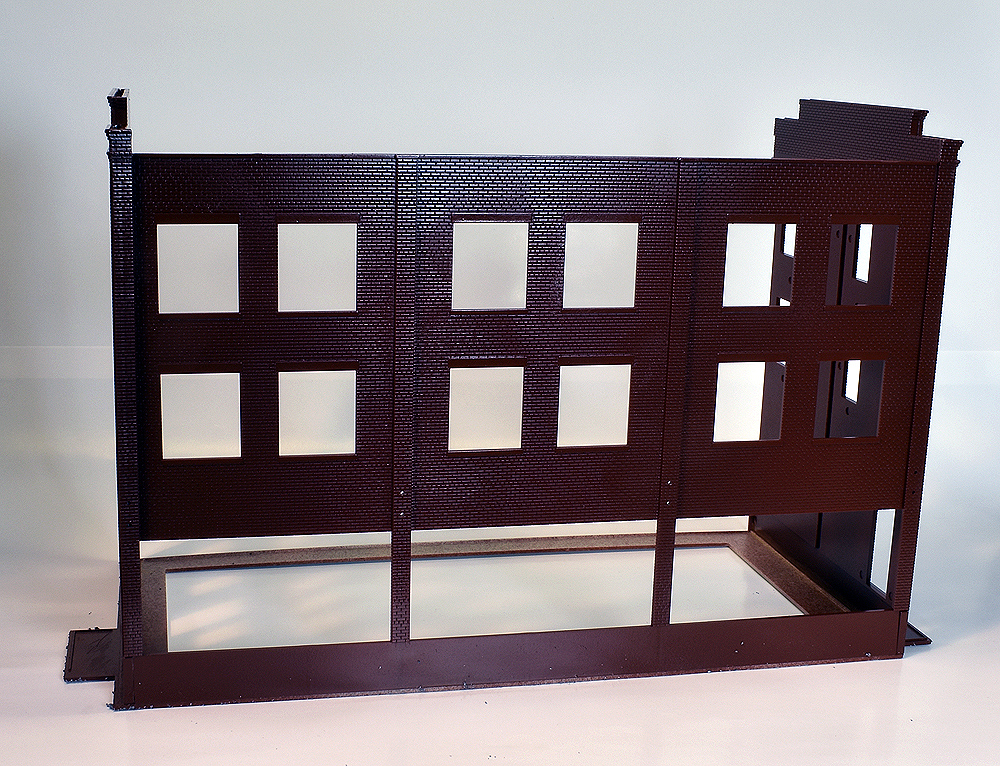
Most techniques I’ll share start with spraying on the brick color, but you can also work the other way, and start with the mortar. Many people will use white for mortar. Sometimes, especially if there’s a lot of lime in the mix, white can be a good choice. But most times, something a little off from white — either a pale tan or gray — will look better. It’s also possible that mortars could be tinted, again for effect. I’ve seen very dark gray mortar, as well as red mortar. Just like brick, there’s a wide variety of “correct” colors. While you’re looking at brick colors, pay attention to the mortar as well. In all of these examples, I built the brick walls and took some time to clean up the corners so the mortar lines wrapped around without any gaps. Some models take more work than others. If the windows were separate parts, I left them off until the bricks were colored.
Mortar first
If you’re going to paint your mortar first, then how do you color the brick?
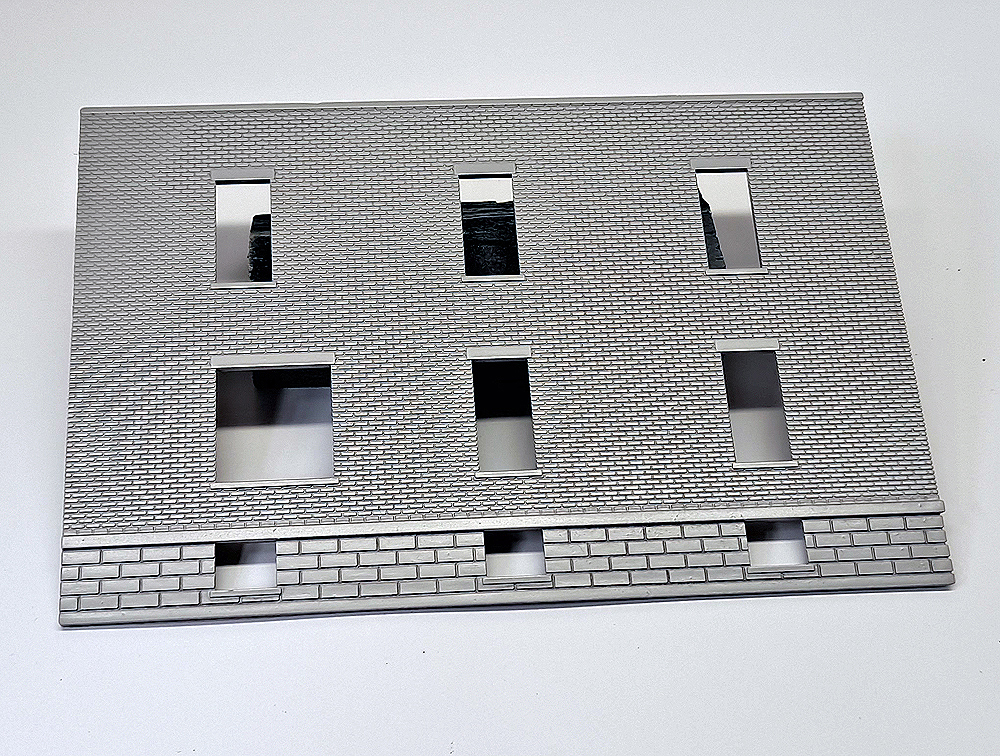
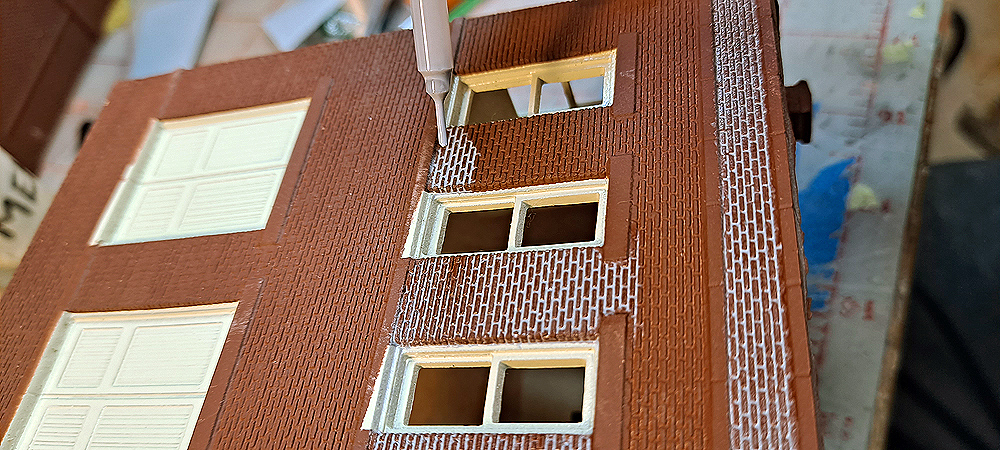
Drybrushing is a valuable technique, but it’s not one I’ve been terribly successful with. I’m probably too impatient in removing the paint. I had just purchased an AK Interactive Rust & Streaking Effects set in five shades of red, from red-orange through red-brown. I thought this might work well. I chose a pale gray color. Rust-Oleum Painter’s Touch 2X 334086 Stone Gray, to represent the mortar on this Design Preservation Models structure I’m using as the office for a coal and oil dealer.
The only downside to the color I chose was that it was only available in a satin version, so I had to add a coat of clear flat. I used Rust-Oleum Painter’s Touch 2X 334022 Matte Clear to avoid compatibility issues with the paint chemistry. The clear coat was more matte, but not a dead flat. However, there was enough tooth to the paint for the pencils to work.
I found that by laying the pencils down and using the side of the exposed pigment, I could cover a wider area more efficiently. I started with a lighter color, and made sure to get into the corners around the windows where the brick detail wrapped into the opening. Sharpening the points helped get into tight areas.
By using lighter colors first, I could overlay darker colors and get some variation in the shade of the brick. Of course, I also could highlight individual bricks with points of the pencils. Be careful when using the point not to let pigment get into the mortar recesses. This method was reasonably efficient for the size and shape of the building I was working on. For a really large structure, or one with molded brick detail that includes deep recesses, it might not be the best choice. Once I was satisfied with how the brick looked, I applied another coat of flat clear, then I painted the door and window details, door and window sills, and the parapet wall and chimney caps. Doing these steps earlier would’ve resulted in brick color getting on these areas of the model.
Brick color first
For larger buildings, or buildings with significant brick detail, what I’ve heard designers and masons refer to as “tricks with bricks,” it’s easier to color the brick first, then add mortar later. I tried a few techniques for this using paint, washes, and joint compound. Let’s look at the somewhat unusual one first, joint compound. This is the stuff you either buy ready-mixed in plastic buckets, or mix up yourself from powder with water, designed to fill gaps and holes in drywall construction.
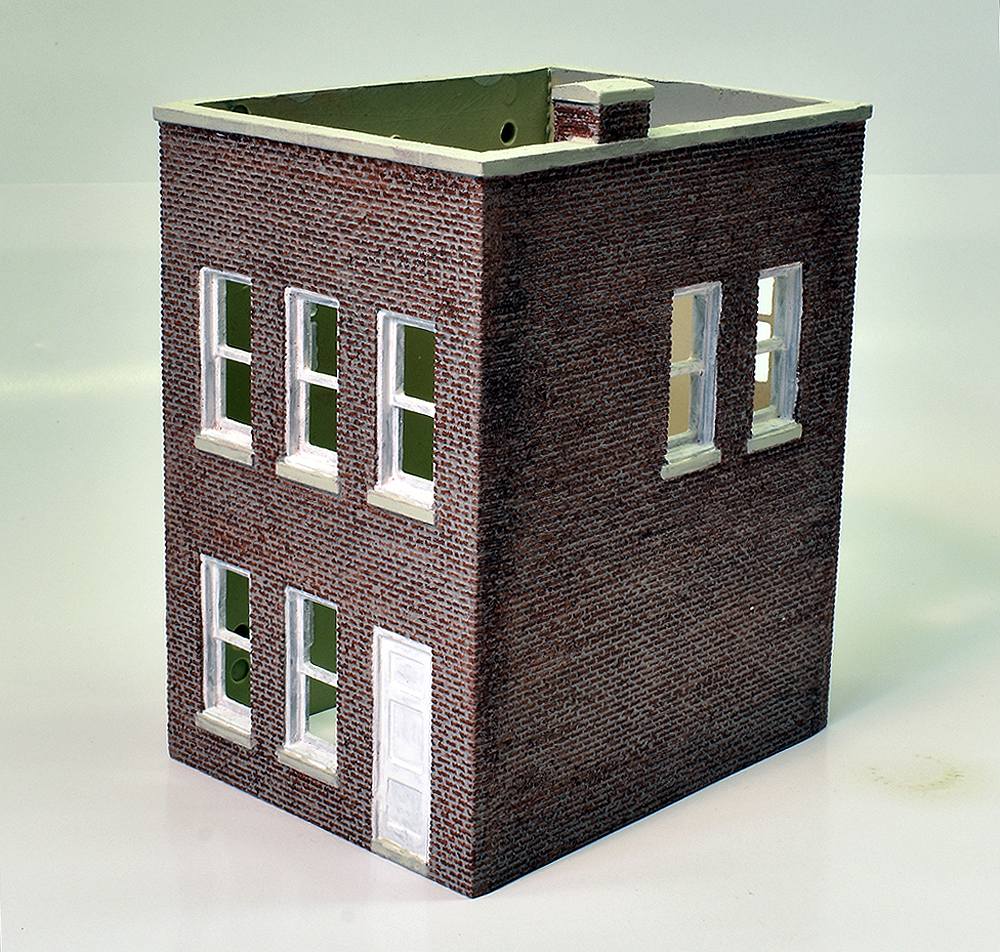
I first tried using this on the large building in the background of the lead photo. I painted the model with a brick red color, likely Rust-Oleum Painter’s Touch 2X 339018 Flat Red Primer, then smeared a bit of joint compound across the brick. I quickly realized this wasn’t going to work too well. The brick color had a flat finish, so it had a fair amount of tooth that stuck to the compound. In addition, the paint was soft enough that it stained the joint compound pink. In addition, the texture of the brick moldings at the top of each bay, along with the pilasters molded as part of the wall, meant I was picking compound out of nooks and crannies all over the wall. One great advantage to joint compound is that it’s water soluble, so I was able to remove most of it with a dampened toothbrush and a bucket of water. Resist the urge to rinse plaster-like materials down the drain. Eventually it will come back to bite you!
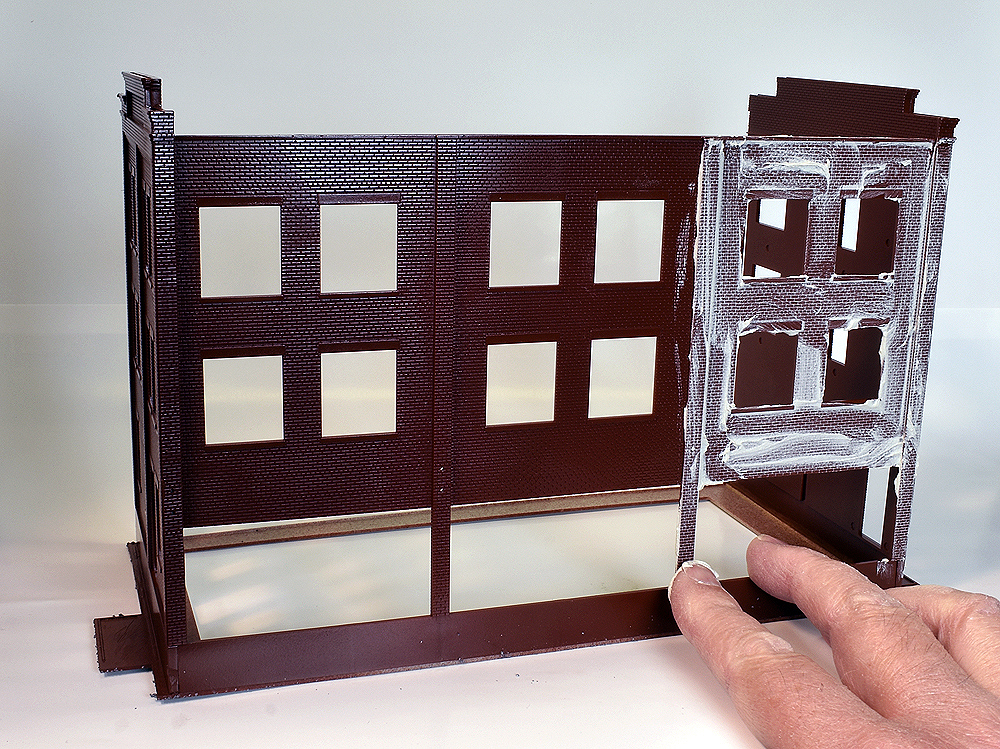
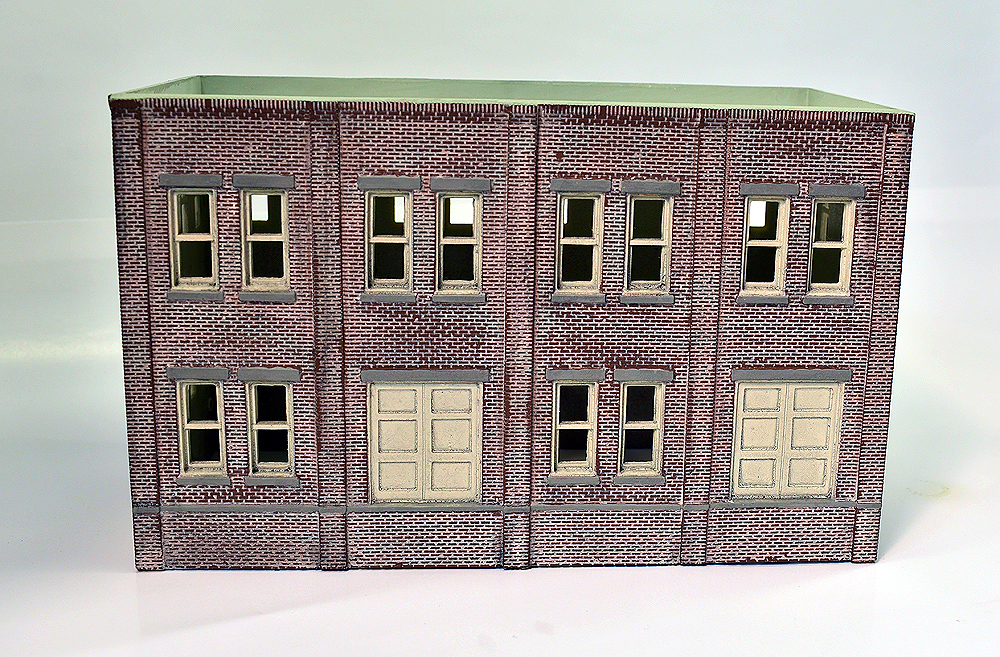
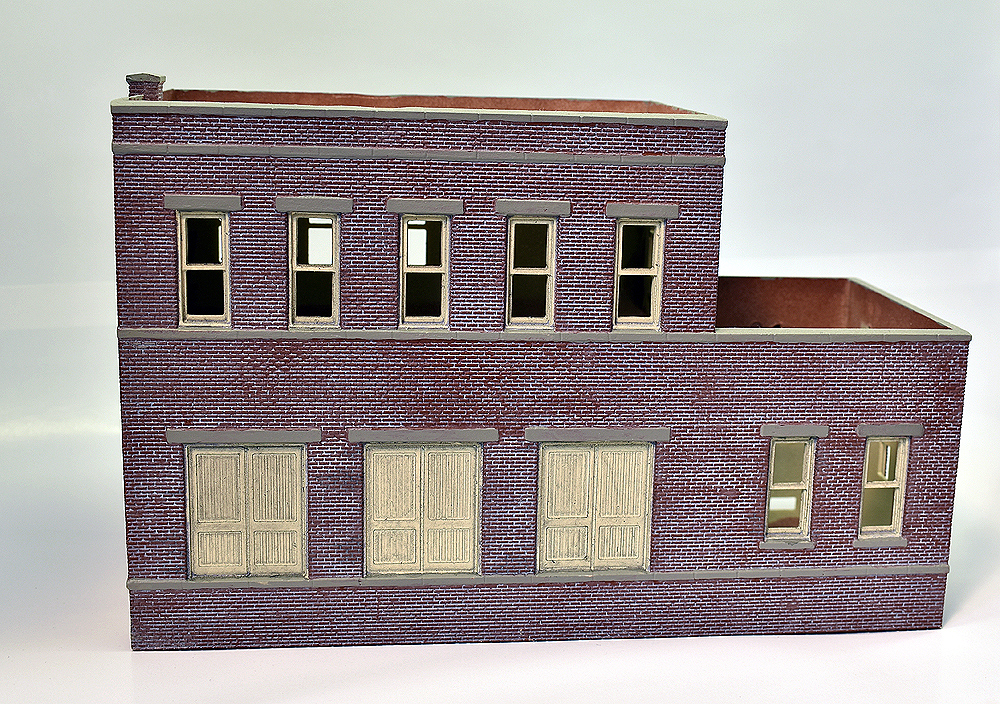
I tried the joint compound a second time, this time coating the primer with clear gloss, and using a wall that was generally smoother. This worked much better, as you can see. I used the same Rust-Oleum Flat Red Primer as before, this time coated with Rust-Oleum American Accents 2X 327864 Gloss Clear. After letting the paint dry thoroughly, I smeared joint compound over the surface. Note that this building, Wm. K Walthers Engineering Office kit (No. 933-2967), has simpler detail than the one I tried first.
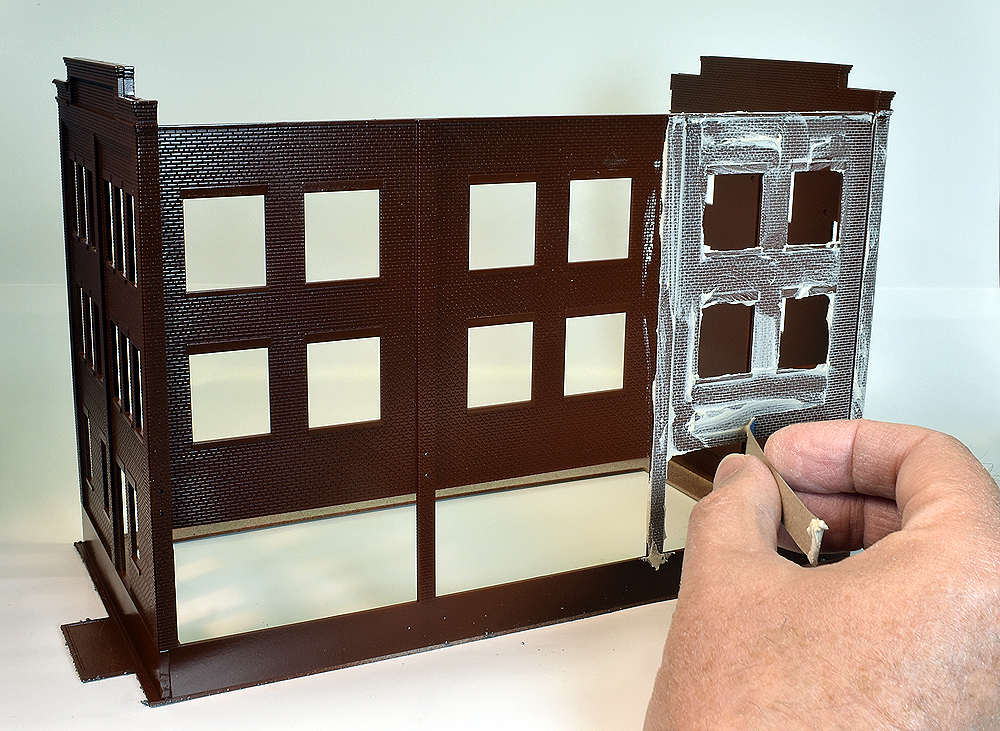
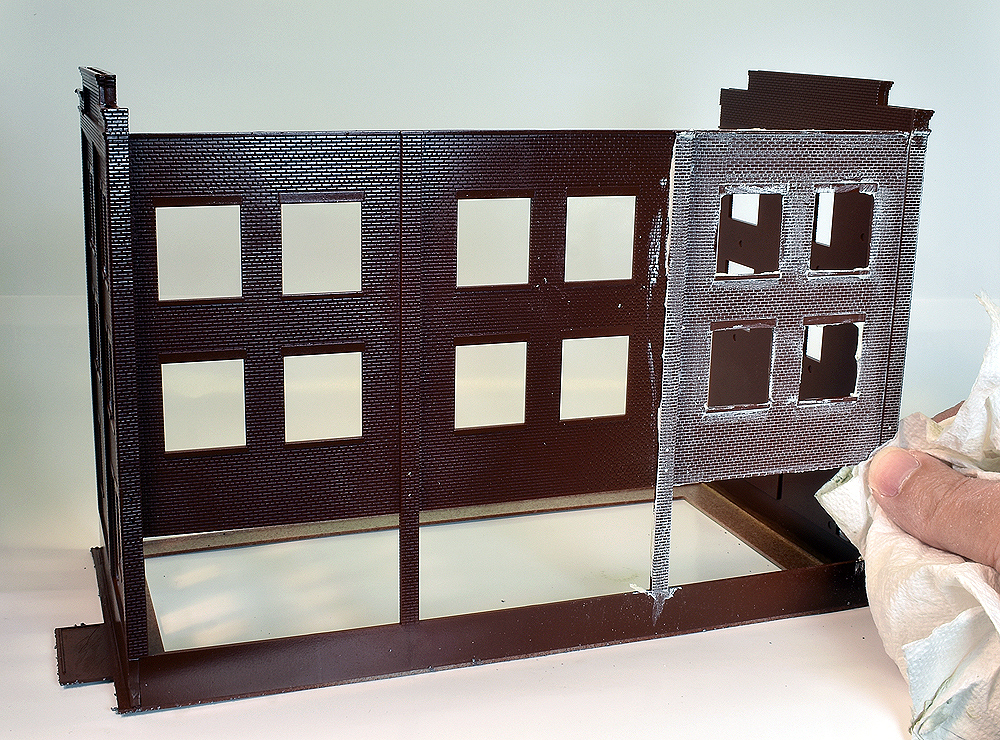
I smeared the compound across the entire bay, then cut a piece of stiff cardboard to use as a scraper. This allowed me to get into the corners around the pilasters. Once I had most of the compound off of the wall, I could see a thin layer start to glaze on the brick face. No worries! I used a dry paper towel to buff the thin glazed coat off the glossy brick and it looks great.
For this to work well, you want a sharply defined brick pattern. Some brick patterns are either shallow or somewhat rounded. Though this can be appropriate for certain types of brick, this makes it more difficult to use the compound technique.
More traditional solutions
When I first got into structure building as a kid, my go-to for brick mortar was Pactra enamel paint. I liked the Camouflage Gray color. I’d paint it on full-strength, then wipe it off with my thumbs and fingers. Of course, besides the fact you can’t get this paint anymore, coating your fingers with enamel paints isn’t a healthy idea.
But there are new products to try, and here are two options: Tamiya Panel Line and Acyrlicos Vallejo Model Air paint. If you’re going to use these, you need to pay some attention to paint chemistry.
Tamiya Panel Line is an enamel that’s been thinned to a wash. It was developed to highlight panel lines in military models. But what is mortar other than lots of panel lines?
One downside to the Tamiya Panel Line is that the colors are somewhat limited. I used 87189 Light Gray. Other options include Black, Brown, Gray, Dark Gray, and Dark Brown. Since these paints are enamels, they didn’t play well with the Rust-Oleum Flat Red Primer, which is also an enamel. In order to protect the paint, I sprayed it with Tamiya TS-80 Flat Clear. This lacquer paint protected the enamel primer from the enamel panel line color. Using panel line colors over acrylics would also be fine.
The panel line color is thin enough I could flow it into the brick and capillary action would pull the color throughout the surface. If I needed to touch something up, a paper towel dampened with enamel thinner cleaned up any overflow. I also used the panel line color to tint some of the joint compound mortar I used on one of the Design Preservation Models structures.
The Vallejo Model Air could be applied similarly. It’s sold ready to airbrush, so it’s easy to flow it into the mortar lines as well. Since it’s acrylic, it didn’t interact with the Rust-Oleum enamel primer. The Vallejo paint is a little thicker than the Tamiya Panel Line, so I had to carefully wipe the surface with a paper towel. Make diagonal sweeps across the surface so you don’t pull the paint out of the mortar lines. Work in small areas so the paint doesn’t start to dry on the surface. A couple of square inches at a time is a good working pace.
With both of these methods, it’s a good idea to work on one side of the building at a time so the thin paint doesn’t flow and pool anywhere.
Once you have all of the brickwork done, it’s time to go back for any detail painting, such as lintels and sills, or windows if the building walls are molded in one piece.
Give these methods a try, and see what works for you!