


Five model railroad uses for Lego. My wife and I have two kids who are enthusiastic about Lego. We enjoy watching the creations they make straight from the box and share in their joy when they make new creations by rebuilding sets. And, like many of you, we’ve also felt the pain of stepping on a plastic brick not picked up at the end of busy day of building.
Though Lego is fun for kids and adults, they also have model railroad applications. These five ideas show how bricks and accessories can be put you use on your layout and workbench. The parts shown in these techniques can be found at Lego stores throughout the world, independent brick-and-mortar stores that sell Lego products, and various online retailers.
Since the Lego bricks and accessories have the potential of being exposed to hobby chemicals in these applications, make sure you buy your own and store them out of the reach of children.
Retaining walls
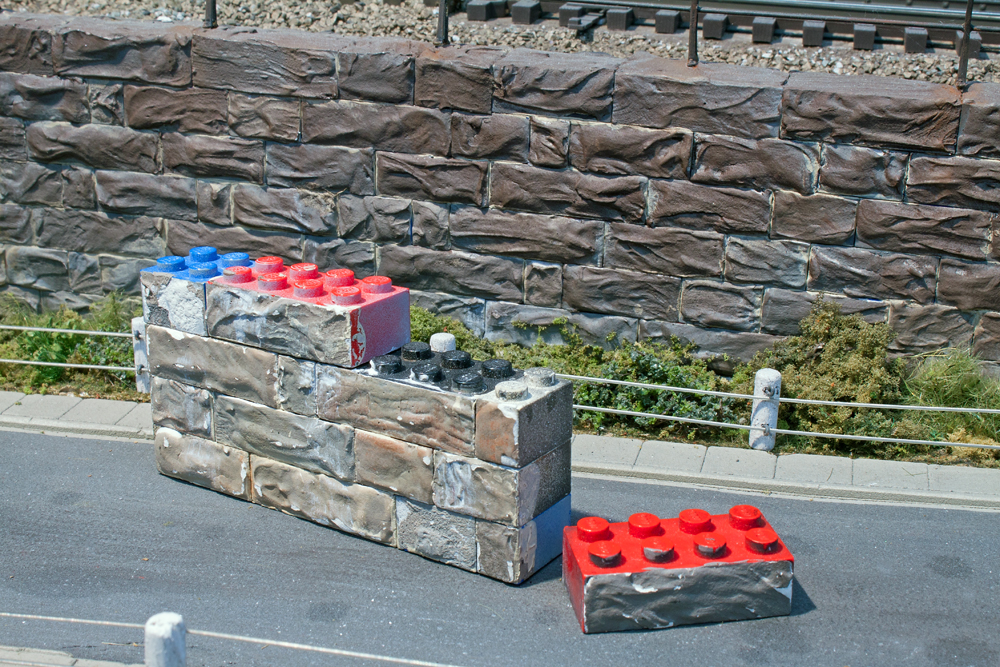
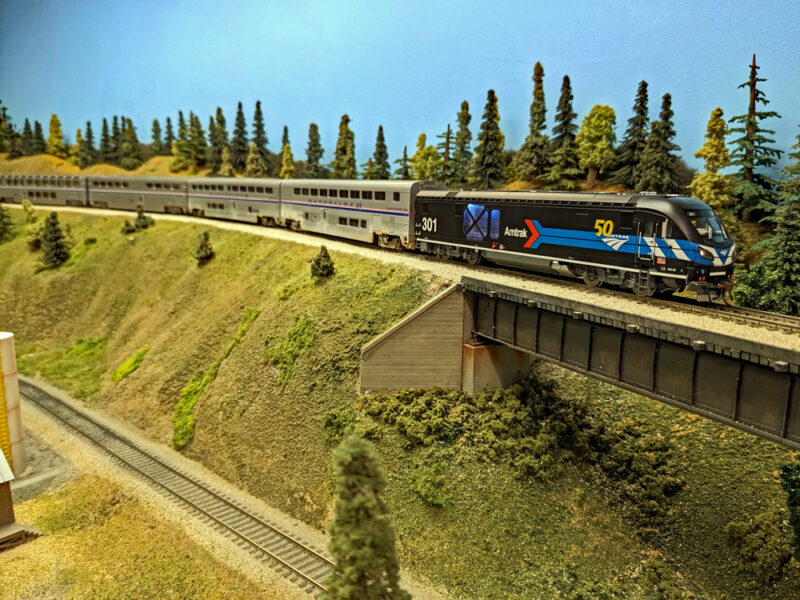
In “Big and busy on the Pennsy” in the November 2017 Model Railroader, John Sethian wrote about his O scale Nassau Division layout. One of the tips John shared was how he modeled block walls using Lego bricks.
“Someone at Lego must be a fan of the Pennsylvania RR, because the size of a standard Lego brick is pretty close to that of a standard Pennsylvania RR stone block in O scale,” John wrote. “I use the following Lego brick technique for bridge abutments and tunnel portals as well as retaining walls.
“First, I spread drywall joint compound on the faces of each individual Lego brick that will be visible on the final model. Next, I use my fingers or a small trowel or artist’s palette knife to form an irregular ‘stone’ surface while the joint compound is still wet. Once the joint compound dries, I paint the bricks with various shades of acrylic craft paint.
“To build the walls, I paint all the brick’s mating edges with Folk Art Barn Wood craft paint. In addition to simulating the mortar between the bricks, the paint acts as an adhesive to help them stick together. After assembling the structure, I wipe away any excess paint and add weathering.”
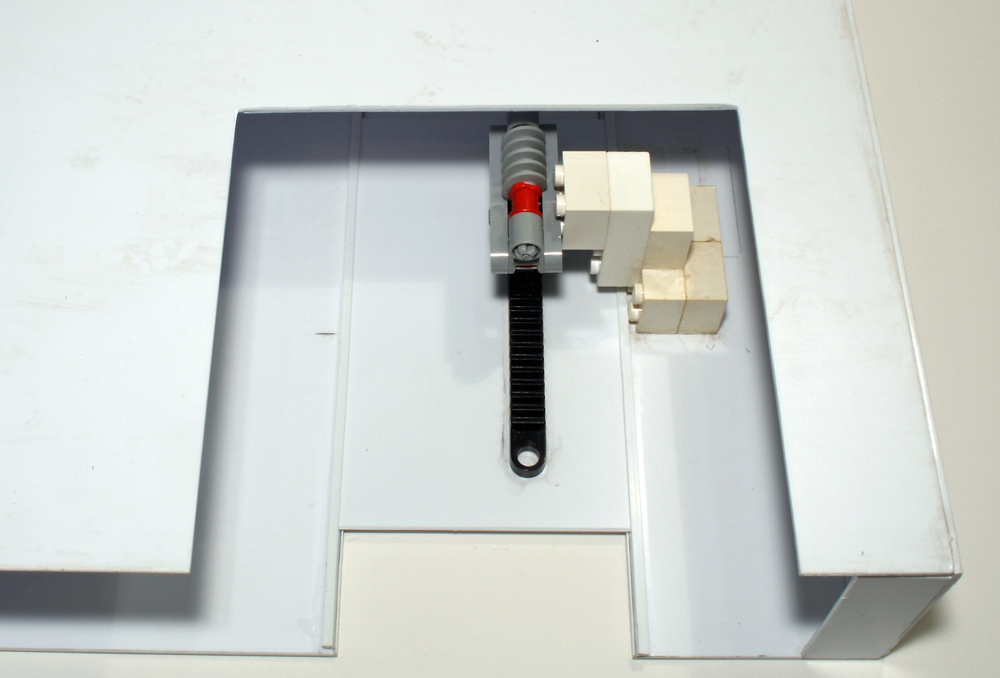
Operating gates

Tom Klimoski authored “How to model a modern lumberyard” in the March 2018 issue. In a sidebar, he shared how he used Lego Technic parts to model an operating gate.
“I used a Lego Technic gear-reducer mechanism to operate the gate for my building supply company,” Tom wrote. “The mechanism takes a horizontal rotating action and converts it to a vertical shaft that can spin in either direction.
“Though the Lego gear set that I used has been discontinued, I found a similar mechanism on eBay by searching ‘Lego gear reducers.’ Additional connection pieces can be purchased online through various websites and direct from Lego.
“I built a small shelf to hold the mechanism at the proper height and lined it up under the long leg of the gate. I mounted the mechanism to the shelf, then extended the input shaft through the fascia and attached a crank handle to the end.”
“After drilling a hole in a small lead weight, I slipped it onto the long leg of the gate from below to act as a counterweight,” Tom continued. “I then bent the long leg of the gate at a 90-degree angle and then 180 degrees back to create an upside down T at the proper height to connect it to the mechanism. I cut the excess wire off after I was satisfied with the location and height. I used a shaft connection bracket from the Lego set to extend the output shaft and connect it to the gate leg.
“To prevent the crank handle from being bumped, I covered it with a hinged exterior electrical outlet cover that crews open when they need to open the gate.
“This simple system operates smoothly and reliably and adds a realistic step that crews have to perform as they switch the industries.”
Operating overhead doors
Tom returned to share how me made a working roll-up door in “Model a modern tilt-slab building” in the May 2019 issue.
“I added 3/32″ H column to the inside on each side of the overhead door opening, making sure the pieces stayed parallel and equidistant from each other,” Tom started. “The two H columns allow the door to slide up when the opening mechanism is operated.
“I also added .080″ angle to trim out the exterior of the overhead door opening,” Tom continued. “To make the overhead door, I cut Evergreen no. 4525 metal siding to the proper size and glued a Lego gear rack to the back. I painted the door using Rust-Oleum Metallic Matte Nickel spray paint. Once the paint dried, I installed the door in the opening.
“The final step for making the door operate was installing the Lego gear reducer mechanism, extending the drive shaft through the roof, and attaching a ventilator to the top of the drive shaft.”
Corner braces
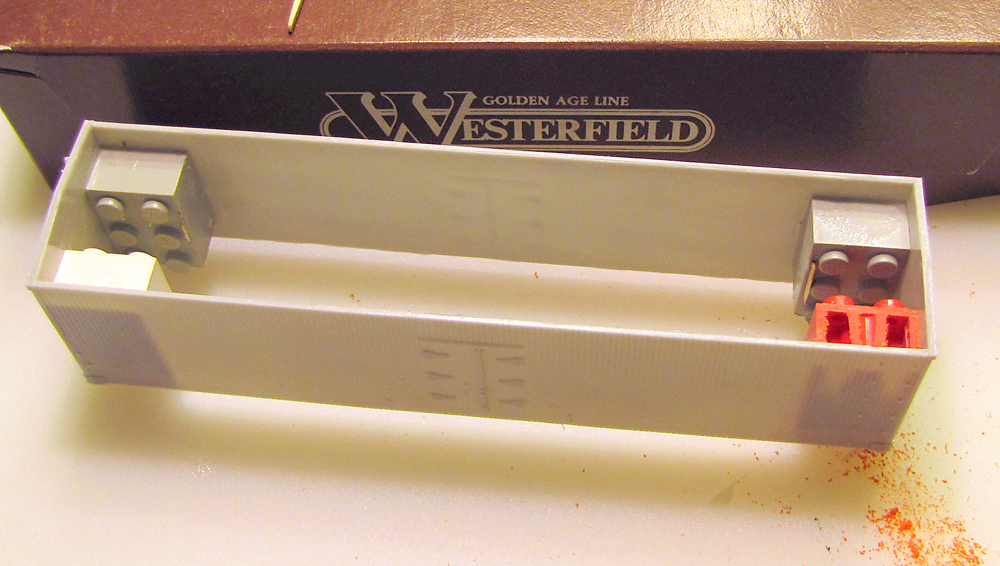
Of the five model railroad uses for Lego, this one was the palm to forehead “Why didn’t I think of that?” technique. In the September 2011 Workshop Tips column, Charlie Duckworth wrote about how he uses Lego blocks to brace resin car kits.
“I’d built several of Al Westerfield’s early single-sheathed automobile boxcars and recall one of the biggest issues I had to overcome was squaring up the sides and ends during assembly,” Charlie wrote. “The thin-edge corners were difficult to join with any degree of strength, so I wound up reinforcing the joints with wood blocks that eliminated any bowing of the resin sides, and provided more surface area to attach the ends.
“Then I found a Lego brick and as I examined it, I saw that all of its corners were square. I quickly realized that the accuracy of the Lego block could provide two perfect gluing surfaces.”
“I begin building any resin kit by removing any flash from the sides and ends with 220-grit wet-or-dry sandpaper,” Charlie continued. “I sand the parts on a flat surface with water running over the pieces to carry away the fine particles of resin. When the edges are clean and straight, I use cyanoacrylate adhesive (CA) to cement a Lego block to the inside, flush with the end.
“Most of the time I use the Lego blocks that have 2 x 4 stubby pins, but the 2 x 6 size also works. I cement blocks to both ends of each side panel taking care to ensure the block is flush with the car end and clear of the future floor location.”
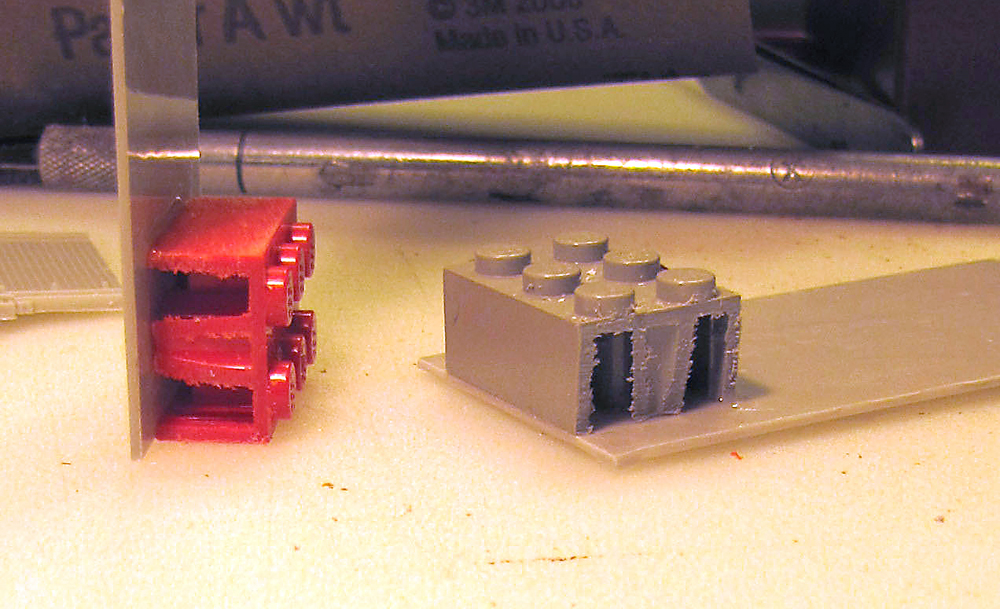
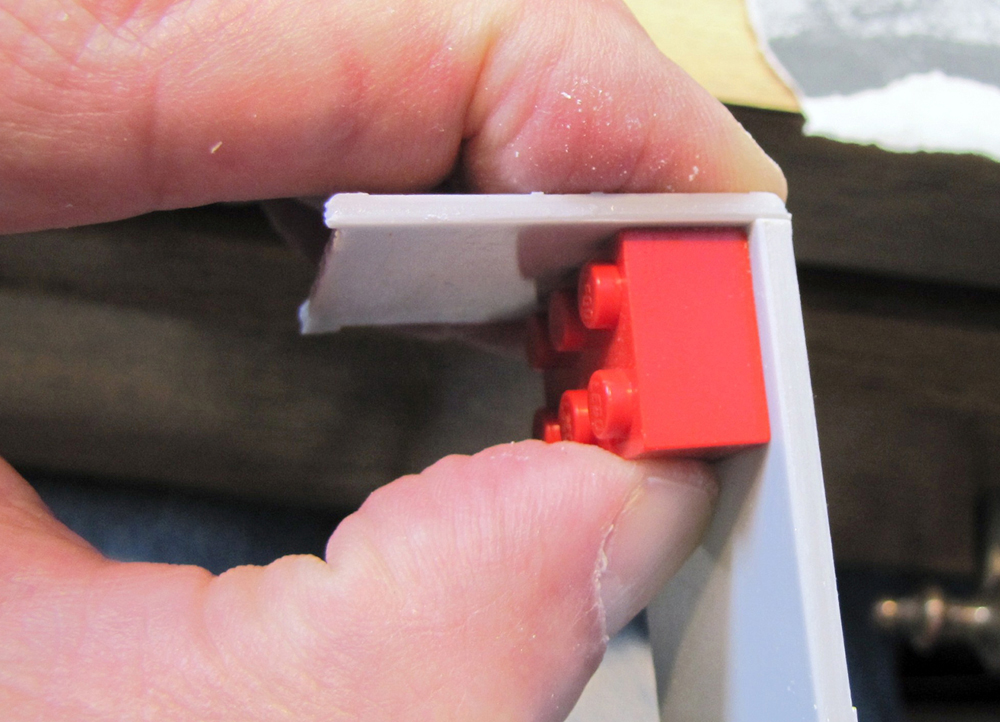
“I work on a piece of plate glass to make sure each block is aligned perfectly,” Charlie noted. “If a block is too long, I use a razor saw to cut it down for a good fit. You could also turn the block so its smaller face is toward the car end. But I prefer to have as much gluing surface as possible, so I trim the block for a shorter car. Once the sides and ends are cemented together, I have a strong basic box that’s square and ready to receive its roof and underframe.”
Sanding blocks
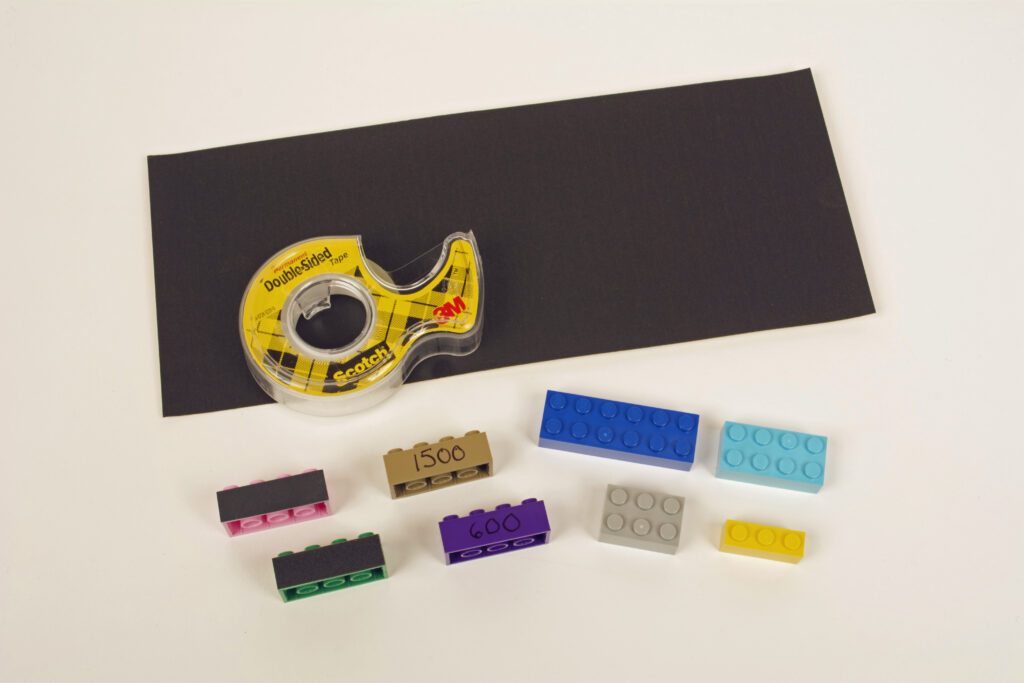
I came across this idea when visiting the Circus City Decals Facebook page. Matthew Welke, the company’s owner, shared how he made sanding blocks for a project he was working on.
“I then came up with a plan to use a Lego brick, which was small enough to work the tight areas but stiff enough to leave a smooth surface,” Matthew wrote. “Double-sided tape on the Lego, then sandpaper attached to that, gave the perfect tool to finish the job.”
After seeing the Matthew’s post, my son and I drove over to Wapi Bricks in nearby West Bend, Wis. The store has a well-stocked parts section for buying individual bricks and accessories. I purchased some bricks in various sizes and colors. My thought was each color could represent a different sandpaper grit. If you don’t want to go that route, pick a single color and write or scribe the grit on each brick.


When using LEGOS, remember to wear shoes. There is no pain like stepping barefoot on a LEGO. Any parent will tell you that…
My dad always insisted on me to use my Legos on my HO scale layout, I told him he was crazy due to the scale difference and I would be laughed out of the hobby.
Thanks for giving me new ideas when building buildings now
I have used Lego bricks to build numerous structures on my outdoor 1/24 scale layout based in Southwest adobe styles. I simply use spacle and then texture paint to mimic the adobe.
It is fast, easy and ages well. For example, see my structure of the Chimayo Santuario on my webpage here: https://www.rfrajola.com/trains/trainlinks.htm
Excellent article. I have been using Legos as interior bracing on plastic structures and as squaring jigs on wood structures.
I also am using the lego gearing and crank to move my HO scale “armstrong” turntable. Those gears are amazingly tough, but I do have a couple of spares.
I made a couple of corner-square jigs with legos that come in handy when building structures.