


By Allan Gartner
The Advanced Control Module from Walthers will work with DCC systems capable of controlling accessories, such as turnouts. Your system will need at least one throttle that you can set thrown/closed, on/off, 1/2, or whatever your system calls it, as needed. Systems where the throttle only allows you to toggle from the previous state won’t give you the flexibility you may need.
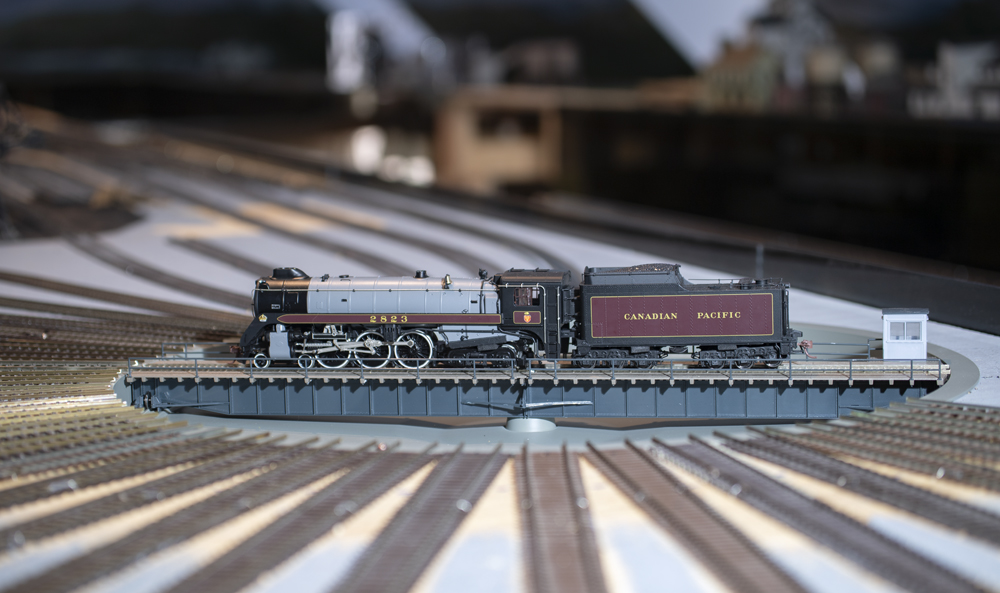
Walthers’ ACM, part no. 933-2321, can be used on Walthers turntable models 933-2618 (N scale 130-foot), 933-2860 (HO 90 foot), 933-2851 (HO 110-foot), or 933-2859 (HO 130-foot). These are recent models and have a blue control box (see figure 1). If you have the older turntable with a gray controller, you’ll have to buy a new turntable. This older model can’t be upgraded.
In setting up the module, you will associate turnout addresses with track numbers up to 99. On my layout, address 201 moves the turntable to track 1. A turnout address “1 thrown” moves the head (end with the shack) of the turntable to track 1. A “1 closed” moves the tail of the turntable to track 1. I use 233 to rotate the turntable 180 degrees from wherever it is.
Wiring the controller
Wiring the ACM is simple. (figure 2). You connect the module to your existing Walthers turntable controller with the supplied cable. Then you connect the module to your DCC track bus with two wires. The wiring for DCC control of your turntable is done.

All you need to do now is associate accessory addresses with your tracks. As delivered, the module has a jumper on two pins labeled “DCC Enable.” Move it to the pins labeled “DCC Learn.”
Using your turntable’s controller, move the bridge head end to track 1. Then on your DCC throttle, enter the address you want to use for that track and enter “thrown,” “on,” or whatever your system uses for accessory commands. In my case, I keyed in 201 and hit thrown. The turntable bridge will execute an “alignment jog” to acknowledge receipt of the command. Continue on in this manner with the rest of your tracks.
You also have the option of setting up an accessory address that will make your turntable do a 180 degree turn wherever it happens to be. To do this, move your turntable bridge to an unused position and enter the accessory address you want to use for this.
When done, take the jumper off “DCC Learn” and move back to “DCC Enable.” Test every track and make sure it works the way you intended.
Be sure you don’t have any devices on your DCC network that are sending the opposite turnout command like “closed,” “off,” or “diverging.” The module uses the opposite turnout command to delete a track association. If you have any devices that do this, disconnect them while you are setting up your module.
I initially tried to use addresses 1001 to 1033. I observed the jog I expected for each address, but when I was done, I had several addresses that didn’t work. I tried several times. Each time, it appeared to take the address and gave me the jog but didn’t work in the end. After contacting Walthers, I figured that something was sending a closed command while in learn mode. I tried to figure out where these phantom commands were coming from but couldn’t. Trying a different address range worked —201 to 233 are fine.
There are a few other details you should be aware of. Your track numbers don’t have to be in order. If you do change things with your turntable such as adding a track, you’ll have to cycle the power to your module to pick up the new track numbers. You’ll also have to teach your module the new track. If you add a new track between an existing track and want all your track numbers to be sequential, you’ll have to re-teach your ACM all the changed track numbers.
Additional options
The ACM has a lot of other non-DCC capabilities. They can be used in conjunction with DCC control or instead of DCC control.
You can control the turntable with an Arduino, a Raspberry Pi, or any computer.
You can control the turntable with up to 24 switches – one for each track. Perhaps you have an old turntable that you controlled this way. You can adapt these controls to your Walthers turntable. You can also use rotary switches, encoders, or even a keypad where you key in the track number. Finally, you can make a control panel of your own choosing that mimics the buttons on the Walthers controller.
The module can drive up to 24 light-emitting diodes (LEDs) to identify your stall tracks. You can put in a two-digit display to indicate your stall tracks, just like the one that comes with your turntable controller. You can put the display in your own panel.
The module has 24 low-power outputs that can drive relay cards. Each relay provides power to its respective track. I found relay cards at All Electronics (allelectronics.com) that contain four relays. At $8 each, this was by far the best deal I could find. You’ll need a 5V power supply to power the relays. You will also need to route the signals from the module’s 26-pin connector to each of the relay cards. No single supplier had everything I needed.
More information is available from the Walthers’ website [hyperlink: walthers.com/cornerstone-advanced-turntable-control-module-for-dcc-operation]
Tips
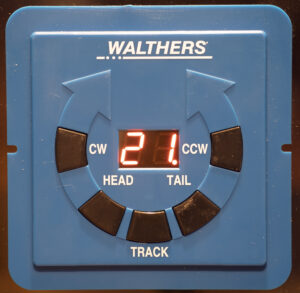
- Neither the turntable nor the four-pin green connector is labeled as to which terminals get DCC power and turntable power. Check when the turntable is upside down and reference the photo in the turntable instructions. Mark your connector right away (figure 3).
Figure 3: Take note. Mark your connector so you know which terminals get DCC track power and which ones get power to operate the turntable.
- When attaching the DCC track bus to the turntable bridge, there’s no way to know the track polarity. If a locomotive shorts out when leaving the turntable, reverse the wires going to the turntable.
- On your layout, mark the circle for the turntable pit, the home sensor location, and – most importantly, before you do any sawing – the locations for the anchor screws around the perimeter. If you don’t, you’ll lose your center reference point when you cut out the turntable opening.
For all the links in this column as well as, wiring turntable tracks, go to my website at: https://wiringfordcc.com/dcc_currents.htm.


Allan, this article was timely for me because in March of this year I converted an older Walthers gray controller 130′ turntable to DCC control for a fellow who has limited fine-motor skills. I used an old Digitrax DH-120 decoder, a Model Rectifier reverser, and an RJ-45 Jack. It does not stop at pre-selected locations but is speed and direction controlled by the Digitrax throttle so the user can align the bridge track wherever he wants. He was frustrated that the old controller failed to keep the alignment info. It is simply a small wiring change of a few wires in the bridge and a small terminal block under the layout. You only need access to the track power bus and to program an address in the decoder. No need to buy a new turntable.
If you would like the wiring diagram or pictures, let me know. Mark Couvillion 409-238-0026 mark_couvillion@hotmail.com