How to build a plywood train table: The train table is a means to an end. We want to build it carefully and well, but we also want to move on fairly quickly to running some trains.
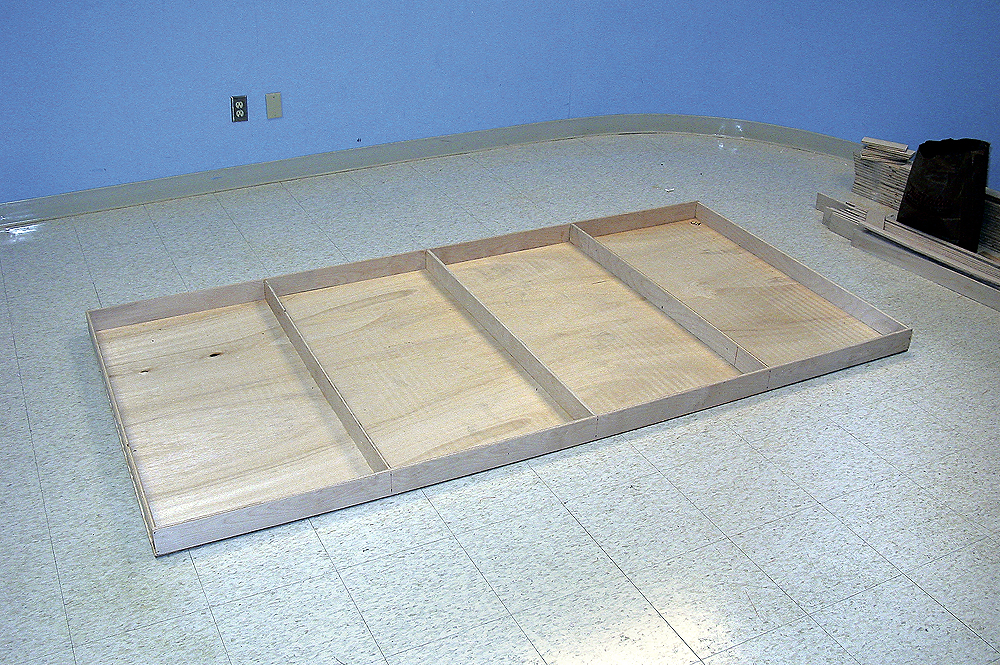
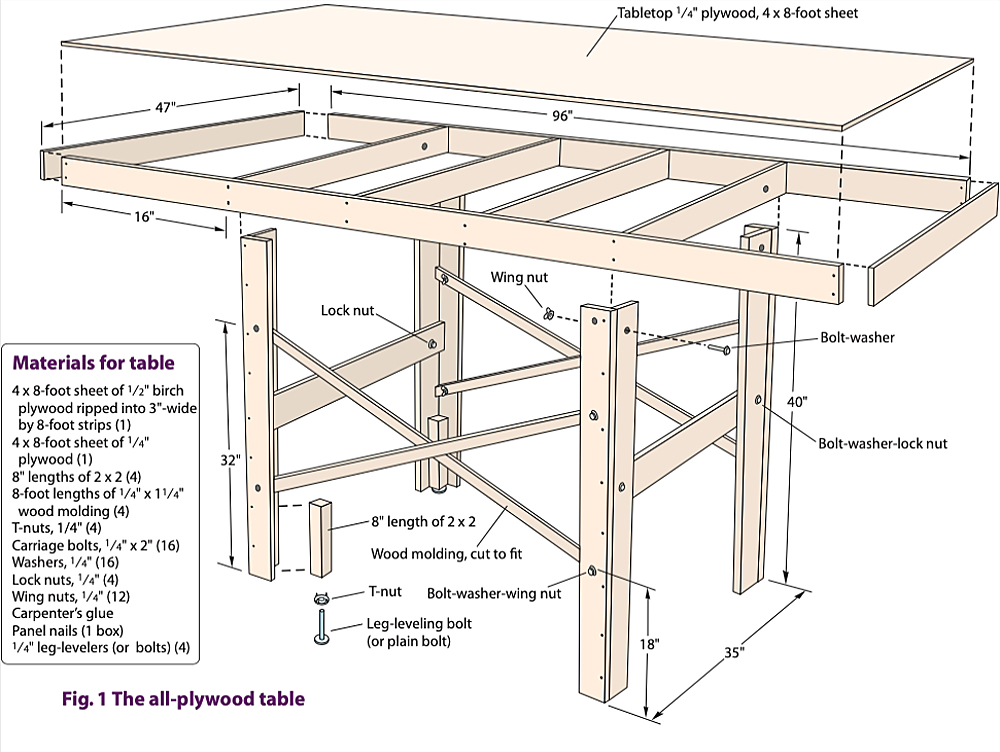
Good, straight, knot-free dimensional lumber (1 x 3s or 2 x 4s) has become expensive and difficult to find, so Jim Hediger, former senior editor of Model Railroader, devised the all-plywood table shown below. If you’re building a small layout, you won’t find a better table design than this one. It’s been used for three staff-built project layouts built by Model Railroader, and the entire staff swears by it.
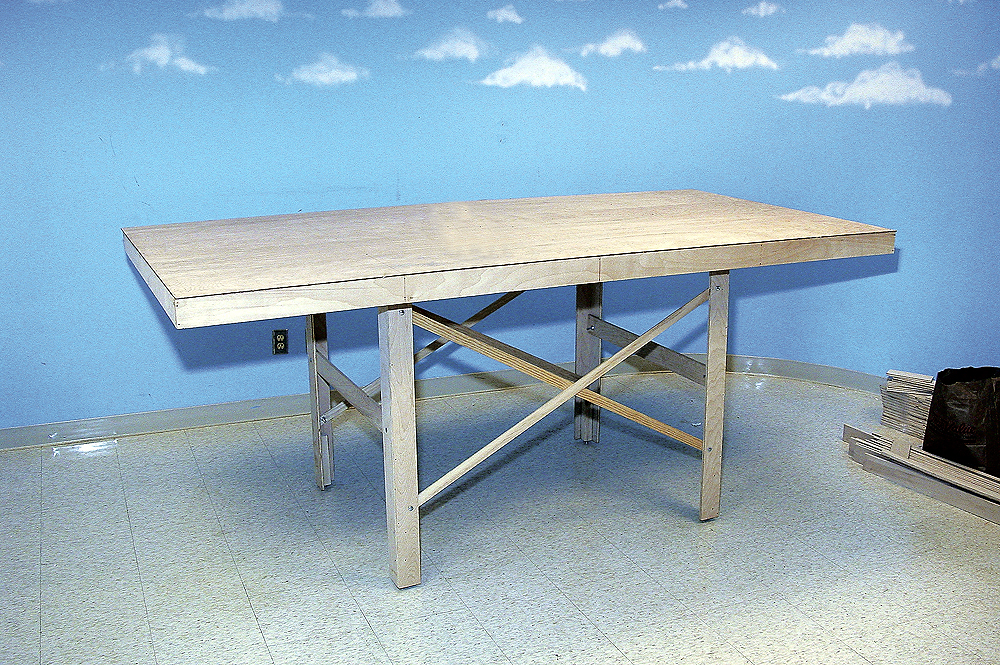
As shown in the diagram, Jim uses 3″-wide strips of 1⁄2″ birch plywood cut lengthwise from a 4 x 8-foot sheet. It’s much easier if you have the lumberyard rip the plywood into the 3″-wide by 8′-0″- long strips. The charge for this service is usually reasonable, and the strips will be perfectly straight.
Jim uses the same 3″-wide plywood strips to make the layout legs, rather than using the more-traditional 2 x 2s or 2 x 4s. Jim assembles the top frame and legs with small paneling nails and yellow carpenter’s glue, rather than the more-traditional glue-and-screws. Once the glue sets, it’s doing most of the work. The nails serve only to clamp the surfaces together for a tight bond and to hold the pieces in alignment.
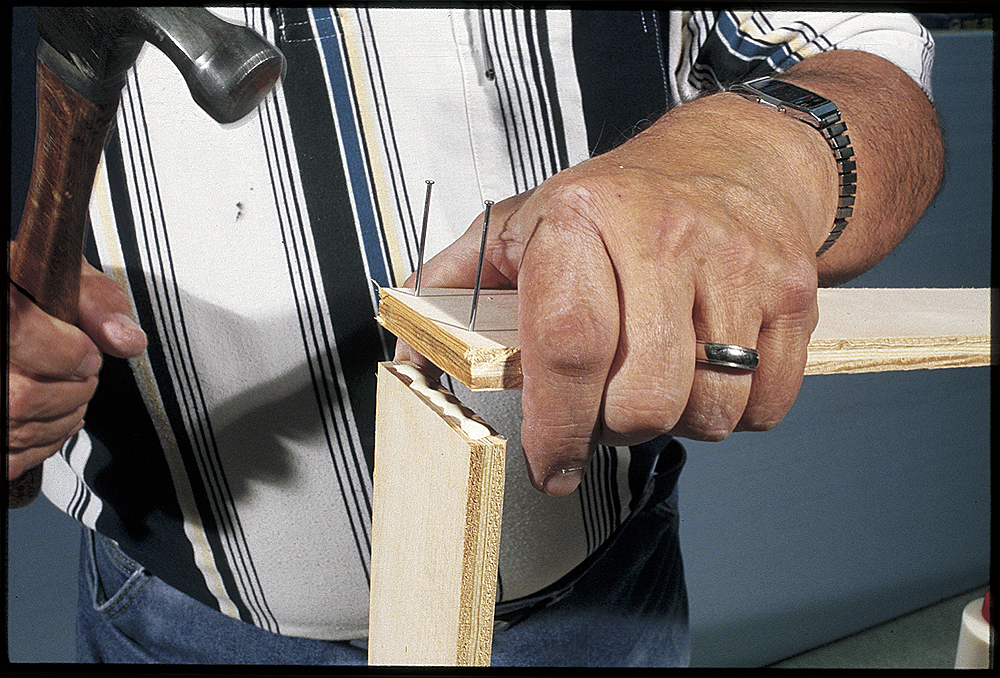
Driving a nail through a piece of 1⁄2″ plywood and into the edge of another 1⁄2″ piece can be challenging. It helps to use a large framing square to draw lines that indicate where the nails should go. If you still have a problem, drill small pilot holes. You should definitely drill pilot holes when you’re working near the end of a piece, otherwise you might split it. If you’re unsure about the tools needed to construct your train table, there are resources available on Trains.com to learn more.
When you’re done, you’ll have a light but strong train table and you’ll be all set to install the legs.
The legs are made by nailing 40″-long plywood strips together with short lengths of 2 x 2 added to the ends of the legs with T nuts to hold leveling screws. The train table’s diagonal leg braces are made from 1⁄4″ x 11⁄4″ wood molding.
Now that you know how to build a plywood train table, let’s run some trains!
Share this article