


Signaling has entered a golden age in the hobby. More options exist now than have ever existed before for modelers to add signals to their railroads. Resources and online groups allow access to information and photographs at an unprecedented level. Possibilities cover the full range of options from a single stand-alone manual signal to a fully interlocked remote-controlled system for your railroad. Let’s look at how to choose signals for your layout.
Modelers who would like to include signals have a lot of choices and places to begin. There are so many choices that it can be intimidating, so how to choose signals for your layout?
We can begin by learning more about the prototype. Railroad signals exist to provide information to train crews. The messages can include specific information on the route ahead, including speed or route information. On different routes signals may convey authority to occupy a track, protection from other movements, or both. How a signal appears is called the “aspect.” This includes light colors, blade or light positions or patterns, and whether there is a number or name plate on the signal. Each aspect is in the railroad rulebook and is singularly linked to specific rules that affect train movement. The information that the aspect describes is called the signal “indication.”
For your railroad, the basics include what sort of signals you would plan to use, and where you would install them.
It can be overwhelming to think of the system as a whole. However, across all the variety we see on the prototype there are a few constants we can use to help plan for any railroad.
Which signal should I use on my railroad?
There are general styles of signal that are common on the prototype in different eras. These include manually operated signals and automatic signals. Both types can be mechanical or electromechanical in nature.
Manual Signals
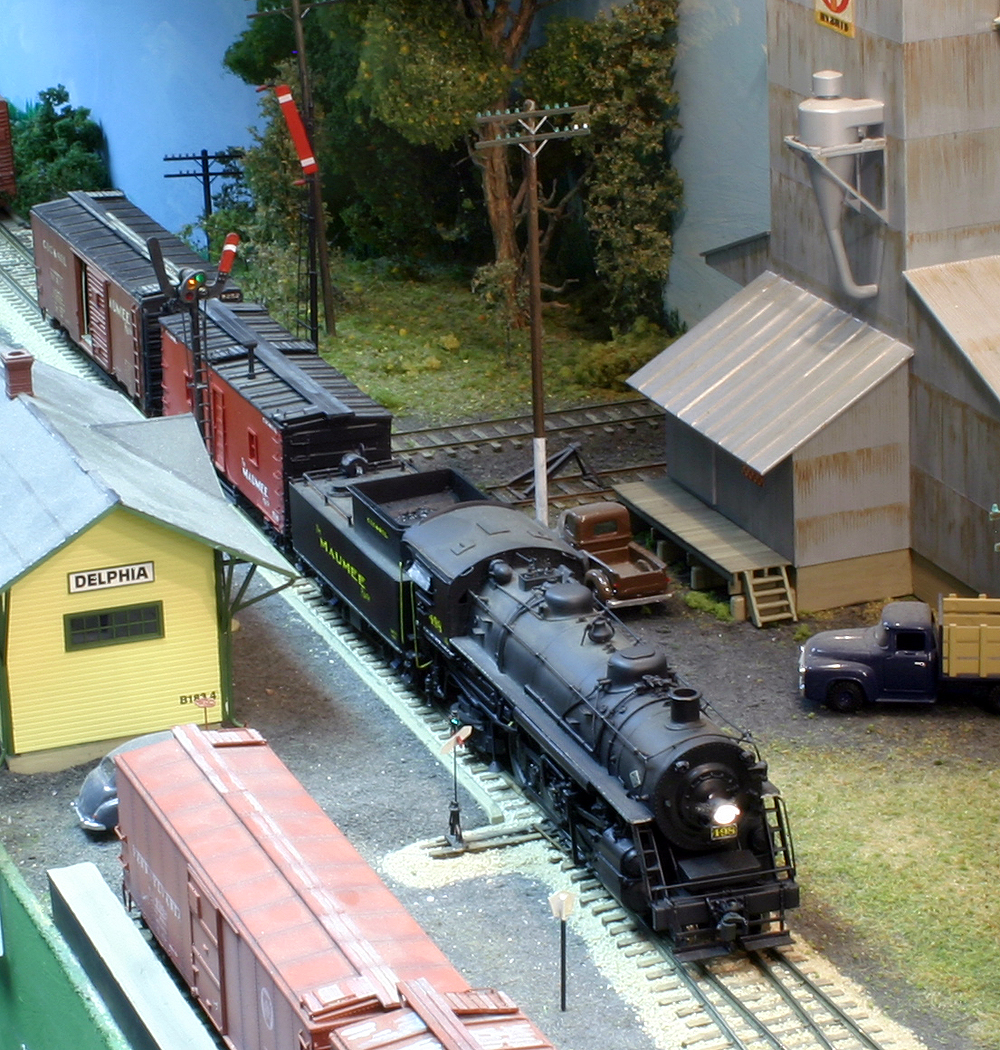
Early railroads used manual signals at depots to communicate requirements to crews to stop for paperwork, or that the track ahead was clear. A manually controlled signal can provide a nice photo prop or function for part of an operation. Manually controlled signals are simple to install and can also provide a nice addition to a scene.
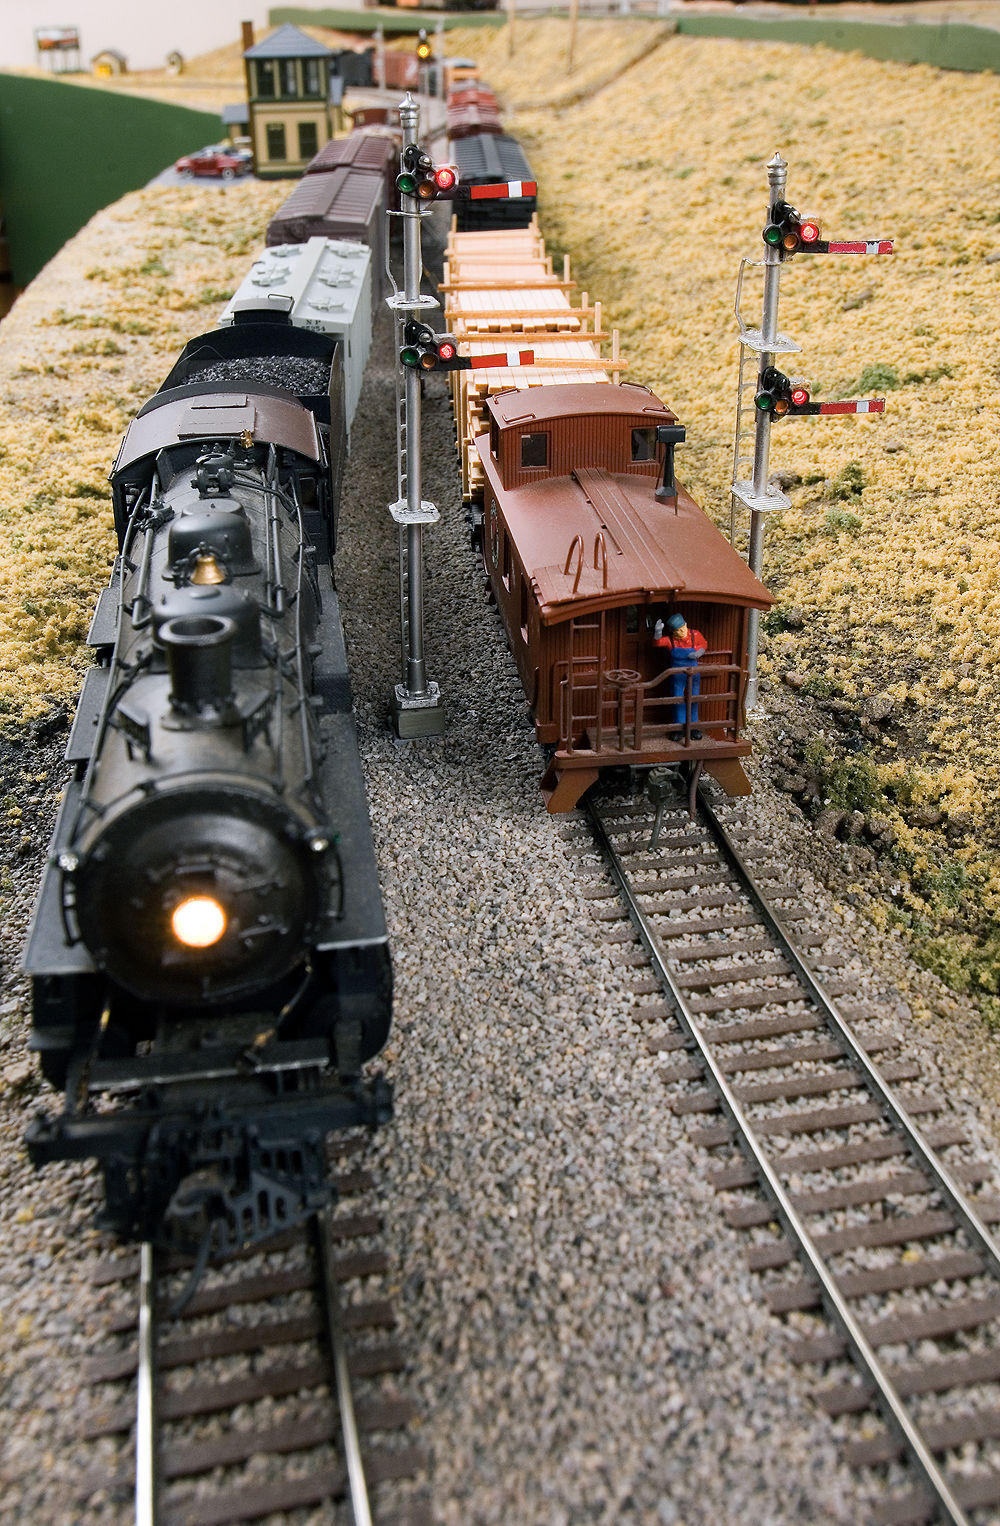
Some of the earliest manual signals were semaphores, so named as a nod to the flag signals used in ocean shipping and military communications. A semaphore blade set in a horizontal position was defined as a stop signal, preventing equipment from running into misaligned turnout points or other equipment, or signifying to a crew that they needed to stop for other reasons, such as receiving a new written order.
Early versions were purely manual, and later versions were mechanical and later electromechanical. A handful of automatic semaphore signals still exist in revenue operation as of May 2023, centered near Wagon Mound, N.M., on the original main line of the Atchison, Topeka & Santa Fe.
Another early signal on a number of American railroads was a ball signal. These consisted of a large hollow metal ball mounted on rope and pole with pulleys. The ball could be manually raised high in the air or lowered to the bottom of the mast by an employee. A lowered ball meant “stop.”
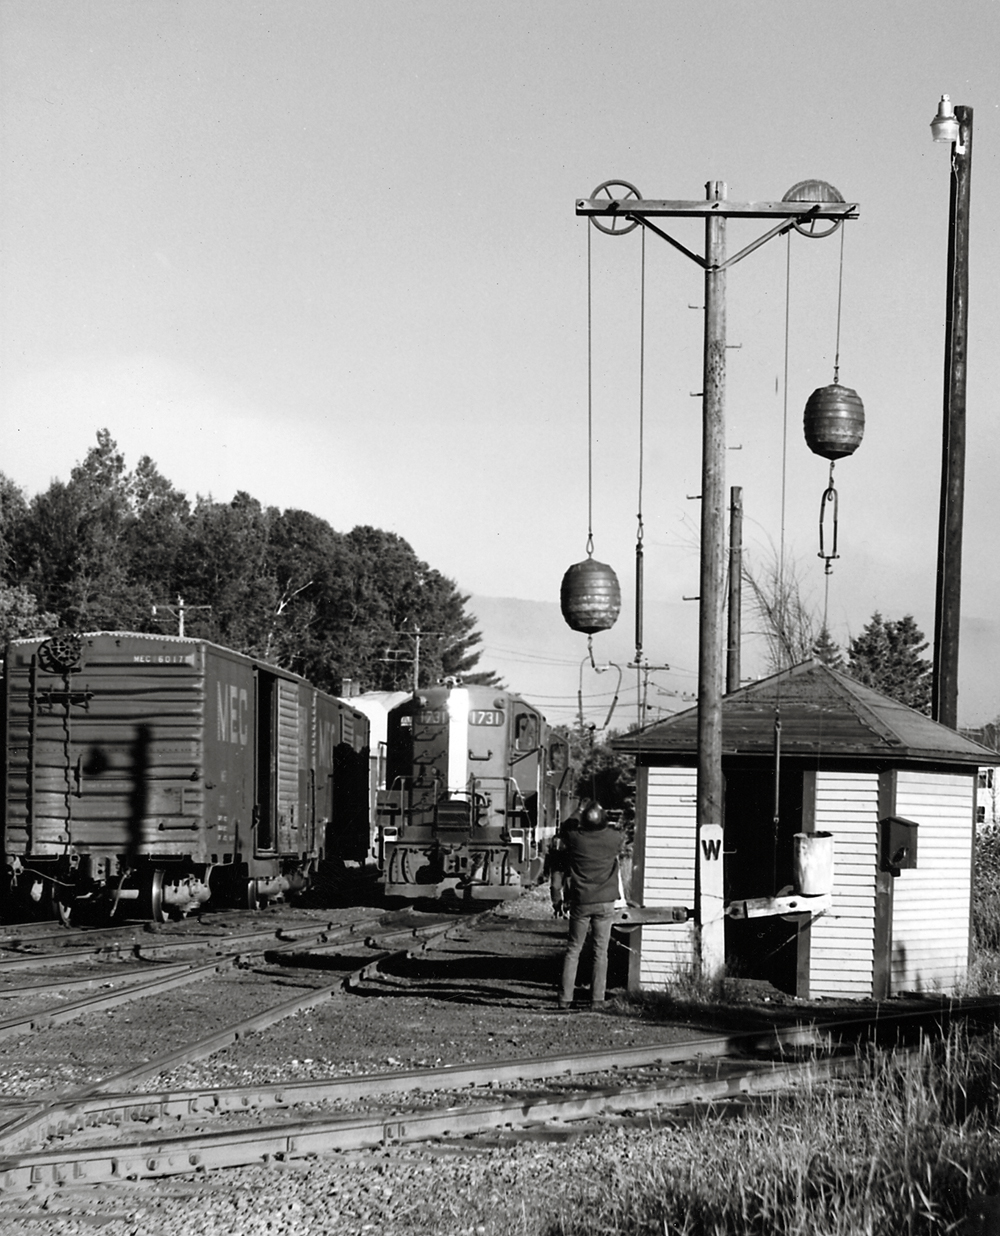
The ball in the high position signified the crew that they could operate past at speed, giving rise to the popular term “highball,” which is still heard today.
The heavy mass of a train requires a long distance to be able to stop. Therefore, railroad signals needed to be visible over long distances. Rather than a simple “stop” or “go” signal, different meanings could be added to improve operations.
Lighted signals and automation
With the early development of trains running at night, the idea of lighting signals came to the forefront. The first signal lights were kerosene lamps. Since these were simple lantern flames, they were relatively low intensity lights. Color at this stage was a huge technical hurdle which required decades of development to handle. White or clear lenses, giving the brightest, most visible light, were used to indicate a clear track ahead.
As electronic devices advanced, a huge leap forward in railroad signaling was developed – the track circuit. Track circuits used the rails and electric relays, consisting of a magnet and an electromagnet.
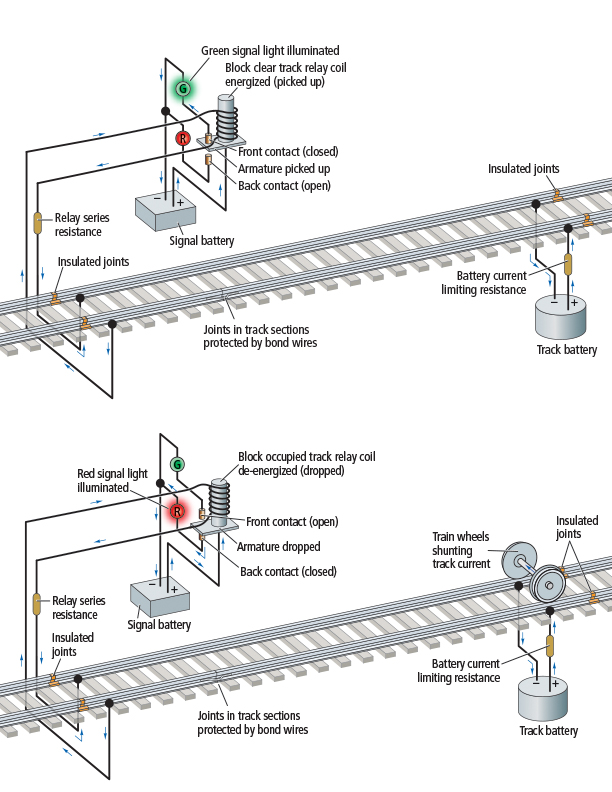
If both rails are attached to a power source, and there is no train in the block, the circuit is complete, and the relay is energized. The wheels and axles of a passing train connect the rails, completing the circuit so that electricity flows across the wheels and axle. This short-circuits the relay, which is then de-energized and opens.
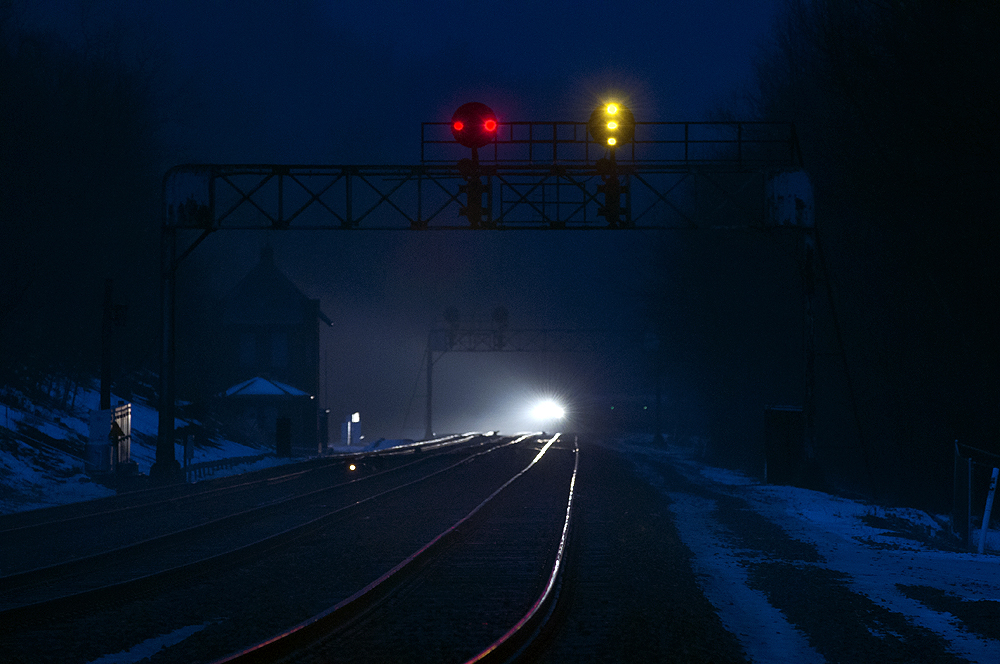
Each detected section of track is called a “block” of track. A closed relay keeps current flowing through the entire length of the block circuit and keeps the block showing unoccupied or “clear.” This principle is still in use on main lines worldwide today. In this manner the system can “see” if a track is occupied, providing a basis for signals that can protect trains from occupying the same track at the same time. Signals were built to show “clear” for unoccupied track ahead, “approach” or “caution” if the second block ahead was occupied, and “stop” if the block immediately beyond the signal were occupied. This enabled higher speeds to be used more safely than before.
Originally, “caution” signals were colored green. When the automatic block signal system was developed in the late 1890s, including a sequence of aspects, the three-signal aspect sequence then became white, green, and red. As years passed railroads discovered that if a green or red lens broke, faded to a lighter shade, or fell out, they would leave the appearance of a clear lens. With “clear” defined as a white light, such a failure would create a false clear indication. So, eventually, some designers chose to eliminate white from the primary aspects and green was substituted for “clear,” with the new aspect yellow (orange, amber) for caution, leaving red for stop.
How to choose signals for your layout
On your railroad, a number of possibilities exist for lighted signals.
- Semaphores with lights: A full semaphore blade signal, with a light bulb mounted behind the rotating base of the blade. The blade has three colored lenses arranged in an arc corresponding to the angle the blade is displayed so that only one is lit at a time. Green is for vertical, yellow for diagonal, red for horizontal.
-
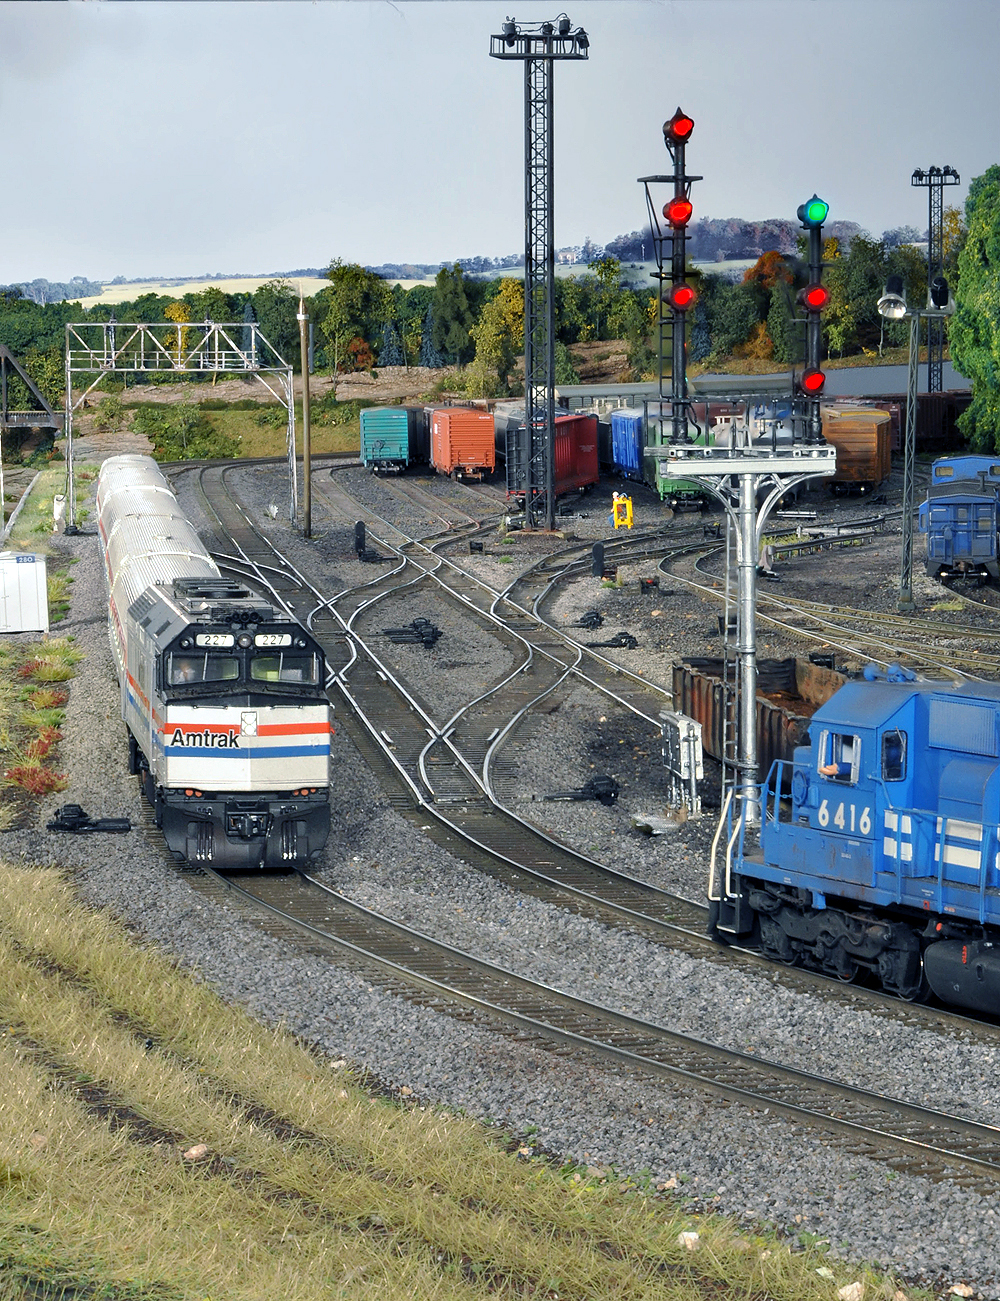
Lit semaphore signals on Steve Barkley’s Northern Pacific railroad. Bob Werre photo - Searchlights: Round signal heads using an electric light shining through a single lens, with colors that change via a mechanical system inside the signal head. Made popular by the New York Central, the Santa Fe and many other railroads. Common in the 1920s-1960s installations. Searchlights are what is modeled on my Onondaga Cutoff in HO scale.
-
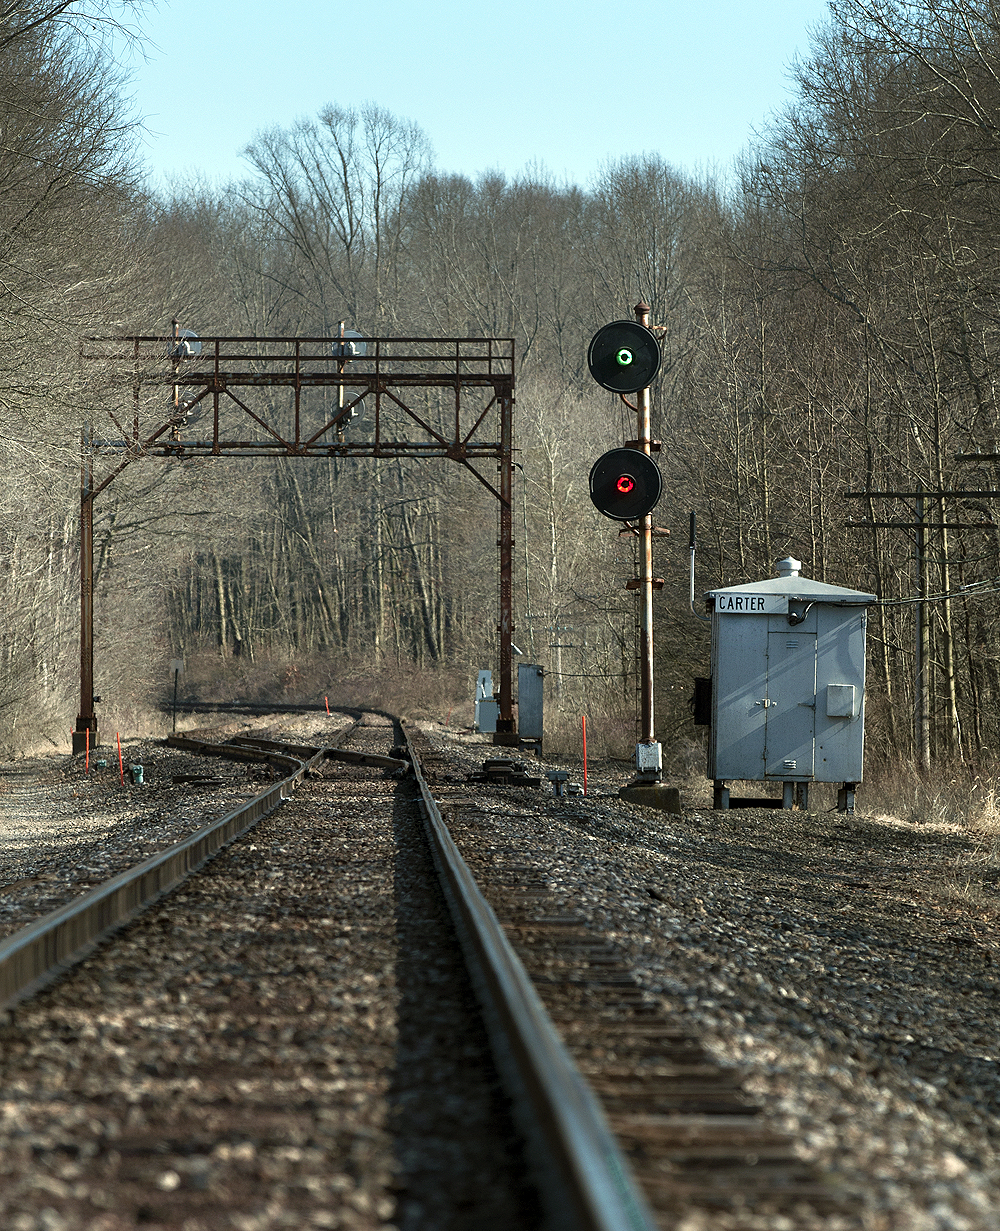
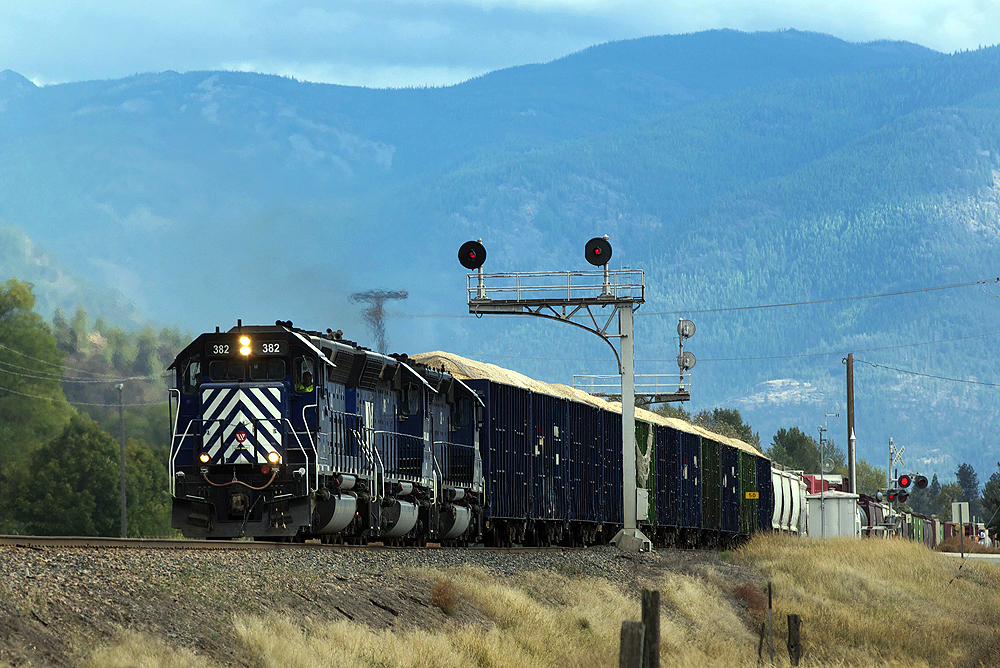
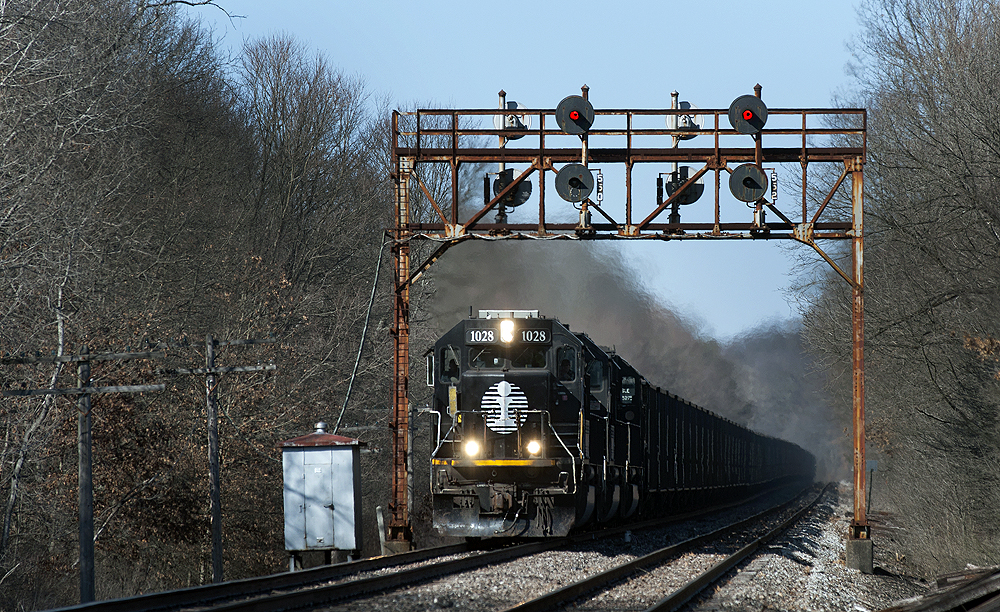
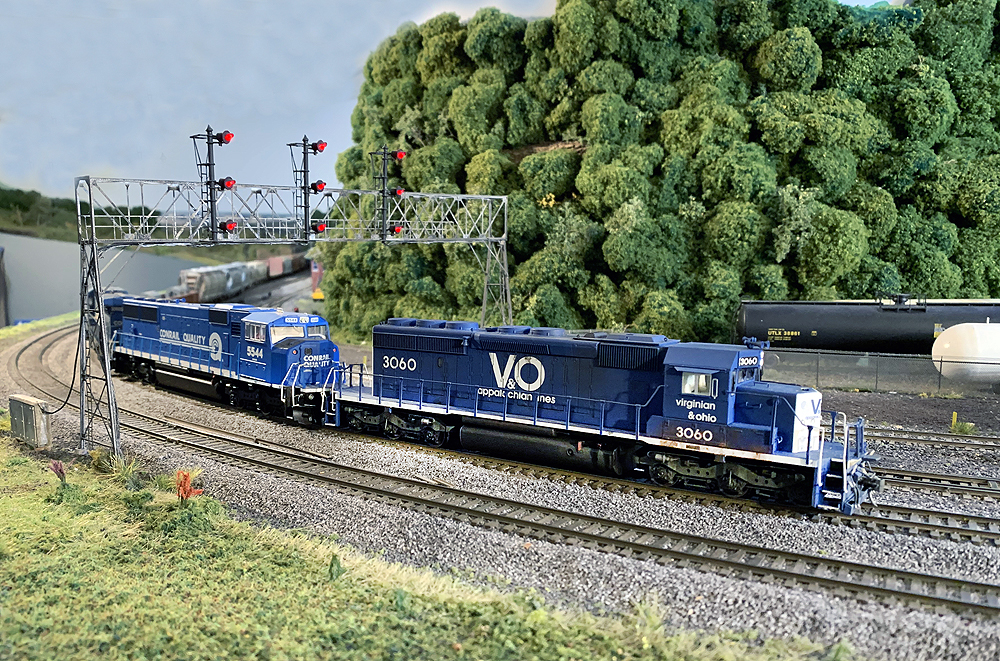
A clear aspect on the classic Union Switch & Signal searchlight southward home signal at Carter, Pa., on the Bessemer & Lake Erie in February 2020. Tri-lights: Round or oval signal heads with three separate lenses and light bulbs, where each lens shows only one color – green, yellow, or red. Some tri-lights existed early the 20th century on railroads such as the Union Pacific, Denver & Rio Grande Western, and the eastern “Anthracite Roads” (Jersey Central, Lackawanna, Reading, etc); today most new installations of signals are also a tri-light design.
-
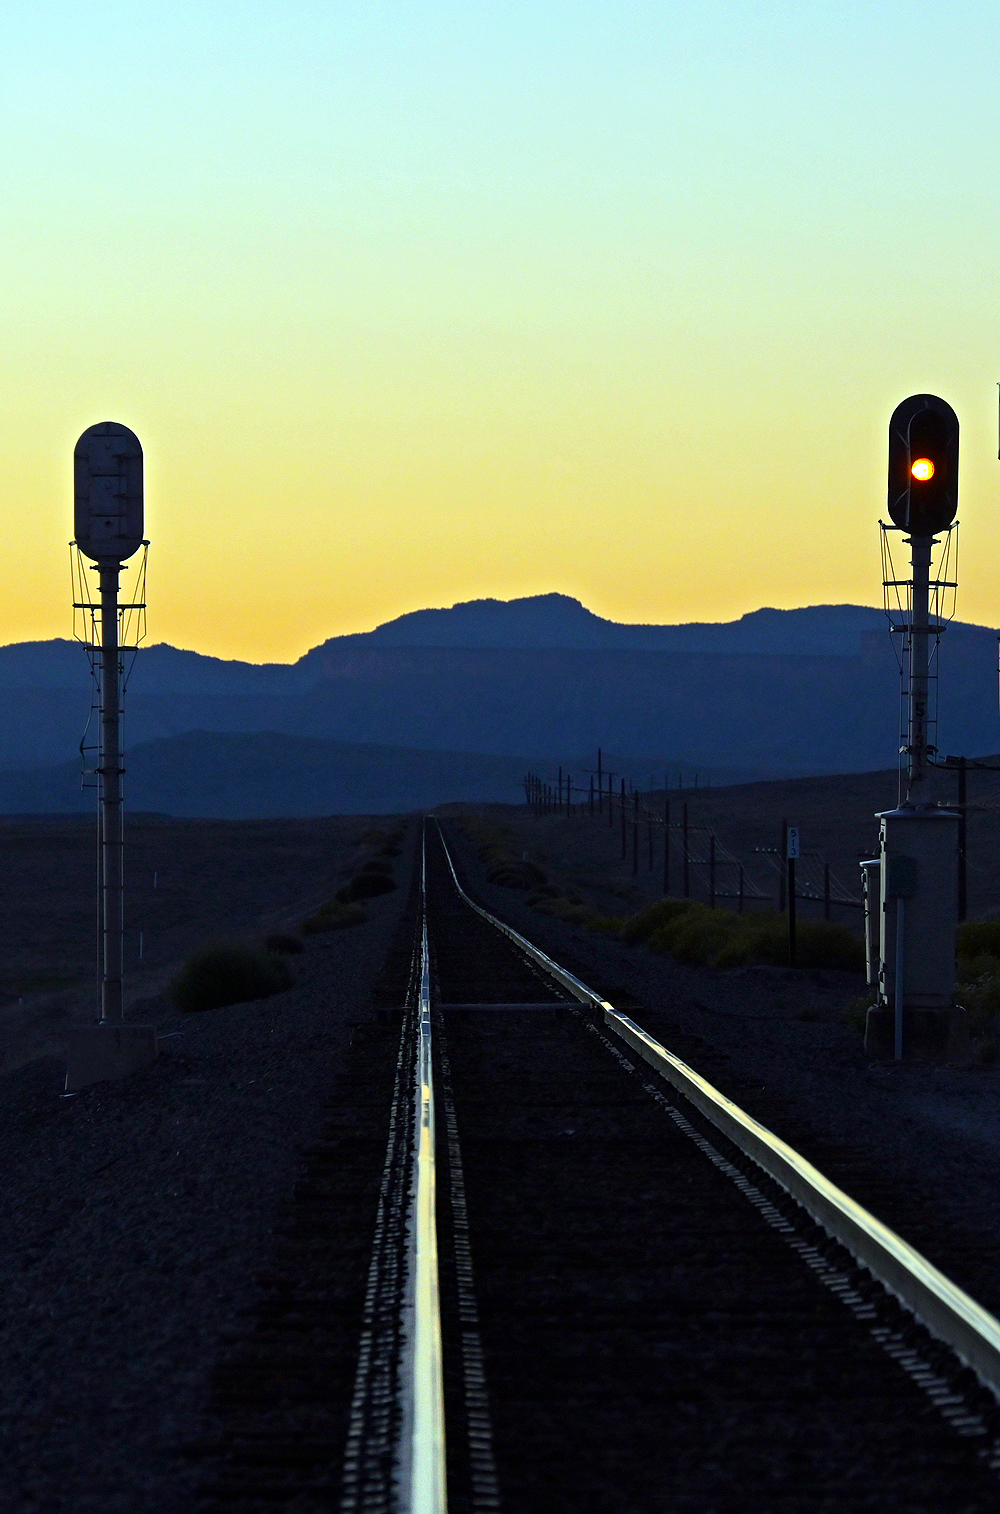
GRS color light signals east of Elba, Utah, show an advance approach aspect in October 2021 as the sun sets to the west behind the Book Cliffs. The yellow lens is the middle of the three on these ‘Type D’ signal heads. - Position Lights: Larger round signal heads with two or three lenses arranged in patterns on the heads made popular by the Pennsylvania, Norfolk & Western, and Baltimore & Ohio railroads. Green or amber lights in a vertical pattern signifies a clear aspect. Yellow or amber lights in a diagonal line signifies a slower speed aspect. Red or amber lights in a horizontal line signifies a stop aspect. Additional lights add meaning to other aspects.
-
Amtrak train No. 43 approaches MG Interlocking on Norfolk Southern’s ex-Conrail, nee-PRR main line, deep in the Allegheny Mountains on New Years Eve in 2018. Murky weather west of Altoona, Pa., does little to affect the appearance of former PRR position light signals showing a clear aspect on Track 1, while Amtrak comes west on Track 2, its movement protected by the stop aspect on the eastward signal bridge.
Like with other areas of model railroading, you will need to consider quality, scale fidelity, availability, and cost in deciding exactly which signals to use. The benefit to off-the-shelf units is they are relatively common at model stores and online and some are backed with a warranty. They are usually available assembled, wired, and lit, and some even come with plugs pre-installed for an easy plug-in system. Limitations to those systems are that many are one size fits all and don’t include options for customized heads or auxiliary lamps or bases, and they may not be close enough to scale to satisfy your eye.
The era you model affects how to choose signals for your layout
Signals can help set the era of a railroad. Like rolling stock, signals have changed over time on different routes, and you‘ll want to look at prototype photos to see what was working in your era on your modeled lines when you decide how to choose signals for your layout. Signals are much more long-lived than rolling stock or locomotives. Most signal systems installed on U.S. railroads lasted for at least a half-century before being retired in favor of improved and updated equipment. Many main line railroads in the United States first installed semaphore signals as automatic block signals in the early 20th century, which in many cases lasted until the 1960s when they were replaced with color-light signals.
Railroads that first installed color-light signals in the 1920s often did not replace them until after 2010, in conjunction with implementation of modern computer-based Positive Train Control. Some semaphores lasted more than a century. Some color-lights are now more than a century old as well. Note that the internal electrical equipment has often been revised, often more than once, but the external hardware, which is what we model, still looks the same. Signal aspects are often changed too, even though the large iron hardware stays the same, so the key here, if prototypic accuracy is important, is to obtain a copy of the correct rule book for the railroad you wish to model, for the era you want to model.
Locating signals
Signals can be installed for appearance in a standalone setup, or they can be included in a larger system where the signals are coordinated across your railroad. Signals on prototype railroads are only placed where needed for operations. It’s important to consider how your railroad operates – or how your modeled prototype operated – to properly locate signals.
Early manual signals were placed in front of the depot or tower in a location where the operator could change the aspect, telling trains to stop for written orders. Depot locations were well known, and so long as the signal was visible for approaching train crews, the system functioned as intended.
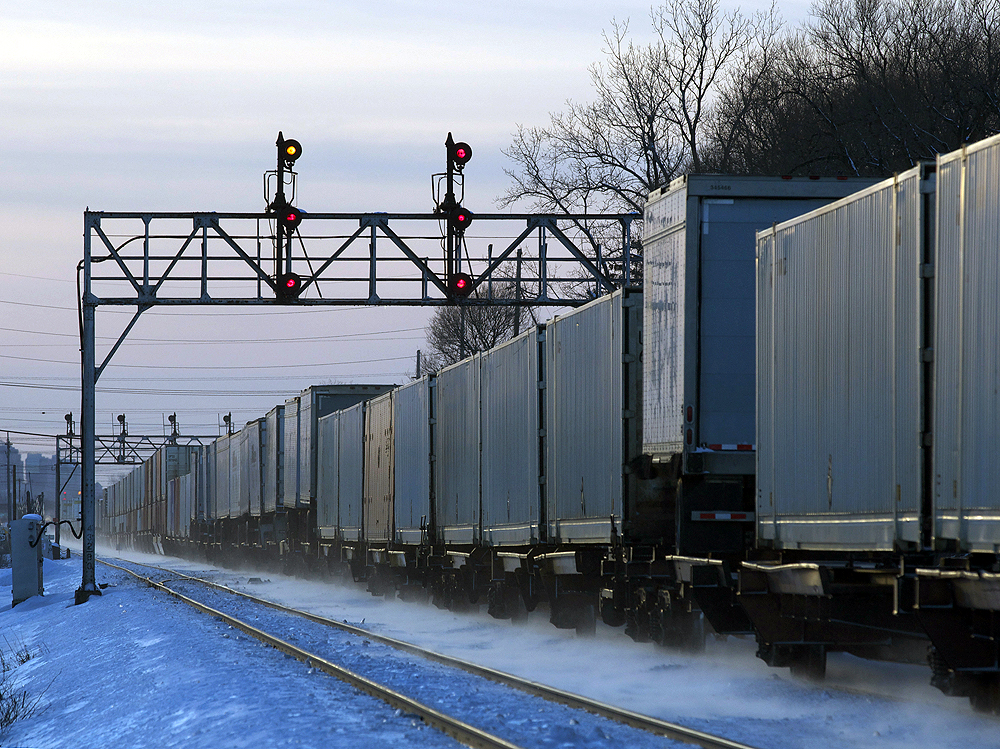
As new electric circuit signals were installed, the signals were placed on main tracks at all block boundaries. Signals are purposefully located on the engineer’s side of the locomotive – in the United States, that means signals are generally mounted to the right as a movement proceeds. Exceptions exist, of course, and include overhead bridges, bracket masts, and cantilever masts; left-mounted masts for adjacent track is common as well in two-track territory.
Signals are also placed at all the entrances to interlockings – locations where track switches and signals were controlled by a dispatcher or tower operator and mechanically tied together to prevent equipment from colliding. Early interlockings were manually controlled, while later installations were remote controlled after the invention of Centralized Traffic Control (CTC). These signals that governed entrance to an interlocking are called “home signals.”
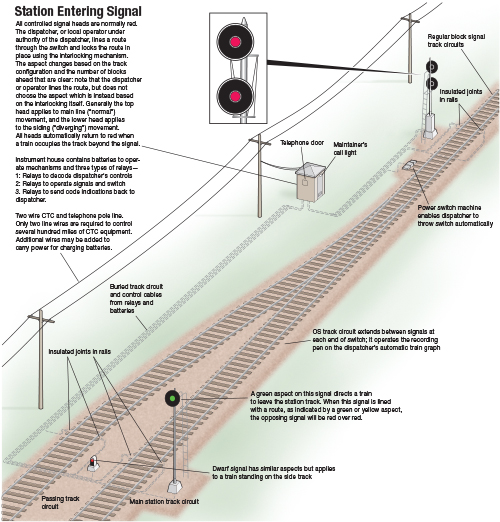 Controlled signals within an interlocking, but not at an entrance, are called “interlocking signals.” “Automatic” signals are located along tracks between interlockings or on routes where switches are manually controlled and are differentiated from controlled signals by a number plate or small sign affixed to the signal and considered part of the signal aspect.
Don’t forget that like any trackside structure, signals must be placed so as to be clear of passing equipment. It is wise to stick with the National Model Railroad Association (NMRA) recommended clearances for trackside objects when installing signals on the railroad.
Manufacturers
A wide variety of manufacturers produce signals in nearly every scale. Manufacturers of signals include NJ International, Integrated Signal Systems, Oregon Railway Supply, Atlas, Lionel, Bachmann, Walthers, Details West, and others. Different companies provide different factory-assembled models each modeler can review and select. Models are also available as custom-built to plans or photographs, a service offered by Integrated Signal Systems and others.
For larger signal systems, there are a variety of options as well. Integrated Signal Systems, Model Railroad Control Systems, Digitrax, Chubb Model Railroad Interface, Azatrax, RR CirKits, and Atlas all offer components and boards to model automated systems. Some of them offer “plug & play” components that can allow you to quickly develop a working system. If dispatcher-controlled signaling is your goal, further sophistication is possible with several of those systems as well as the Java Model Railroad Interface (JMRI) and the Crandic Automated Traffic System (CATS).
Highball!
Understanding options for signal installation and construction is more feasible now than it ever has been. Signaled railroads are being built across the hobby thanks to available information, modern products, and technology. Whether you are looking to install one signal or a whole system, it’s a great time to get started.
In my experience, working signals will become a major focal point and one of the first things visitors notice. Given the attention they receive, signals are worth your investment – much like your favorite locomotive would be, except signals are always there for each of your engines to pass by! Consider adding signals to your railroad – they are truly something you will enjoy looking at for years to come.
Learning more
A more complete overview on modeling railroad signaling and interlockings is available in Guide to Signals and Interlockings, available from Kalmbach Media.


Good to know. Also check the position of the turnout before you place the signals. If your siding is on the right side stick the signal on the left if the siding is on the left stick the signal on the right that way you will have clearance and your equipment will not bump the signal when they go through.
This practice changes by railroad and era. OSL and Southern Pacific which were owned by Harriman stuck their signals on the right and righthand ran from on their network. After UP bought all the Gould lines and the CNW all signals are on the left and the conductor reads the signals not the engineer and we now use wide body cabs so both of them can read them. Today with PTC all interlocking signals are on the left when facing a right hand siding for clearance.