


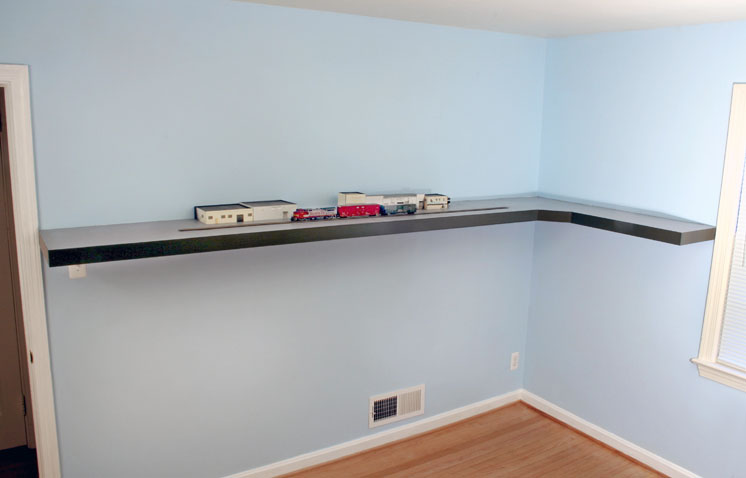
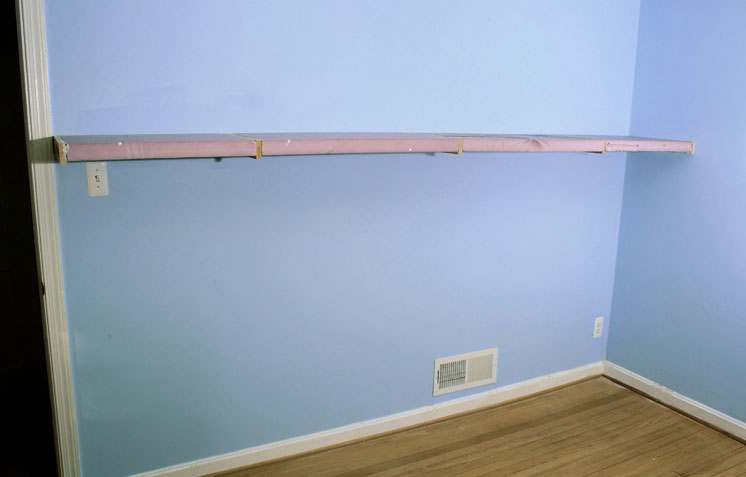
At the local hardware store I noticed various floating shelf designs. Because there are no visible brackets, this shelf support system is sleek and uncluttered.
For a wider shelf to work, the backing plate against the wall had to be harder than the soft pine typically used for layout benchwork. The soft wood could work free from the mounting bolts. I also needed to minimize the shelf’s weight, while making it rigid enough to resist warping.
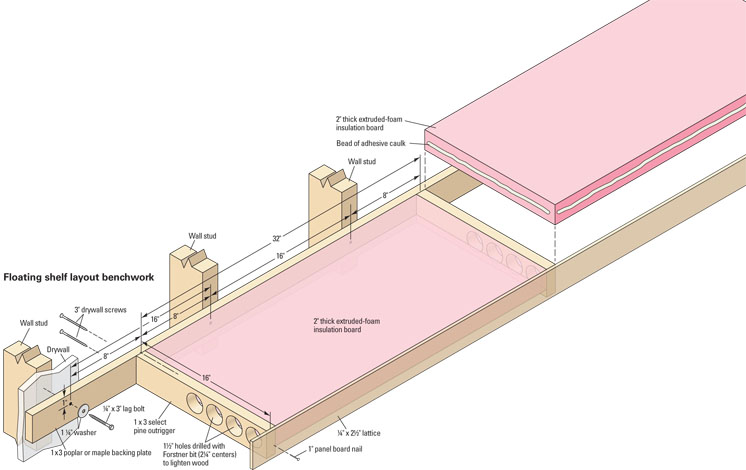
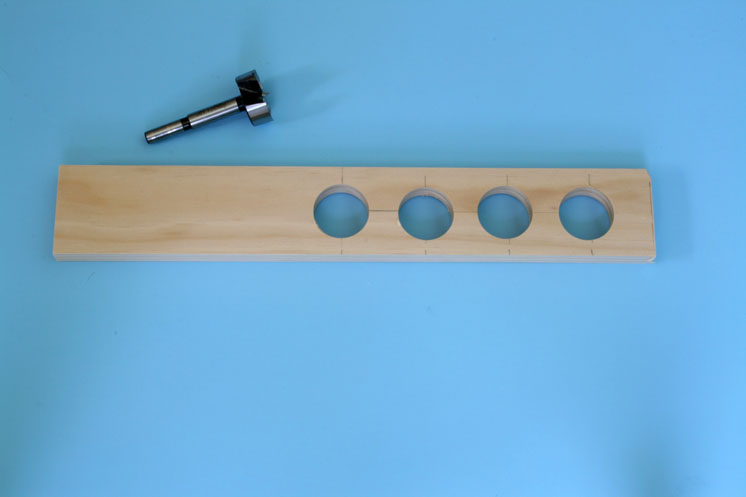
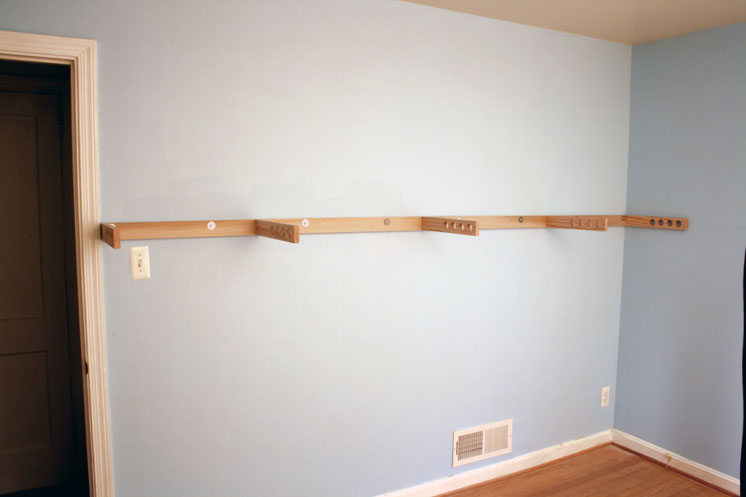
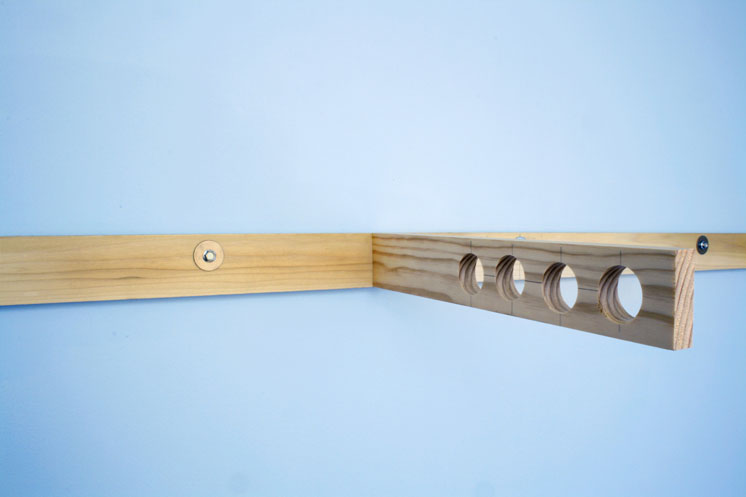
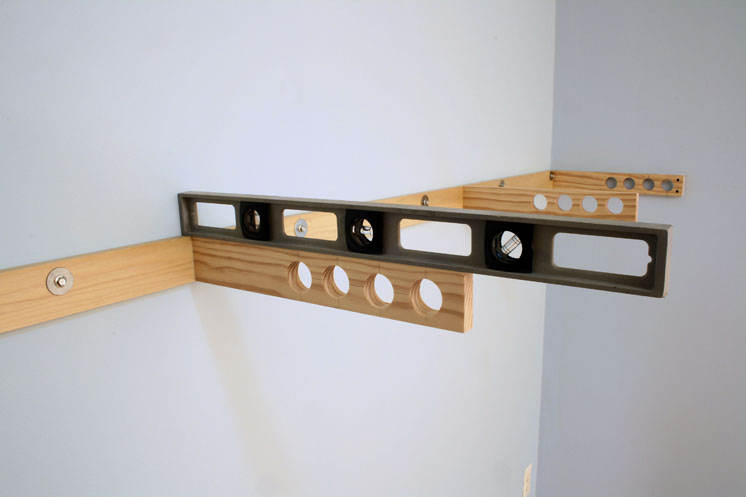
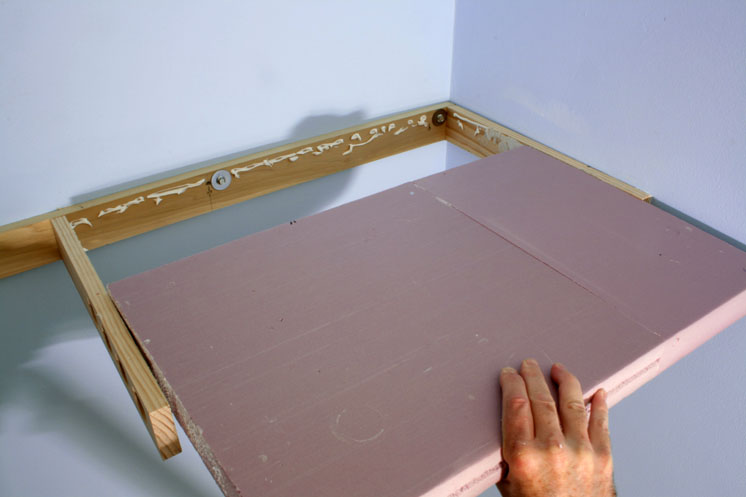
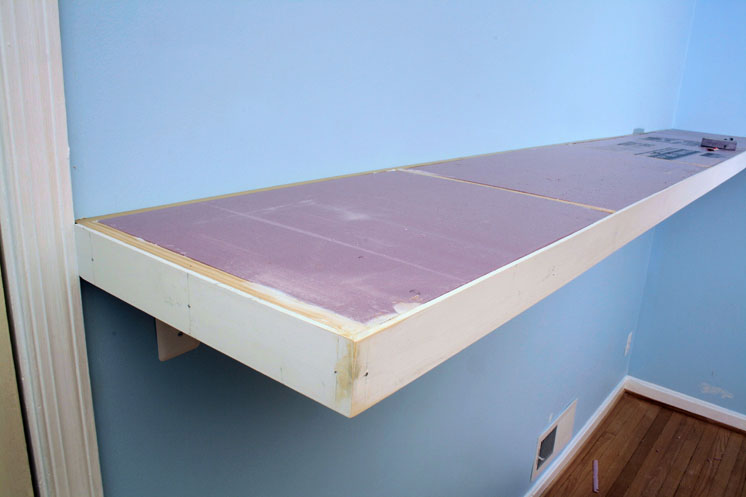
After some experimenting, I found a combination of materials that’s lightweight, stable, and visually clean. My floating shelf benchwork consists of a poplar backing plate, select pine outriggers, an extruded-foam benchwork top, and wood lattice fascia. Follow along as I describe how to build this sturdy and professional-looking shelf layout benchwork.
1⁄4″ x 11⁄4″ washers
1⁄4″ x 21⁄2″ lattice
1⁄4″ x 3″ lag bolts
1 x 3 pine
1 x 3 poplar
1″ panel board nails
2″ extruded-foam insulation board
3″ drywall screws
Foam-safe adhesive caulk


Thanks. I want to build a wall mount HO lay out in my living room and now I know how to mount it to the walls and not take up any floor space. Thanks again.
Wiring during or after construction? Surface mount or between layers of foam? Dcc or radio control?
I think if T-braces were used on the top of the backing plate to outrigger joint it would be possible to make shelves that could extend further than 16″. Also, if you want to have a more uniform surface for the layout, one might cut rabbets in the foam so that it sits more on top of the backer board and out riggers. If you don’t have access to a table saw or router, you could set a 1″ insulation board plug in the opening and then glue a 1″ board on top for an even more continuous surface. Not having checked it out, you would need to make sure that the glued 1″ to 1″ board would be as stiff as the 2″ solid board.
Great idea, it would work for me in a “dream” expansion of my layout.
Simple and nice!
I wonder if I can use a 1” construction with press board underneath?
Sweet idea David! Do you have any diagrams or website discussing your approach? Would love to read them!
I achieved about the same thing by using a “French Cleat” design. I built 18″ X 48″ boxes out of 1″X4″ popular, topped it with 3/8″ plywood, then sheet foam board. The layout is “U” shaped along 3 walls. It’s very stable, level, and does not slope or move.
I built my benchwork 2′ deep and in some places more in the fashion described. No legs on my entire layout 45′ main line plus staging area. maximum span 14′. used steel studs and a crimper for assembly, but screwed to the wall(s). have NO sag at any point. All open beneath for access to wiring, etc. and my roll around desk chair. Love it!
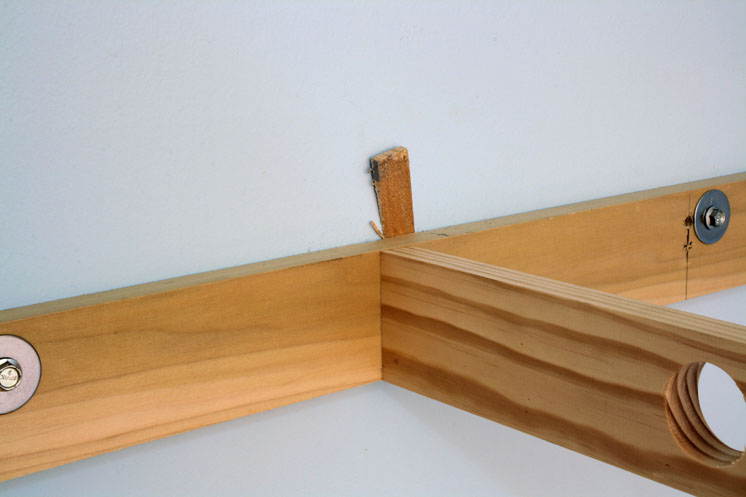
Great idea and article. I would suggest one change. Screwing into end grain in inherently weak. Instead, I would attach the outriggers with pocket hole screws from the outrigger to the backing plate.
Lance saves the day! Despite the fact I have a small compact basement I still plan to run my LGB D&RGW passenger cars in the room. A disadvantage of living in this apartment is that I have no access to the great outdoors to construct a garden railway. (Apologies to Marc Horovitz, LOL) Lance’s concept is the answer I’ve been looking for!
Item: I’d like to be able to view the entire contents of GMR 2019 on the website. Not all railroads modeled are lncluded.
Very clean look. The lower portion of the holes in the outriggers could also be used for wire runs.
Very nice. And very interesting. Can you show track plan? And any additional info? Is the final fascia necessary, or just for visual? If you don’t use a fascia, could the brackets be less than the full width of the shelf? Example: a 12″ shelf with 10″ brackets? Aluminum brackets? Just curious of what else can be done? Options are nice. A lot depends on what materials are available to the individual and where they live. Just curious. And thanks for this very illustrative article.
Hi Morgan,
You can see Lance’s track plan by clicking on the HO scale Los Angeles Junction under Related Articles above. His layout is also featured in Great Model Railroads 2019.
Thanks for reading,
Dana Kawala
Senior editor
Model Railroader magazine