How To Build a Model Railroad How to build a stow-away model railroad test track

How to build a stow-away model railroad test track

By Angela Cotey | April 12, 2019

| Last updated on November 3, 2020

Built on a compact 2 x 4 folding tabletop this model railroad test track holds two N scale track loops

Email Newsletter

Get the newest photos, videos, stories, and more from Trains.com brands. Sign-up for email today!

modelrailroadtesttrack
Tom Knapp’s workshop now sports this N scale standard and narrow gauge model railroad test track that folds up.
MRRRW0110_02
With the safety bolt retracted, Tom can lift the table out of its hangers and tip it up against the door.
MRRRW0110_03
The test track folds flat against the door, where it’s held by a magnetic latch mounted under the top edge.
modelrailroadtesttrackswitches
This group of slide switches and plugs is mounted on the corner of the tabletop so Tom can select the power supply for each test track.
modelrailroadtesttrackdiagram
Diagram showing the main components of the model railroad test track folding benchwork.

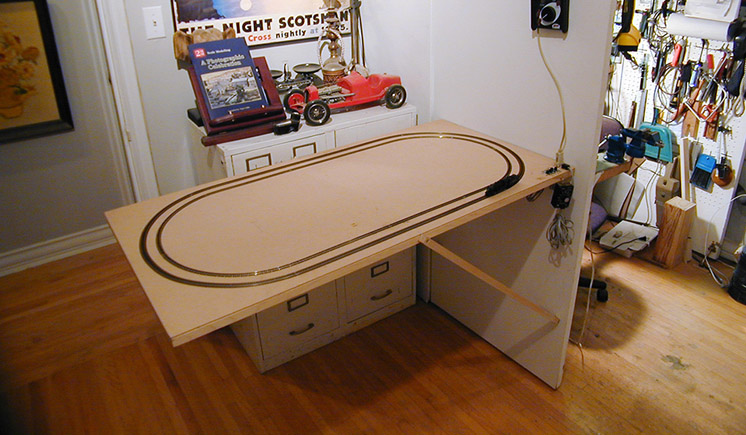
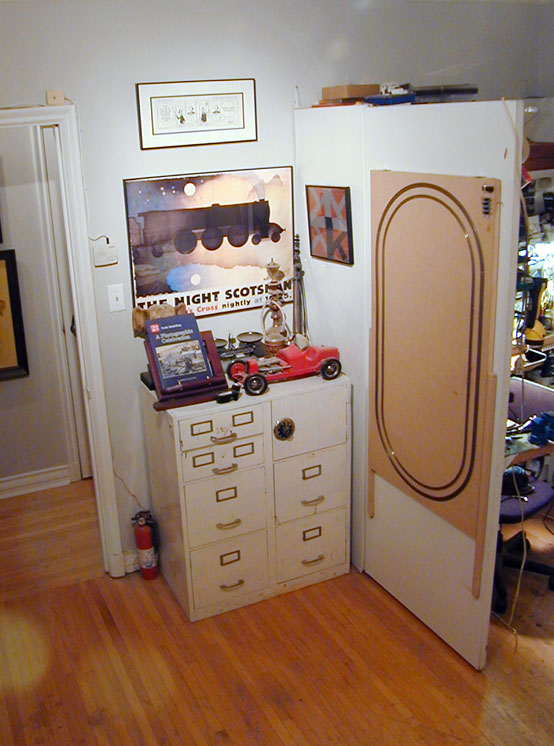
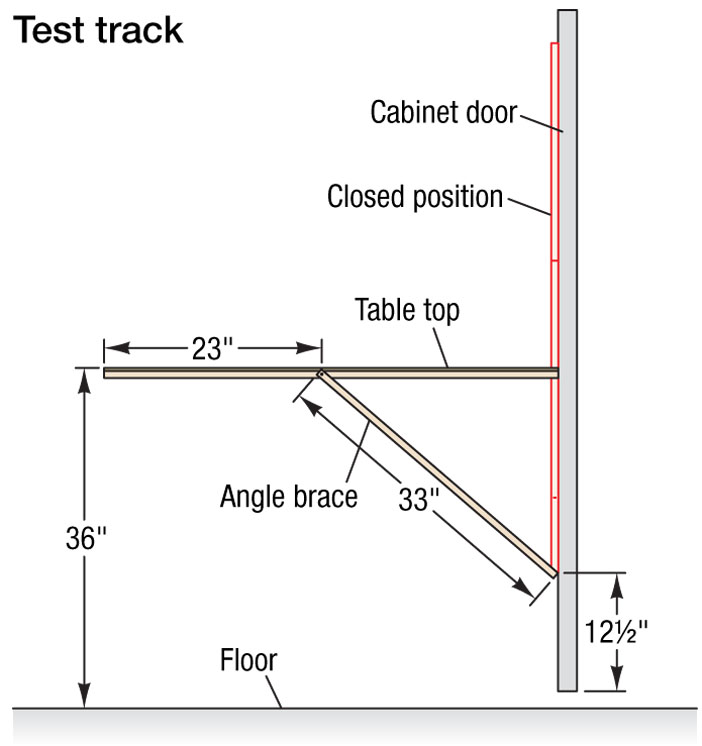
This handy folding test track is built on a lightweight 2 x 4-foot table that holds a pair of N-scale test loops – one for narrow gauge, and one for standard gauge. A pair of hinged angle braces and flush hangers support the open test track, and it’s held in its folded position by a magnetic cabinet latch mounted under the top edge.

I built the table shown in the photos and illustration from a 2 x 4-foot piece of 1⁄8″ hardboard that’s framed with strips of 1″ square hardwood glued in place. These strips are sold in 48″ lengths at home improvement stores. The angle braces are also hardwood strips. I mounted my test track on the door of the modular workshop cabinet I described in the April 2002 issue of Model Railroader.

I used Atlas code 55 flextrack for the N standard gauge loop, and Peco’s Z scale code 60 track for my N narrow gauge loop. The curves are 10½” and 9″ radius, and they’re tighter than those on my layout, so successful navigation of the test track ensures smooth operation.

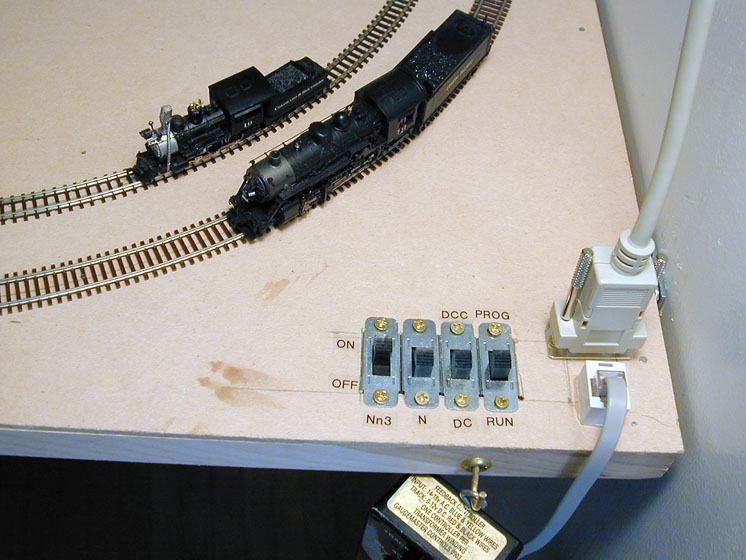
Both loops are secured with spikes driven through holes I drilled through the ties and hardboard. I spaced these fasteners at about 2″ intervals near the rail joints and curves, and about 4″ apart on straightaways. [Another possibility would be to secure the track with latex construction adhesive or adhesive caulk. – Ed.]

Four slide switches activate one or both tracks with a choice of either DC or Digital Command Control (DCC) throttles. When DCC is selected, another switch selects either the program or run output, and I added suitable plugs in the table top to connect either throttle.

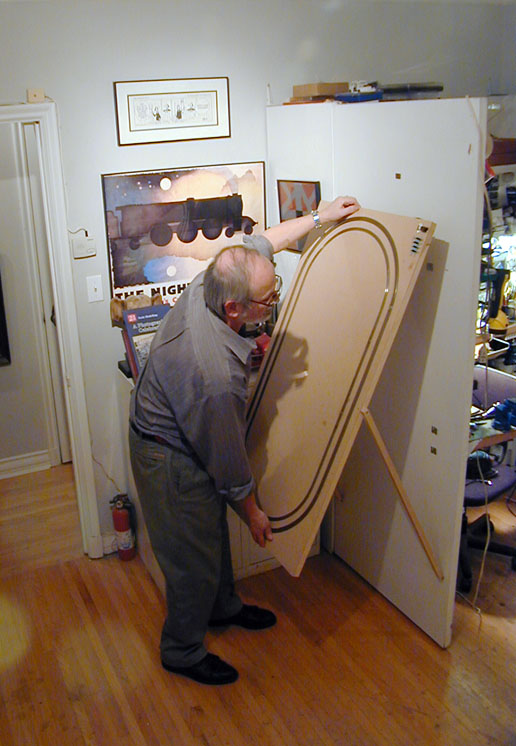
I attached the test layout to my workshop door by carefully meas-uring the locations of the pivot screws and drilling pilot holes for them. Then I enlarged the holes in the braces so they could move freely, and drove the screws into the sides of the table.

Next, I cut a single 2″ utility butt hinge in half to make a pair of hinges 1″ wide for the bottom ends of the angle braces. I replaced the hinge pins with cotter pins so I can remove the test track from the door.

I marked the hinge positions shown in the drawing and installed half of each hinge on the lower door spaced 24″ apart.

I use pairs of steel clips, called “flush hangers,” to attach the table end to the door. The hangers came from a hardware store, but there are many brands of similar clips.

To get everything in the right position, I started by mounting the female hangers on the end of the test track, about 3″ in from the outside edges. Then I fit the lower hinges together, slipped the cotter pins into place, and checked the layout’s fit against the door.

As I lowered it, I propped the table in position while I checked it with a level to position the matching male hangers and mount them on the workshop door.

I also added a small sliding bolt that engages a hole in the door when the test track is open and in the operating position. This safety bolt prevents the test track from disengaging from the clips if anyone happens to press down too heavily on the free end of the table.

2 thoughts on “How to build a stow-away model railroad test track

  1. Actually, I have a layout that uses scenery and has that same track plan… its really nice to just run trains around and relax 🙂

  2. I have a poster that’s exactly like the one you have depicted in the photographs of your room.

You must login to submit a comment