


Car Swap Project part 5: Printing decals with an ALPS printer: As the three friends endeavor to make custom boxcars for each other’s layouts, Gerry Leone, Seth Puffer, and David Popp embark on printing custom decals. There are several easy ways to print your own decals, just as long as you don’t want white lettering. To do that kind of printing, you need a special machine called an ALPS printer. While these haven’t been made in years, Gerry is fortunate enough to own one and a lot of ink cartridges for it too. Everything should be smooth sailing – as long as the ancient printer and its even older computer still work.
David: So, now that we’ve worked out the designs for the various railroads in the previous installment, it’s on to printing them out. Modelers have been printing their own decals for years, and it works great with just about any color except white. To print white decals at home, you need something that hasn’t been made for a while – an ALPS printer. Lucky for us, Gerry knows a guy.
Gerry: And that guy happens to be me.
Seth: Hey, I know that guy too!
Gerry: ALPS printers were – and still are – the only consumer-affordable way to print white decals for model railroads. The printers, which will also print full color, were originally developed for designers and advertising agencies who wanted to produce realistic looking “one-off” package and bottle label designs for client approvals.
Seth: Gee, Gerry, didn’t you used to work for an advertising agency?
David: Did they notice their printer had disappeared when you retired?
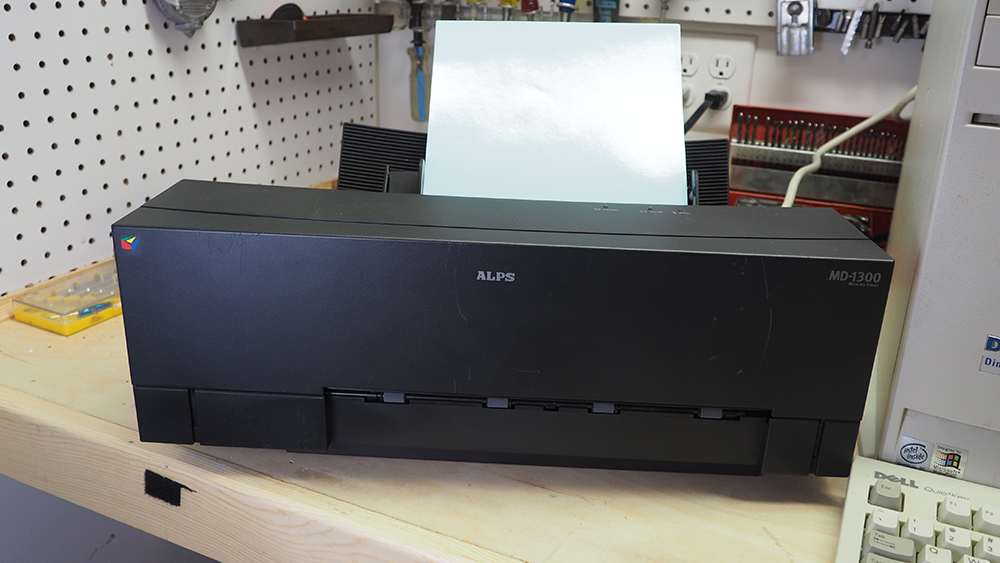
Gerry: ALPS printers were also made for consumers who wanted to print their own photographs. The printer was actually called a MicroDry printer and the methodology is sometimes referred to as “dye-sublimation printing.”
David: Ok, you lost me on dye-sublime-something-or-other.
Seth: Is that even important?
Gerry: Nope! All you need to know is that I’m fortunate enough to own an ALPS printer. In the 2000s a friend brought his to my house so I could design and print logos for his model railroad. As a return favor, he left his ALPS behind for a few days. I was hooked.
David: So, you didn’t take the agency’s printer?
Gerry: Nope, nor the other guy’s. I promptly ventured on to eBay and bought one for myself for a mere $125. That same printer today sells on eBay for well over $1,000. I’ve actually seen them priced at five times that amount.
Seth: Ok, I’m not buying one for myself. Why do they cost that much now?
Gerry: ALPS printers haven’t been made since 2007, and the “inks” (more on that in a bit) haven’t been produced since 2015. Thankfully I stocked up on the inks the moment I heard that announcement. ALPS printers are quirky machines. Without adding some fancy homebrew electronics, ALPS printers will only print from a computer by using the ancient parallel printer port, and that port has to be directly connected to the computer’s motherboard; an IDE parallel port card inserted into the computer won’t work.
David: So, my new Mac wouldn’t run it anyway, even if I could afford one?
Gerry: Not a chance. I’m using an ancient Windows 2000 computer to print my decals. At over 25 years old, the whole setup is pretty rickety and any one of the components could irrevocably crash and die at any moment, bringing an end to my decal printing days. So, I consider every decal I print a godsend.
David: Good news is that you could probably sell all that ink you’ve stockpiled at a decent profit.
Seth: So, how much toilet paper do you still have from 2020?
Gerry: Let’s just say that if there’s another shortage, I’d be cleaning up. But speaking of ink, ALPS printers don’t use conventional ink to print. The ink is actually colored wax, which comes on a cartridge similar to an old audio cassette, except a bit squatter and thicker. The printer itself holds four of these cassettes, one for each of the four printing colors: cyan, magenta, yellow, and black. Much like printed books or magazines, all the colors of the rainbow are generated from those four inks.
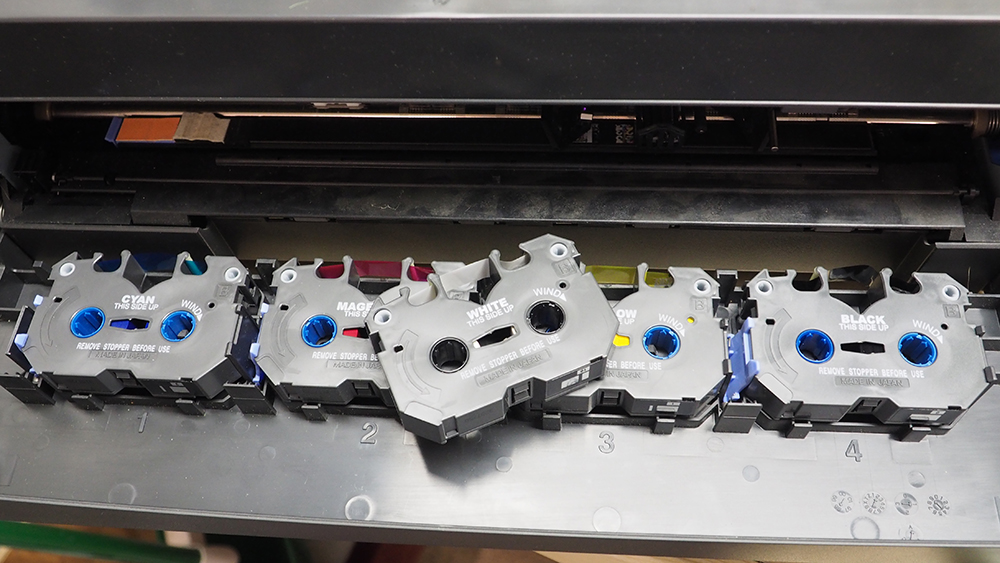
David: Wait, how do you get white? I thought that’s why we’re using your ancient printer.
Gerry: If you want to print white, you need to remove one of the CMYK cassettes and replace it with the dedicated white ink cassette. When it prints, the printer selects one of the cassettes and physically moves it into position behind the print head. When you hit “print,” it will print an entire page of the cyan parts of a graphic, pull the paper back to its original starting position, select the magenta cassette and print all the magenta portions, pull the paper back, and repeat the process with the yellow and black cassettes.
Seth: How does it keep all of the colors lined up in register and not make blurry decals?
Gerry: It’s a minor miracle to me. Back in the day ALPS produced a wide range of ink cassettes, including metallic silvers and golds. Today those cassettes are so rare I’ve never actually seen one for sale, much less in-person.
David: Gold would have been great for passenger car decals.
Gerry: Yes, it would, but you can only get it through time travel these days. The print head of an ALPS printer contains hundreds of incredibly small heating elements. As the print head moves across the paper and the colored wax rolls past the head, those little elements instantly heat, depositing the colored wax on to the paper. As you can guess, the first things to fail on an ALPS printer are the individual heating elements, which then produce blank lines within the graphic.
David: Since the printer takes 4 passes at printing custom colors, how do you set up your print files?
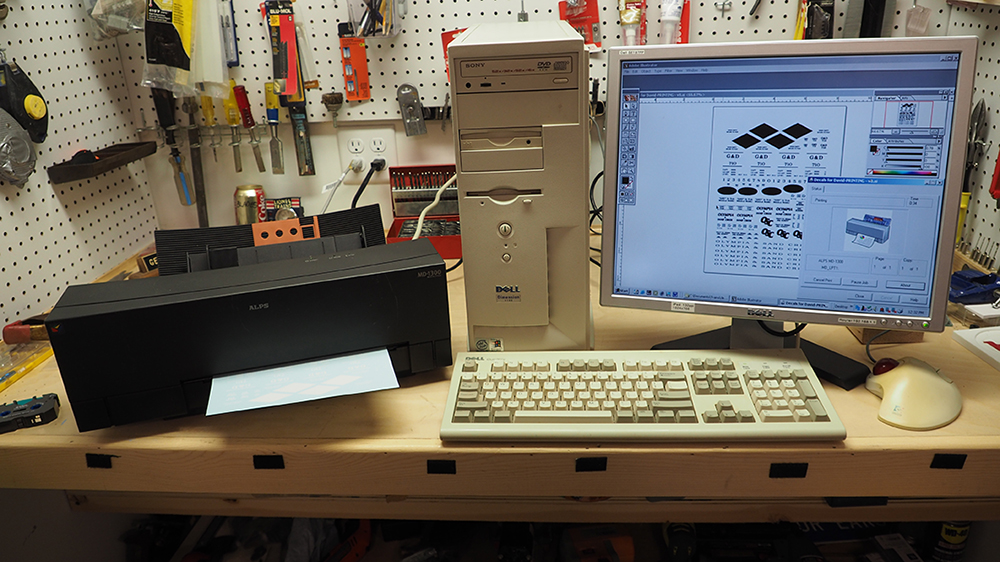
Gerry: Setting up a graphic file for an ALPS printer is cumbersome at best. The ideal file to use is a vector file – something generated by a program like Adobe Illustrator or Inkscape. Other graphics programs which generate raster graphics, such as Photoshop or Paint Shop Pro, will produce jagged curved and diagonal lines. In order to print white, the graphics in the computer file need to be black. Then you instruct the printer to print only using the white cassette. So, a 100% black graphic printed with only the white cassette, will turn out 100% white on decal paper.
Seth: Wow, you’ve got to think about the color choices very carefully.
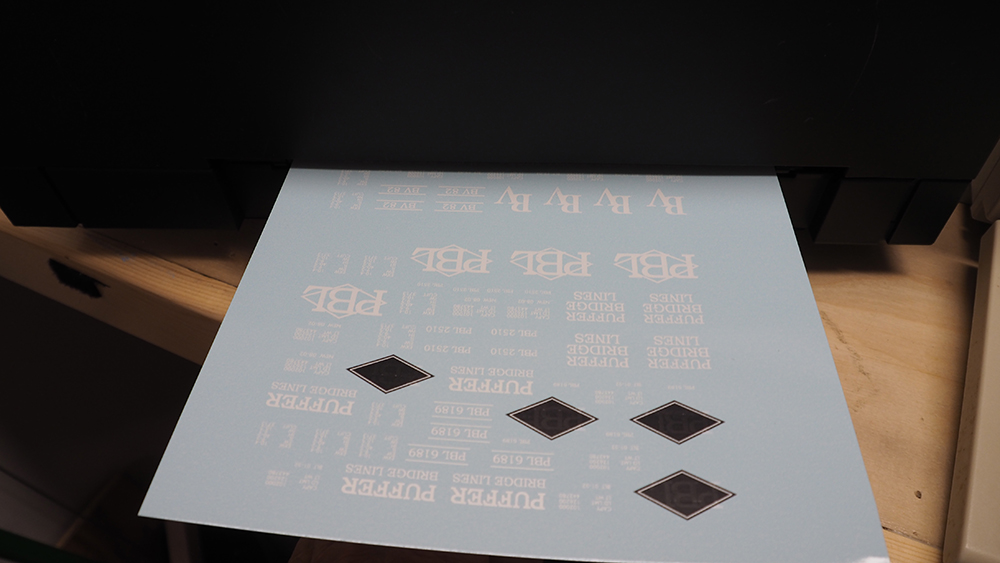
Gerry: It gets confusing quickly, especially since decals printed on an ALPS printer usually need an underlayment or two or more passes of white. The ALPS ink colors are translucent enough to allow a freight car’s paint color to show through, changing their visible color. A decal using only a single pass of white in the ALPS printer will produce a graphic that appears pink when applied to a brown boxcar. So besides turning all the white areas of a graphic black in the computer file, the entire design needs to be turned black in order to produce an underlayment of white. Setting up a full sheet of multi-colored decal graphics often takes several hours.
Seth: With the complexity of our designs, and the high quantity of white graphics, I hope you have a lot of white ink cassettes handy!
Gerry: Not to worry. My trusty ALPS printer still chugs along, and I was able to produce all the decals for this fun project.
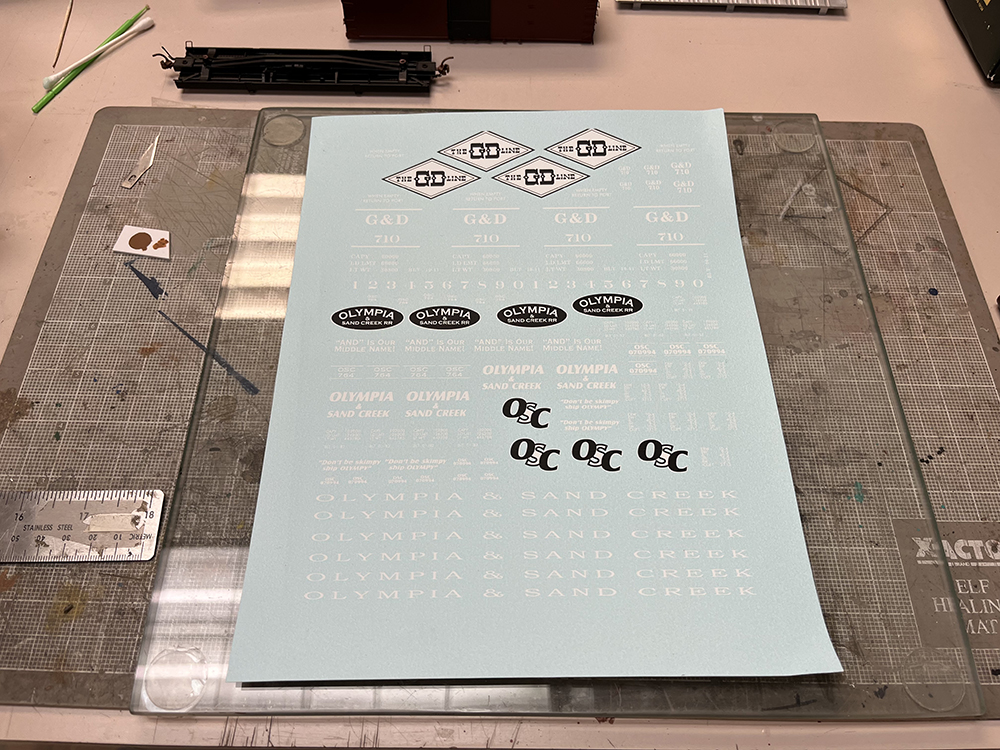
David: Totally cool, Gerry. I always wondered how ALPS printers worked. I shot a picture of the decals on my workbench when they arrived. I was thrilled to see you also made me a custom set of Gorre & Daphetid decals as well!
Gerry: Yes! I’d designed an ad for the GD Line decals for the NMRA years ago, so I just reworked them to fit your boxcar.
David: Thank you! With the decals handled, we’re off to actually doing the modeling work.
Seth: I know I cannot wait!
David: And that’s a good thing, Seth, since we’re going to start the next installment with your cars!
Gerry: Time to get to work.


Don’t know how (or if!) these comments get passed on, but you might tell Gerry Leone that as of 1-10-2025, there is an ALPS gold ribbon on auction on eBay. The bid ends 1-15-2025 at approx. 5 PM CST.
These articles are great, but I constantly read interesting and engaging articles that use equipment that can’t be bought or kits/supplies that no longer exist. I read these articles to learn ways to do things from all of you MMRs. So I don’t have access to an ALPS printer and I want to print my own decals for my fictional Mt. Lorenzo Timber and Gravel. Not to be mean, but I was rooting for the failure of the ALPS printer/vintage computer so you would have to find another way. Are there decal substrates that are white and can be used with my standard ink jet printer or are there other methods? I challenge the writers of Model Railroader to not only tell us how it can be done with a unicorn, but also how it can be done with modern readily available equipment/supplies. I get excited to see some of these articles and disappointed to read words like discontinued, no longer available, retired, and out of production (typically decades ago). Where do you guys store all of this stuff?
So, the big question is this: why has no one manufactured a printer that can print white in the past 25 years? One would think there would be a market for them: trains, rockets, cars, boats, and the list goes on.
Gerry Drewes from Colorado Springs
Interesting story guys. I bought an Alps printer yeas ago for way too much money.
I had to replace it maybe 5 years ago for an MD-1000. (not as fancy as my earlier one) but still works. I have been running them on Windows 7. I just looked at my ink supply and found a metalic gold and a metalic silver. Would be willing to trade either one for a small new pickup. They gold really does a nice job on old passenger equipment. hobby.
Gerry Drewes from Colorado Springs
Interesting story guys. I bought an Alps printer yeas ago for way too much money.
I had to replace it maybe 5 years ago for an MD-1000. (not as fancy as my earlier one) but still works. I have been running them on Windows 7. I just looked at my ink supply and found a metalic gold and a metalic silver. Would be willing to trade either one for a small new pickup. They gold really does a nice job on old passenger equipment. Thanks for what you guys do for the hobby.
catch-ya-later Gerry
It makes me wish I purchased an ALPS printer back in the day. I did a lot of model rockets when they were new. One of the guys in the rocket club had an ALPS printer and would print decals for us. I did not think at the time it was a good investment to spend that much money on a printer to make decals for a $8 rocket. You would think after 35 to 30 years ago that we would have way to print white…it is 2023 ya now.
Another great installment guys. Quick question Gerry – because the white ink is wax based are there any precautions or different methods when applying the decals that one has to be aware of? Or are they no different from the commercially available white decals?
Gerry might be better to answer this. As you’ll see in a later installment, I did have a bit of trouble with the white wax ink, but it wasn’t the norm. We gave the decals several coats of Testers Dullcote before we applied them, then sealed them up with more clear coats. You just need to handle them as carefully as any other decal. They really did work well!
Artie — Because ALL the colors are wax-based, the decals tend to scratch fairly easily. One wrong move with the tweezers and you can scrape off the wax. Even with two or three coats of Dullcote they’ll still scratch. However, that’s not the norm. As David said, if you handle them gently, like you would any decal, they’ll be fine. And in many cases, if you DO scratch them, you can do a little touch up with matching paint after they dry.