


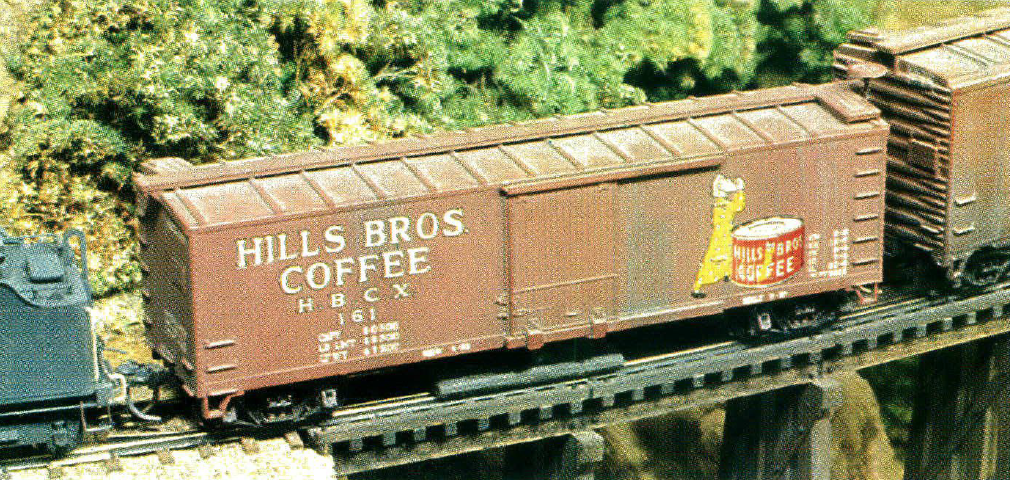
A simple track cleaning car inspired by John D. Allen and the master model railroader’s Gorre & Daphetid Railroad.
This has been described in MR and elsewhere before, but for the sake of those who might have missed it or for newcomers to the hobby, a description of it bears repeating because it works so well. In fact, these free-floating pads have Worked so well on my HO scale layout that I no longer find it necessary to clean the rails by hand.
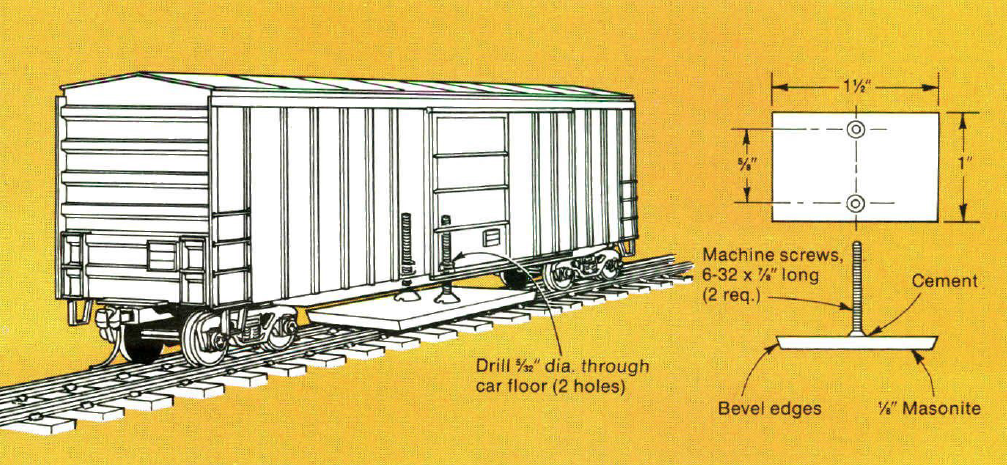
Not having at hand a detailed description of John’s pad design or mounting methods, I endeavored to create my own. I use 1/8-inch Masonite (either tempered or untempered) for the pad. Each car assembly consists of a Masonite rectangle 1-inch wide by 1 1/2-inches long with its edges beveled slightly with fine sandpaper. The bevels reduce the possibility of a pad TW catching on a switch point, frog, or crossing. Then, using 5-minute epoxy, I glue two flathead machine screws as shown in the drawing.
Next I drill a pair of 5/32-inch holes, also 5/8-inches apart, through the underframe of a boxcar to accept the screws. These holes are slightly larger than the diameter of the machine screws so the pads “float” along the rails without being permanently attached to the cars. Thus, the pressure of the pad on the rails is determined by the weight of the screws and pad alone. The screws simply hold the pad in position under the car while the car guides the pads along the rails.
To disguise the pads a little, I paint them fiat black. In the shadow of the car they can hardly be seen.
And to clean the track cleaner, I simply rub it back and forth across a piece of fine sandpaper a few times and it’s ready to go again.
That’s it, as quick and easy as it sounds. With this method you can operate the cleaning cars right along with the rest of your equipment. And they can easily be removed if you wish to run the cars without the cleaning pads.


Thanks, Lou. Check out my tribute web site for MORE G&D:
gdlines.org
I recently built two of these, one is a 50′ plug-door boxcar, the other a 36′ boxcar, and they really do work great. The key is to make it so the rough, waffle-pattern side is on the track. I also used one and a half inch roofing nails on the 50′ car and one inch roofing nails on the 36′ car instead of machine screws, and I attached them with hot glue instead of epoxy. I holds well when in use, but can easily be removed if you make a mistake positioning the nails or want to replace the pad.
When I first heard about John’s idea, years ago, I too built one. It was very simple, not too obvious, and really worked. I used some stick on weights on the pad to weigh it down as well.
I did the same for an N scale wagon. The only mod I did was to add 2 fishing weights on top of the screws inside the wagon to push the pad harder to the track and cleans better.Most round ones already have a hole in them, just drill out a little larger to fit the screw end.
It occurred to me as I read this article that I have in my collection the absolutely perfect car: a G&D box car!
I read this article when it first appeared and have been using it for decades! It really works!
You need to curve the leading edges of the masonite to prevent hangups.
I have had these cars for years and they clean the rails well but sometimes the pads negotiate switches with difficulty. It is best not to ‘high ball” through switches and be alert for derailments if the pad gets caught.
This is smart!!
Okay, I’ve read about this track cleaning car several times over the past year or so, but still have a question that never seems to get answered. The masonite I have has 2 sides: a smooth, almost glassy side, and a rough, waffle-pattern side. Which side goes down?
The waffle side goes down on the rails.
Marty
I have used this system for years with very good results, I’m not going to say you never have to use anything else but sometimes it is neccessary. Another thing for the occasional trouble or hard to reach spot is a piece of wood about 3 inches by a little over one inch with a piece of drywall, I’ll say sand paper but it’s more like gritty screen. I use finest I can get it doesn’t have to be real rough and the fac