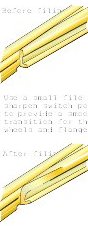
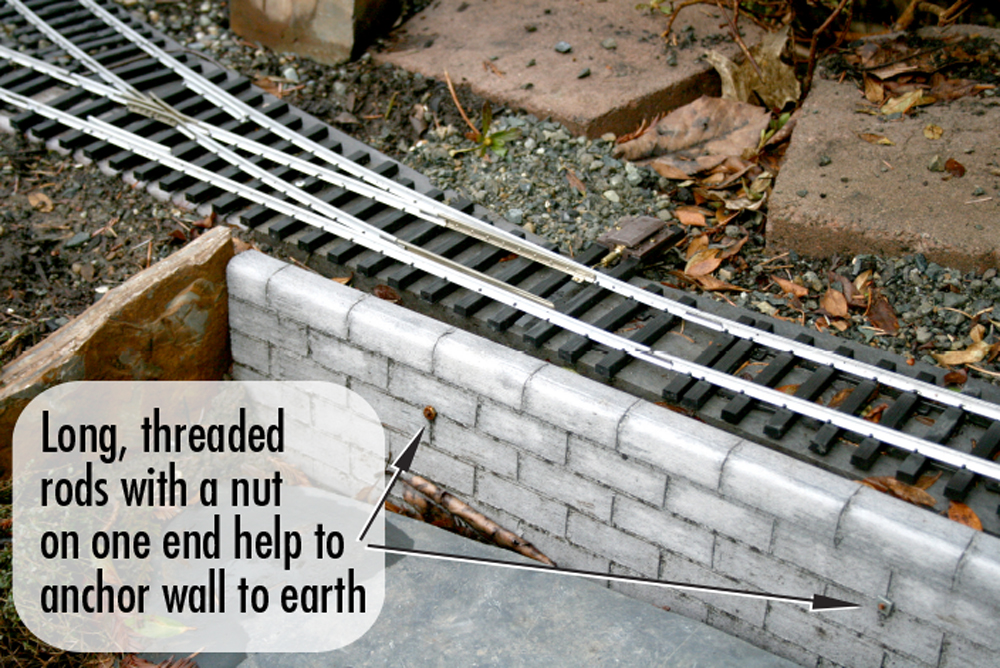
Every rail joint must be carefully aligned, properly fitted, and level. Sight along the rail to check the alignment through the rail joiner. After the track is spiked down, use a fine file to smooth the top and inside corner of the rail joint until you can slide a fingernail across it.
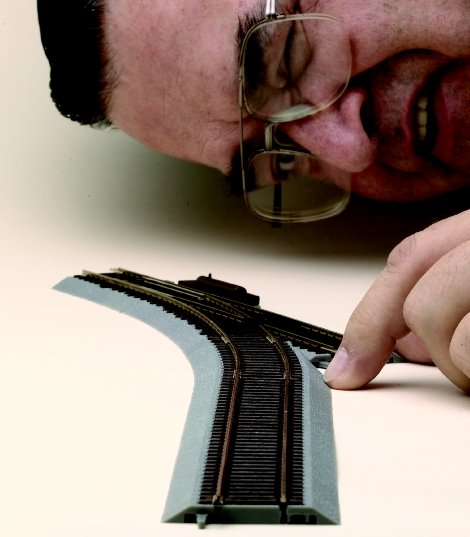
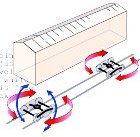
Turnouts, or track switches, are the most common places where derailments occur due to the many interruptions in the rails. Gauge is critical at the switchpoints, rail joints, and the frog assembly, and anything which impedes the smooth passage of the wheels is a potential problem. Tight track gauge squeezes the flanges against the railheads and makes the wheels climb up and derail. Wide gauge also causes problems as the backs of the wheel flanges cannot span the space between the guardrail and the frog, forcing the wheelset to climb up and create another potential derailment. Commercial turnouts tend to be a bit wide at the frog. This can be corrected by filing the inside faces of the guardrail and the frog until the gauge pins fit properly. I also sharpen the point of the frog at this time. Gauge can be adjusted on turnouts with plastic ties by gently heating the outer rail with a soldering gun, pushing the rail into gauge, and then allowing the ties to cool.
The movable switchpoints must be tapered to fit tightly against the stock rails and provide a smooth passage for the wheels. Commercial switchpoints often have blunt ends which catch the wheel flanges and cause derailment. Use a file to blend the top edge of the point into a smooth transition. If you can slide a fingernail over this transition without it snagging, the wheels will also pass easilv. Check the gauge across both switchpoints as sorne are thicker than others. This means the turnout can be in gauge when it’s lined for one route, but off in the other direction. File material off the inside of the thicker point to correct the gauge.
Install couplers properly
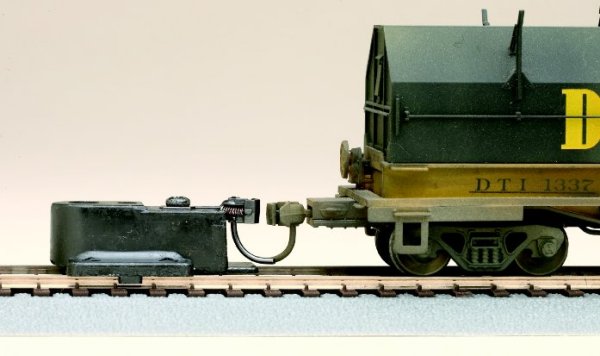
Couplers take a surprising amount of mechanical abuse on a layout, so their operating reliability depends upon proper installation and regular maintenance. Read and follow the manufacturer’s instructions and take time to adjust the couplers for proper centering and minimal vertical play. Inspect the coupler and its mounting parts closely before installation and carefully remove any molding flash which impairs free movement.
Next, make sure the coupler box cover and its mounting screw(s) or the metal retainer clip are properly seated.
Finally, place the car on a piece of track and check the coupler height. Kadee makes an excellent HO gauge for this purpose; Micro-Trains makes one for N. Most freight cars tend to be low, so use washers to adjust the height for a perfect vertical match.

Weight appropriately
Most freight cars need some additional weight to obtain the best performance. The NMRA’s Recommended Practice 20.1 includes the following formulas to determine the optimum weight based on the different car lengths (in inches):
Recommended total car weight (in ounces)
- O scale: 5 plus 1 ounce per inch of length
- S scale: 2 plus 1/2 ounce per inch of length
- HO scale: 1 plus 1/2 ounce per inch of length
- N scale: 1/2 plus .15 ounce per inch of length
All weight should be kept as low in the carbody as possible and the weights should be centered and secured so they cannot slide out of position and make the carbody tip to one side.
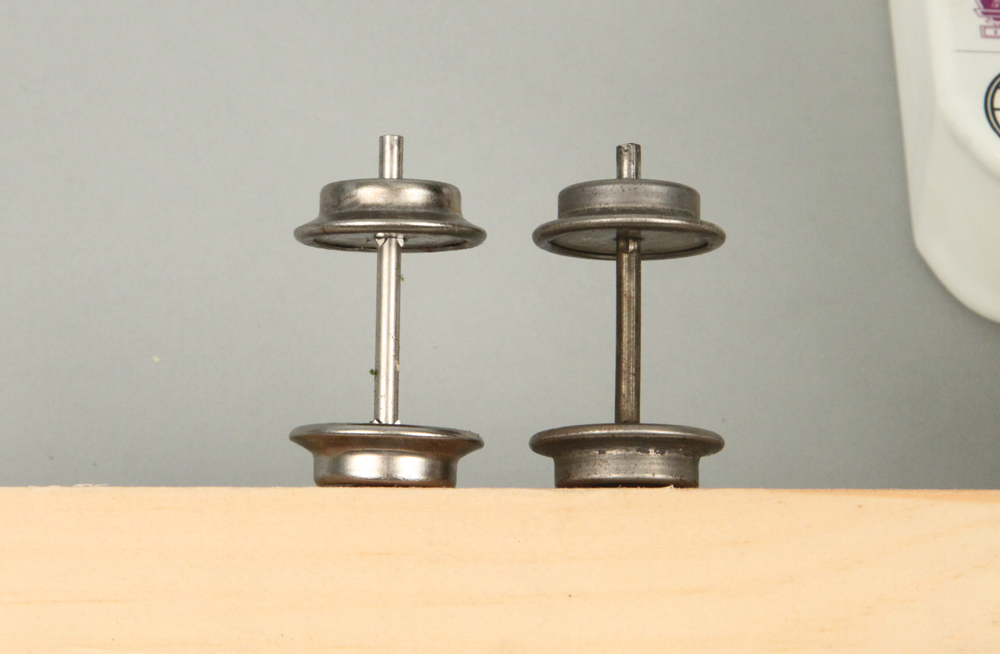
Check and adjust wheelsets
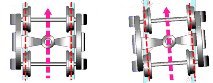
Wheelsets that are in gauge and centered on the axles are essential. I check every wheelset on every piece of equipment before it goes on the railroad. Most model manufacturers work to reasonable tolerances, but variations in gauge do occur. Two notches on the side of the NMRA gauge make it easy to check this dimension.
Wheelsets that are out of gauge can generally be adjusted by twisting a wheel along the axle until they match the gauge. Just be careful to keep the pair of wheels centered on the axle or you’ll wind up with a dogleg truck, where both axles may be in gauge, but the truck’s angled tracking forces the flanges into the rails making them very prone to derailment.
Inspect the trucks carefully and make sure all of the wheels contact the rails with even pressure. Cast, rigid truck frames sometimes warp slightly during shipment or storage. If so, they can be warmed under hot tap water and gently twisted until they’re square again. If sprung trucks do not equalize smoothly, look for casting flash on the moving parts and carefully remove it.
Adjust truck mounting
The trucks should be mounted on the car so they swivel freely. Any stiffness here forces the wheel flanges into the railheads; where they’ll find any imperfection. Both trucks must rock a little under the carbody to handle slight irregularities in the track.
I’ve also found that one truck can be kept fairly tight to keep the carbody from wobbling from side to side, but then it’s essential to leave the other truck fairly loose.
Use minimum lubrication
Couplers should be lubricated with powdered graphite Teflon as those don’t attract dirt. A little puff of lubricant does the job and lasts a long time.
Needlepoint wheelsets running in acetal plastic sideframes seldom need lubrication unless they make noise. In such cases a puff of powdered Teflon does the job. Oil isn’t recommended as it dries out and turns to a gummy residue that adds a lot of drag. Some petroleum-based oils will also damage the plastic in the sideframe.
Brass or metal trucks get a drop of light oil only if they make noise (the squeaky wheel gets the oil). Overlubrication seeps out and may damage the paint job.
Make running repairs
Everything I’ve covered so far can be done as you build your equipment fleet. But what about the cars already on the layout? A hard-nosed inspection of every car about once a year will reveal all sorts of things that have changed due to the wear and tear of an operating layout. The last time I did this major inspection only about ten percent of my veteran cars passed all of the standards!
To repair the numerous bad order cars (a prototype term for cars needing repairs), I sort them by the degree of work required. You’ll find most require only minor repairs like adjusting the couplers, loosening a truck screw, or adding a bit of lubricant.
Maintain the fleet
Many experienced modelers remain willing to put up with derailments as the price of running trains, but that’s a rationalization to avoid investing the time it takes to make the necessary adjustments. Observe what’s happening as the trains run and be hard-nosed about taking care of problems as soon as they’re identified. After a while, you’ll find fewer problems which need attention.
With the quality of the equipment we have today, there’s no reason to put up with derailments any more. Putting in the five or ten minutes required to eliminate specific track problems, change-out bad wheelsets, and adjust each car makes an amazing difference in how your railroad performs – even when visitors are present.


I have two places on my track that will not accept two of my locomotives backing through, one is a simple curve and the other is an expensive double crossover. I really believed that E-Z Track could not possibly have a problem so I have worked on trying to find tender trucks that would solve the problem. Nothing worked! Thanks to this article I inspected the track with a critical eye and a NMRA track gauge. I have concluded that Bachmann is working to tolerances that would be acceptable for a toy but not for a serious operating model. I cannot fault them since this keeps the equipment affordable. From now on everything gets a critical inspection before blind acceptance.
Foundation is importent. flat @ level befor laying track helps a lot.
Thanks for a good reminder. MR: This one is worth re-publishing in an upcoming magazine. Thanks. Hans
Thanks for the information. I have often wondered if I’m adding to much weight. I have a 00 set-up and the wagons and carriages tend to be shorter. Anyone with any suggestions?
Most helpful, now maybe even I can do it right..
Thanks,
Great article.
Thankyou . The artical has supported some of the things i allready do but , I usually give them 2-3 strikes and this is frustrating.So 1 strike is a good rule.
wow dat was alot of help
Excellent article. Thank you very much.
an ounce of prevention is worth a about a ton of cure – good practical article
Your information is great keep it up.
Thanks to Jim Hediger for this article. I also have printed this article and have found the points accurate, primarily through experience over the years. This is great not only for the professional but also for one starting out in model railroading.
Thanks again
This has helped a lot. I had some running stock that kept derailing and some that didn't. This article, especially the part on truck alignment has helped in getting all my running stock aligned. Thank you
Several years ago I read an article on car weight. A club out East, did extensive testing on their club layout with car weight. Their conclusion was that the recommended NMRA formula for HO of 1 oz base weight plus ½ oz for each inch of car length was excessively heavy. Their recommendation was to use that same formula but reduce it by 20%. I have used this 80% (or 20% reduced) formula for several years and have found it to be a good weight for my layout. Many of the better rolling stock we have available today falls in this weight range. The various loads we have available is going to change this weight considerable. Do like the real roads do, put your heavy car to the front of the train.
Another good information article. Up to the high standard we have come to expect from Model Railroader. Thanks
Please keep this type of article coming!!!
It's great to read the ideas of others that re-inforce the things
I've done or that give me solutions to problems I've encountered
and make the Hobby so much more enjoyable.
Thank You , Brian
Great reminder for all of us to follow and advise others. Routine inspection and maintenance is essential for ALL mechanical devices. Thanks for a good reminder. MR: This one is worth re-publishing in an upcoming magazine. Thanks again!
A nice article.
For the first poster, the recommended practice of car weight is like this:
You have a 50' HO scale boxcar. It measures roughly 7 inches. Given that the car should weigh an absolute minimum of 1 ounce, the recommended practice states that a 7 inch HO car should require 1/2 ounce per inch of car, or 3.5 ounces of additional weight. With that initial 1 ounce, the car should weigh 4.5 ounces in total.
I'm not sure where the minimums came from, unless cars back in the day were much lighter than they are now.
What is nice, is that much of the rolling stock (ready to run from Atlas, Athearn, Walthers, Intermountain, etc. and even some recent kits like from Accurail) are pretty close if not dead on with the RP 20.1. The only cars I have to routinely add weight to are hoppers, cabooses, and well cars (the articulated ones, which by adding weights inside the containers and running them at the end of a train helps).
Great article . From now on I will inspect all the points you have mentioned at a regular basis. I did have some problems with derailments from time to to time . Thank you
I don't know…I guess I'll have to read the artical a few more times to get it.
Maybe in video format ?
Keep the info coming , I'm laying tracks on my layout, about 400' I need all the help I can get. Keep up the good work.
Thanks for sharing it may help in my problems.
I liked the bad-order, one-strike policy. This is how the real railroads do it!
I get a lot of ideas from the magazine and also from the forms