


Car Swap Project Part 2: Stripping lettering from models: As explained in the first installment of the series, modelers Gerry Leone, David Popp, and Seth Puffer have decided to create custom boxcars for each other’s model railroads. This time around, David starts the real work of preparing the cars that he will use for the other layouts. During the process, his attempt to strip the lettering from the cars results in doing more work than he’d originally had planned.
David: Once Gerry and Seth agreed to the project, it was time to find cars we could use. On30 boxcars haven’t been made in a while, and they aren’t always easy to find, so I decided that I’d help Gerry and Seth out by jumping on eBay and scrounging up a couple of On30 boxcars that I could send to them. It took a bit of work, and cost a bit more than I’d expected, but I managed to find two painted, but undecorated cars.
Seth: I got mine fairly quickly. Thanks!
Gerry: You were lucky. I had to wait a lot longer for mine because I live out in the hinterlands.
David: Sorry about that. You wanted the ventilated car, and I’d forgotten it at the house for a couple of days, as I wanted to put Kadee Couplers on it for you before I mailed it to you.
Gerry: Thanks! Also, the Post Office was nice enough to leave it sitting in the snow in the ditch by my mailbox.
Seth: You know, Gerry, if you plowed your long and winding driveway once in a while, you might get better service – and more people to come operate your layout.
Gerry: The long and winding road that leads to my door, gets lots and lots of snow…you’ve seen that road befoooore…
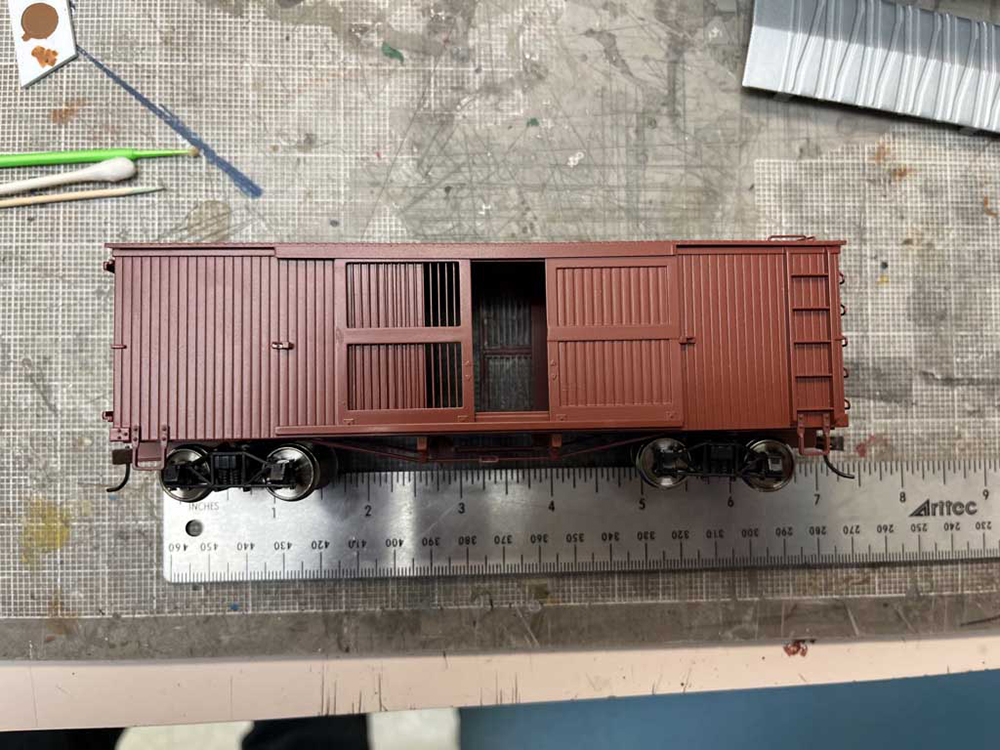
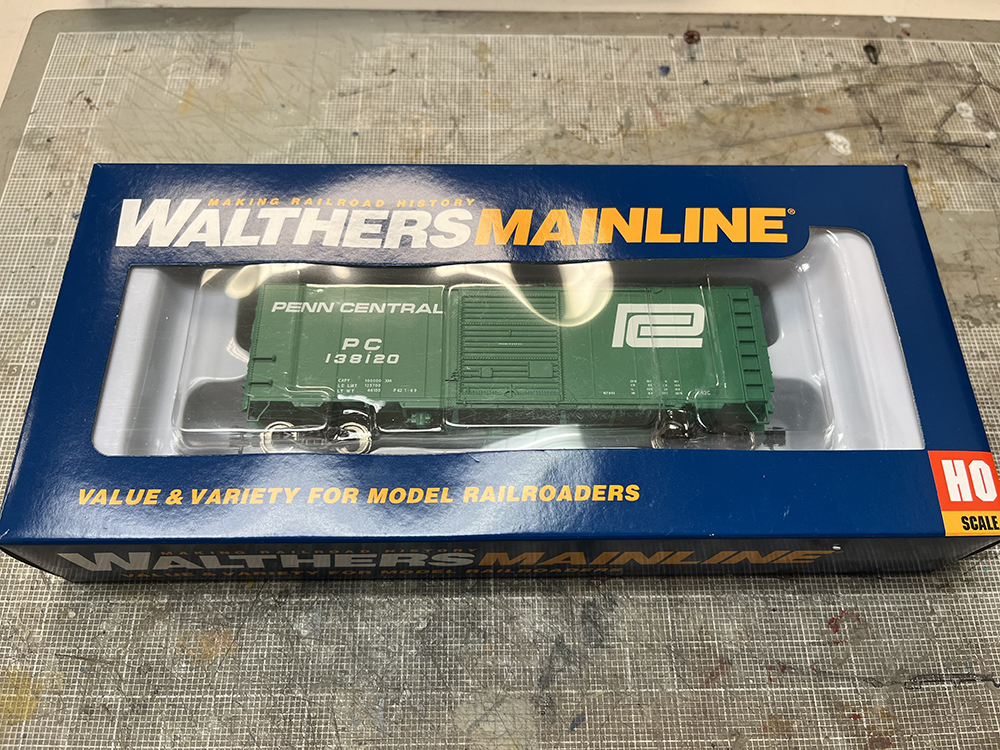
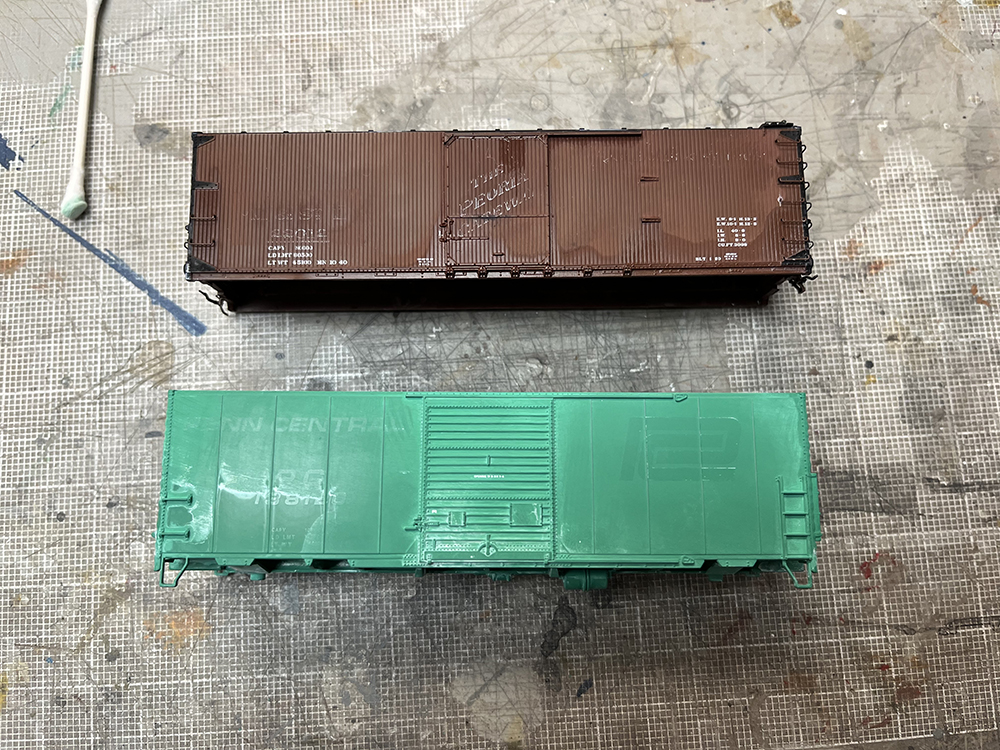
David: Thank you, Mr. McCartney. With the On30 cars handled, I looked around for suitable HO scale cars for the ones I decorate for Gerry and Seth. We had a few product samples laying around the office, and I settled on a Walthers 40-foot ACF modernized boxcar for Seth’s 80s/90s era layout and a Rapido USRA double-sheathed boxcar for Gerry’s 50s layout.
David: As shown in the photo, I picked both cars for their paint work. I figured the Olympia had purchased used cars from other railroads and simply added new graphics to them.
Gerry: Nice choices. I simply ordered undecorated cars for me and Seth.
Seth: Wow, that PC car is bright!
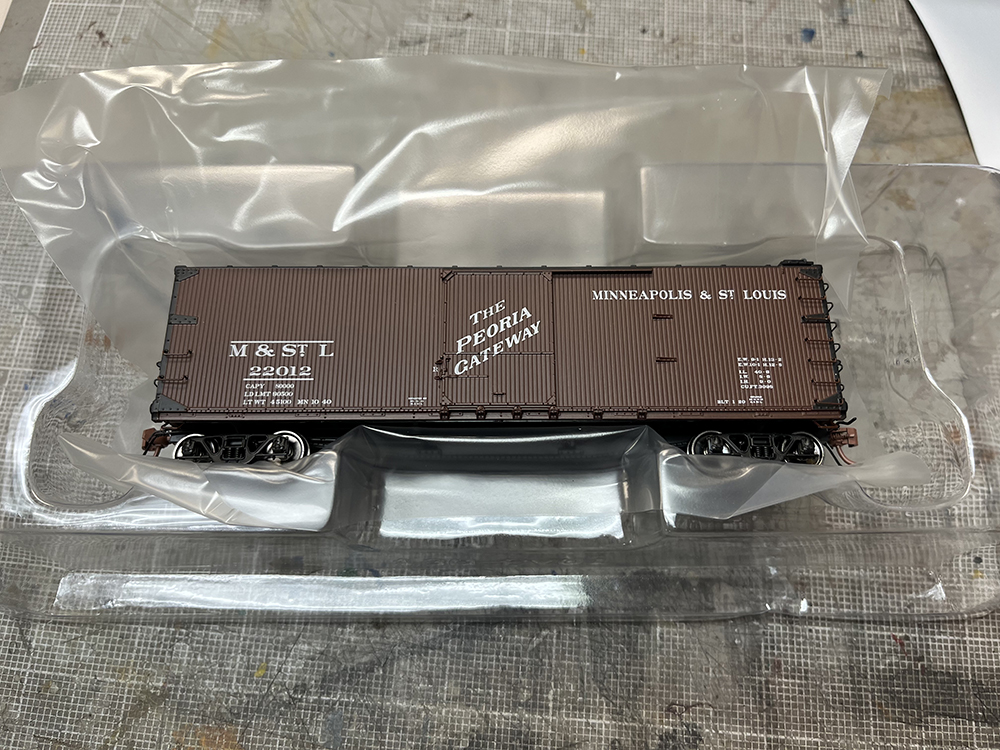
David: I’ve always liked the New York Central/Penn Central Pacemaker Green and thought I could change up the car a bit by painting the door black. I also liked the Minneapolis & St. Louis car’s black ends and roof, so I planned to keep the paint on both cars and just remove the lettering.
Gerry: How, exactly, were you planning on removing the lettering without removing the paint?
David: I’ve used various methods with assorted results to remove lettering before. A lot depends upon the manufacturing process as to how easy or difficult this turns out to be. I studied it for a bit before…
Seth: You asked Cody.
David: I asked Cody.
Gerry: I’d have asked Cody to just do the job for me.
David: While I could have done that, I’ve got Cody working on other things.
Seth: Yeah, like Crazy Ideas 1 to 10, as explained in the last episode.
David: In all fairness, Cody’s only working on Idea No. 6 at the moment. No, I just needed him to provide a solution. In this case it was Walthers’ Solvaset decal setting solution. This stuff is designed to soften decals so that they snug down to the surface well.
Gerry: But the factory cars aren’t decaled, they’re printed, right?
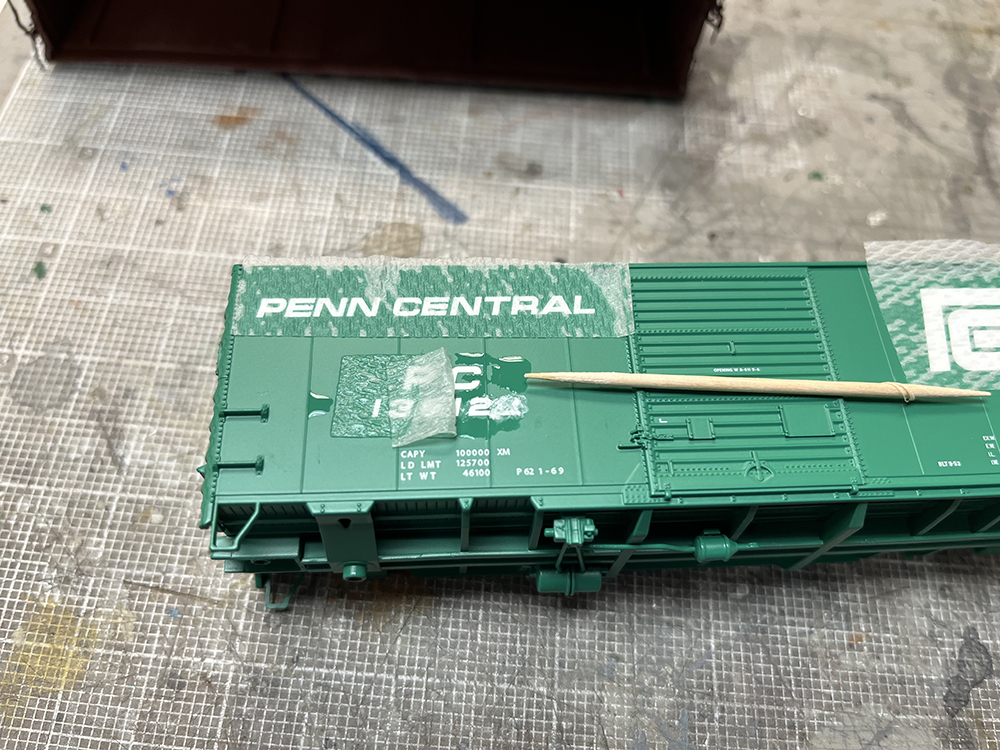
David: Correct. But Solvaset will also soften the ink used on the cars, while leaving the paint alone. Cody recommended cutting small patches of paper towel, placing them over the lettering, the soaking the towel with Solvaset for 30 minutes or so. As shown in the photos, that’s exactly what I did for both cars. I had to periodically apply more solution, as the towels kept drying out.
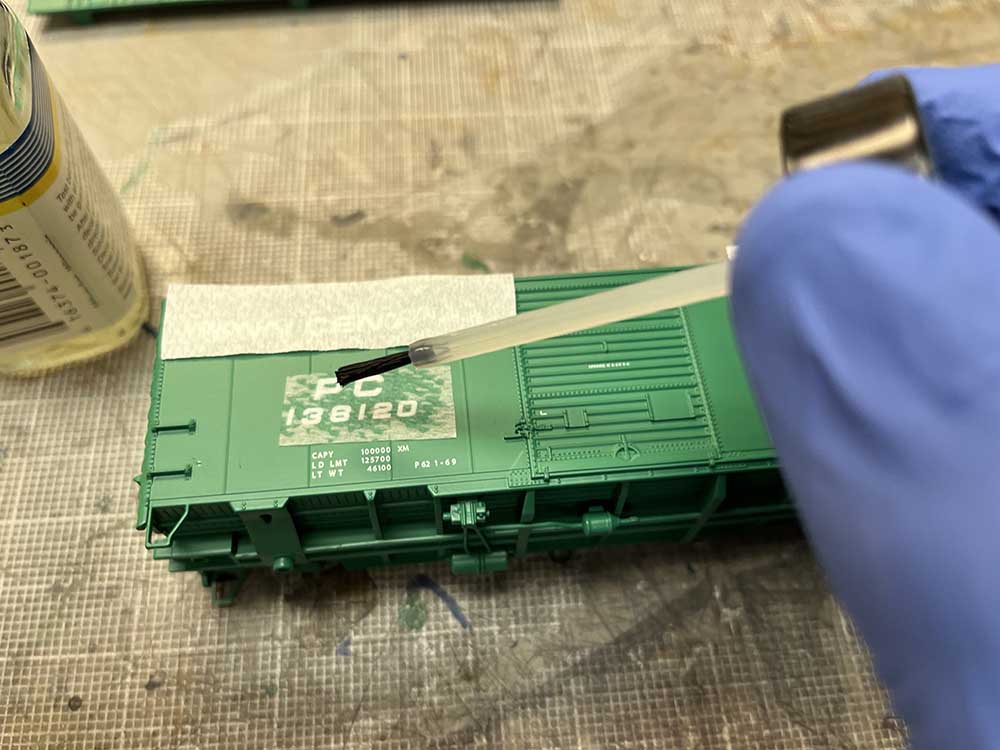
David: Once the ink was softened sufficiently, I used a toothpick to gently scrub away the letters and numbers, starting with the road number on the PC car. From time to time I cleaned the surface with a cotton swab then rewet it with more solution.
Seth: Did it work?
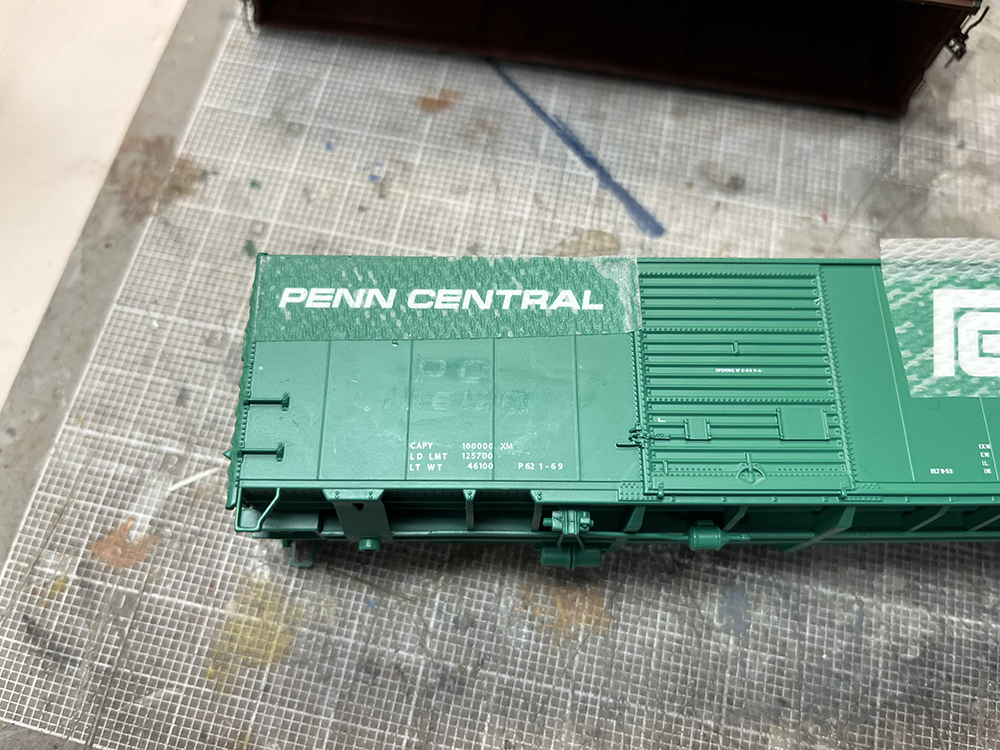
David: I thought it was going to work. I was able to remove the road number sufficiently, although you could still see ghosts of the letters in the paint. And the white ink left a lot of residue on the car side, which didn’t swab off very well. If I only needed to renumber the car, I could have then covered the residue with weathering.
Gerry: But that PC logo is pretty big.
Seth: And it’s got a ton of white ink in it.
David: Yes, the worm logo proved to be really stubborn. But not as stubborn as the M&St.L car turned out to be. That lettering wouldn’t come off completely, particularly around any raised details. Not wanting to spend a whole week at this, I resorted to something stronger. Since the lettering was already soft, I decided to use a limited amount of 90 percent isopropyl alcohol to try to move the process along.
Seth: 90 percent isopropyl alcohol, if left to its own devices, will strip paint.
Gerry: Yes, it will, and quickly too!
David: I knew that. I use it all the time to strip paint, but I figured I could control the reaction. I started with cotton swabs again, but that didn’t work fast enough for me, so I resorted to soaking the car side in the stuff for brief periods, then use a toothbrush to get the lettering off while holding the car under running water to minimize paint damage. It sort of worked, but it still left a lot of white stuff behind. Also, the alcohol quickly damaged the green paint on the PC car, which then seemed to soak up the white ink as it came off. As shown in the photo, I didn’t manage to remove enough lettering on either car to consider them a success.
Gerry: I’d say that on a scale of 1 to 10, you were really close to zero.
David: Well, considering I already had the bottle of alcohol out…
Seth: I know where you’re going with this.
David: I stripped both cars completely. As shown in the photo, that proved to be the only way to completely eradicate the Penn Central logo and lettering. Even with the white ink removed, the pad printing had clearly marked the paint on the car, and the printed areas were the very last paint to come away from the shell.
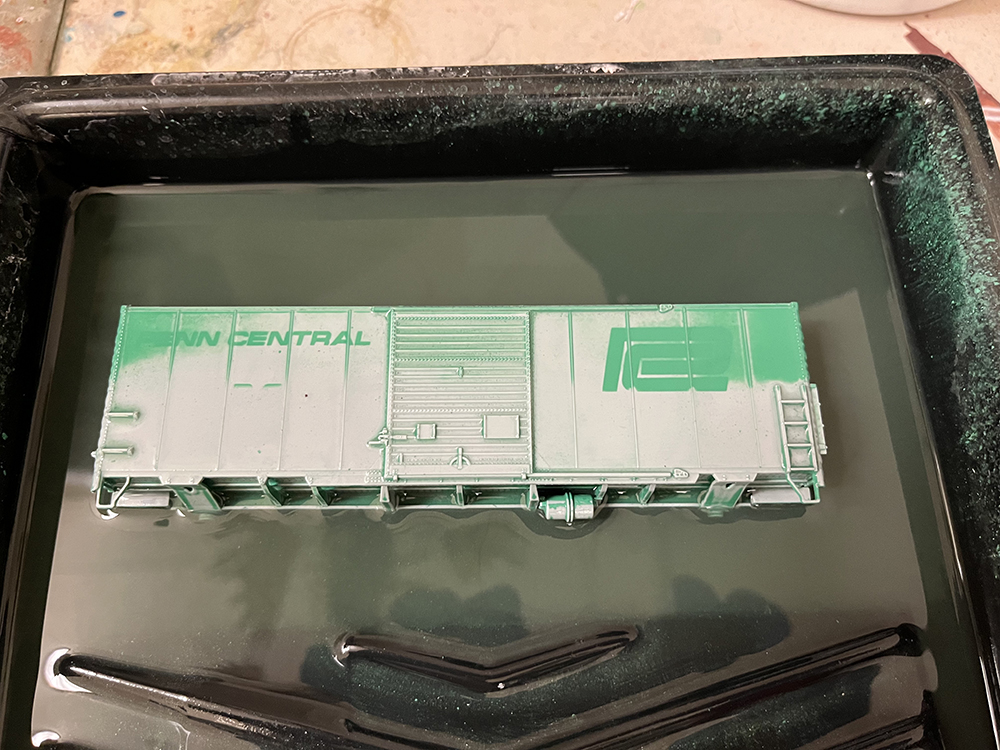
Gerry: The good news is that the lettering was finally gone.
Seth: The bad news was that so was the paint.
David: I was particularly sorry to lose the black roof and ends of the M&St.L car, as with all of the add-on details on the model, it turned out to be impossible to mask it and repaint them. I finished up by washing the shells in warm water, then let everything dry overnight.
Seth: So, what have we learned here?
Gerry: That Seth and Gerry were smart by buying undecorated cars to start with!
Seth: And that Cody probably would have done a better job!
David: Actually, Cody’s Solvaset trick would have worked great if the only lettering I needed to remove was the road number. He uses it all the time for renumbering cars.
Seth: But the fact that you were trying to take off all the markings made it more difficult.
David: Particularly since the ink on the M&St.L car proved to be very stubborn and the copious amounts of white ink on the PC car got into the paint. But hey, it was worth a shot!
Gerry: Well, I’ve got my own car-prep story to tell in the next installment.
David: And I’ve got some repainting work to do as well.
Seth: Man, you guys have all the fun!
Follow the links below to read the previous installment in the Car Swap Project series!


David, I just tried it on a bobbler caboose and it worked great! Just soaked it with Micro Sol and allowed it to set a while. Kept up the process with light toothpick “encouragement” and more Micro Sol. A new decal and you can’t tell. THANKS!
For a similar project, I went “old school” Cody and used Microscale Solveset to remove lettering. I have a BNSF Directors train made from Santa Fe cars whose lettering needed removing. I applied the Solveset and let it stand then attempted removing the letters with a pencil eraser. I found that patience is definitely the way to go here as I sound out the hard way when some of the paint came along with the letters. Obviously, the longer the setting solution stood, the easier it was to remove the letters without damaging anything else. A little light sanding, some masking and a light coat or two of silver paint, the Circus City decals went on without a hitch. As the expression goes, “one would never know!”
David: I’ve had some luck following up Solvaset with 70% isopropyl. Of course it helps that I’m not as much of a perfectionist as you and Cody, and I’m willing to mask some paint degradation with paint touch up and weathering.
Thanks for the tip, Albert. Perhaps it would have worked better with 70%. By the point I’d broken out the bottle of alcohol to try stripping the lettering, I’d already been at it for two hours, and I was running out of time to get the job done. As you will see in future installments, it all worked out for the best anyway! Thanks again for the note.