Questions and answers about large-scale track
I see there are locomotives in 1:24 scale for gauge-3 track. What width is gauge-3 track? How many gauges are there?
Gauge 3 is 2.5″, which is the correct gauge for modeling standard-gauge trains in G scale (1:22.5). 1:24 scale is close. There are three gauges commonly used in garden railroading: Gauge 0 (11/4″ or 32mm), gauge 1 (45mm), and gauge 3. However, virtually any gauge can be used.
DOWNLOAD our FREE scale and gauge chart to learn more.
What are the meaning of track codes?
The “code” of a rail (i.e, code-250 rail) is merely its height measured in thousandths of an inch. Hence, code 250 is .250″, or 1/4″ tall.
What are the advantages or disadvantages of brass vs. stainless steel rail for garden railways?
Brass has several advantages over stainless steel. It is easier to work with, can be easily soldered, is cheaper, conducts electricity well (if that is a concern), and will weather to a nice, dark color (except Aristo-Craft track, which does not seem to weather). Stainless steel is more difficult to work with, more expensive, cannot be easily soldered, and will always be bright and shiny.
How long do railroad ties/sleepers last outdoors?
The answer to this question depends on many factor–the type of material the tie is made from (plastic or wood), your climate (dry vs. wet vs. salt water spray), and even how much direct sunlight each tie receives. Commercial gauge-1 track ties contain UV protectants to help them weather outdoors longer. Properly maintained, your outdoor ties should last many years. The exception would be handlaid track made with a soft wood (balsa, etc.). These ties would deteriorate much faster.
How do you install railway ties?
If you’re using sectional track, the ties are integrated with the rail into one piece. No assembly is required. If you’re using flex track, the rail and ties are separated. After bending/cutting the rail to the desired curve(s), the ties simply slide onto the rails. No glue or screws/staples needed!
What’s the minimum radius track I should use?
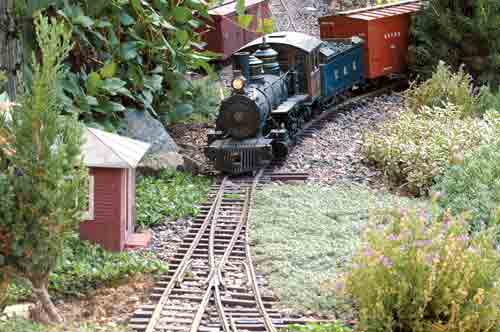
Most trains will negotiate the smallest radius available, which is LGB’s #1100 curved track. This is 2′ in radius, making a 4′-diameter circle. However, this is far too tight for realistic operation. A general rule of thumb is to use the largest radius you have room for.
Though this is a matter of opinion, I feel that a radius of 7′ or 8′ is about the minimum on which a train will begin to look realistic going around it, and then only if the rolling stock is fairly small. Larger rolling stock needs larger-radius curves. If you use flex track, you can make the track go where you want it to, and not be constrained by the pre-made curvature of sectional track.
LEARN MORE about sectional track in our downloadable article package.
LEARN MORE about flex track in our downloadable article package.
LEARN MORE about how to handlay your own track in this package.
If I build a garden railroad, will I be able to take my garden tractor over the track, or should I plan to build an overpass of some kind?
Yes, you should be able to run your lawn tractor over the track, with some qualifications. The track will need to be very firmly supported at the point where the tractor crosses it. I’d suggest a concrete pad, perhaps around 4″ thick, with reinforcing metal contained therein upon which the track is laid. Also, the concrete should be brought up to the top of the rail as well, both inside and outside the track. In fact, it would probably be best if the track were embedded in the concrete, with the flangeways cleared out to allow for the passage of trains. Given this, any rubber-tired vehicle (car, truck, tractor, etc.) should be able to cross the track without causing damage.
What’s the best way to lay garden railway track?
There are many, many ways to lay track outdoors, none of them right or wrong. I prefer using a method similar to that of full-size railroads.
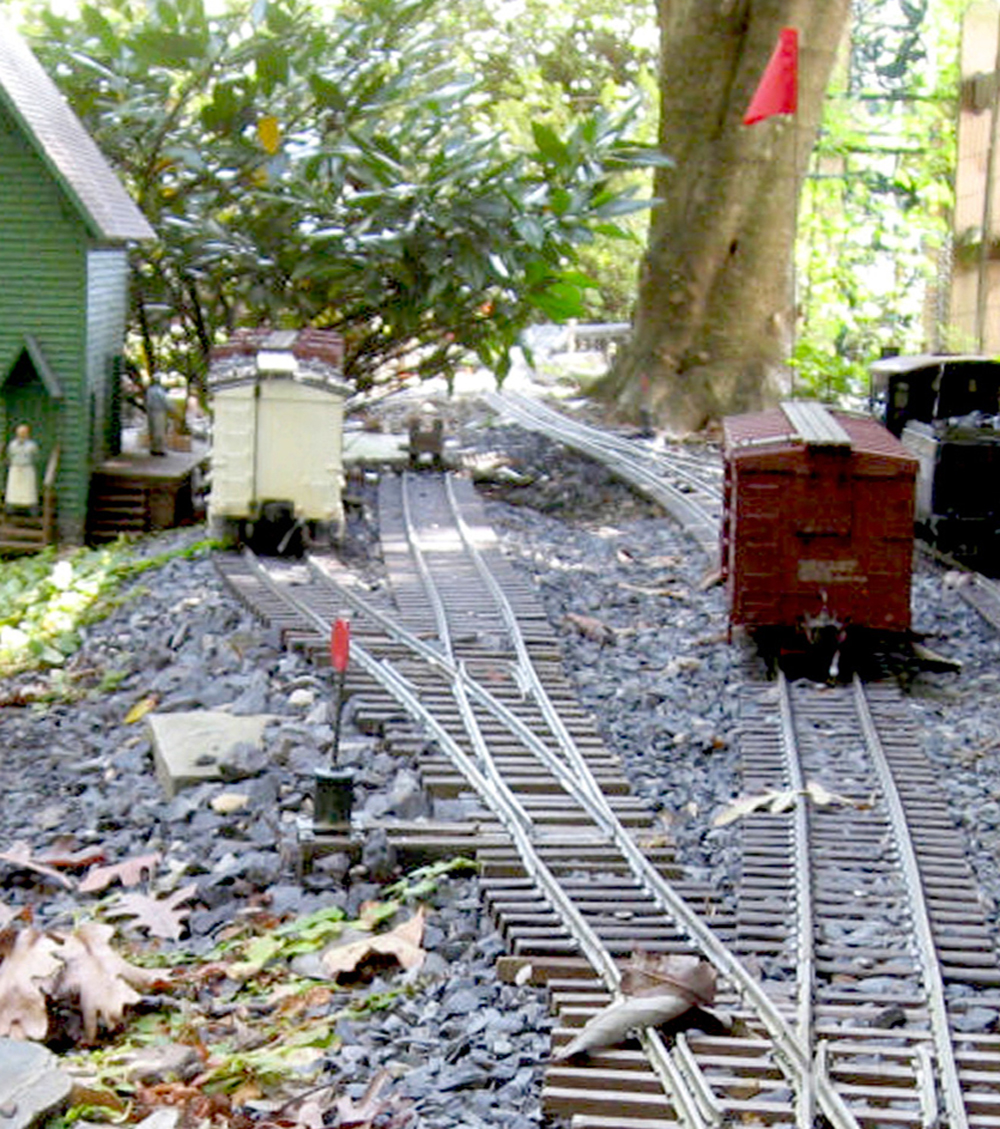
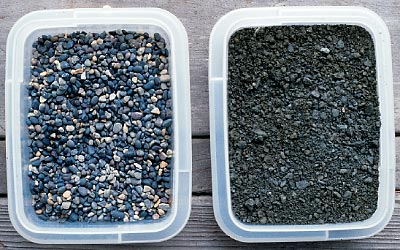
Dig a trench 2″-3″ deep along the line where you want your track to go. Fill the trench up to the level of the bottom of the ties with crusher fines, decomposed granite, or some other crushed rock. Do NOT use pea gravel or squeegee. This is river rock, and the stones are round. They will roll against each other and against the track, and are unable to securely hold the track in position. Crushed rock has “teeth” and, when tamped, will lock against itself and the track.
Tamp the ballast with a stick or a brick to seat it and level it. Place the track in position, level it up, and fill the trench with more ballast. The top of the ties should be even with the top of the trench. Tamp the ballast around the ties until it is firm. Do this with a stick, and take your time. It will take a while to properly ballast and tamp, but this is time well spent.
Track will change with the seasons. It will contract in the winter and expand in the summer. The ballast method allows the track to move freely, eliminating the buckling rails and broken ties of track rigidly fixed to a wooden or concrete base. Also, if you live in the frost belt, frost heave will move the track around, perhaps necessitating a once-a-year realignment. Ballasted track makes this an easy operation.
LEARN MORE in our Building a garden railroad downloadable article package.
What is the best way of installing gauge-1 track in a new outdoor railway? I was planning to dig a 10″-wide trench, 5″ deep, installing limestone as a base, with chicken grit as ballast.
The method you have outlined sounds fine, except that you can get away with a trench 4″ wide x 2″-3″ deep. If you use larger rocks as a base with smaller ballast on top, you’ll find that the ballast will sink between the larger rocks over time. I suggest using your ballast material for the base as well.
In my search for ballast at a local feed & seed store, I asked for chicken grit. They asked if I meant crushed oyster shell. Are chicken grit and crushed oyster shells the same thing?
Technically, there is a difference. Chicken grit is crushed rocks or pebbles which aids in digestion. Oyster shells are consumed for calcium to harden an egg’s shell. Since the shells are crushed pieces with a “tooth,” (as opposed to rounded edges, like river rock) they could be used as ballast, provided they are crushed finely enough.
When using a rail bender, how do you get the two different radii perfect enough to slide onto the plastic tie sections? Since this is flex track, should I just bend the assembled straight sections around the 3.5′ radius and anchor it down?
One way to get pretty accurate curves is to draw each rail on a piece of paper to the desired radius. You can do this using strings of the correct length with loops at either end. Stick a tack into the floor through one loop and use the other to trap the point of a pencil to draw the curve. Bending the rail to match the drawn lines should be a relatively easy task. Fine adjustments can be done by hand. Rails needn’t be perfectly bent–the ties will hold them to gauge. If you are building your railroad indoors, you might get away with bending already-assembled track, but I wouldn’t recommend it. Outdoors, it’s a definite no-no. The track will always try to unbend and with sun, weather, and frost heave aiding and abetting it, it will eventually succeed.
Are there any type of long “nails” to anchor my garden railroad track into the ground?
Depending on where you live, you may or may not want to do this. If you live in an area subject to frost heave, I’d definitely suggest that you not. However, if you live in the sunny South, you might try rain-gutter nails. Pin your track to a piece of pressure-treated wood, then put the gutter spike through a hole in the wood, into the ground.
How do I keep the track clean?
Constant cleaning of the track is probably the biggest thing that drives people away from track power. Mechanical cleaners (as opposed to solvents) are still the most effective, unless your track is coated with oil, say from a live steamer.
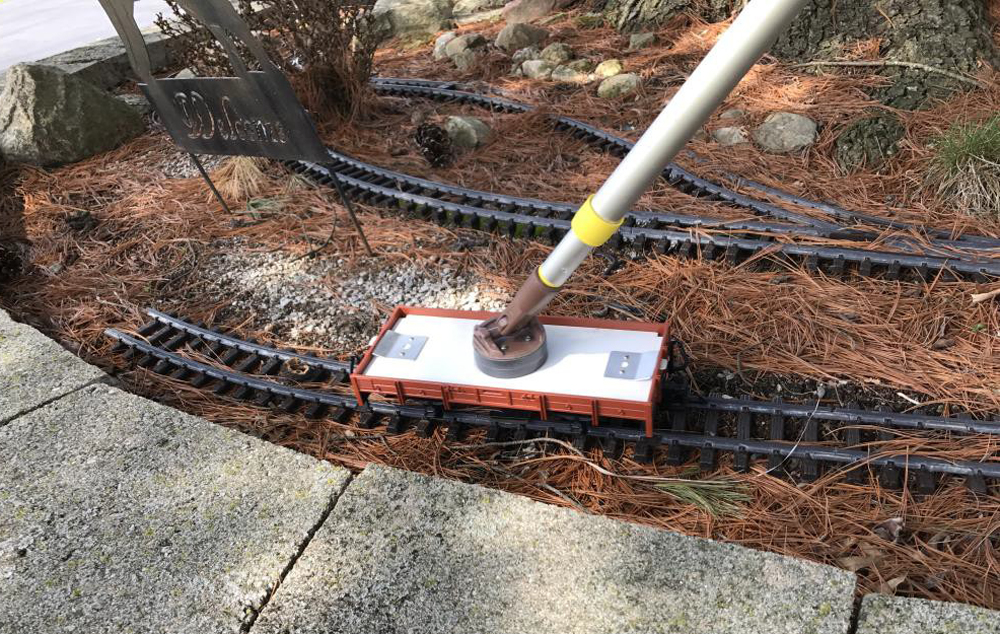
Start out by brushing any dirt, sand, or debris from the track with a small broom. The track can then be cleaned. A drywall sander, which amounts to sandpaper on a stick, is a popular way of cleaning the track, since it allows you to stand up. Scotch-brite pads from 3M also work well.
Proprietary track cleaners, like Joe Black’s sanding pad in a rolling chassis, can work well. These must be pushed around by hand or by a battery-powered engine until the track is clean enough to run a track-powered locomotive. PIKO America also sells a self-contained battery-powered track cleaner that looks like a small switcher
LEARN MORE about track basics, including cleaning track, in our downloadable article package.
BUILD your own track cleaner! Get ideas in this downloadable package.
How much track cleaning is required once track is installed?
That depends on a lot of things. What is your rail made of? Aluminum seems to require more cleaning than brass. How many trees do you have around and do they drop sap? What sort of birds or animals are around that might contribute to dirty track? Do you run plastic wheels or metal (metal runs cleaner)? How long between runs? The more often you run, the less track cleaning you’ll have to do. What is your climate like? Dry climates seem to require less cleaning. Is there salty air near you? If so, more cleaning.
Is there anything I can do to prevent ice from forming on my outdoor track?
Unfortunately, I know of nothing that will prevent ice from forming on the rails. Any chemical that might be applied could also interfere with conductivity and/or gum up your wheels. Increased amperage would have little effect. Heating the rails via solar radiation is probably the best bet. Once the ice has melted, wipe the rails down well so ice does not reappear (at least not until the next snowfall). If any readers have a better answer, I’d like to hear from you.
A reader response:
I am responding to the reader who asked about something to stop ice from forming on his tracks in the winter. He can purchase heat cables, used to melt snow and ice on roofs, at the hardware store or farm store and put them under the tracks. Just plug them in when the snow starts and no ice or snow will form. They are safe, inexpensive, and they work like magic. –Dale Schenekl, via e-mail