Olympia 2, The Log Blog: Part 4 – Punching holes in things
| Last updated on November 20, 2020
Trains.com is undergoing website maintenance that is expected to last approximately two weeks. Click here to learn more.
| Last updated on November 20, 2020
Members enjoy 15% off any purchase in our store. Join Today!
Model Railroader 2026 Calendar
Don't miss Model Railroader’s all-new 2026 calendar, featuring Rod Stewart's spectacular layout!
re: My Sci-Fi solution to the hole in the “world”: Don’t forget the sound effects when you install this baby.
Hi David,
Great stuff.
I picked up the tip on the alignment dowels from a video you did a few years ago and they worked great. I just tried to order more and it looks like they are no longer available. The product is out of stock, and their contact page now has this message:
“There will be no one to look at emails from midday on 28th April until further notice, as the current C&L staff are unfortunately being made redundant, and Pete is unavailable for the first few weeks of May. Phil Reid (the new owner) will then take over answering emails from a date to be announced around the middle of May, and he hopes to open for business and be able to start taking orders around the start of June.”
After I submitted the last comment, got to thinking about using a special lighting effect to get the trains through the hole in the wall. You know, like some cheesy movie where people step into a different dimension or something. Blues and greens would work well. All you would need in addition to the lights would be detector circuits on both sides to trigger the effect.
Shoulda done this one on April 1.
I suspect that if I had to do the transition between modules that you are doing, I’d build mountains that go between, then use tunnels for the track work. I’m not sure how the moving of the backdrop is going to work.
Hello again,
It appears that I’ve messed up the product number on the LED set from The Home Depot, even though it shows clearly on the package in the video. The correct number is 1000053797, and if you don’t have a Home Depot in your area that stocks the item, you can order it directly from the company’s website.
Sorry about the mix up (not enough zeros), and enjoy the series!
David
I liked your original ‘L’ shaped plan because it helped with hiding the tie in between the two shadow boxes. I would continue to use the existing log brow and use your proposed pond as the intake for logs to be processed. I’ve seen photographs of log brows across the pond from the sawmill, so the existing log brow is not that far from your proposed sawmill location. The pond monkeys would usually sort the logs and then float them over to the sawmill for processing. The shed as it exists now could be an extension of the sawmill if the proposed sawmill were moved up closer to the scene divider. That would help with the transition between scenes a bit. Drying sheds usually had a spur extension running into them to load lumber, So it would not be a problem to run the track out the other side as you have laid out in the video. Also, moving the sawmill closer to the scene divider would give more room for a wigwam burner and/or a couple of bunk houses.
I’ve enjoyed the entire series so far and I look forward to the upcoming videos.
As a rank amateur I’m hardly in a position to offer expert advice, but I tend to agree with Kim — I don’t see the benefit of having the vertical fascia between the modules…seems like more of a distraction than anything else. Seems to me like the plywood separating the two modules could easily be cut in an arc that would provide plenty of structural support for the top yet result in an open ~8 foot long switching layout. Otherwise, I’m impressed with your thought processes David — lots to learn from here.
Wonderful to see your progress, David, and I like your new ideas, especially the mirror! I agree with Daniel Smith in that pondering and solving the uncommon problems of adjusting and modifying the new additon presents. Keep it up!
Hello all, thank you for watching the series. It has been great fun getting back to Olympia, but I will say it took a bit of nerve to start tearing things out of the original layout. Now that I’ve started, however, I’m in full swing and remove bits that need to be reworked without even a second thought.
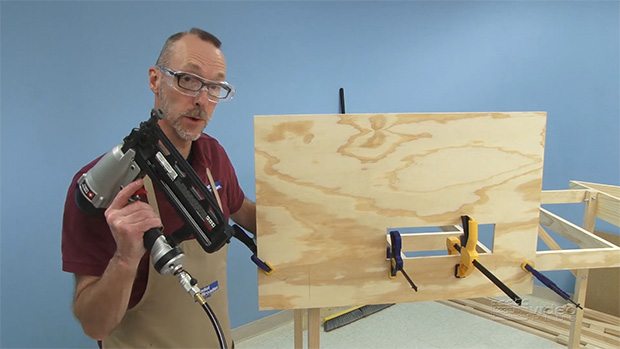
Ralph, I’m assuming your question is in regards to the openings cut into the plywood end panels on the original layout. Cutting those is covered in the original Olympia series part 3, which you can find in the project railroads section on MRVP. Last weekend, I cut the openings even bigger on both the new and old layouts to connect the sections together with a lot more open space in-between. It seems funny to be able to look out of the original layout into the new section now, but it really was the best solution based upon the new track configuration.
Glad you are enjoying the project. There’s plenty more to come!
David
Hmm, interesting you are rethinking the design as you go. Something we all do, I think. Certainly a heck of a lot of timber and plywood for a very small amount of track and limited operations. I think the picture-box effect is causing more grief than what it’s worth. I understand the top valence and the bottom facia, but the middle, I think, has run it’s course. I think it interrupts the flow of view, now. Originally it was a good idea, like Star Wars – capturing a section of a storyline (train track). But like Star Wars follow ups, it is trying to shoe-horn ideas into a rigid storyline (the scene) set up by the first movie (layout). Maybe it’s because I’m preferring the open flowing scenes too much.
I see you’ve sort of given up on the “L” shaped layout in flavor of a lineal one.
Rearranging the plastic backdrop so that it blends in to the new portion is an excellent idea. It would make it sort of seamless as opposed to the abrupt end of the world, except for the gaping hole through which trains may pass.
Not too sold on the mirror idea, yet. Think you may have to have it higher than you want to keep the illusion going.
I find the discussion of problems and solutions much more interesting and valuable than the ordinary “how to” articles and presentations. I could build a car, locomotive, or structure exactly like one in the magazine. But when I go to build a layout, the room, the objectives, and the obstacles will be different from anyone else’s, so everything I see on MRVP or in the magazine must be adapted. Seeing the adaptations that David is making on Olympia 2 (and on the Canadian Canyons layout) reminds me that there ARE ways to make things work!
This is a fantastic video series. Each episode is loaded with lots of terrific information.
I guess that in the future, all traveling show railroad layouts should be planned from the beginning to be expanded later into something larger and modular, less painful later. Great tips on lighting and the mirror David.
Thanks.
Watching Olympia Part 4 with much interest. Question: how did you cut those openings in the side of the original layout? They were very expertly done! Please share your technique as we are faced with this chore from time to time. Thanks!
It’s amazing how things can get complicated so quickly when adding on to a layout!
An interesting set of challenges and changes. Looking forward to seeing the next installment.