Videos & Photos Videos How To Benchwork How-to Library: Track Planning Made Easy – Computer-aided design, Part 3 Elevations and turnouts

How-to Library: Track Planning Made Easy – Computer-aided design, Part 3 Elevations and turnouts

By Angela Cotey | April 20, 2017

| Last updated on November 23, 2020


Email Newsletter

Get the newest photos, videos, stories, and more from Trains.com brands. Sign-up for email today!

Having trouble viewing this video?   Please visit our Video FAQ page
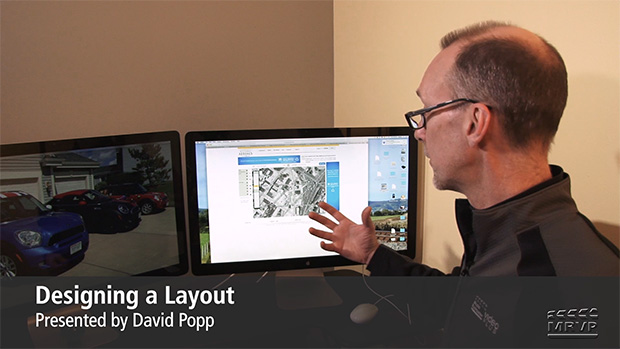
Modeler Gerry Leone wraps up his track-planning mini-series on computer-aided design (CAD) software with a tutorial on adding elevations and turnouts. Working with the simple plan he drew in part 2, Gerry shows you how the software figures distances and grades, and how you can use that information to determine if your design has enough clearance for trains you want to run. Although the mini-series concludes with part 3, leave your comments below and let us know if you’d like to see more videos like these on MRVP!

22 thoughts on “How-to Library: Track Planning Made Easy – Computer-aided design, Part 3 Elevations and turnouts

  1. Thank you Gerry, please could you do more videos on 3rd Planet, I have printed out the complete user manual, laminating the pages and putting them in a 2 ring folder, I find it hard to follow, short videos of how to use 3rd Planet would be much appreciated.
    Kind regards Gary, in Perth Western Australia.

  2. Hi Gerry. I’m in the process of learning the program.. One question: how do you get the track elevations to appear on the plan? I could not find that answer anywhere in the documentation. Thanks.

  3. Ive been wanting to see some easy explained demonstrations on track planning software. Gerry. You did a great job of explaining it so its easy to understand. Any chance you can show us how to add structures? If we see the size(s) of a structure with several walls on the back of a kit that we may want to add, especially for buildings that are not uniform sized like a square or rectangle, maybe has a loading dock or its been added on in later years. It would be interesting to see how that is made in the software.

  4. Great Series I do use 3rd Planit. Any chance your doing a video on printing. This continues t baffle me

    Jerry Hampton

  5. Excellent introduction to the topic, Gerry; thanks very much for the effort. What can we do out here in consumer land to convince the powers that be at Kalmbach to build on this series?

  6. Excellent video series. However, in my limited experience, it takes awhile before you get to this point where it really is this easy to use. But the videos do give encouragement that it is possible to use cad effectively after a reasonable learning period.

  7. Great video Gerry. Very started me looking at cad systems for my next layout. Would like to see more

  8. Thanks Gerry… I look forward to ‘doodling’ with this sometime in the future as my current layout has plenty of work for me to do right now. All of this is GREAT stuff!

  9. My challenge is not designing, but documenting an existing layout. I guess I would need to take lots of measurements to establish points of track position and elevation, then connect them for the main, and finally add sidings, yards and industrial trackage. I do have easements on all curves, which could be trickier to draw. Very welcome series, which will encourage me to put my layout onto paper.

  10. Hi, all — Thanks for watching and for commenting. A few answers:

    Robert — you’re absolutely correct, the elevation should start AFTER the crossing and end BEFORE it. I had it backwards, although I’m sure the difference would be marginal — maybe 1/8″ or so. The other thing I didn’t mention was that if you’ve got roadbed (e.g. 1/4″ cork) you have to take that into account, too. Good catch — thanks!

    David — Yes, the program does provide for variable center-to-center track spacing, determined by the user. It’s especially helpful in yards, staging, and on multiple-track helixes (or helices).

  11. Great series Gerry.
    One question.. When planning an elevated track to pass over another, shouldn’t the start and end points be after and before the crossover point respectively? If they’re before and after the crossing point, as in this example, there’s a very small chance you won’t reach the desired height in time to pass over the lower track.
    (My wife is constantly at me ‘stop planning and start building’)
    Robert.

  12. Nice series, Gerry. I like how you copy elements rather than picking and placing new ones from the library. Good tips and explanation on the elevations tools as well!

    Would like to see you add some bench work.

  13. Very neat stuff. Gerry, you have opened my eyes to new possibilities. My wife may be in touch with you about the time I will probably spend on playing with this 🙂

  14. Very informative and in relaxed manner. Like the new stylised opening and closing clips. Very modern!

  15. Thank you, Jerry, for taking a lot of the mystery out of CAD planning. Guess I’ll have to fire up the program and give it a go.

  16. Good track planning software and great tutorial Gerry on its many uses. One caution, a person can become immersed into the wonder of designing track plans and never get started on the benchwork. Each track planning software package should include a feature that pops up on the screen once every few hours that says “put down the mouse and start building the layout” 🙂 Thanks Gerry.

  17. Hi Jerry, Good series. I would like to see more like this.
    I have a question about track spacing, does the program do that?
    Thanks, Dave

  18. I have used a similar program, Cadrail from Sandia Software, for several years with great results. An additional feature of many of these programs is the ability to run trains on the layout that has been designed.

You must login to submit a comment