


What was your first train set (or locomotive)?
In the late in 1960s my dad worked for an auto parts store. Champion Spark Plug had a sales promotion that if you sold a certain number of spark plugs, you would receive a Lionel train set. Apparently my dad was a great salesmen, as he sold enough spark plugs to receive two Lionel train sets, which he gave to me as a present.
The set consisted of a 2-4-2 steam locomotive, a few cars, track, and the transformer. With two sets I was able to have a really large loop of track and played with the trains for hours on my bedroom floor. Eventually I added a few turnouts and sidings and relocated the train set on top of a ping pong table in my bedroom. As you can imagine, the tables took up a good portion of the room and I had to have my bed partially under the layout, but it was worth it. I continued to add to my layout with money I made from a paper route and later expanded the layout when it was moved to a screened in porch. My parents were encouraging with my love of trains and model railroading.
As I got older and began high school the Lionel trains were sold. I did not pick up the hobby again until after I was married, and had a house with room for a layout in the garage. My first HO scale layout was a 4-by-8 track plan, built from a Model Railroader track plan book. I designed the layout so that it could be hoisted by a pulley system to the ceiling when not in use.
Describe your model railroading philosophy in 6 words.
Realistic operations following prototype practices.
What has been your biggest modeling success?
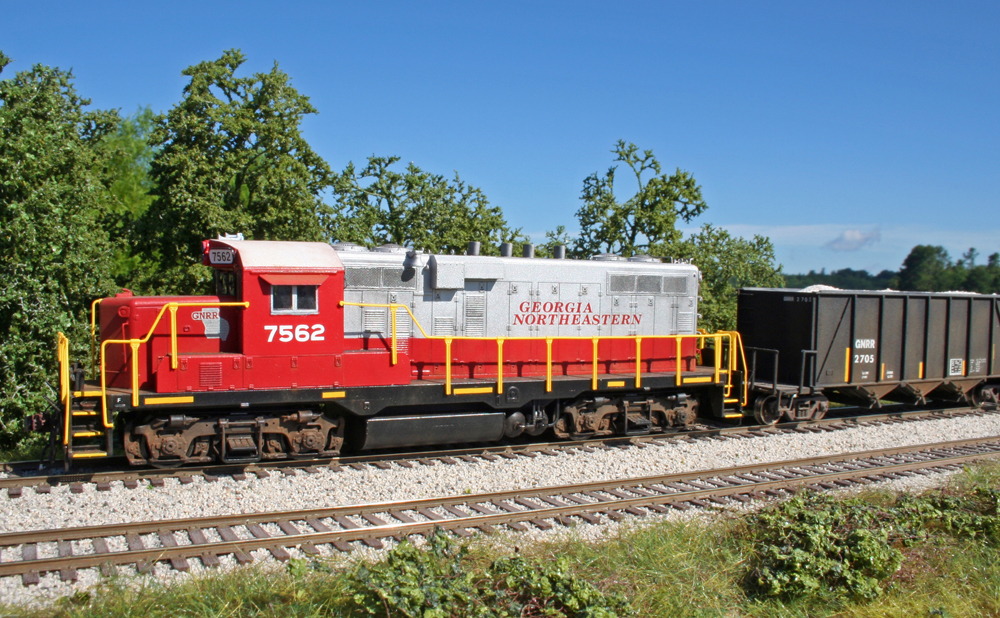
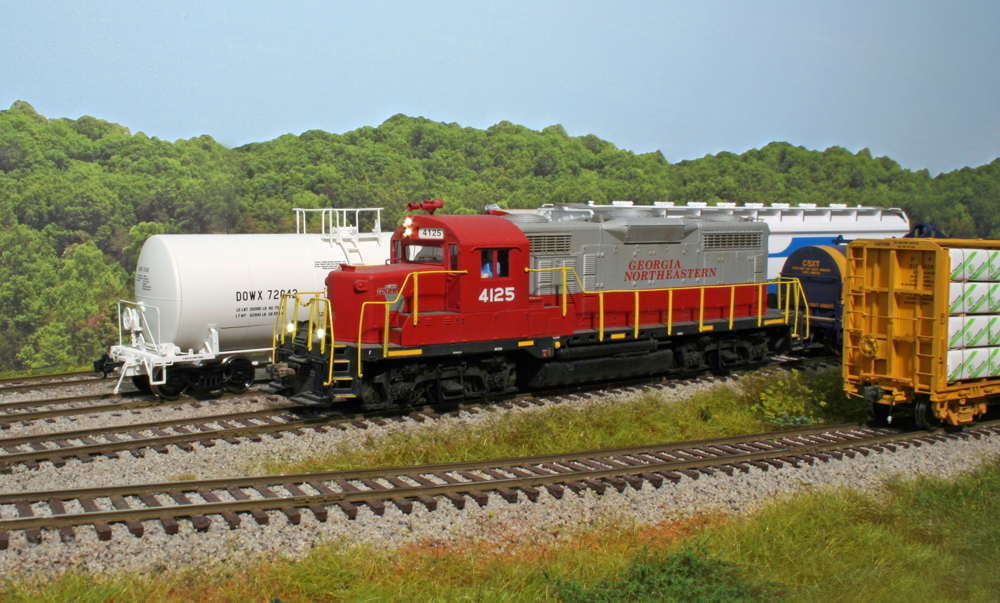
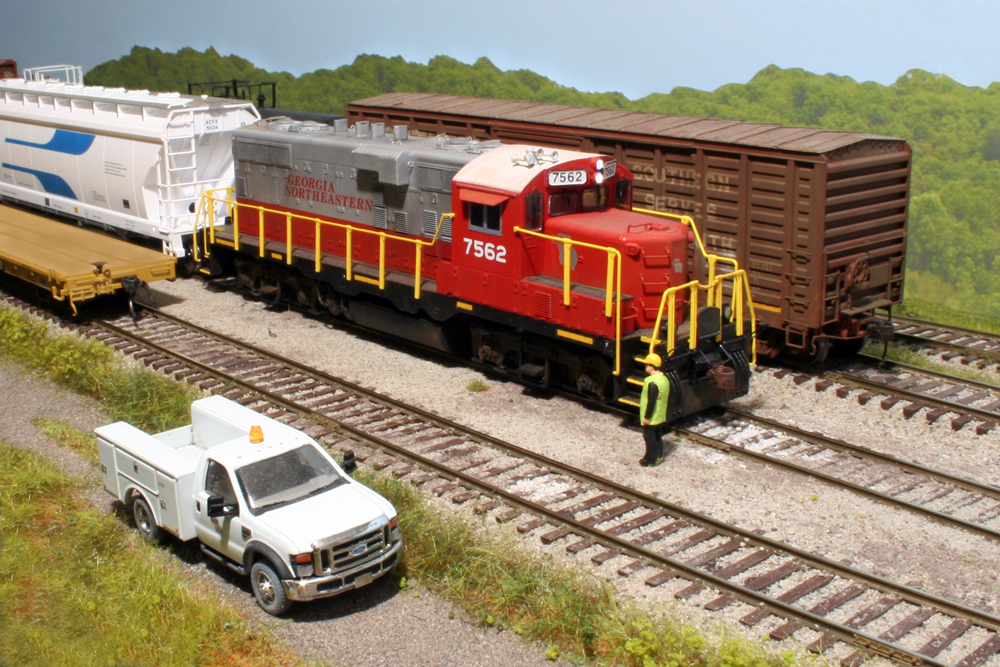
Building my current Georgia Northeastern Railroad (GNRR) layout and having a book I wrote, Building The Right-Sized Layout, published by Kalmbach.
Watch video of an operation session on the GNRR.
Watch video of an update to the GNRR.
What was your biggest modeling mistake?
When building my current GNRR layout I was working on the bridge scene over the Etowah River. I had finished the scenery up to the water’s edge and had painted the river bottom on the layout base. All I had left to do was to pour the Magic Water by Unreal Details, a two-part epoxy resin for the water surface. I mixed the resin and poured the river and it came out perfect. I turned off the lights and let the epoxy dry overnight.
In the morning, to my disbelief, I found a gnat stuck in the “water” right in the very front middle of the river. Apparently the gnat was thirsty and thought the water looked very realistic and it got stuck trying to get a drink. I tried to pick it out and only made the issue worse, leaving a big hole in the epoxy. Time to start over. I filled and sanded the hole left by the gnat, painted the river bottom again, and then poured the epoxy. This time I made a “tent” from plastic wrap to cover and seal off the area from any thirsty insects while the epoxy dried. My second attempt was successful, the water came out perfect, and no insects were harmed in the making.
What’s your least favorite modeling task?
Installing a decoder and adding ditch lights for a locomotive. I upgraded all my locomotives to ESU LokSound decoders and added ditch lights based on the prototype GNRR locomotive fleet. While not exceptionally difficult, it is tedious work to solder all the tiny wires making sure you don’t make any mistakes, and then try to neatly stuff them back under the shell as you reassemble the locomotive. I found if you take your time and follow the instructions it really is not that bad of a project, plus you have the satisfaction of having it done and seeing your locomotive operating.

What project(s) have you been working on recently?
For my latest project I built a new larger removable staging cassette for my GNRR layout. The staging cassette has scenery and represents Elizabeth Yard in Marietta. In addition, the removable staging cassette can be used for photo shoots outdoors. The new staging cassette expanded the yard from two tracks to four tracks, which greatly enhanced the operations in the yard area.
I recently held an operating session on my layout with the new staging cassette. It added a lot more work for the North Local crew to sort the cars from the yard and build their train prior to switching the industries. Previously, crews picked up their train already blocked which reduced their time in the yard. The new yard worked flawlessly, it added approximately 10 to 15 minutes to the local job, and it was a lot of fun to switch.
What advice would you give to a new hobbyist?
Build a layout as soon as you have a chance. It does not have to be large layout to enjoy the hobby; start small and go from there. The only way to improve your hobby skills is to practice them by building a layout and working on your models. Even if you don’t have space, you can join a club or start working on your model fleet. I highly recommend sound and DCC for your layout. Learn about how DCC works and buy a system so you can set up and program decoders. That way when you do have a layout you will already know how the system works and your locomotives will be ready to go.
The most important aspect of the hobby is to share it with others. I have made many lifelong friendships with other modelers by just reaching out and asking questions. I am always willing to share and help others as many have helped me along the journey of becoming a better model railroader.
My website is: www.ThomasKlimoski.com


