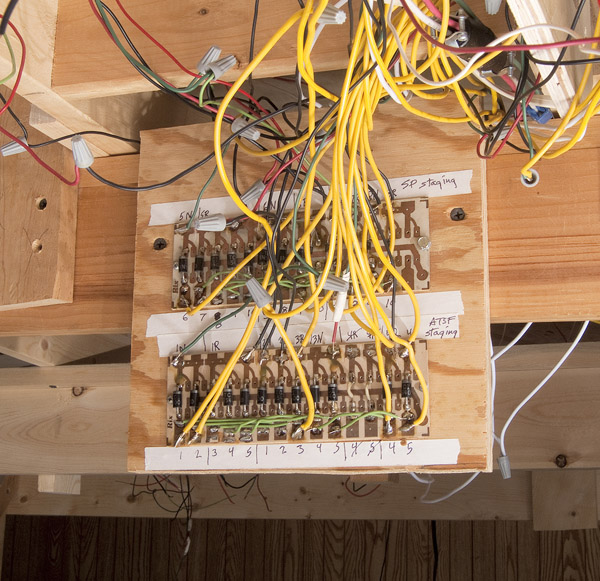
Let me give you an example. Recently I was building and installing a couple of diode routing systems to control the turnouts for my N scale staging yards.
If you’re not familiar with such systems, I’m afraid they’re a subject in and of themselves that I don’t have the space to go into here. I wrote an article on them back in the May 1982 Model Railroader, and several Kalmbach books on wiring cover them. Briefly, such systems let you set up a route through a group of turnouts with the push of a single button. It not only takes fewer buttons than aligning each turnout individually, but it’s also a neat thing to be able to do.
An air of confidence – Test twice, solder once
I had a good head start on these projects because I’d salvaged the circuit boards from my previous layout and was able to redesign and reconfigure them. I was also using push buttons I’d recycled, so I was feeling pretty good about the entire thing.
I mounted all the required gadgetry for the first system to a plywood panel, then crawled under the layout and attached the panel to the benchwork. Then I connected the wires to the switch machines and push buttons, proudly extricated myself, and hauled myself back to my feet. (I’ve attained an age and girth which makes trips under the layout not nearly as fun as they used to be.)
Then I pulled up a stool and sat down to enjoy the fruits of my labor, watching a locomotive move in and out of the staging tracks via the various routes I had established. About half the time the locomotive went where it was supposed to, but the other half it didn’t.
So now I had to make several more descents into the depths to fix the problems. This didn’t go well. I finally came to my senses, disconnected all the wires, and took the entire affair back to the workbench. There I could better see what I was doing and wasn’t trying to solder above my head while looking through the wrong part of my bifocals.
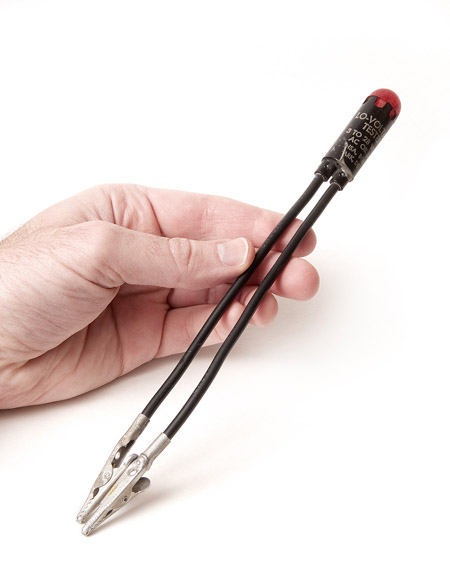
Testing equipment
I used a test light to check that each outgoing terminal was working, and if it wasn’t, to find where the breakdown was. The photo at left shows the light I use, which I’ve had forever. I highly recommend getting something like it. I sometimes use a multi-meter, but it’s a lot more delicate.
The bad diodes I found were easily replaced. Since they worked fine on the previous layout, I can only surmise I’d overheated them while soldering new wires for the switch machines.
I went under the layout and reinstalled the system, this time testing each wire as I connected it. I spent three hours on a Saturday installing the system the first time and about five on Sunday doing it over and getting it right.
A sequel
This re-found faith in testing paid an extra dividend. I’d run out of my previously used push buttons and had bought a new batch of 40 via the Internet, saving a lot of money in the process.
“Why bother,” I thought, but I went ahead and tested each of those new buttons anyway. I discovered that 39 were “normally open,” but one was “normally closed.” Somehow it had gotten in the wrong bin at the supply house. (If you know what you’re looking at you can spot the difference by the shape of the soldering leads. I didn’t know it at the time, and if I ever get another batch, I’ll have forgotten by the time I get around to installing them.) I didn’t bother to try getting my 40 cents back.
But back to my story. If I had installed this push button, it would have fried one of my Peco switch machines, even though they’re quite rugged and will take a lot of abuse. A little testing had paid off big.