


I’ve had a degenerative muscle condition for 20 years. Because it has been a gradual degeneration, I’ve been able to adjust my modeling over that period. I can still scratchbuild and kitbash buildings. I can also paint and decal locomotives and cars; it just takes longer. At times, modeling has become frustrating. However, I’ve been forced to find new ways of doing things.
Because of my disability, my wife and I sold our two-story house of 32 years and purchased a single-level condominium in 2018. That meant I had to dismantle my 25-year-old layout and send it to the dumpster [see Bob’s previous layout in the September 2019 issue of Model Railroader. – Ed.]. It was a very sad day. Fortunately, I had friends to help pack up my rolling stock. Others were pros at disassembling and carrying out the layout benchwork.
Several months after moving I decided to design a new layout in the condo’s smaller basement. The height of the new layout would be mid-chest high on me. I employed L-girder construction using 1 x 4 joists so I could reach under the surface for wiring. My main electronics – DCC and Computer Model Railroad Interface circuitry – would need to be under the layout, yet accessible from a standing or seated position.
The widest portion of the layout would be 3 feet. Either side of the three-foot sections would allow for access from an aisle. A 26-foot-long portion cantilevered off a wall would have access from one side only.
I attached multiple 4” long sections of 1” PVC conduit 18 inches apart through which to run my wiring. The conduit pieces were attached to an L-girder with 2” no. 6 trim screws. Inside the conduit I ran the screw through vinyl tubing to protect the wiring from the screw threads. I’m able to reach under the tabletop to fish through wiring from above due to the 1×4 joist space provided in L-girder construction. All the wiring runs along the L-girders will eventually be covered by a hardboard fascia attached with screws.
My Digitrax DCC electronics are on a 2 x 4-foot piece of plywood that slides in and out from under the layout. Wiring it was easy from a seated position.
Once my benchwork was up, nothing should require me to crawl under the layout. I am physically unable to do that. I still have stuff stored under the layout, but I don’t need to get on my hands and knees to gain access.
In the later years of my previous layout, I started using Hankscraft stall motors to line my turnouts. Since I installed them on the surface, each needed to be hidden inside a structure. Where there was no building, I constructed one to cover the motor.
Although I saved all the Hankscraft motors from my previous layout, I decided to try smaller mini-servos on my new layout. All are surface-mounted and hidden in structures. I only have eight servos on mainline turnouts. Turnouts in yards or off the main are manually operated. The servos are controlled via one Octo III by Tam Valley.
I plan to scenic and ballast my two branch lines and the 26-foot main line. I’ll use some view blocks to give the illusion of changing grades. The terminal yards won’t be ballasted for two reasons: it’s a lot of track to ballast and I often make track changes in yards to meet operational needs. Just in the past month I’ve added four passing sidings and engine facility tracks in both yards.
While this disability has been frustrating, I’ve not given up model railroading. It has been difficult for me to climb down and up basement steps when I attend other modelers’ ops sessions, but I still make it a point to attend. I still attend my National Model Railroad Association South Central Wisconsin Division monthly meets and help out at their annual model railroad show.
Staying active in the hobby has helped me keep that “disability wolf” outside the door.
Modeling tips
Here are five items to keep in mind when building an accessible layout.
1. Must have access from a standing or seated position
2. Wiring must be accessible from an aisle
3. Nothing should require climbing under the layout
4. All switch machines are surface-mounted
5. Minimal scenery
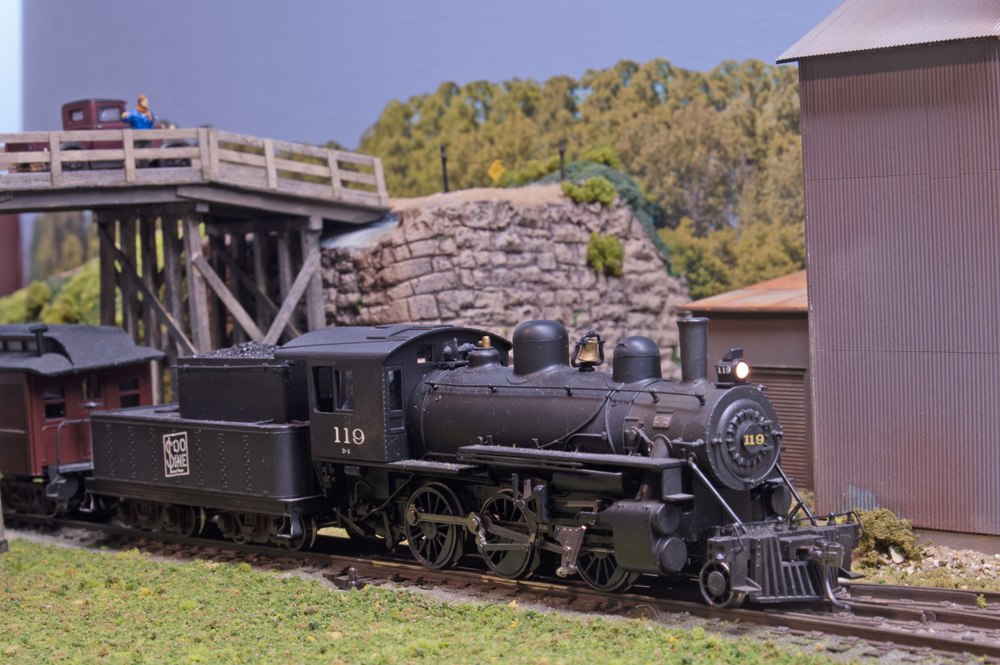
Bob Wundrock hasn’t let a disability stop him from enjoying model railroading. Thanks to a carefully thought out design, he has been able to do nearly all the work himself.
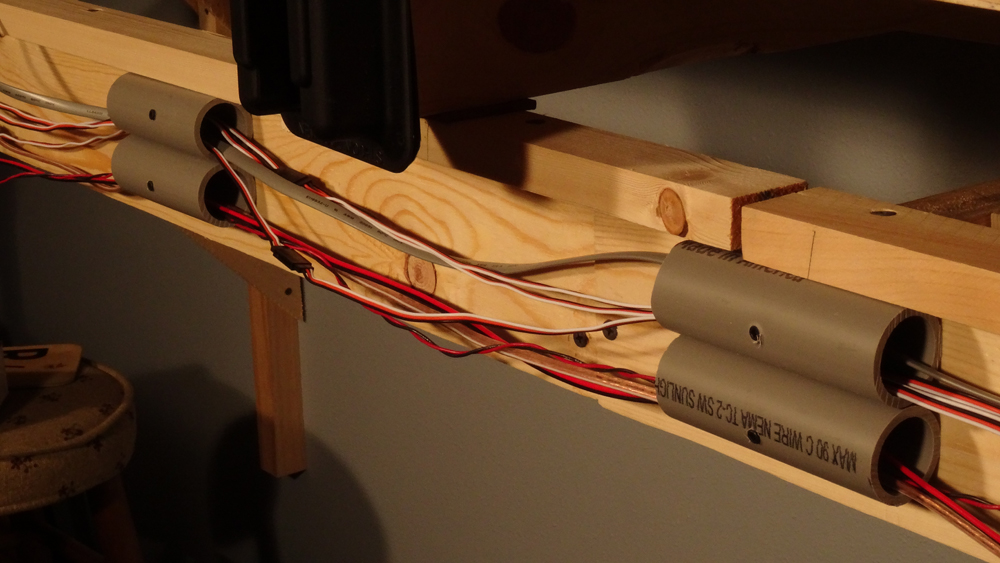
The layout’s wiring runs are located along the front edge and are supported by multiple 4” sections of one-inch PVC conduit spaced 18” apart.
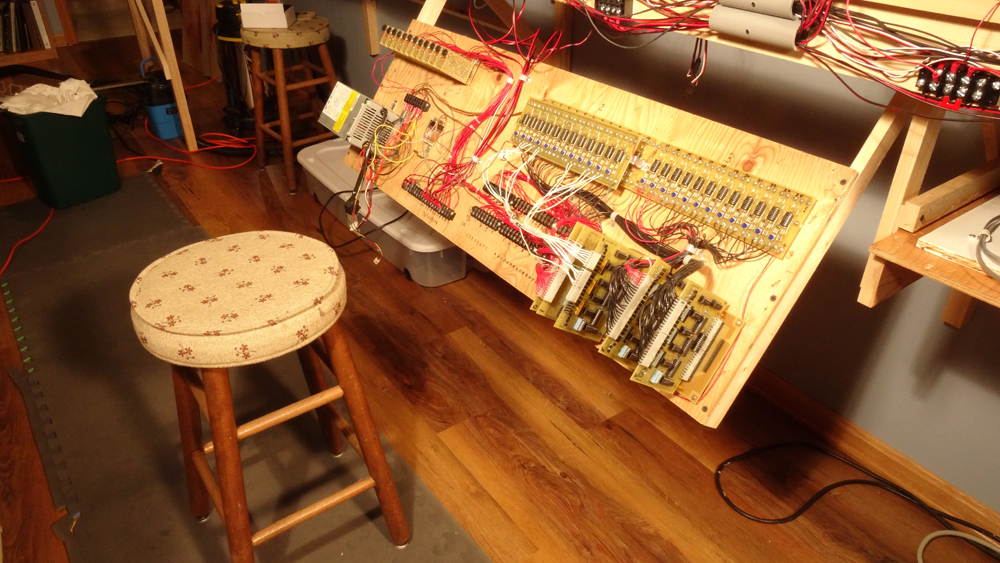
Electronics are installed on a piece of plywood that slides in and out from under the layout. Wiring it is easy from a seated position.
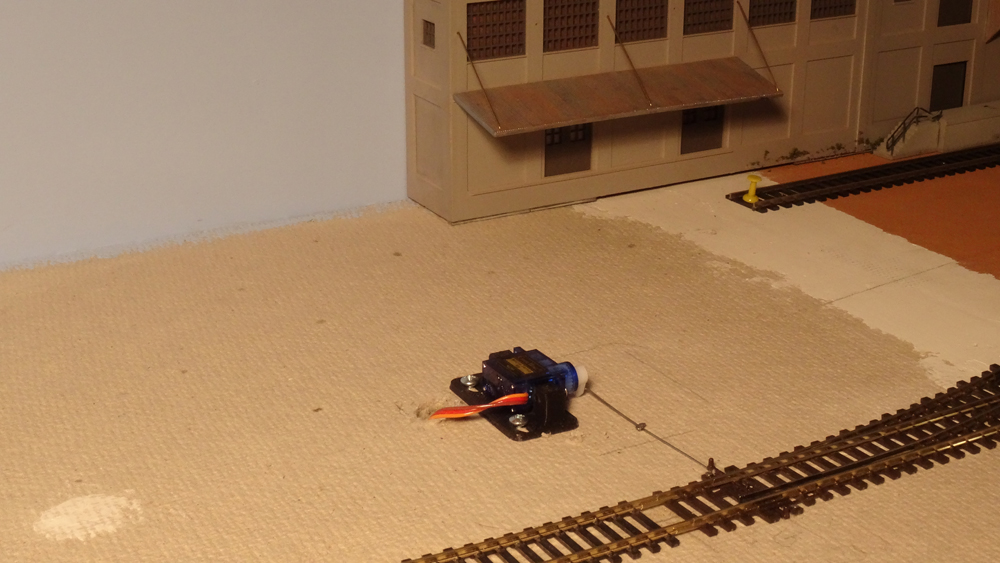
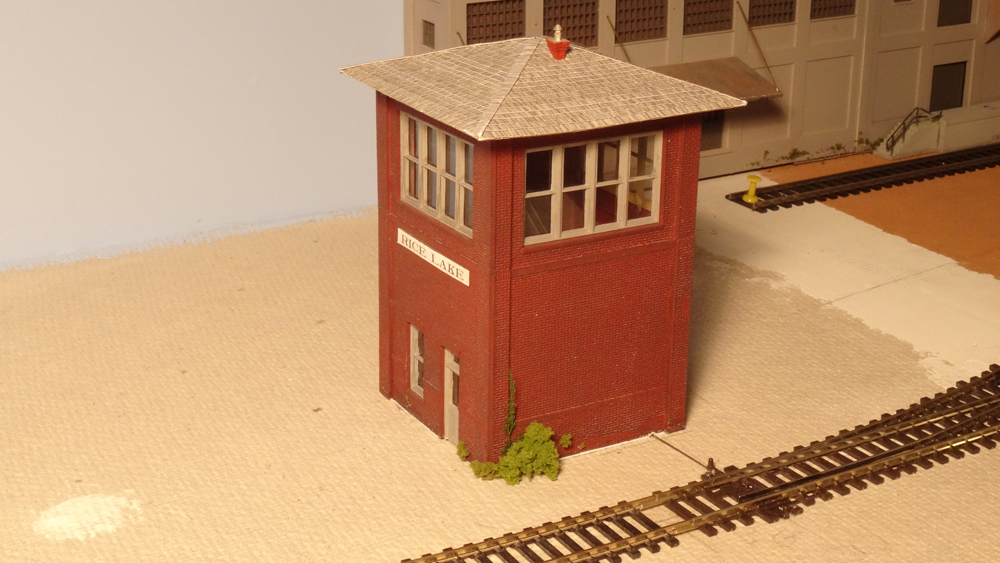
Servo-style switch machines are mounted on the surface of the layout and are concealed under removable buildings.


Lots of great ideas here Bob.