Flemming Ørneholm’s HO scale Eaglecreek & Northern, which was featured in the February 2012 Model Railroader, is a testament to his ingenious use of space. In less than 7 x 12 feet, Flemming’s HO scale layout captures the sprawling vistas of the west along the Union Pacific. With massive UP 4-8-8-4 Big Boys regularly hauling freight along the main, the layout feels larger than it is. Over the past year, Flemming made the layout even better with an engine terminal that includes a roundhouse and a Digital Command Control (DCC)-equipped HO scale 130-foot turntable.
The inspiration for the extension to the layout came from an engine terminal module that Flemming saw during the National Model Railroad Association British Region convention in 2010. Thinking that he’d run out of layout space, Flemming originally planned his own engine terminal model as a stand-alone diorama. However, he always wanted an easier way to turn locomotives on his layout, so he figured out a way to incorporate the scene into the Eaglecreek & Northern.
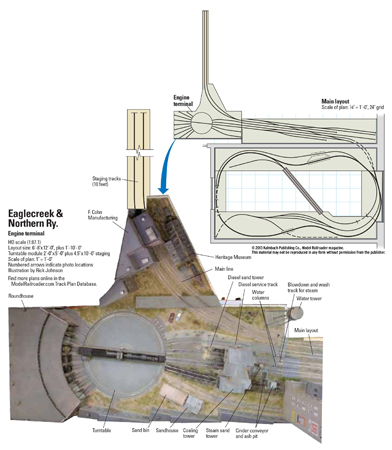
Space-saving design
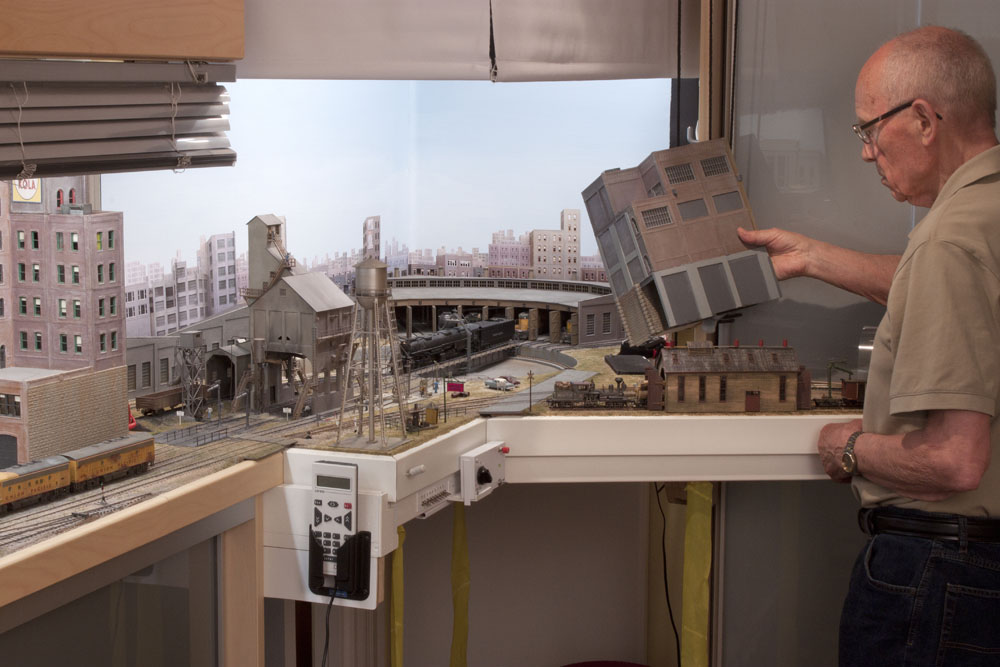
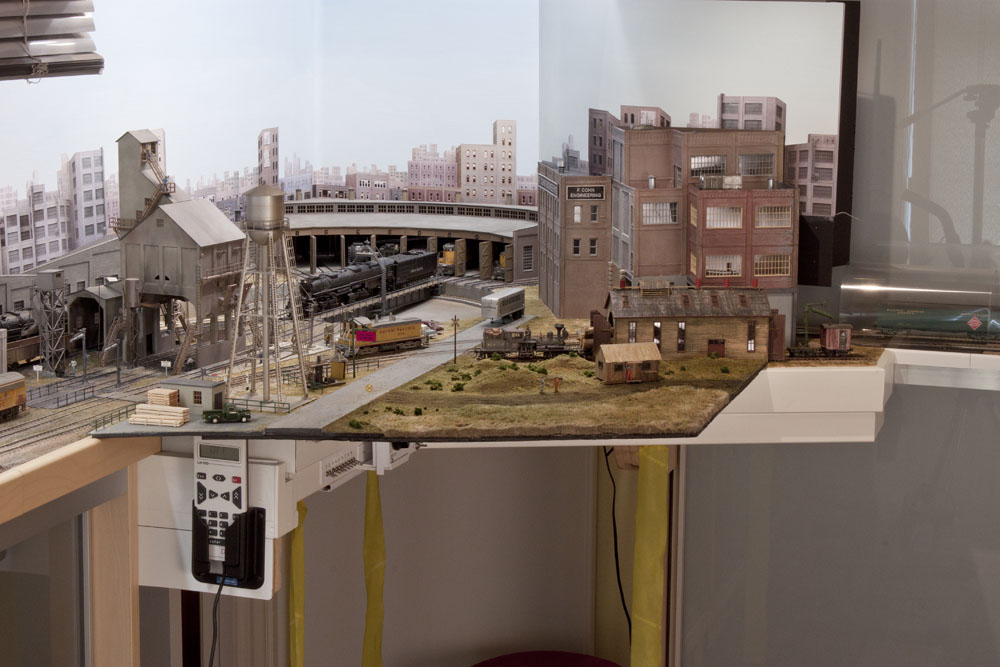
As you can see in the overhead photo below, the new layout extension consists of three parts: the engine terminal diorama, a narrow shelf with two10-foot long staging tracks, and a city corner section that connects the staging tracks to the main line. There’s also a removable foreground section that’s used only for adding depth to layout photos.
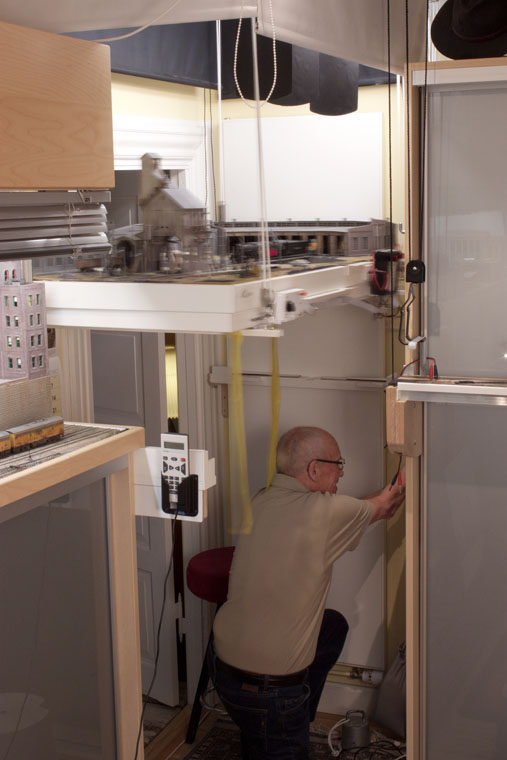
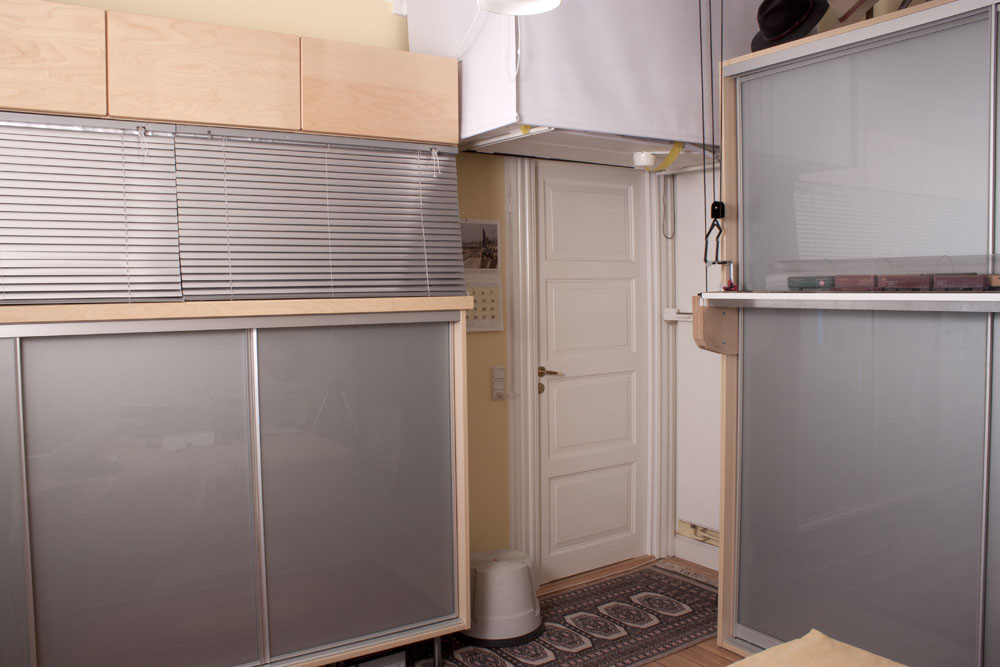
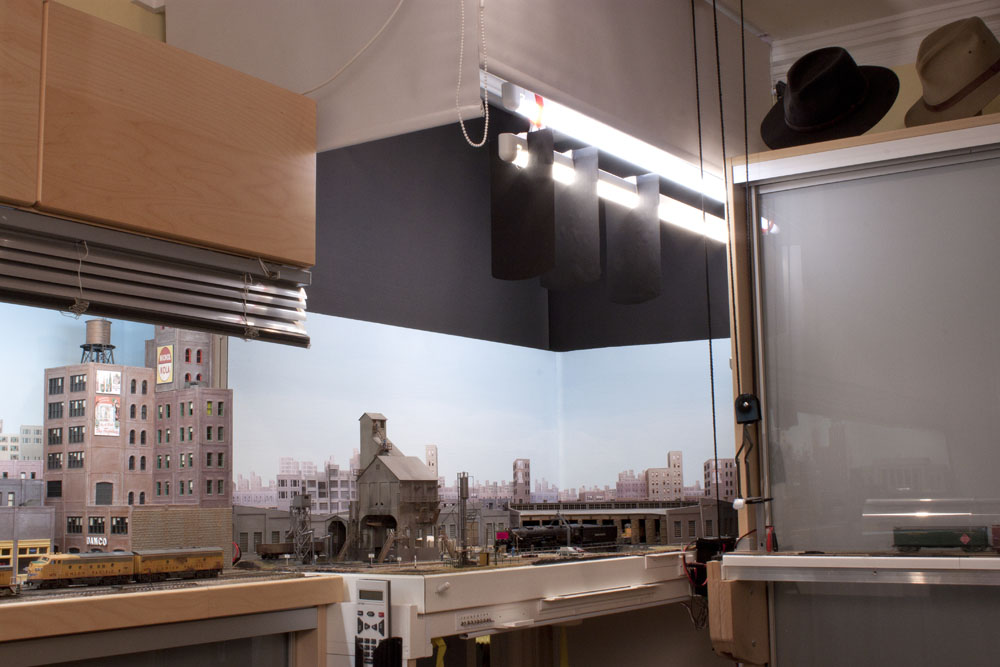
The biggest challenge in building the layout extension was that it had to span the doorway between rooms. Flemming solved the problem by building the engine terminal scene and the staging track shelf on a pulley system. Between operating sessions, Flemming hoists these sections to the ceiling. The corner city section lifts out and is stored under the main layout.
Flemming made the sections as lightweight as possible. The engine terminal and corner section are made of foam insulation board. To give the sections a finished appearance and to protect the soft foam, he covered the edges with a fascia made of white sheet styrene. The staging shelf is a single length of aluminum channel.
Window shades mounted on the ceiling protect the scene from dust. The staging tracks have clear acetate for dust protection. These sheets are attached to one side of the aluminum channel so they can easily be flipped up when the staging tracks are needed for an operating session. A long venetian blind conceals the city yard between sessions.
Backdrop and lighting
The backdrop is made of hardboard painted with sky blue acrylic paint. Because the scene is in a corner and needs to be removable, Flemming made the backdrop in two pieces. He coved the corner joint between the two backdrop sections to avoid the harsh shadows that would be caused by a right-angle corner.
Flemming made the city scene on the backdrop using photos of his building models that he manipulated with photo-editing software. He then printed the backdrop scene on photocopier paper and attached it to the backdrop with spray adhesive.
The same window shades that conceal the scene when it’s stored act as lighting valances when the scene is in use. Above the backdrop, Flemming also uses black shades to conceal the upper portions of the room’s doorway and interior wall. This keeps the viewer’s attention focused on the scene.
Two fluorescent light tubes are concealed behind the window shade valance provide layout lighting. To help conceal the light source from the viewer, Flemming added a few “barn doors” to one of the light tubes. Typically used in theatrical lighting, barn doors are usually movable flaps mounted around the lens of a spotlight to direct or diffuse the beam. Flemming’s barn doors are sheets of styrene attached to the light tube. The sheets are black on one side to match the shade above the backdrop and white on the other to match the inside of the lighting valance.
Better photos with removable foreground
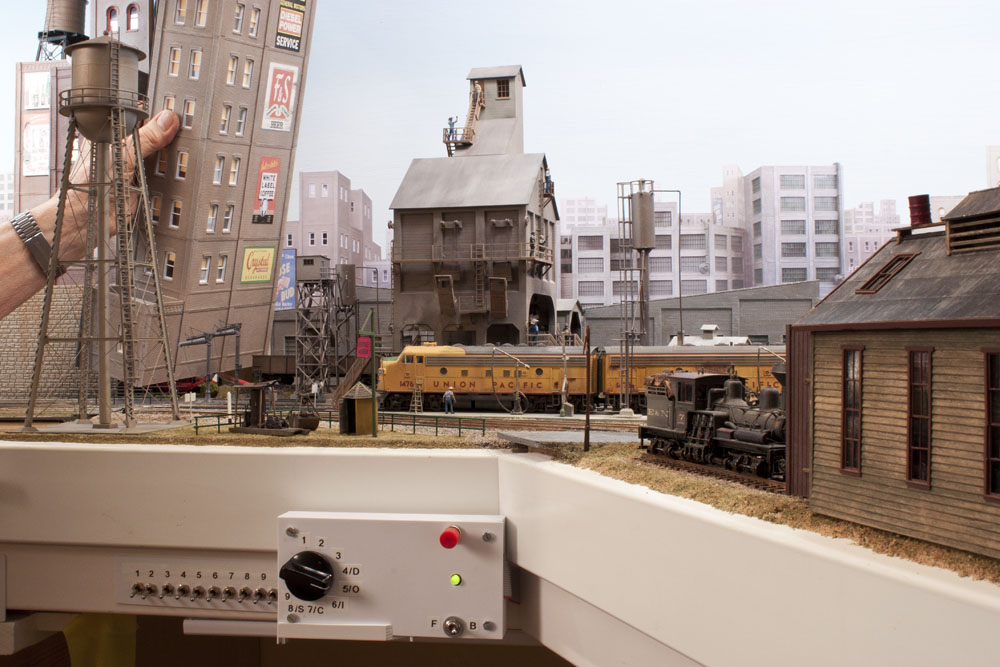
Narrow benchwork is useful for fitting a layout into a small space, but it makes taking realistic layout photos more difficult. If the track is close to the edge of the benchwork, it’s hard to get a photo that doesn’t have part of the fascia in the shot. Flemming solved this problem on his engine terminal module by building a removable photo foreground.
The foregound consists of a sheet of lightweight Gatorfoam that rests on top of the fascia edge. [Gatorfoam is commonly used as a backing material for photos. It’s available in several thickness from art supply stores. – Ed.] Flemming scenicked the Gatorfoam with ground cover that matches the rest of the layout, and also added a road and maintenance shed. When operating the layout, he simply lifts off the foreground so it’s out of the way.

Servicing steam and diesel power
The sand house and tower, cinder conveyor and ash pit, coaling tower, and water tower are Walthers Cornerstone Series kits. The roundhouse is also a Walthers kit that Flemming modified to fit the available space. The two water columns are from Tichy Train Group.
The tall buildings on the corner connector section of the scene are made from Design Preservation Models modular parts. This section also features the Heritage Museum, from which antique logging equipment regularly makes excursion runs.
With his layout extension, Flemming once again proves that building a great model railroad doesn’t require a large train room. The most important thing is how creatively a model railroader uses the space available to him
Name: Eaglecreek & Northern Ry. engine terminal module
Size: 2 x 5 feet with 41⁄2″ x 10′-0″ staging track shelf
Prototype: Union Pacific
Locale: western United States
Era: 1955
Style: module
Minimum radius: 28″
Benchwork: foam insulation board
Height: 57 1⁄2″
Roadbed: foam rubber and auto body sound insulation
Track: Peco code 83 flextrack
Backdrop: painted hardboard with printed photo
Control: Lenz DCC