


Visual trickery has been part of model railroading for many years. John Allen used mirrors on his HO scale Gorre & Daphetid to make scenes appear deeper than they really were. John also made inches appear like miles on his model railroad using structures and scenery to create the illusion of distance, a technique known as forced perspective.
Some modelers confuse forced perspective with selective compression. However, they’re not the same thing. In forced perspective, we use models from a smaller scale to convey the sense of distance. For this article, I used an N scale house and barn and various sizes of trees on the HO scale Milwaukee, Racine & Troy, our staff layout.
Selective compression, on the other hand, means reducing the size of the prototype when making a model without leaving out key identifying elements. For example, a prototype depot might have five freight doors. By modeling the structure with three freight doors, we can convey the look and feel of the real thing but save space.
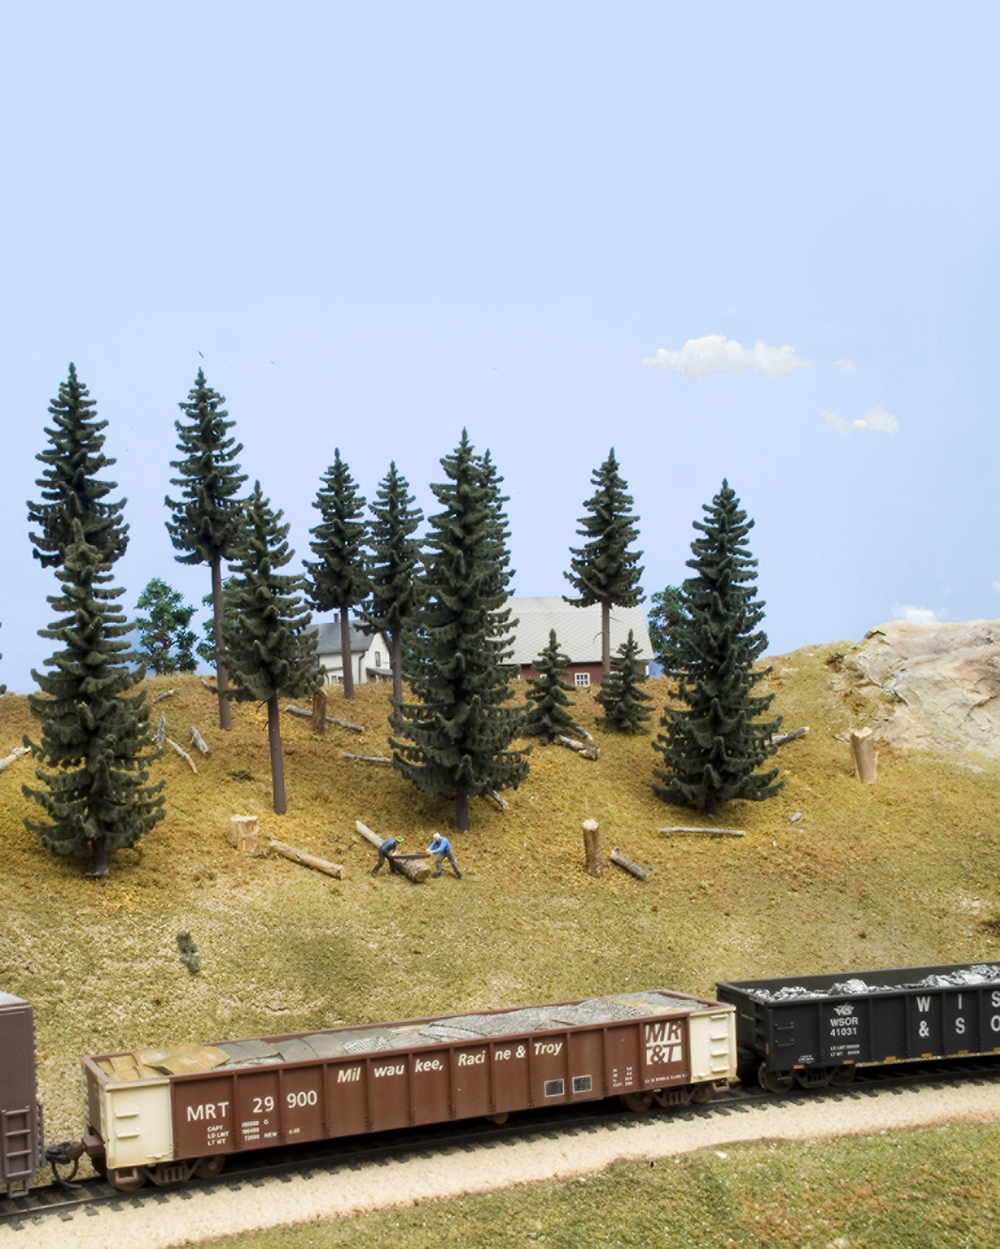
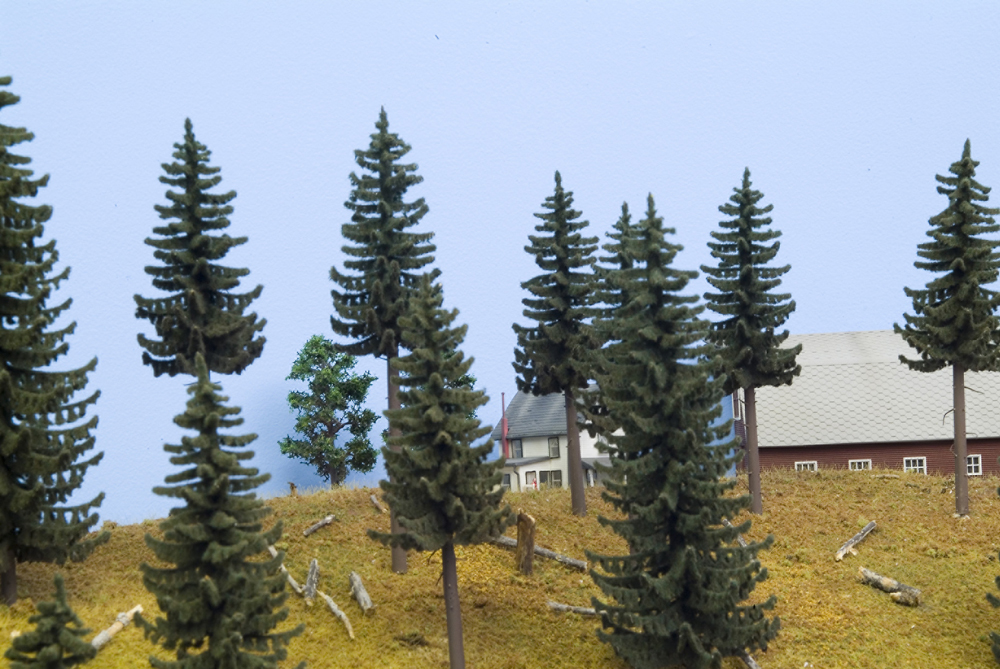
The key to success with forced perspective is not placing models of different scales too close to each other. Initially, I’d planned to put this N scale farm scene on a different part of the layout, but there were two HO scale structures nearby that would have given the trick away. By putting the smaller structures in the background, just beyond the crown of the hill, I was able to make it look like our layout goes on forever, even though there is a mere 17″ between the backdrop and tracks.
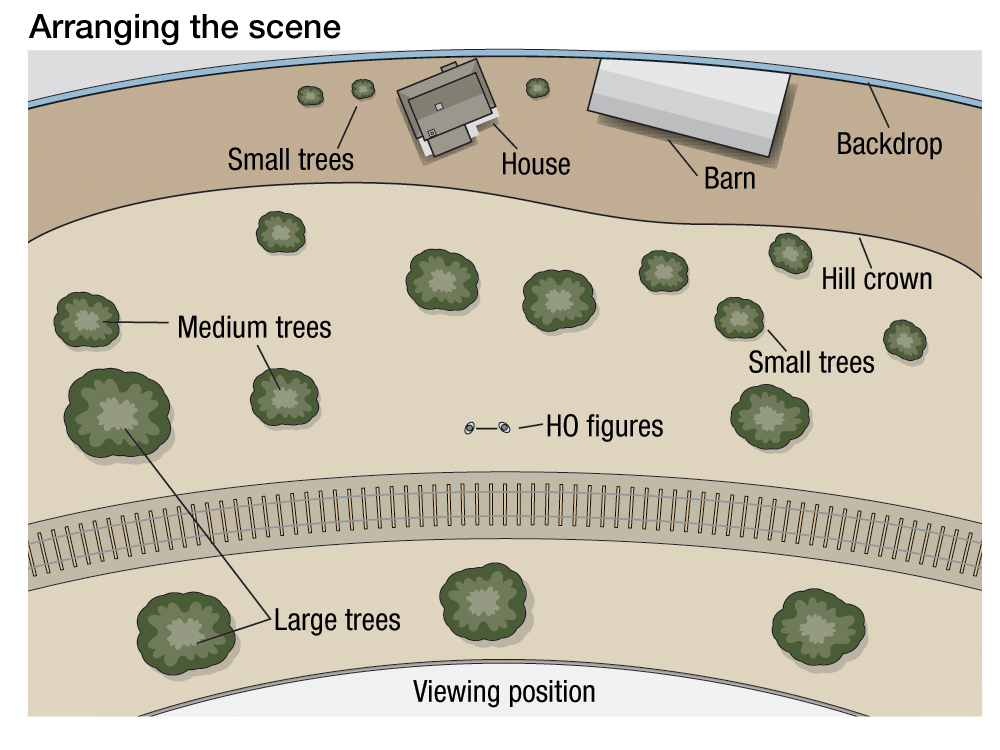
Step 1 Planning
The illustration shows the relationship of the items in the scene to each other. Notice how the tallest trees are in the foreground, closest to the aisle and the viewer. The farther away the scene gets from the aisle, the smaller things get. I used small and medium trees near the top of the hill, planting them in a grove to prevent direct sight lines of the farm house and barn, the two background structures I used for this project.
Figures are another important element in forced perspective. The HO scale lumberjacks work fine as foreground figures. However, the effect would be ruined if they were near the crown of the hill.
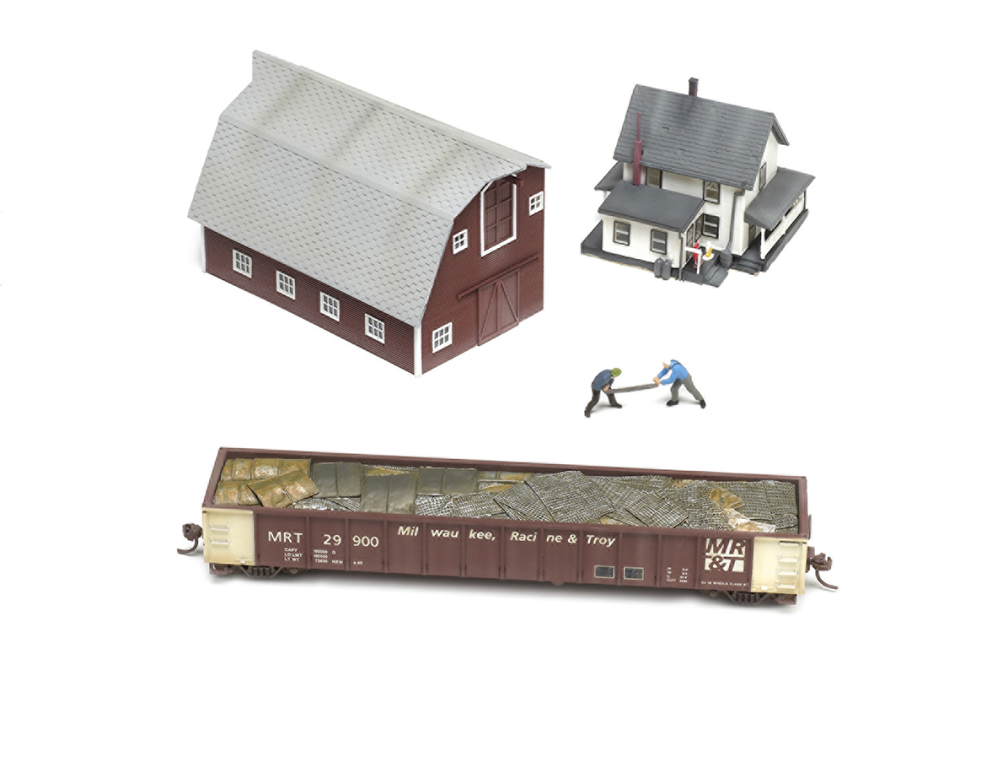
Step 2 Perspective
Distance is the key to success with forced perspective. As you can see in the photo, the illusion of distance doesn’t work when the N scale barn (American Model Builders kit no. 619) and Bachmann farm house (no. 45812) are close to the HO scale lumberjack figures and Milwaukee, Racine & Troy gondola. However, when the structures are placed farther back in the scene, as shown later in this article, forced perspective works as intended.
It’s important to take your time when planning a scene that uses forced perspective. During this project, I wound up moving the structures and trees several times until I finally had the items arranged in a satisfactory manner.
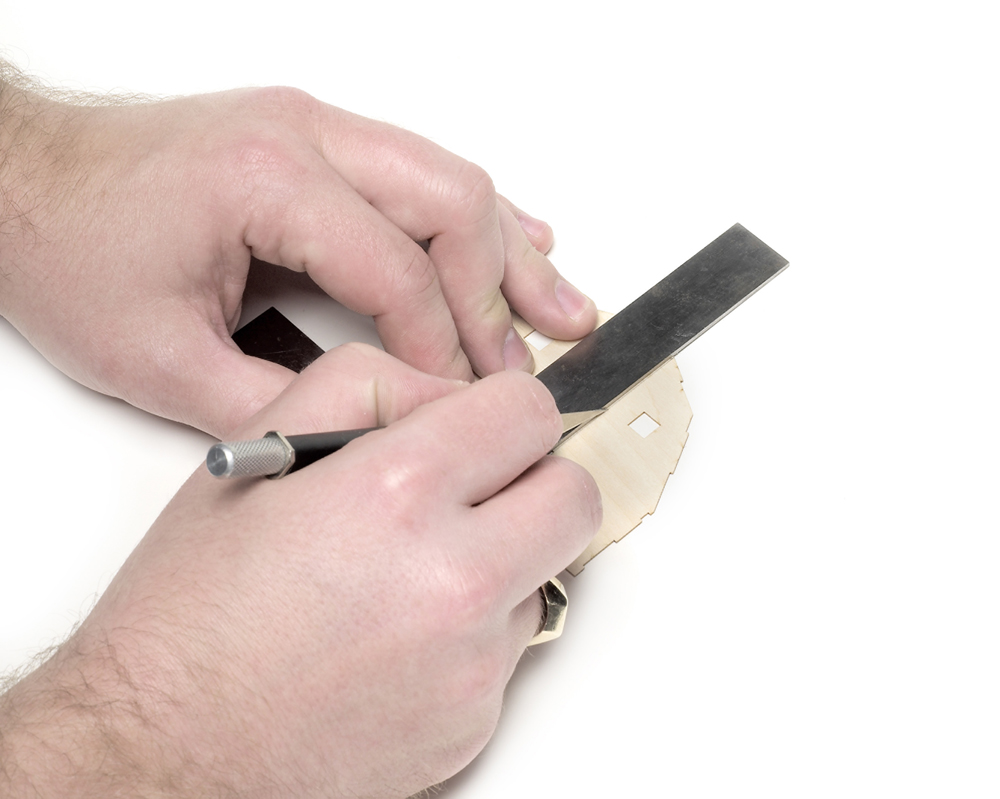
Step 3 Structures
The Bachmann farm house is factory assembled, so all I had to do was weather it with thinned Polly Scale Steam Power Black and L&N Gray [Testor Corp. has discontinued the Polly Scale line. Acrylic hobby paints are available from Acrylicos Vallejo, Hornby, Mission Models, and Revell, among others. – Ed.] Since the house is in the background and farther from the viewer, I applied the weathering a bit heavier than normal so it would stand out.
The barn is a laser-cut wood kit that I had to modify slightly before assembly. To save space, I converted the barn from a full kit to a low-relief model by cutting off the back third of the structure. First, I used a steel square and a hobby knife to cut the end walls and roof. I made several light passes through the wood until I had cut through the wall. Then I lightly sanded the edge with 400- and 600-grit sandpaper until it was smooth.
Next, I assembled the barn. Though the structure includes cardstock roof braces, I reinforced the walls and corners with 1/8″ x 1/8″ stripwood and scrap wood. Because the barn has a milled siding pattern, the walls are strong with the grain but flexible across the grain. The stripwood helps prevent the walls from sagging or warping.
In addition to bracing the walls, I spray-painted the barn with Rust-Oleum Gray Automobile Primer, inside and out. The primer ensures an even finish on the exterior of the barn, and it discourages moisture from warping the wood from the inside.
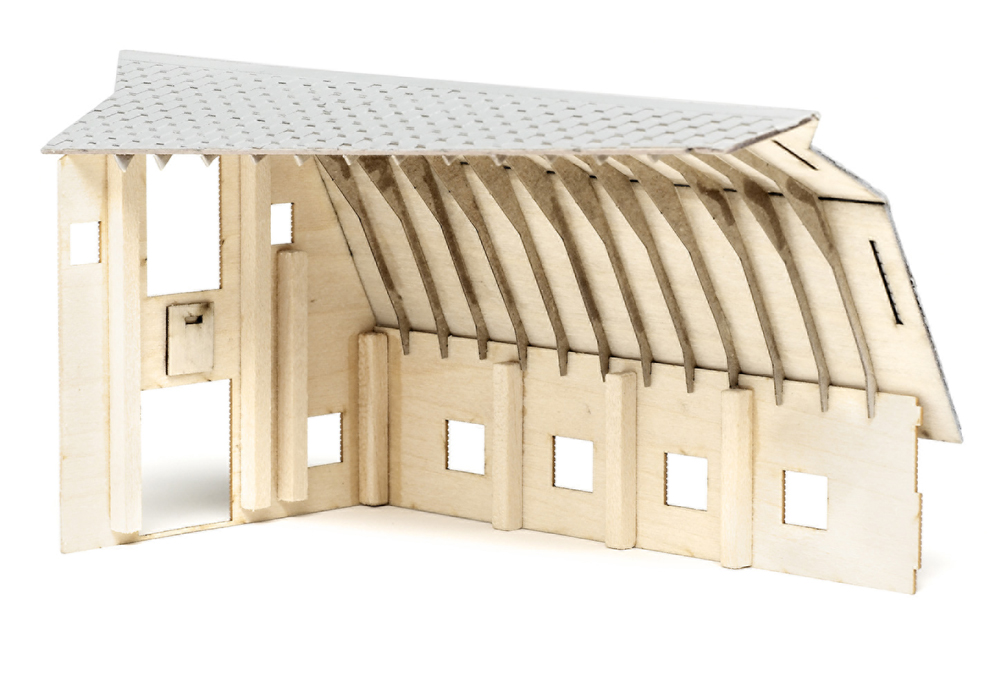
Since I wasn’t using the barn’s far wall and part of its roof, I needed to reinforce this part of the structure so it wouldn’t warp. I attached a piece of .030″ styrene sheet here and used 1/8″ x 1/8″ stripwood for the joints between the styrene and wood. I used cyanoacrylate adhesive to glue the styrene to the wood.
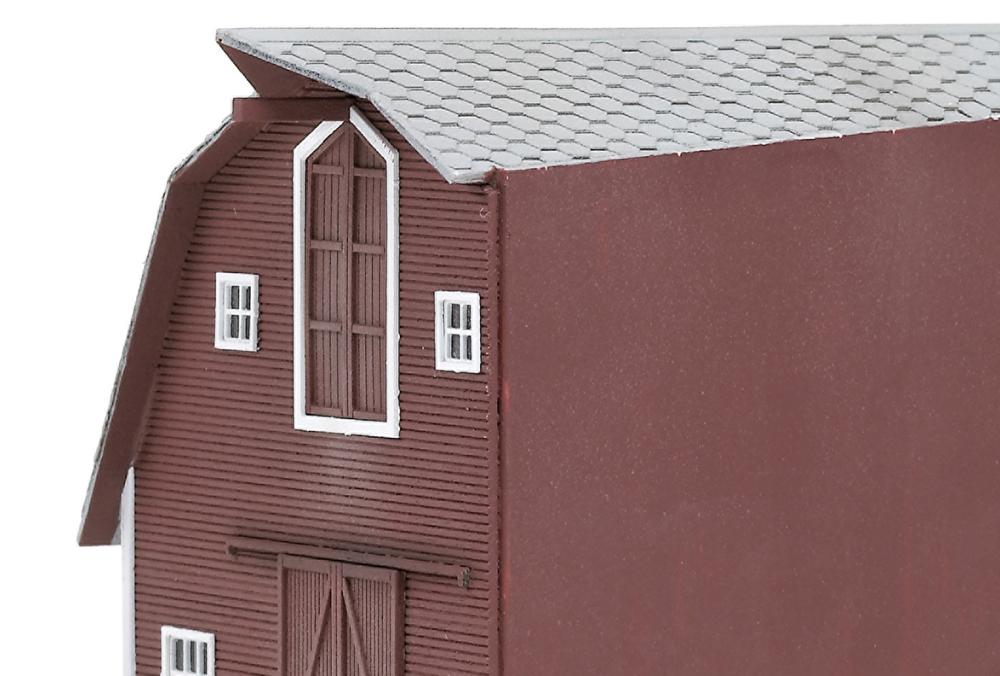
Next, I airbrushed the barn Polly Scale Rock Island Maroon (walls), Milwaukee Road Gray (roof), and Reefer White (trim). I then installed the clear window glazing to the back of the windows and set them in the factory-milled openings. I wrapped up the detail work by adding the peel-and-stick window frames and corner trim.
Finally, I weathered the barn with the firm’s L&N Gray and Steam Power Black.
Step 4 Trees and more
My goal was to have the house and barn partially obscured by trees. In the foreground were Busch coniferous trees, which I wrote about in the July 2007 issue of Model Railroader. These trees vary in height from 5″ to 7½”, so they do a good job of blocking direct views of the structures.
On the opposite side of the hill, next to the house and barn, I used 3″ deciduous trees from Scenic Express. These smaller trees look better next to the N scale structures. Using the hilltop to hide part of the trunks also makes it appear that the trees are farther away.
After you’ve read, “Using forced perspective,” check out more “Expert Tip” articles.


