


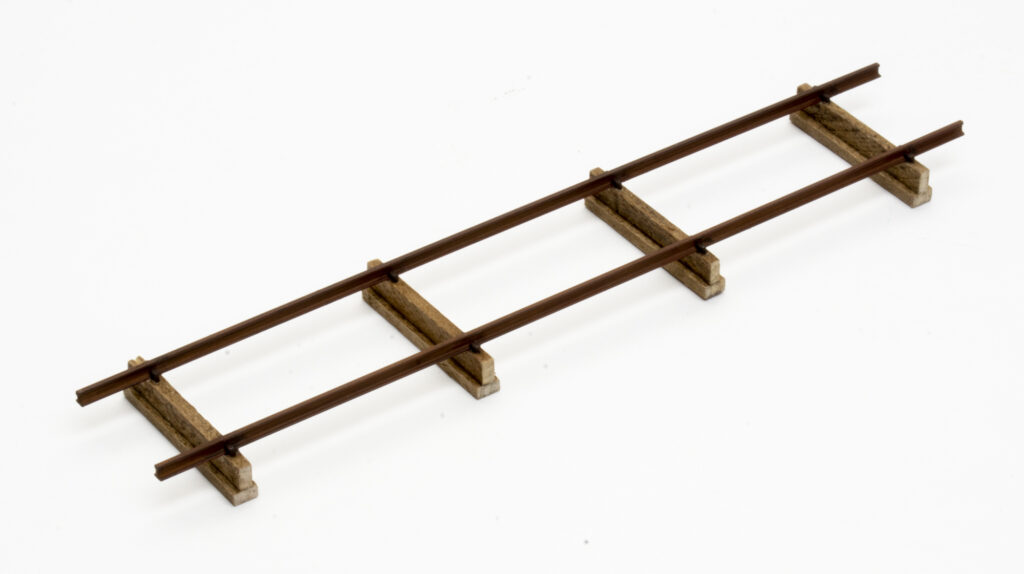
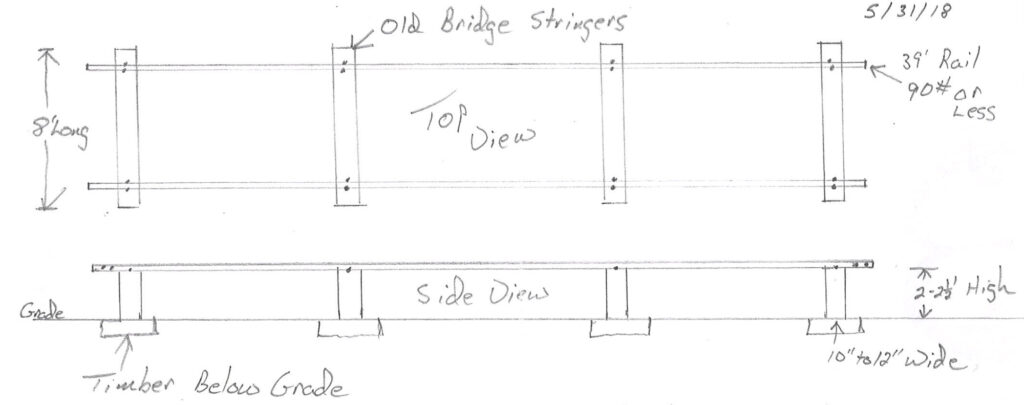
Sometimes a discussion about prototype railroading can lead to a modeling project. A few years back I was talking with my longtime friend William Phalen in Crookston, Minn. During our conversation, I mentioned seeing a photo of a pile of grain doors by the Crookston Farmers Co-op Elevator. He said the doors were stored on a rack made of old bridge stringers and two pieces of rail. His drawing below shows the rack as he remembered it.
What are grain doors? Back in the era when boxcars were used to transport grain, temporary wood doors were nailed across the door opening. Since the grain doors didn’t extend all the way to the top of the opening, the loading spout could be placed above the doors so the cars could be loaded.
When the boxcars were unloaded, the wood grain doors would be collected (usually at elevators in the Twin Ports of Duluth, Minn., and Superior, Wis., for cars from Crookston). The doors would then be returned to the railroads. The grain doors were shipped back to grain elevators in boxcars. Full-size racks were used to keep the wood doors organized and off the ground.
Though paper and reinforced cardboard doors entered the scene in the 1950s, wood grain doors continued to be used into the 1970s. Having a pile of grain doors on a storage rack would certainly add some visual interest to your grain elevator scene.
Bridge stringers
I started the project by cutting eight 8-scale-foot lengths of Grand Central Gems HO scale bridge stringer (295-TB23). The product is now offered by Grand Central Scenery as its item TB-23. After cutting the wood, I cleaned up the edges with a sanding stick.
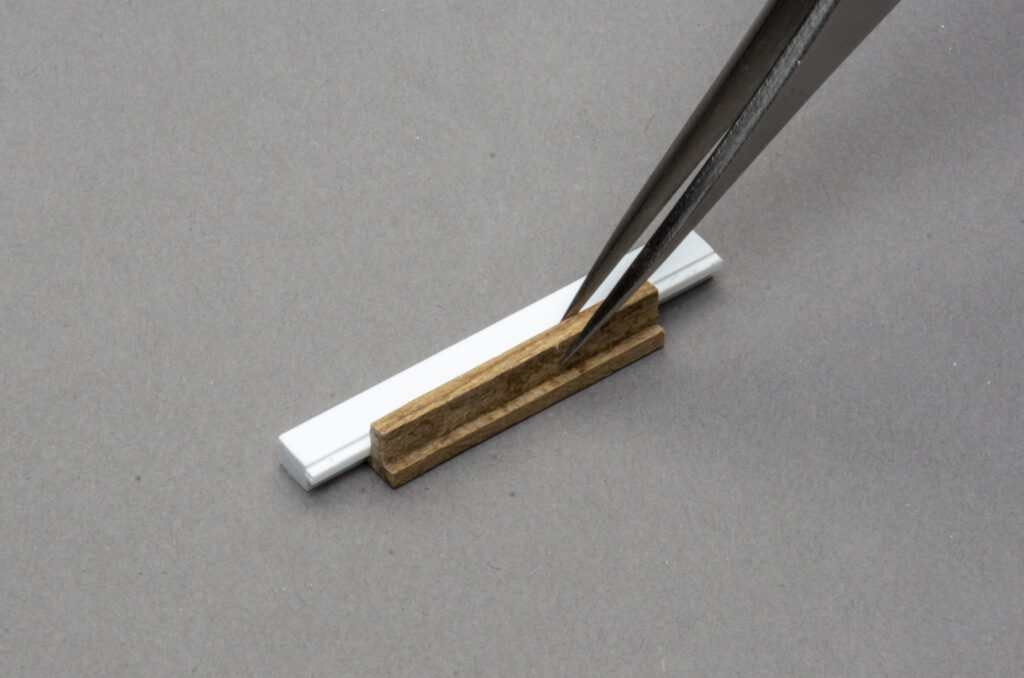
Next, I fashioned the bridge stringer material into four upsides down Ts. Though I probably could have eyeballed it, I made a styrene jig instead. I started by cutting a 12-scale-foot length of .125” x .156” styrene strip. Next, I placed a piece of bridge stringer material next to it horizontally. I then attached a piece of .040” square styrene strip to the edge of the larger piece of styrene, overlapping the bridge stringer.
To assemble the wood rack bases, I placed an 8-scale-foot piece of bridge stringer against the jig so the one edge was covered by the .040” square styrene strip. Then I applied wood glue to one narrow edge of a second piece of stringer. Using tweezers, I placed the glued edge of the vertical stringer on the horizontal stringer. Once I confirmed the parts met at a 90-degree angle, I used a Microbrush dipped in water to remove any glue that oozed out of the joint.
Two sticks of rail
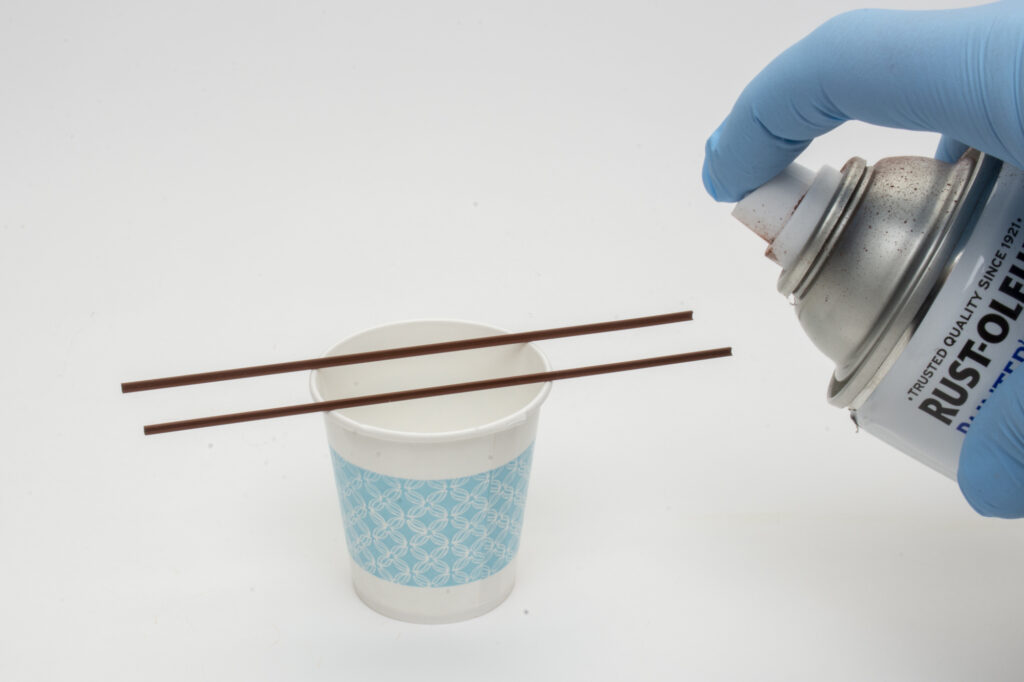
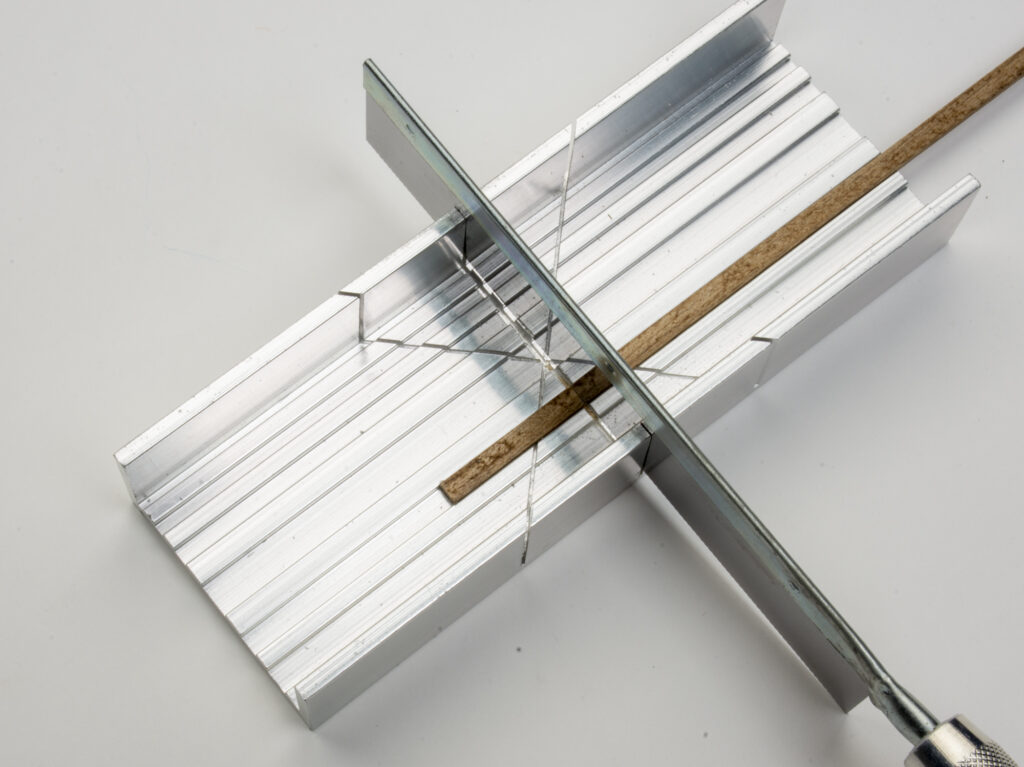
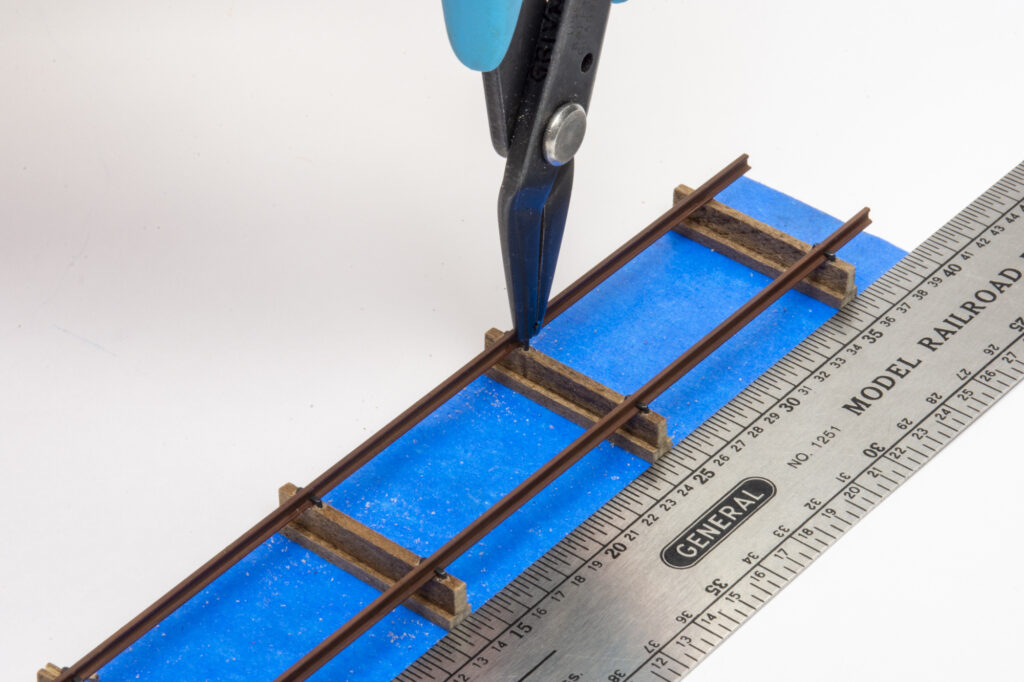
The rails for the grain door storage rack are from a piece of HO scale code 83 flextrack we had laying around the Model Railroader workshop. After removing the plastic ties, I cut two pieces of rail to 39 scale feet with track cutters. I smoothed any rough spots with a file. I cleaned the rails with a towel dipped in 70 percent isopropyl alcohol before proceeding.
I spray-painted the rails with Rust-Oleum Flat Red Primer (334018). I let the primer dry for 24 hours before spraying the rails with Testor’s Dullcote. The flat finish helped set the stage for some quick and easy weathering.
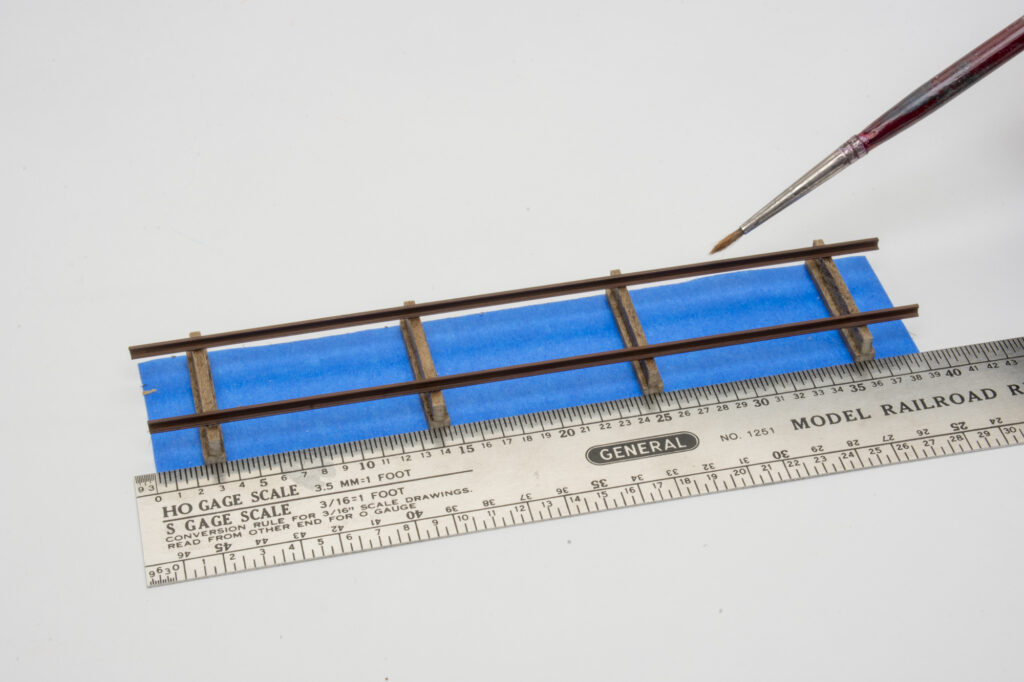
After the Dullcote dried, I attached the rails to the stringers using Crafter’s Pick The Ultimate. Though I’ve had success with this adhesive in other modeling applications, it didn’t work all that well here (probably because the wood is so porous). I’d recommend using a stronger adhesive like 5-minute epoxy instead. The rails are set in from the edges about 1/8”.
Then I used a paintbrush to apply Monroe Models Rusty Brown (975) and Quick Age (978) Weathering Washes to the rails. The alcohol-based washes react with the Dullcote, yielding a textured, rusty-metal look.
Finishing touches
William indicated spikes on his drawing, so I added them to my model of the grain door storage rack. To prevent the Micro-Mark small spikes (83517) from splitting the wood, I drilled pilot holes using a No. 72 bit in a pin vise. Then I gently pressed the spikes into the holes with Micro-Mark’s spike insertion plier (82839).
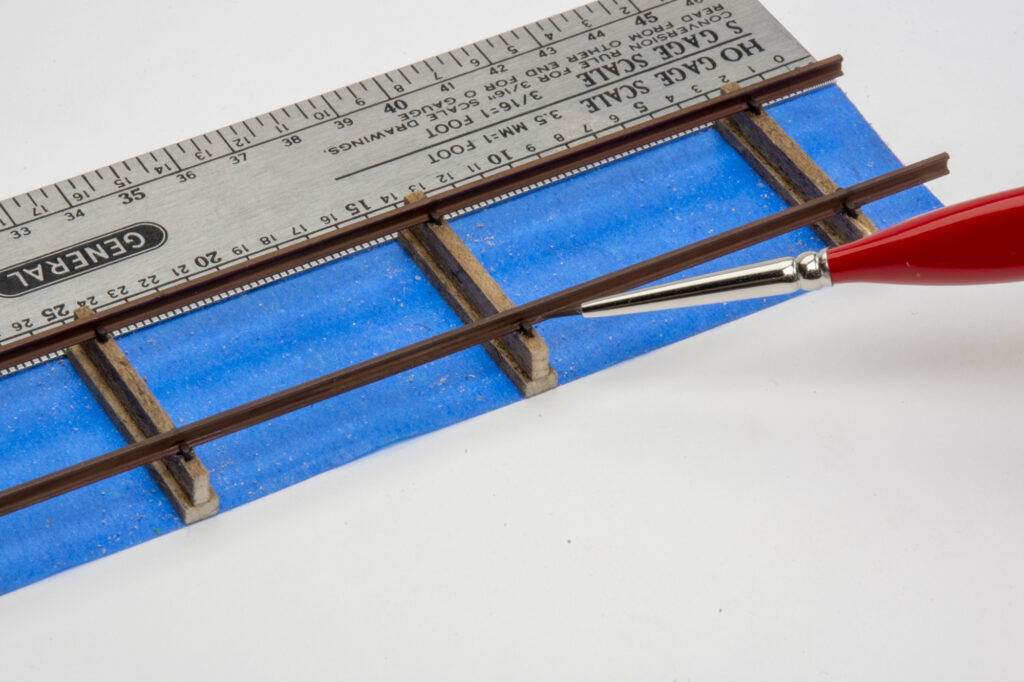
To give the spikes a similar aged look, I brush-painted them with Vallejo Panzer Aces Dark Rust (302). Any similar dark rust color would also work. I also used the Vallejo paint to touch up a few spots where paint had been scraped off the rails. The color doesn’t match the painted, weathered rails, but I was OK with that. Full-size rail doesn’t always weather evenly.
With that, my grain door storage rack was complete. HO scale grain doors are available from Great Lakes Models and the Great Northern Ry. Historical Society.
For another take on modeling grain doors, check out Jeff Wilson’s article “Modeling realistic wood grain doors” in 25 Freight Car Projects.


