Mountains have long been a popular scenic feature on model railroads. Sometimes they’re incorporated to accurately re-create a prototype location. Other times they’re used to help conceal a tunnel, helix, or turnback curve. Regardless their purpose, there is no denying mountains are dramatic and add visual interest to a model railroad.
All of the methods shown here have been tested on operating layouts. To learn more about modeling rock formations, read Contributing Editor Tony Koester’s article “Rocks aren’t hard” in the September 2004 issue of Model Railroader.
You’ll also want to check out the Classic Trains special issue Mountain Railroading: The Epic Struggle Against Gravity in the Age of Steam and Early Diesel. The 124-page magazine includes stories about Horseshoe Curve, Cajon Pass, Donner Pass, Saluda Grade, and more.
A tried-and-true approach
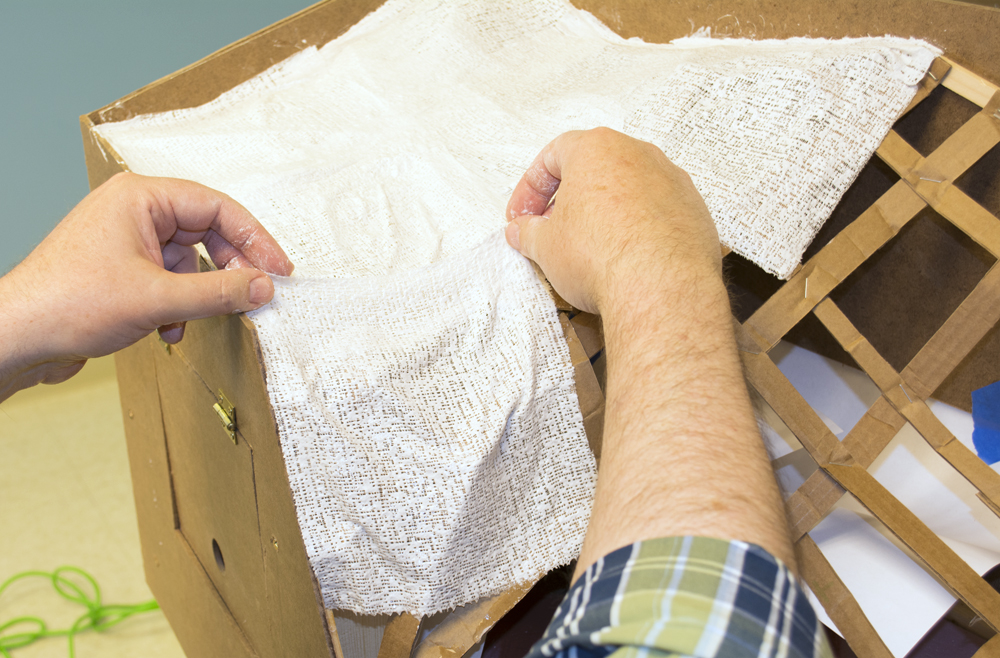
A popular method for making mountains is applying plaster-impregnated gauze to a cardboard web. Model Railroader Editor Eric White illustrated the time-tested method in the April 2016 issue when he added a mountain scene to our compact HO scale Eagle Mountain project layout. Here’s the technique in a snapshot.
Eric first cut ½”- to ¾”-wide strips from a sheet of corrugated cardboard. Then he weaved them into a web, using hot glue and staples to secure the cardboard at the joints and to the layout.
Once the web was finished, he applied two layers of plaster-impregnated gauze to the cardboard, slightly overlapping the pieces. Some modelers prefer using paper towels or newspaper soaked in Hydrocal instead of gauze. Both techniques work equally well.
In the May 2016 issue, Eric explained how he made plaster rocks in rubber molds, blended the castings into the gauze-covered mountainside with Sculptamold, and painted the rocks with Woodland Scenics Earth Colors.
Variations on a theme
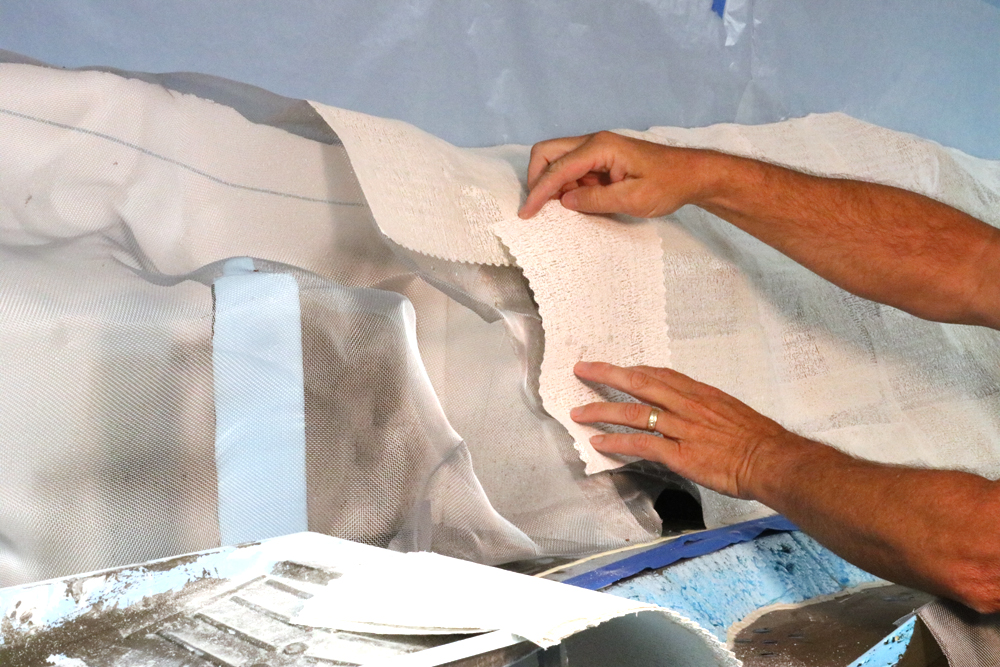
Doug Tagsold turned to a variation of the plaster gauze and cardboard web method when adding a snowy mountain scene to his Colorado & Southern layout. He shaped the area, which measures 25 feet long by 2 feet deep, using white expanded-bead foam board, aluminum window screen, scrap pieces of extruded-foam insulation board, and plaster-impregnated gauze strips.
After the plaster had cured, Doug used a marker to indicate where he’d place the rock outcroppings. Then he applied an equal-parts mix of plaster of Paris, play sand, and water to those locations. Doug used an artist’s knife to cut strata detail into the “green” material.
Doug applied texture paint to the areas without outcroppings. The paint/plaster mix filled in the small voids in the gauze. He used a chip brush to apply diluted brown latex paint, mixed 1:2 with water, to the outcroppings. He followed that with an India ink wash.
To learn more about how Doug scenicked the area, read the February 2021 issue of MR.
Following the prototype’s lead
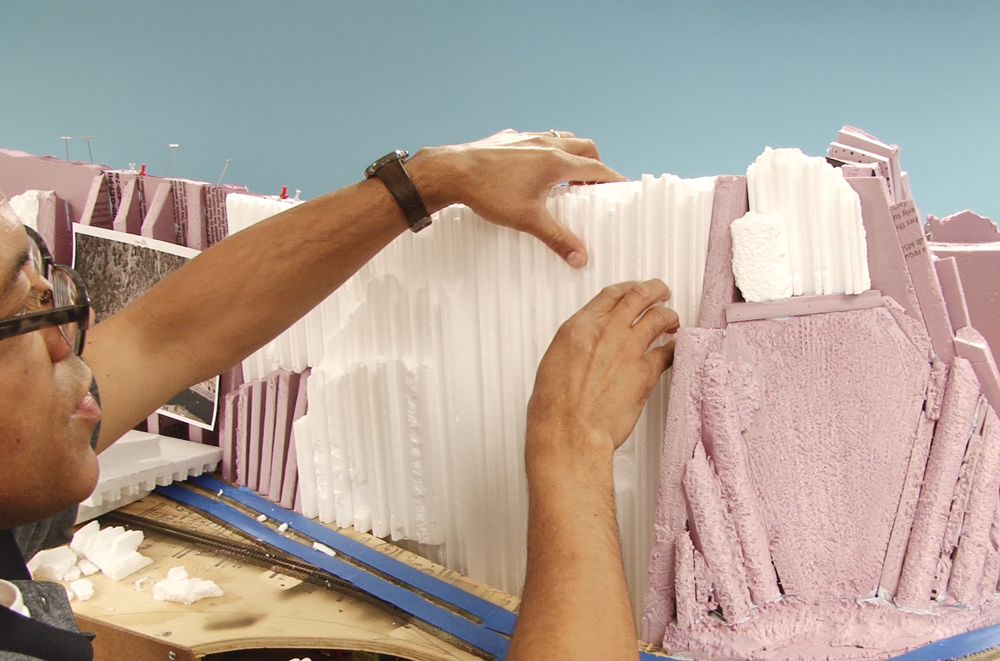
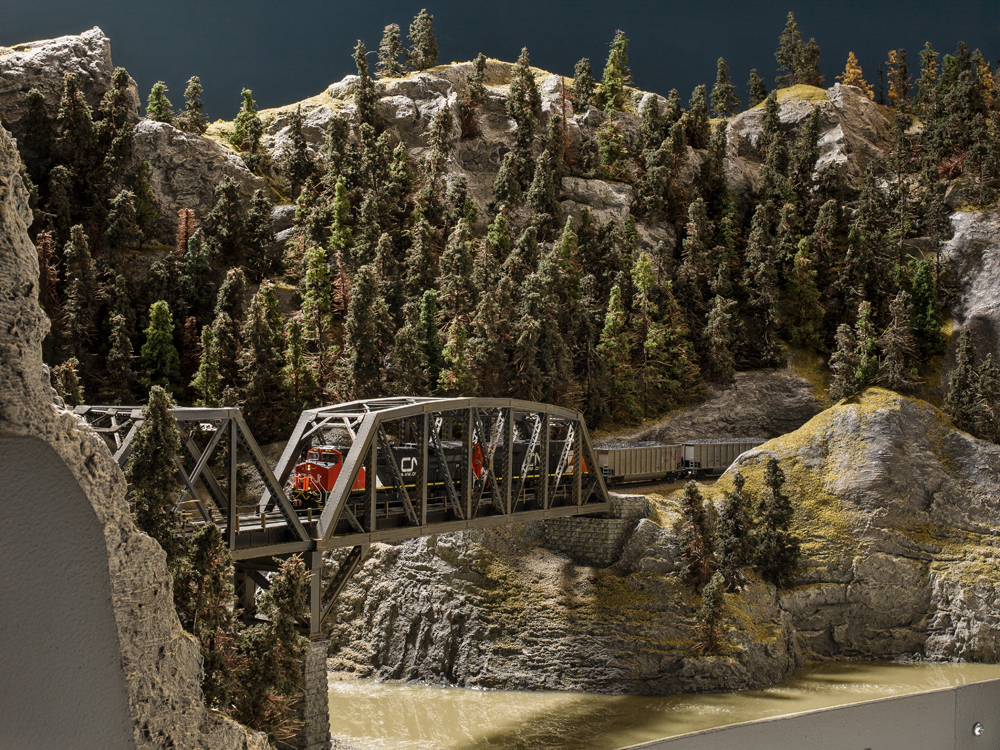
When the Model Railroader and Trains.com Video teams built the N scale Canadian Canyons project layout, they had to think outside the box when working on the mountains. To re-create what they saw in prototype images of British Columbia’s Fraser and Thompson river canyons, the crew put the extruded-foam insulation board on edge. They supplemented the foam with Woodland Scenics Profile Boards (ridges facing out); the same company’s Shaper Sheets; and plaster, Sculptamold, and spackle.
Various techniques were used to model the rocks. Some were made using Sculptamold applied with Woodland Scenics plaster brushes. Others were cut into the foam with a serrated steak knife and overcoated with the same Sculptamold and brush technique. At Kamloops Lake, the crew used foam rocks from Mountains in Minutes and rubber rocks from Cripplebush Valley Models.
To learn more about the mountains on Canadian Canyons, read the March 2019 issue of MR and check out the video series on Trains.com.
Wedding cake method
When extruded-foam insulation board is stacked in layers to build mountains, it’s referred to as the wedding cake method. Why? Because the stacked foam looks like a layered wedding cake.
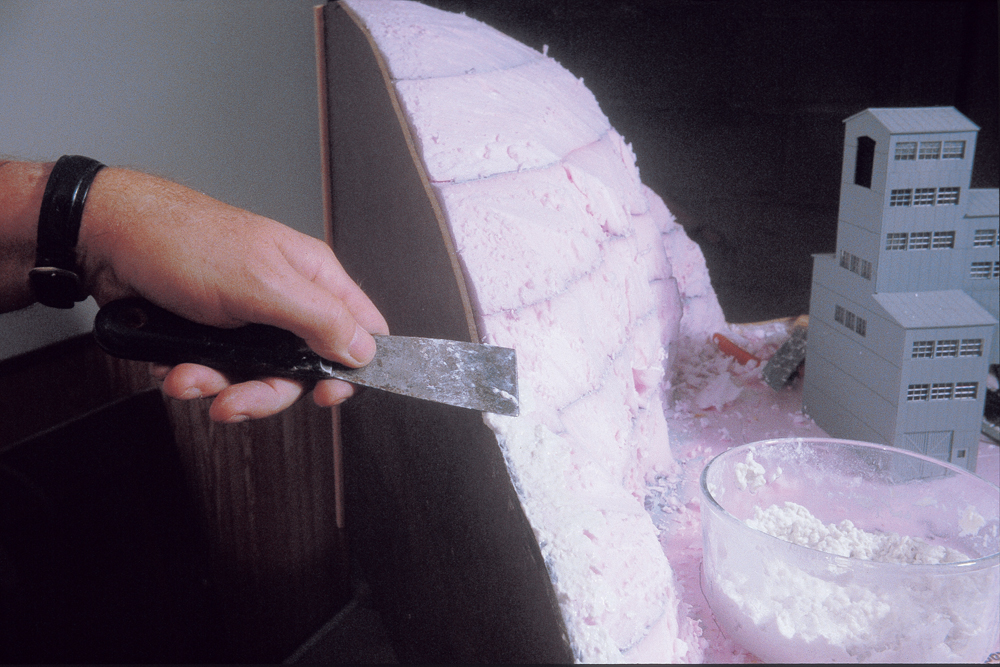
Retired Model Railroader Managing Editor Jim Kelly used this method when adding a small mountain behind Turtle Creek Mine No. 1 on the HO scale Turtle Creek Branch, featured in the January 2005 issue of MR. He stacked layers of 2”-thick extruded-foam insulation board, securing the pieces with PL300 construction adhesive. The acrylic product is designed for use with foamboard. Solvent-based adhesives will dissolve the foam.
Jim then carved the foam with a 10” cake knife. Don’t use your family’s good cutlery for this. Instead, get a knife that at a big-box retailer, grocery store, or craft shop that you’ll use exclusively for model railroad scenery. You can also cut and shape foam with a hot wire cutter or rasp. Regardless the tool, wear personal protective equipment and work in a well-ventilated area when cutting extruded-foam insulation board.
After carving the foam, Jim used a putty knife to apply Sculptamold to fill in gaps between the layers of foam and between the foam and tempered hardboard fascia. He later covered the foam with poly fiber and plaster and foam rocks.
Learn more about Jim’s scenery techniques in the January and March 2005 issues of MR.
No space? No problem.
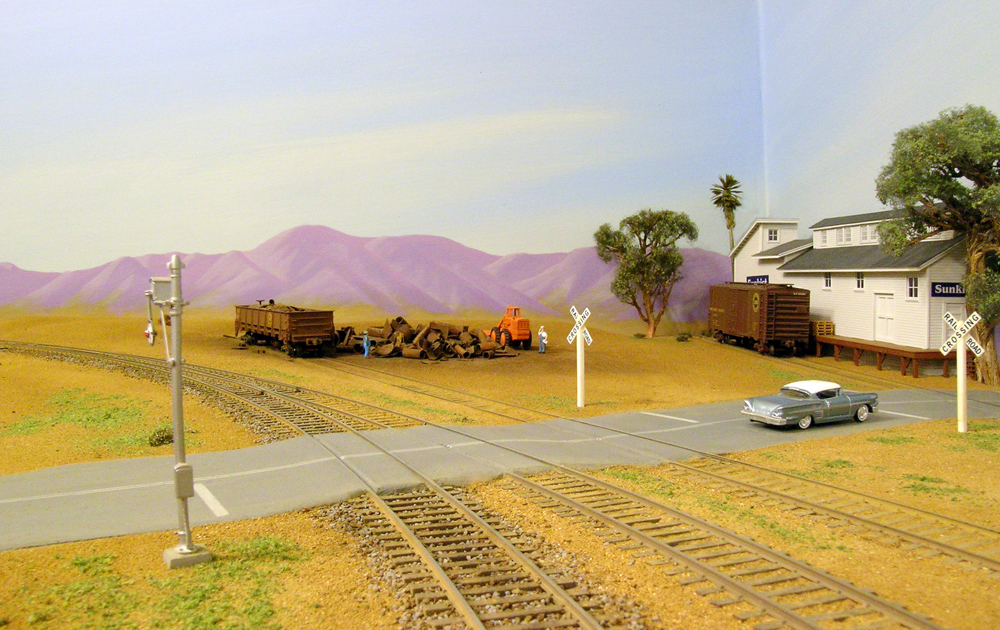
We’ll wrap up our look at five techniques for modeling mountains by shifting our focus from the foreground to the background. In the January 2008 issue of MR, Bruce Petty demonstrated his easy-to-follow techniques for painting distant mountains on the backdrop of his HO scale layout.
The inspiration for Bruce’s mountains came from pre-1950s artwork found on labels attached to orange and lemon crates. After purchasing flat latex paint from a local hardware store, Bruce painted the backdrop directly on the walls of his layout room. He started with the sky, added the mountains, then blended the backdrop and foreground scenery.
In addition to Bruce’s article, you can learn more about painting backdrops in Mike Danneman’s October 2004 article “Painting a scenic backdrop” and Contributing Editor Pelle Søeborg’s January 2007 story “Paint a simple mountain backdrop.”