How To Expert Tips Brass engine disassembly basics

Brass engine disassembly basics

By Mitch Horner | February 14, 2023

Taking some of the mystery out of brass locomotives

Email Newsletter

Get the newest photos, videos, stories, and more from Trains.com brands. Sign-up for email today!

Brass engine disassembly basics: When I was a kid, I’d go to the local hobby shop and drool over the brass steam locomotives in the glass display case near the cash register. I’d seen most of them in the Pacific Fast Mail advertisements that used to grace the back cover of Model Railroader, and here they were in the flesh, so to speak. They were pricey for a teenager, but clearly better detailed than any of the ready-to-run models in the various boxes on the shelves farther back in the shop.

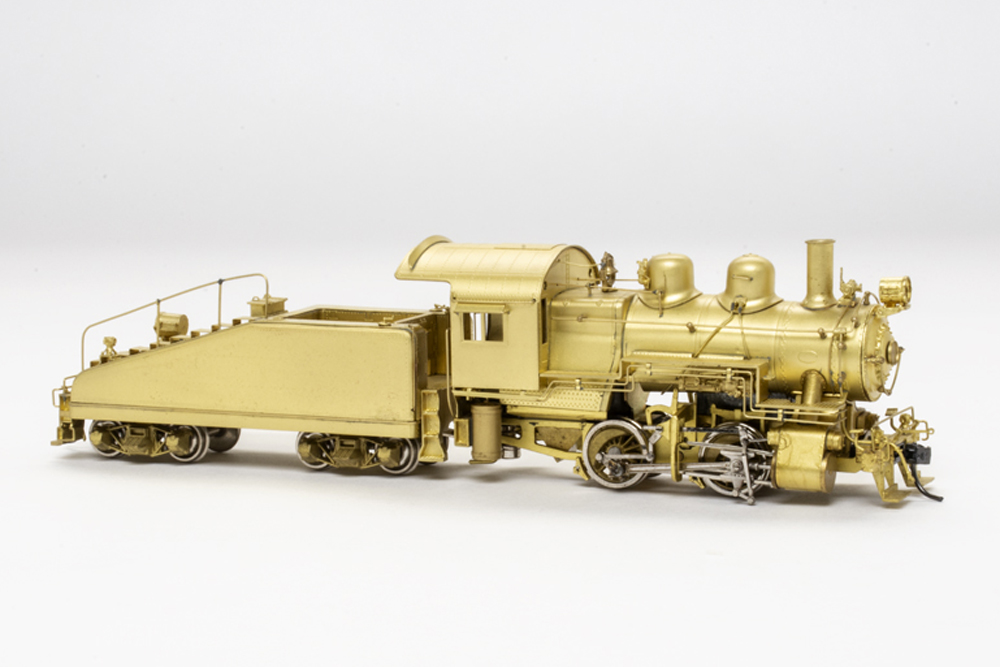
Brass engine basics: An image of a model steam locomotive

Now, most ready-to-run plastic models have detail levels that would’ve impressed the most devoted brass connoisseur. There are, though, some models that are difficult to find in any other form. Usually, they’re of less popular railroads, or less popular types. Mine falls into the latter category.

Steam switchers can be had, but if you want something specific, it’s best to check out the brass dealers at hobby shops, model train meets, or on the internet.

A friend of Model Railroader, Forrest Nace, is acquainted with many brass dealers, so I emailed him with my needs. I was looking for a Pennsylvania RR class A5s 0-4-0 switcher, or in PRR parlance, a shifter. These locomotives were denizens of the tight spaces in cities, and I needed one for my PRR Washington Avenue Branch shelf layout.

Forrest put me in touch with a dealer in New York state, who had three options at three price points. I chose the medium-priced model, which was just over $200. When the model arrived, still in its original box, I couldn’t wait to test it out. I took it into the office where I could measure current draw, speed at various voltages, and pulling power. The locomotive was all set up on the test track. I turned the power pack’s throttle knob. I heard the motor humming, but the model wasn’t moving. Hmmm. Now what?

First things first – take the model apart

There’s usually a large screw under the smokestack that holds the frame, cylinders, and boiler together. I found this one and removed it, but the boiler was still attached.

Brass engine basics: An image of the underside of a steam locomotive

Two small screws on the back of the cab were holding the assembly to the frame. With those screws out, the boiler and cab assembly came free from the frame.

Digging for the problem

With the boiler off, I could see the can motor and gearbox, and a piece of neoprene tubing that connected the two. Given the age of the model, I suspected the tubing might have dried out and wasn’t getting a strong grip on the shaft coming out of the gearbox.

Removing the motor would let me test this theory by being able to grab the gearbox shaft to see if I could turn it manually. I disconnected the wires from the motor before removing the motor mounting screws. I pulled the motor free, but even with a small pair of needlenose pliers I was unable to turn the gearbox. It would move a bit, then bind.

Since I couldn’t turn the gearbox, it had to come off. I started removing screws on the bottom of the model, working from the outside in.

Brass engine basics: An image of the underside of a model steam locomotive

With the bottom plate off, I removed the bottom cover of the gearbox. It’s helpful to have very small screwdrivers. Some that I used were included in large scale plastic model kits.

With the gearbox removed, I could easily turn the gears, so that wasn’t the problem. Maybe something with the running gear?

Aha! Now we’re narrowing it down. The drivers would turn a little bit, but then started to skew in the frame. I had narrowed down the problem, but more disassembly was ahead of me. The valve gear would have to come apart to get the drivers out of the frame so I could isolate the part that was binding. Make sure to support the parts you’re trying to disassemble, as they’re easily bent. The screw heads are thin to clear the other moving parts.

With the drivers out of the frame, I was finally able to locate the problem. The eccentric rod – the small rod standing straight up from the connection with the main rod and side rod – was stuck, either with solder (bad), or corrosion/dried oil (not great, but not as bad).

Repair and tune-up

With the problem diagnosed, it was time to find a solution. If worse came to worst, I’d have to get out a soldering iron and try to free the connection. Hoping for the best, I applied some Labelle oil to the joint and went to lunch. With any luck, an hour or so of soaking would free up the connection.

Success! The oil freed up the connection, meaning I wouldn’t have to try to desolder, then reassemble the parts with solder without binding everything up again. That was a cycle of events I was happy to avoid.

An image of lubricating oil being applied to model locomotive gears.

After oiling all of the connections, I put the running gear back together and rolled the chassis on our test track. Everything was now moving freely.

Although the gearbox moved freely, I knew the grease inside was about 30 years old. I separated the halves of the gearbox to get inside and discovered it was pretty gunky in there.

I used a flat screwdriver to scrape out the majority of the old grease from the gearbox shell, then wiped out the rest with a paper towel. I also wiped the gears off, making sure to get between the teeth of the main gear and the worm gear. I replaced the worm and main gear into the gearbox shell, then lubricated everything with plastic-compatible oil. I don’t want that main gear turning to mush. With everything lubricated, I reassembled the gearbox.

Reassembly and testing

I already had the bottom plate holding the drivers to the frame, so I placed the gearbox on top of the front driver axle, then slipped the gear cover over the bottom of the axle gear and tightened the screws.

An image of a model locomotive being tested

With the tender attached to complete the electrical circuit (the tender picks up power from one rail, the drivers from the opposite rail), I gave the model power … and it moved! I learned a couple of things with this model: It’s not that difficult to take a brass steam locomotive apart, and if I had started by oiling everything I could reach, I might have solved my problem without all of the disassembly. For me, the next steps involve adding a Digital Command Control decoder with sound, and painting the model to look like a hard-working city dweller.

Want to see this brass engine in action? Watch Model Railroader Editor Eric White’s How to troubleshoot and disassemble an HO scale brass steam locomotive on Trains.com Video!

You must login to submit a comment