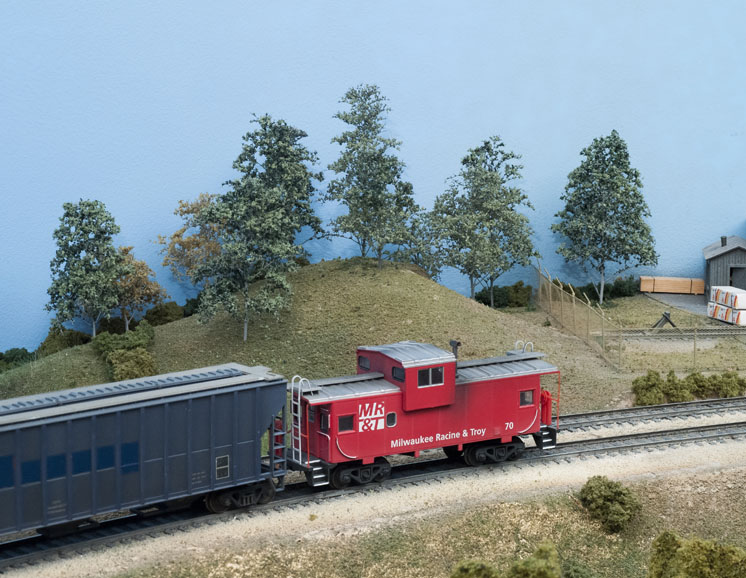
If there is one thing our HO scale Milwaukee, Racine & Troy club layout can use more of, it’s trees. The 28 x 54-foot model railroad has some areas that are densely wooded, matching the Badger State setting. But there are other locations where the ground meets the sky-blue backdrop with nothing to mask the harsh right angle.
Over the years, we’ve used a variety of trees on our model railroad. We’ve planted commercial trees from dozens of manufacturers (January 2013 Model Railroader), used kits featuring plastic and metal armatures and ground foam (not the subject of a story, but there are a lot of them), and even turned to scratchbuilding trees using wooden dowels and furnace filter material (March 2011). This time, we gave Scenic Express SuperTrees a try.
In the ready-to-run world of model railroading, SuperTrees provide a nice, hands-on alternative for scenery. You get to make the trees to the size, shape, and color that you want, and you can rest assured you won’t find an identical tree on any other model railroad. And for around $1 each (not counting the flocking material), the trees are a good deal.
So get some SuperTrees, diluted matte medium, paint, and leaf flock, and get ready to make some trees. If you work in assembly line fashion, you should be able to knock out more than 30 trees in two evenings’ time.

I used the Scenic Express SuperTree value pack for this project. Inside the package is a quarter-bushel of dried plant material from the Arctic tundra of Scandinavia (according to the packaging, the plant is a distant cousin to western sagebrush). The kit contains enough material to make approximately 30 trees ranging in height from 5″ to 8″. The kit retails for $29.98, so that’s about $1 per tree. Leftover pieces can be used for bushes and undergrowth, so there’s little waste.
In addition to the plant material, the kit also includes a sample pack of Scenic Express SuperLeaf multi-textured flake material. Our kit contained dark green, but the firm offers its leaf flake material in other shades of green; various autumn colors; and white, pinks, and purple for modeling flowering trees.
There’s also a packet of concentrated Täk-E-Glue. The product, which needs to mixed with warm water, is a tacky yet flexible model scenery glue.

Step 2: Clipping and dipping
The clumps of dried plant material need to be broken apart to make individual tree armatures. Do this with care, as the material is very brittle.
Once I had the armatures separated, I used a hobby knife with a no. 11 blade to remove any leaves from the stems. I also used the knife and a pair of sprue nippers to trim the branches into realistic looking trees, as seen in the photo at right.
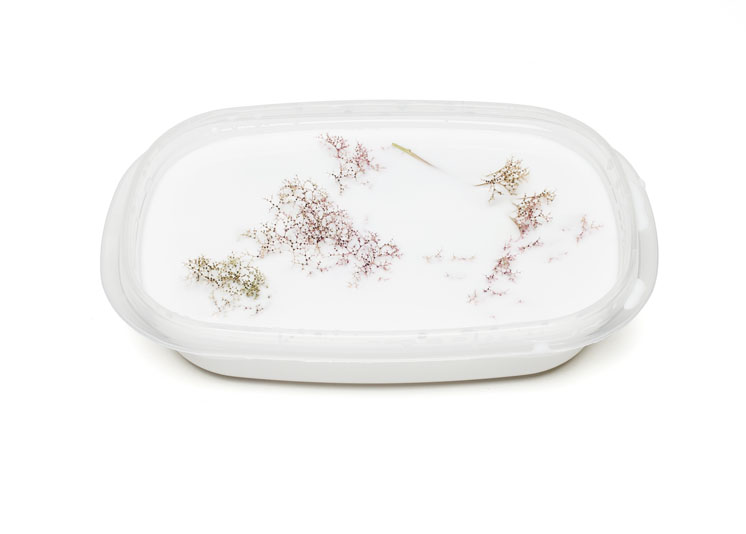
With the armatures shaped, I soaked them in diluted matte medium (1 part Mod Podge matte to 7 parts
water) for one to two minutes. I soaked the armatures in a plastic food container, as shown in the middle image, but any container deep enough to submerge the armature will work. The soaking time depends on the thickness of the plant material.
Why is this necessary? Well, the natural plant material absorbs the matte medium. This preserves the trees, making them less attractive to bugs and other critters that may want to munch on them. The matte medium also makes the trees somewhat flexible, allowing them to withstand light bumps without breaking.
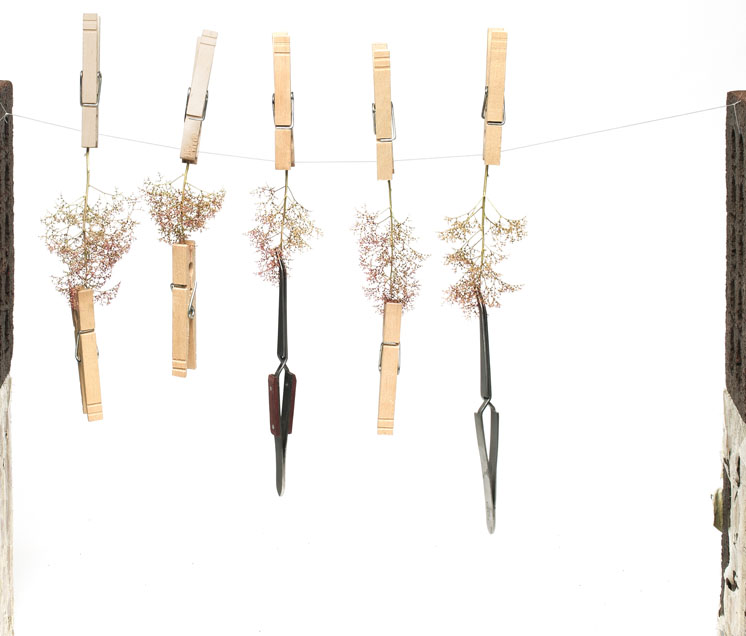
After soaking the armatures in diluted matte medium, I shook off the excess liquid in a garbage can and hung them upside down on a drying line with clothespins. If the armature has a bent trunk, attach a pair of self-closing tweezers to the tip as a weight to help straighten it out. A clothespin would also work, as shown at lower right.
The matte medium should dry within a couple of hours, unless the humidity is high, in which case it will take longer. The instructions suggest working outside on a warm, sunny day to speed up the drying time.The clumps of dried plant material need to be broken apart to make individual tree armatures. Do this with care, as the material is very brittle.
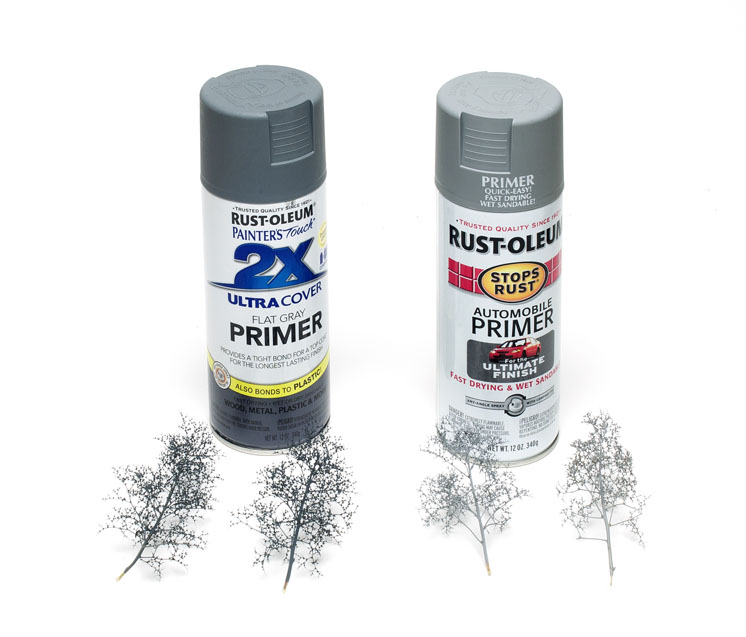
After the matte medium had dried, I sprayed some of the armatures with Rust-Oleum 2081 Light Gray Primer and the same firm’s Painter’s Touch 2X 249088 Flat Gray Primer. The former is good for maple trees, while the latter is suitable for oak and hickory trees.
You can add some warm tones to the armatures by misting on some brown or rust-colored paint. But please, don’t paint the entire armature brown. I have yet to see a real tree trunk that is solid brown.
In addition to spray-painting the armatures, you may also apply acrylic or organic solvent-based paints with an airbrush or paintbrush. No matter what technique you use, you’ll get good results.
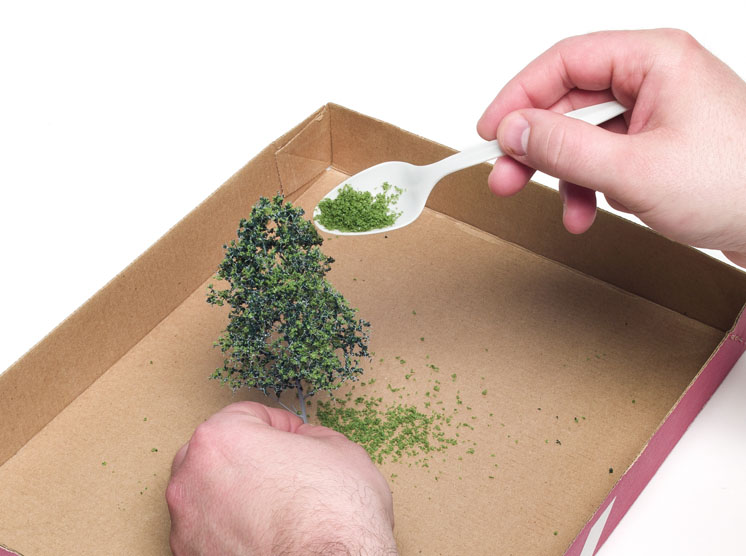
I let the paint dry for at least 24 hours or until there was no discernible paint odor before proceeding. Then I applied the Scenic Express SuperLeaf material introduced in Step 1.
I used four colors of Scenic Express SuperLeaf: Dark, medium, moss, and olive green. On the tree shown here, I first dipped it in matte medium before I applied dark green SuperLeaf material.
After a couple of hours, I came back and dipped the tree in more matte medium before adding medium green. This captures the look of sun hitting a tree, where the leaves on the shaded branches are darker and the outer leaves are lighter.
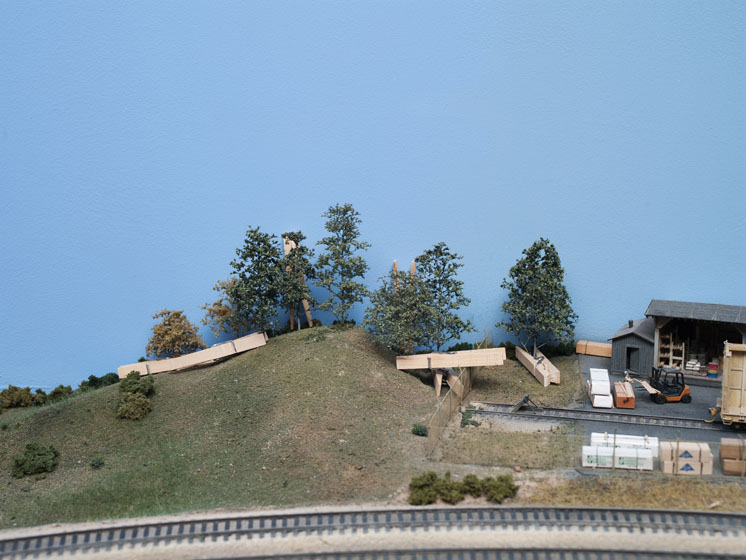
Once I had a sufficient number of trees to populate the scene, I added them to the layout. A T-pin, awl, and small (1⁄8″ and smaller) drill bits were all I needed to make the holes in our plaster gauze-and-cardboard scenery.
After I positioned the trees so their best sides faced the aisle, I secured them with a small amount of white glue. I used clothespins and self-closing tweezers to keep any stubborn trees upright while the glue dried.