


How to cut and fit sectional and flextrack: Cutting rail is a common activity that becomes important as soon as anyone begins building a model railroad. Small layouts built with sectional track generally fit together pretty well, but when flextrack is used, it’s often necessary to trim the rail ends to fit.
Most flextrack is made with rails of equal length. One rail is held securely by the plastic ties, while the opposite rail can slide through the ties when the track is bent into a curve. During installation, flextrack is normally laid with the rigid rail on the outside of the curve. This places the movable rail inside the curve so it can slide through the ties without catching and distorting them. The ties look more realistic when they remain at a right angle under the rails.
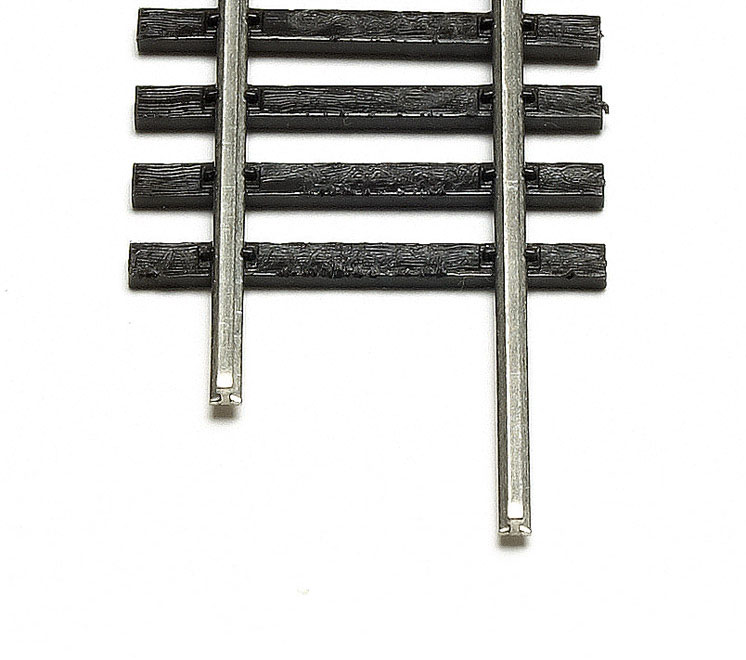
The inside rail has a tighter radius and extends beyond the end of the ties so it must be trimmed to allow the next piece of track to fit properly.
Three different cutting tools are used for this job depending upon the rail’s material and size. A fine-tooth razor saw will cut almost any type of metal rail, including steel. A specially ground flush-cutting plier works well to cut HO and smaller sizes of rail made of soft metal. Finally, a ceramic cutoff disk in a hand-held motor tool will cut almost anything, but be sure to observe the proper eye safety precautions.
Many of these tools are available at the Kalmbach Hobby Store, hobby shops, or from any of the hobby mail-order tool suppliers like Micro-Mark and Walthers.
Razor saws are inexpensive, readily available, and easy to use. Look for a blade that has at least 30 teeth per inch (TPI). The finer 42 TPI blade cuts slower, but will produce a much cleaner cut.
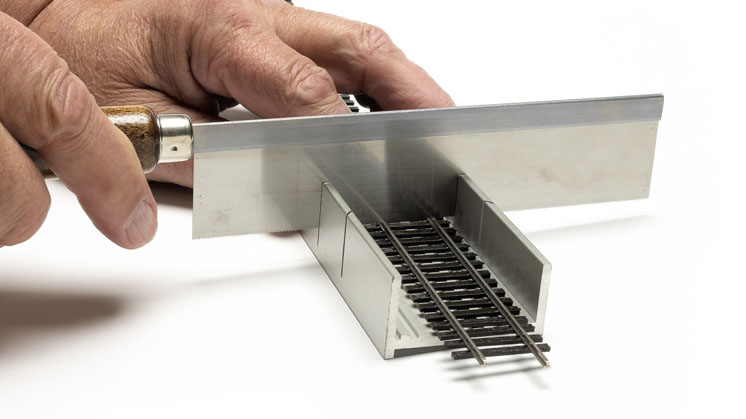
Using a hobby miter box will help produce square cuts in both rails, and it’s easy to flip the track over to trim off the end tie to make room for the rail joiners. For larger scales, cut a wooden guide block with square ends and a pair of grooves down the middle to set over the rails while the cut is made.
Flush-cutting rail nippers work well on soft-metal rails in HO and smaller scales. However, their specially ground cutting edges are easily damaged if they’re used to cut anything harder, including brass or copper wire (the pressure of cutting a round workpiece nicks the fine cutting edges and ruins the tool). If this specialized tool isn’t abused, rail nippers will last for many years.
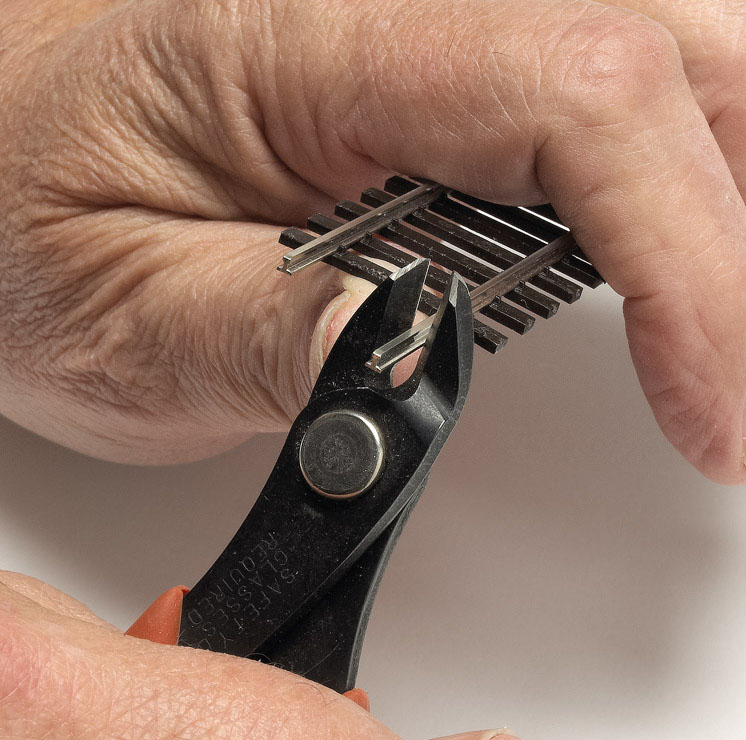
Flush-cutting rail nippers are designed to make clean vertical cuts at a right angle to the length of the rail. Align the plier’s cutting edges with the rail standing up between them. That way, both cutting edges will go through the rail head and base at the same time and meet in the middle without crushing the rail. I make my initial cut close, but slightly oversize, and then go back and do a final thin trim cut. This produces a clean rail end that only needs a minimal cleanup with a file to remove any burrs.
Rail nippers are extremely useful if you decide to cut in a new switch. Just lay the turnout where you want it to fit and mark the cuts on the railheads. Work the nippers down over each mark and you can cut through all four locations, leaving the flush-cut ends on the layout as you lift out the track piece. Fit the new turnout, put joiners onto the track ends and push them back so the turnout can drop into place. Slide the joiners into place and you’re all done.
A motor tool and a cutting disk makes a smooth, clean cut. Use eye protection and a light touch to allow the spinning disk to do its cutting job. Be careful; the ceramic cutting disks are easily broken by any side pressure.
Motor tools are also handy if you need to add an electrical gap in the rails. Spike both sides of the rails on either side of the gap to hold them as the cut is made. Don’t be in a hurry to touch the fresh cut gaps with your fingers, as they’re usually hot.
Handy rail cutting tools
Atlas
400 razor saw
Dremel
hand-held motor tool (many different models)
409 cut-off disks
Gyros
8316008 razor saw
1132156 cut off disks 1⁄32″ and 1⁄8″ x 1½” diameter
1132208 cut off disks 1⁄32″ x 2″ diameter
11321102 cut off disks 1⁄32″ x 1″ diameter
11321154 cut off disks 1⁄32″ and 1⁄8″ x 1½” diameter
K&S
295 razor saw
Mascot
102 razor saw
Xacto
239 fine razor saw
75330 miter box
Xuron
90028 rail cutters (pliers)
Zona
35550 razor saw, 42 TPI


Hi Jim,
In the paragraph referring to Figure 2 it says "This produces a clean rail end that only needs a minimal cleanup with a file to remove any burrs". You do need to fine tune the edges after cutting, which should make the joiners go on with nominal effort.
Nice overview of the topic. However it slides much too easily over the instruction that after cutting the rail with nippers to make room to add a turnout, one should slide the rail joiners over the ends of the remaining track. There is no mention of the plastic under the rails that hold the ties in place, that also greatly hinder the ability to easily slide on rail joinders, especially the entire joinder so the turnout can be inserted. Any suggestions on how to get the joiners to easily slip on?