Central Valley’s HO scale injection-molded plastic fence is a close match for the fence used by the Burlington Northern near buildings in the area of Minnesota that I model, 1. Though the fence looks good, it’s difficult to attach as-is to an extruded-foam insulation scenery base. However, with brass mounting pins, the fence can easily be pressed into place.
The first step in adding mounting pins is to mark the center of each post. With a push pin, I put a dimple at the center point in the bottom of each post, 2. This prevents the drill bit from wandering.
Next, I measured 1 scale foot from the tip of a no. 69 drill bit and put masking tape at that location, 3. The tape acts as a stop, so all of the holes are drilled to the same depth.
After inserting the bit into a pin vise, I began drilling the holes, keeping the bit as vertical as possible. If the bit hesitated, I would back it out to clean out the plastic shavings before finishing the hole. It’s important to let the bit do the work. If you force the pin vise, you may snap the delicate drill bit.
With all of the holes drilled, I began installing the brass mounting pins. I used 2 scale foot lengths of .028″ brass wire for the pins, 4. I installed them with medium viscosity cyanoacrylate adhesive (CA).
On a short length of fence, only three pins are necessary: at the end posts and middle post. After the CA had dried, I painted and weathered the fence. Installation was a matter of pressing the fence into the foam scenery base.

1. Central Valley’s plastic fence lacks mounting pins, making it difficult to install on extruded-foam insulation board. However, with brass mounting pins, the fence can easily be pressed into place.
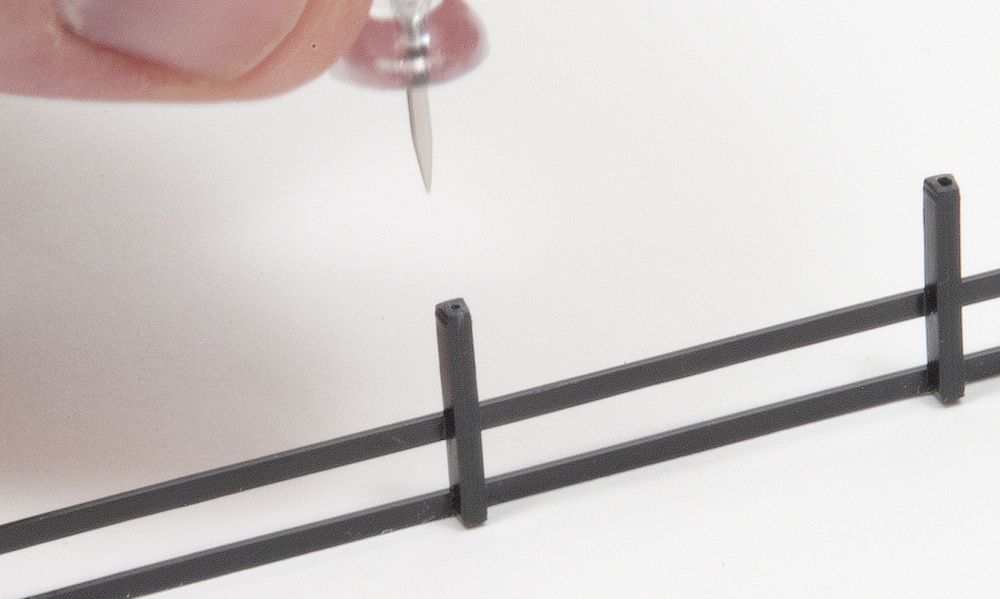
2. Mark the center of each post with a push pin. The dimple prevents the drill bit from wandering.
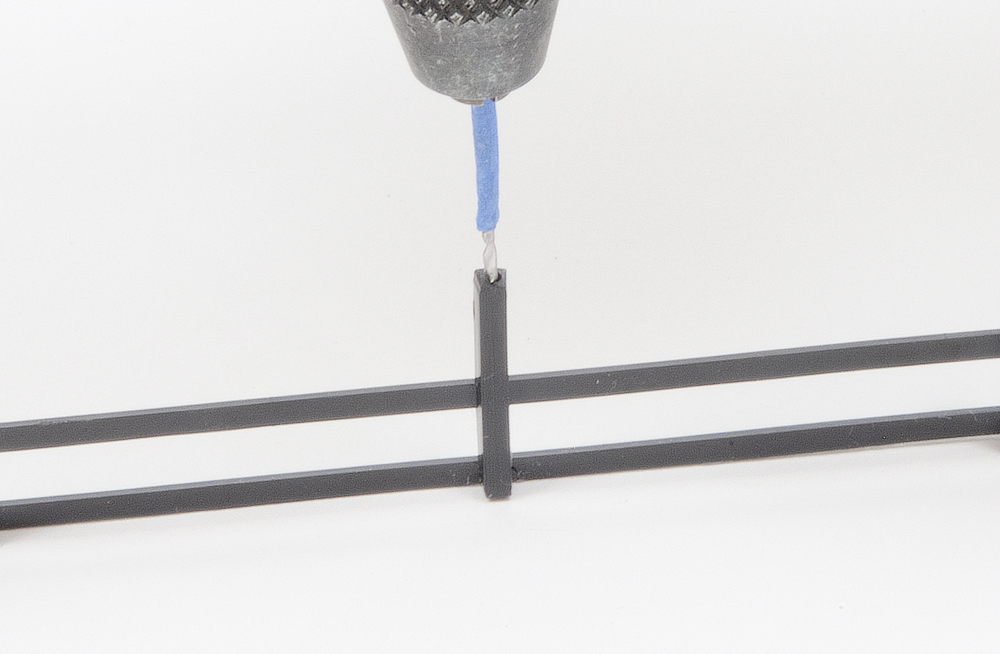 3. Use a drill with a no. 69 drill bit marked 1 scale foot from the tip to drills holes to a consistent depth.
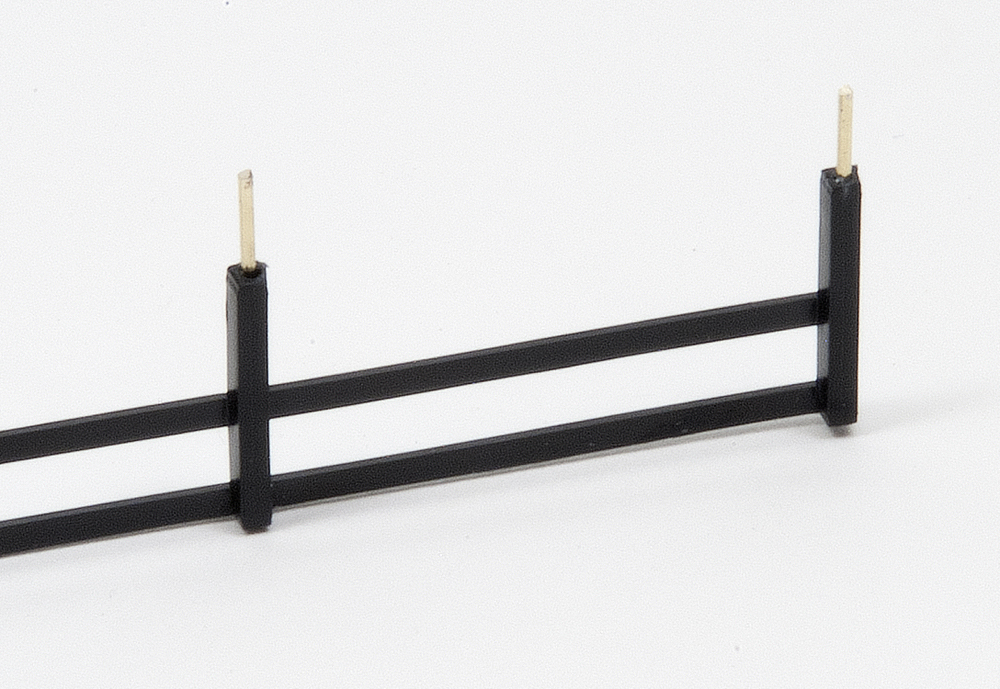
4. The mounting pins are 2 scale foot lengths of .028″ brass wire. Attach them with medium viscosity CA.