Five tips for blending backgrounds: While scenery at the outside edge of a layout may pose some difficulties (see my story “Scenery on the edge” in Model Railroad Planning 2017), the back of the layout also has its challenges. The abrupt change in the model scene from horizontal to vertical at the backdrop demands we do something to make the transition. We often install a tree line, build a mountain, or paint or paste on a backdrop scene. These are scenic staples and may be all that’s needed to create a suitable setting for the railroad. A well-done painted backdrop can be very appealing. For those without artistic ability or an artist friend, many commercial photo backdrops are available. You also can have custom scenes of unlimited length printed – at a price. To create effectively blended backgrounds without breaking the bank, let’s explore five tips for blending backdrops.
I could use one or more such backdrops on my layout, but it’s not a project I’ve pursued. However, my buildings and scenery elements are easily removable, so a long backdrop could be installed without undue deconstruction. Being able to clear the layout is a factor to consider if you think a sizable backdrop installation is in your future. Why not install the backdrop before doing the foreground scenery? If it’s a rural or mountain scene, that’s probably OK. But in an urban scene, the alignment of foreground buildings and backdrop structure images is often more critical. If you’re not sure about the positioning of the foreground elements, you might want to wait for a finished backdrop. Also, scenery construction can be a bit messy and could damage an expensive backdrop.
Using small prints
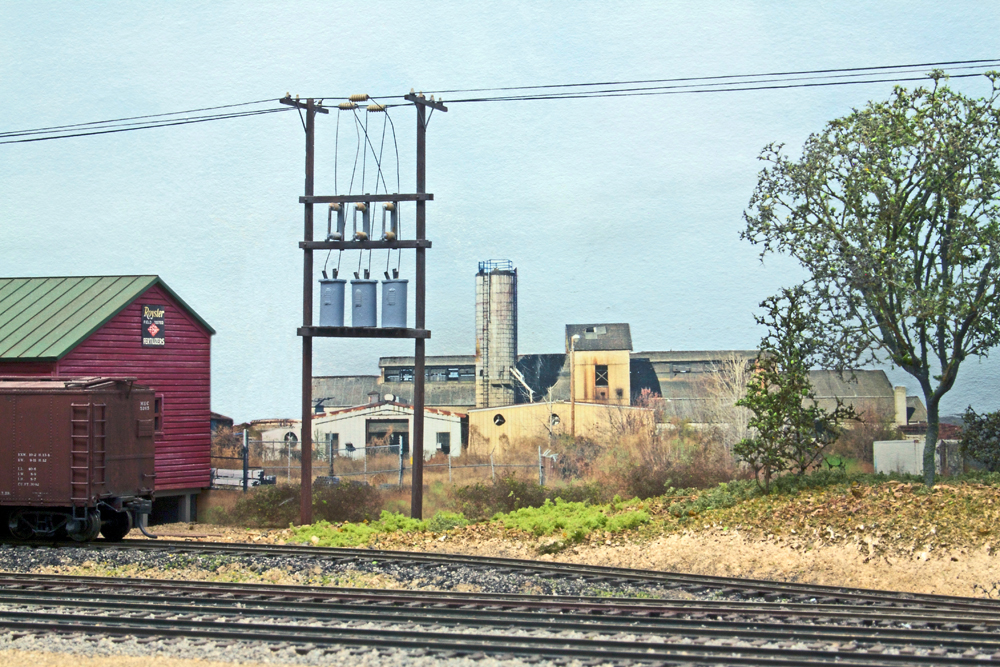
My approach so far has been much simpler. I use relatively small photo prints of an appropriate length and not more than about 4″ high pasted on open backdrop spaces between 3-D structures or behind trees. I use the structures and trees as visual foils to help blend the photo prints into the scene.
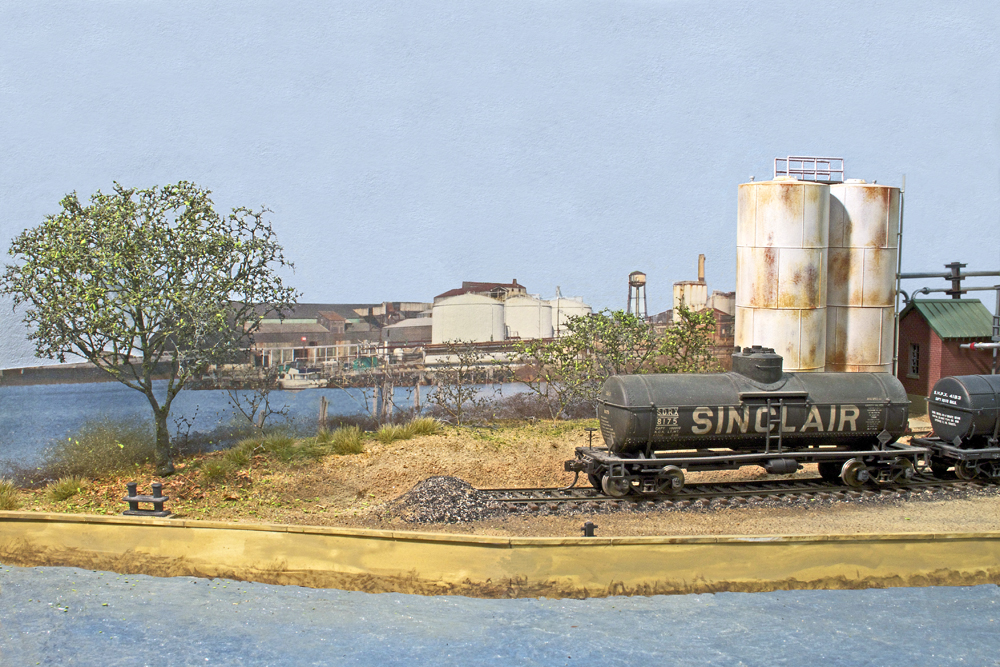
I also keep the horizon line low. Without the foils and low horizon line, the images may look like photos pasted on the wall and won’t blend into scenes. I install the backdrop photos after the scenery elements are set so everything lines up.

I print the photos on my home ink-jet printer on either ordinary bond or matte photo-quality paper. The bond paper prints are less crisp and not as brilliant as those on photo paper, which seems appropriate for backdrop images. I cut off the sky and conceal the white edge using a colored pencil or crayon. The prints can be sprayed with Testor’s Dullcote to provide a protective coating if I’m doing nearby scenery work later. But I’m careful with later spritzes of rubbing alcohol as a wetting agent, as drops of alcohol will leave hazy spots on a surface sprayed with Dullcote (or on a freight car or structure, for that matter). Don’t panic: Another spray of Dullcote will fully restore the surface. Commercial backdrop and laser-printed images are a little more resistant to moisture.
Applying the images
I paste the images on the backdrop with glue sticks, white glue, or sometimes rubber cement. I haven’t settled on what’s best and have recently refastened portions of images pulling away from the wall with thin double-sided tape. Whatever you use, you want to be able to make positioning adjustments as you apply the image. I avoid standard dry-mounting techniques, as they seldom allow much if any adjustment once the image and backdrop make contact.
Structure flats
As with photos, I take care installing structure flats against a backdrop. I don’t want them to look like flats. By obscuring the view, I can make the shallow depth less obvious. A flat placed at eye level or higher will blend in easily. Truncated structures are less jarring against a backdrop than on an aisle edge. If the junction where the roof meets the backdrop isn’t visible, the shallowness is obscured. A parapet on top of a brick building helps accomplish this. On peaked roof buildings, I cut the roof off after the peak, so the peak hides the short, truncated back slope.
Scenery along the backdrop
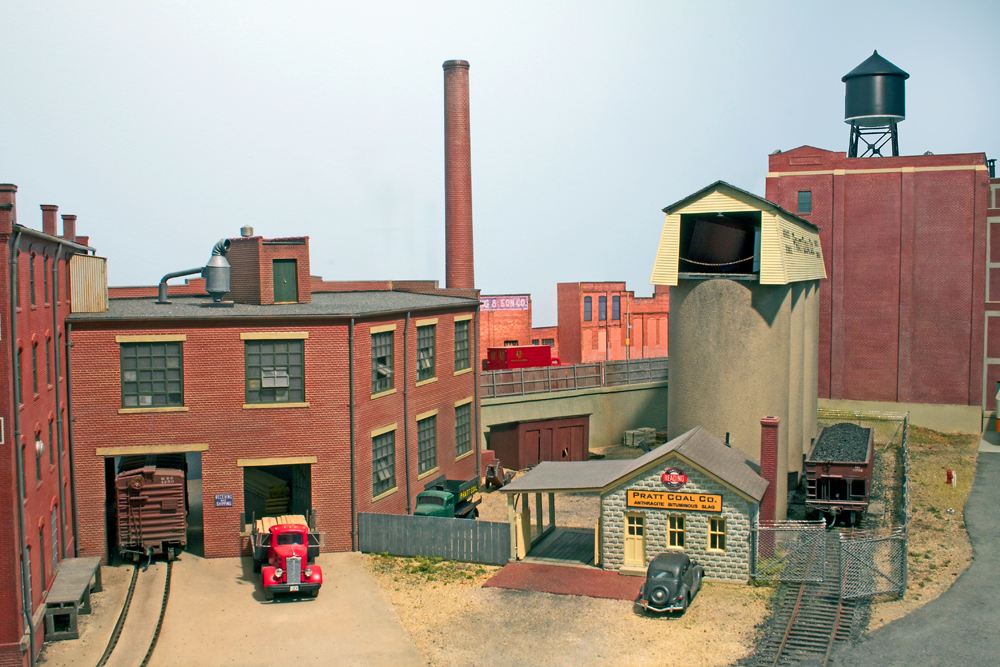
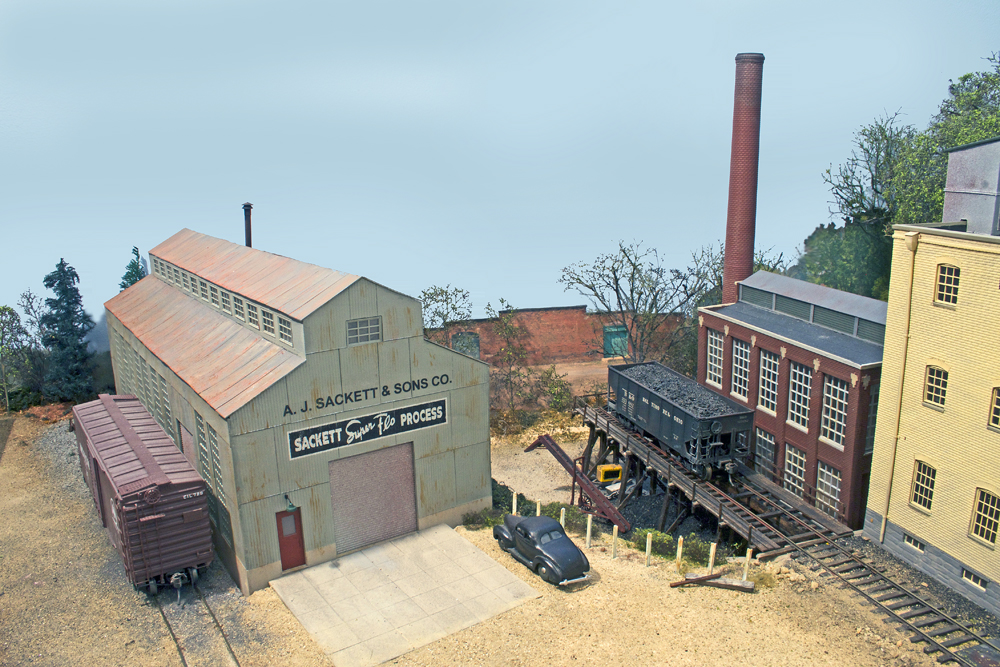
When building scenery along a backdrop, there may be opportunities to create viewing alleys between structures, trees, or hillsides. The eye is drawn to such arrangements – for instance, looking down a street framed by buildings or trees. There’s a void, sometimes called negative space, that fools the eye to see more than is obvious. It becomes a center of interest on the layout.
I created a 3″ deep depression on my railroad to accommodate a coal delivery trestle. It’s bounded by a boiler house on one side and an industrial structure on the other. This created a viewing corridor that leads to a photo of a warehouse pasted on the wall.
We can make more interesting backdrops. Create spots where people try to look beyond the foreground elements to investigate more distant details on the background. Using techniques like this, along with controlling viewing angles and using scenic elements to blend the background into the foreground scene, can expand the experience of our layouts past the walls of our train rooms.