Automatic knuckle couplers have been a part of model railroading for more than 60 years. Not only do these couplers look more like what you see on full-size locomotives and freight cars, they’re easy to install and use. You can learn more about them in my articles on HO and N scale couplers on Trains.com.
Coupling equipment with automatic knuckle couplers is effortless, but a good number of modelers are content to use their hands — known as the 0-5-0 switcher — for uncoupling. Though this technique works, it’s not very realistic. Further, our full-size hands may break the delicate parts off our scale freight cars and locomotives and damage nearby scenery. Lifting cars off the rails may also lead to unwanted derailments.
Thankfully, there are better options. Here are some common methods for uncoupling cars.
Permanent magnets
The first option for uncoupling cars with automatic knuckle couplers is permanent magnets. In HO scale, Kadee sells a delayed under-the-track version (308), as well as delayed (321 and 322) and non-delayed (312) versions that fit in the gauge of the rail. Permanent magnets are polarized across the rails.
In N, Micro-Trains offers two styles of magnets. The under-the-tie 308 is easy to hide with ballast or other scenery material. If you’re okay with the magnet being visible, the 1310 (magnet only) and 1311 (magnet secured in the gauge of a 5” section of Atlas track) are options.
Bachmann also offers uncoupling magnets in HO (78999) and N (78998) that include a scale brakeman figure.
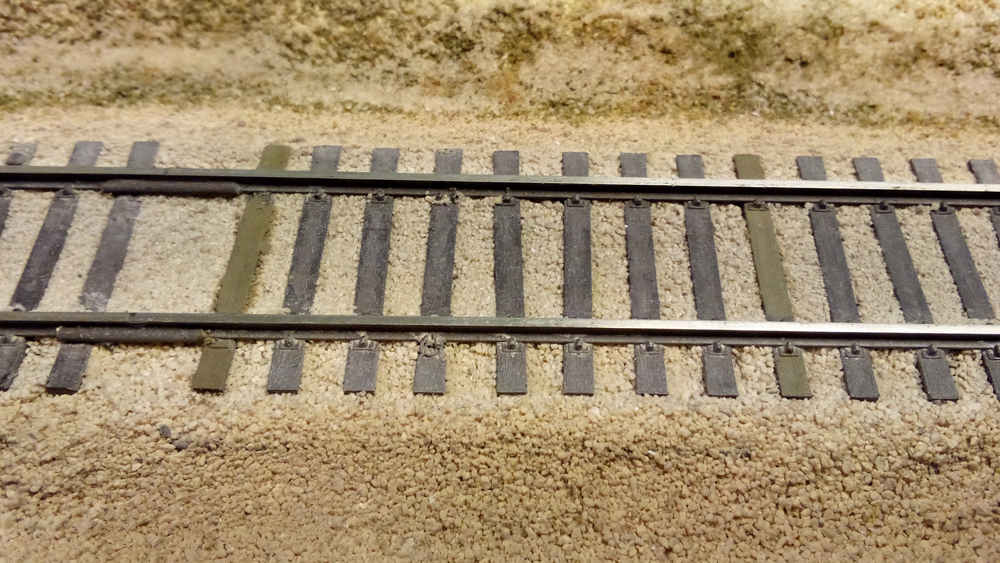
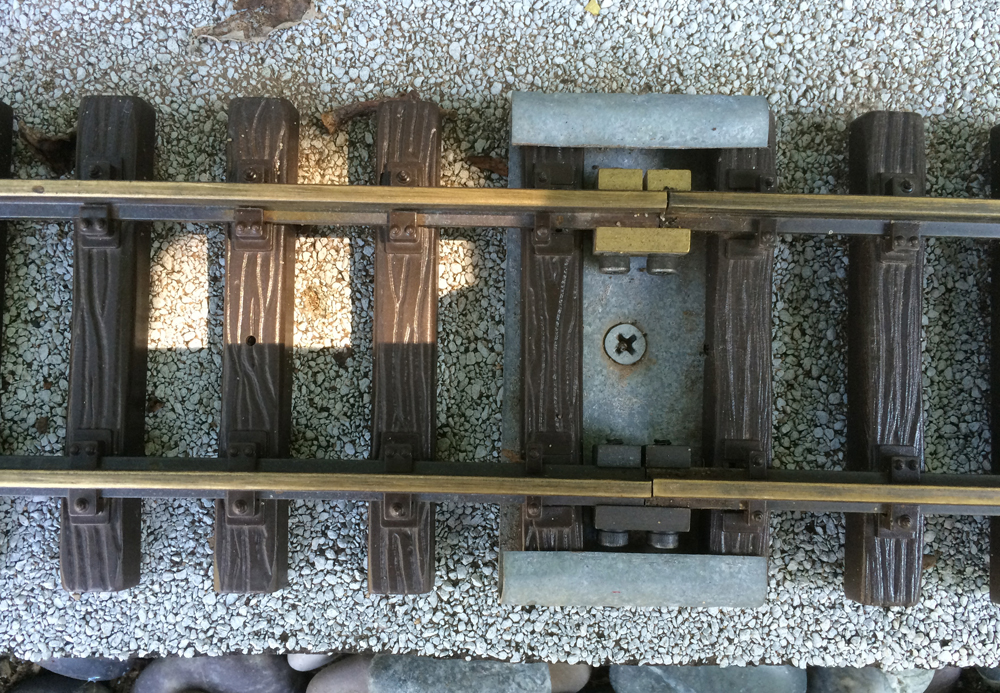
There are many Kadee 308 under-the-rails magnets on our HO scale Milwaukee, Racine & Troy staff layout. The thicker magnets have enough power that they can be placed under the rails. Better yet, they can be concealed with ballast and roadbed.
Though you may know where the magnets are located once the scenery is applied, visiting operators may not. A subtle way to indicate magnet locations is with paint. The two light brown ties in the photo above indicate the edges of the magnet at Williams Bay.
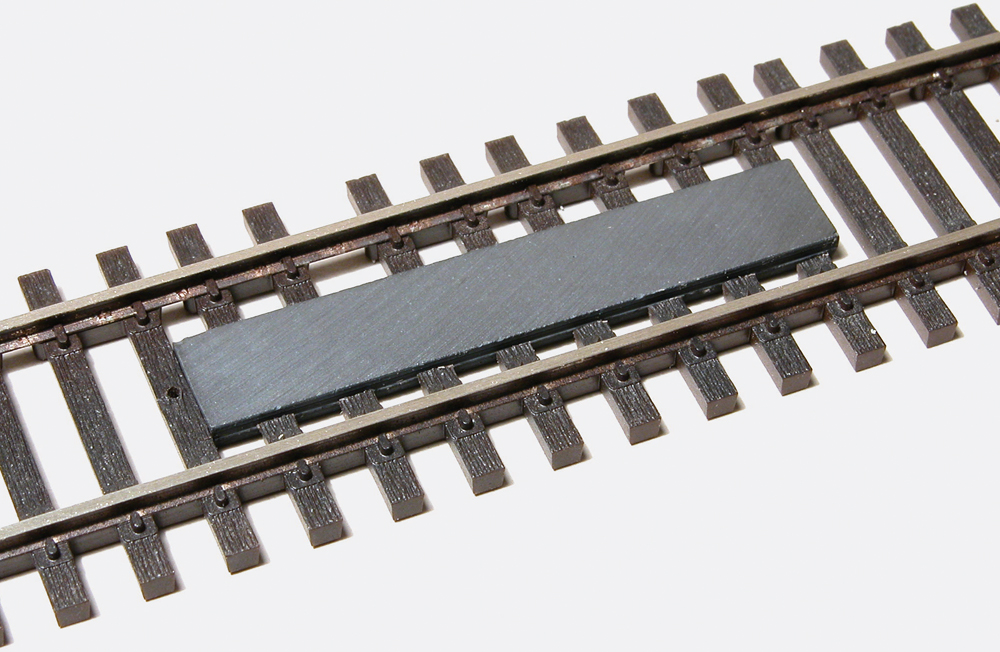
If you’re OK with the magnets being visible, between-the-rails magnets are another option. The Kadee 312 and 321 magnets are designed for HO scale code 100 track; the 322 is for code 83.
On occasion, you may be able to put the magnets on the tie tops. However, if coupler trip pins won’t clear the magnet, you’ll need to use a chisel blade in a hobby knife to trim ties in the gauge where the magnet will be located. This process is shown in the instructions included with the Kadee magnets.
Two terms you’ll see with uncoupling magnets is non-delayed and delayed. Non-delayed magnets uncouple cars right at the magnet.
Delayed magnets set couplers into the delayed position, allowing equipment to spotted at locations beyond the magnet. Here’s how the process works.
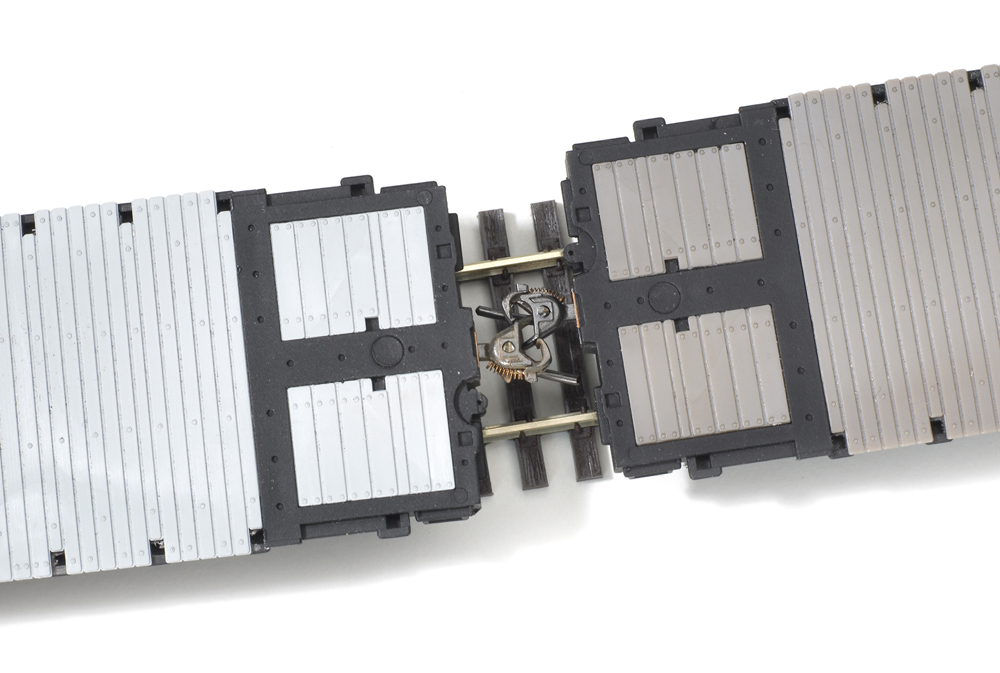
First, two pieces of equipment are stopped over a delayed magnet. As soon as there’s slack in the coupling, the metal trip pins pull the knuckles apart. When the train pulls forward slightly, the couplers are spread in the delayed position.
Then the train carefully pushes back to the uncoupled car. The couplers will engage, but not couple, as shown in the image above. Then the train pushes the car to its desired location. When the train backs away, the couplers return to their normal position. The same techniques work for N and HO scales.
Automatic uncoupling is best reserved for sidings and secondary lines where setouts and pickups are made. Experienced modelers rarely put magnets on the main line to prevent accidental uncoupling.
Electromagnets
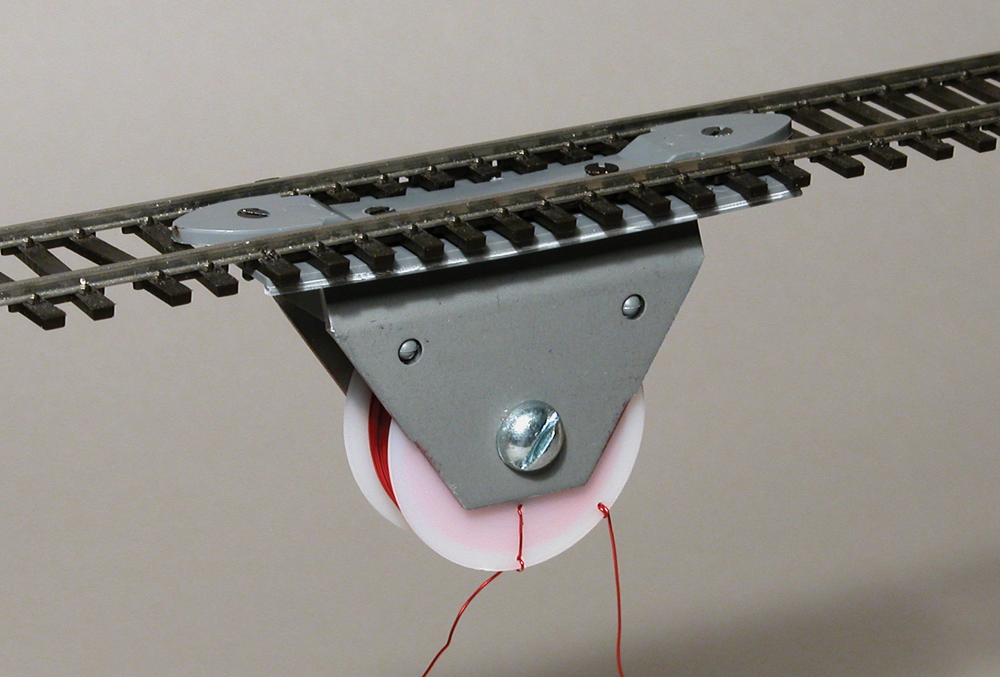
If magnets are necessary on the main, consider using electric delayed-uncoupling magnets, commonly known as electromagnets. These magnets only work when a button is pushed to activate it.
Electromagnets are more labor-intensive to install. For the device to seat properly, a hole needs to be cut in the roadbed and subroadbed. In addition, each electromagnet requires a power supply. Most modelers use push buttons on the fascia or layout control panel to activate electromagnets.
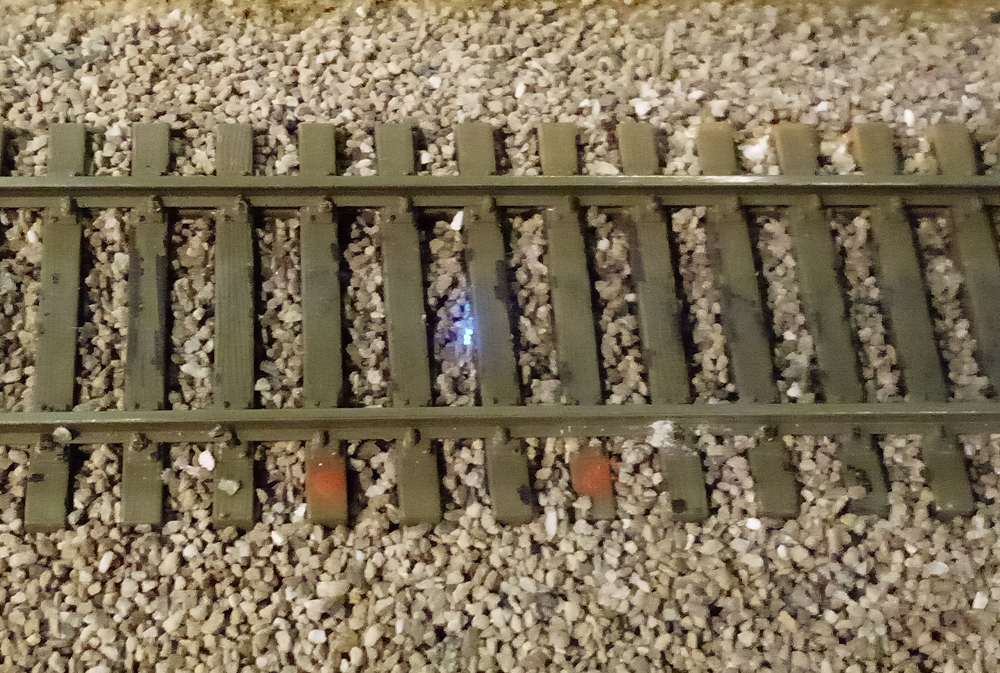
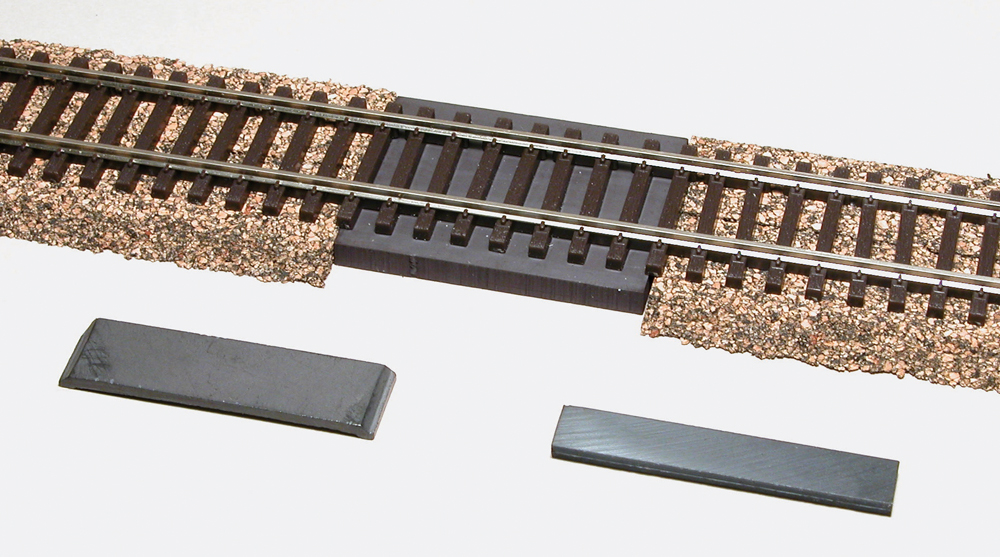
We used RailCrew on-off remote uncouplers from Rapido Trains on the Jones Island section of our HO scale Milwaukee, Racine & Troy. When turned on, a blue light-emitting diode illuminates in the center of the magnet to indicate where the electromagnet is located.
Rapido offers RailCrew on-off remote uncouplers as single-sale items and in six- and 12-packs. You can watch Trains.com Director David Popp install a RailCrew remote uncoupler in Episode 6 of Rehab My Railroad.
Manual tools
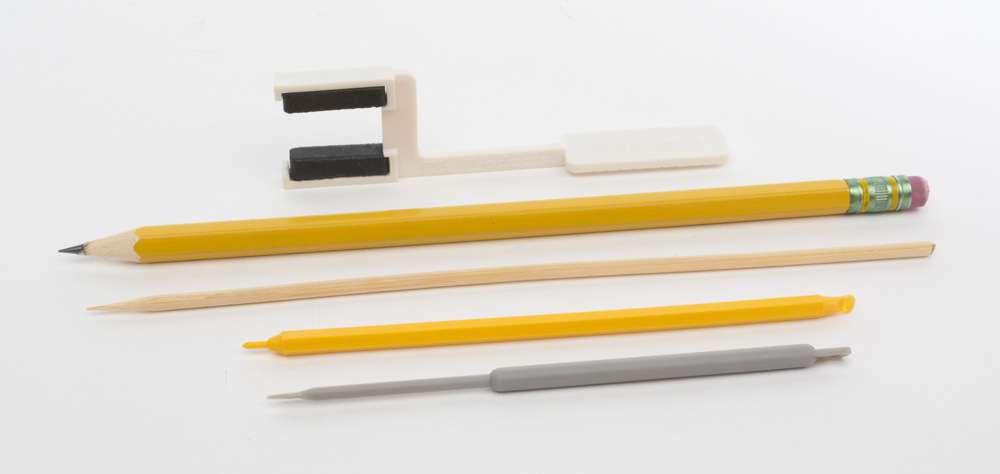
We’ll wrap up our look at common methods for uncoupling cars with manual tools. Some modelers find the forward-and-back move to set the couplers in the delay position unnecessary and non-prototypical. If you want to avoid using magnets on your layout, consider manual tools like the Accurail Accumate Switchman, Kadee Dual Tool, Rix Uncoupling Tool (HO), and Rix Pick (N).
Other modelers prefer using simpler tools, such as wood skewers and pencils. Former Model Railroader managing editor Jim Kelly fashioned a manual uncoupling tool out of a sword-shaped plastic drink stir stick. You can read more about that in his N Scale Insight column in the January 2015 issue of MR.