Q: I’m an HO scale modeler and struggling with track laying techniques. I would appreciate guidance on measuring, cutting, and installing flextrack on curves. I’m always disengaging the rails from the ties, and thus having trouble connecting to the next track. Also, when superelevating curves, is it better to attach the risers under the outer rail to the roadbed or to the underside of the ties? Finally, I’m struggling with the beginning and end of grades. Both places seem to have too sharp a vertical transition, creating problems with uncoupling and bottoming out. I’m using Woodland Scenics Incline Starters. – Bret Hall, Burlington, Vt.
A: Track laying techniques are most efficiently learned by doing. There aren’t special tricks; if you design your layout properly and test-fit track carefully before cutting it, you’ll soon develop a talent for it.
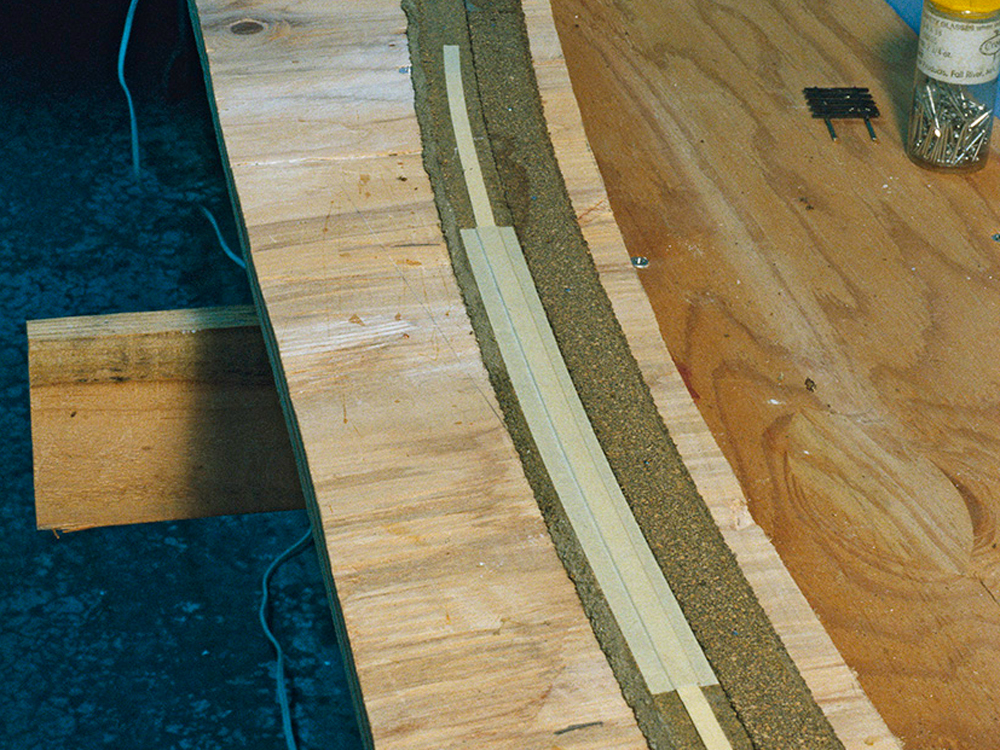
The only suggestion I have when it comes to bending your track is to lay it flat on a surface and press down as you bend it to ensure it flexes only from side to side, not up and down or in a twisting motion. If the track is “stiff” and the rails don’t want to slide in the ties, flex them gently in short lengths to loosen them up. Some manufacturers make their flextrack with one rail firmly affixed to the ties and the other rail looser; bend this kind of track so the rail that can slide easily is on the inside of the bend. That way, after making the bend, you have excess rail to cut off, rather than a gap to fill.
If you want to superelevate your curves, it’s fairly simple. We’ve run articles on how to do it in the past, including “Superelevated curves in 4 steps” in November 2013’s issue or “Superelevating flextrack” in October 2008. I prefer the method in Andy Schnur’s 2008 article, which uses ramps of masking tape and flexible cardboard shims taped to the roadbed.
If you’re having trouble with vertical curve transitions of your track being too sharp, that’s due to the curve transition being too sharp in the underlying subroadbed. Woodland Scenics Incline Starters are made of foam, so you can use foam-shaping tools like rasps or sanding blocks to take off the sharp corner at the top of the grade.
At the bottom of the grade, fill in the divot with taped-down layers of cardboard, kind of like you would for your superelevation ramps. Note that if your grade is short, this may have the unwelcome result of creating a vertical S-curve. If it’s a tradeoff between the center and the transitions, try to make the center of the grade at least as long as two of your longest cars.
For modelers using plywood subroadbed, try to avoid starting or ending elevations where the joints in your subroadbed fall. Put your subroadbed joints in areas of constant grade instead and splice another layer of plywood underneath those joints to keep them flat. Use the plywood’s natural resistance to bending to make those vertical curves gradual. And use at least 1/2″ thick plywood so it will have enough resistance.
Send us your questions
Have a question about modeling, operation, or prototype railroads? Send it to us at AskTrains@Trains.com. Be sure to put “Ask MR” in the subject.