Q: After carefully measuring and cutting rail, too often there is still a gap between the rail ends that some of my N scale cars don’t like. I’ve been trying some different fillers, but it’s a challenge for N gauge. Any suggestions for a gap filler? – Steven Simmerman
A: Hi, Steven. Some rail gaps are good – not just to electrically isolate wiring districts, but to allow for future rail expansion and benchwork contraction. If all your rails fit perfectly from the start, in a few years you might find rails being shoved out of gauge as your benchwork lumber dries and shrinks. It’s a small effect, but it does happen, and considering how small the gaps in an N scale rail should be, it doesn’t take much to become troublesome. Check out Jim Kelly’s N Scale Insight column “Sidewinders, squeezers, and crushers” in our January 2012 issue.
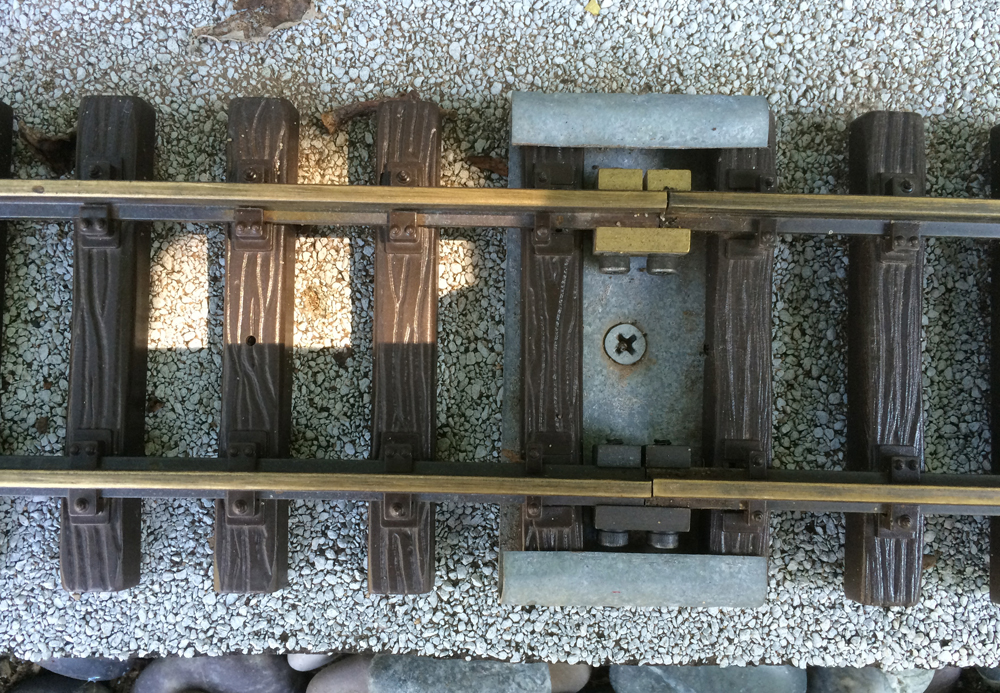
But as finicky as some N scale cars are, those gaps don’t have to be very big to cause problems of their own, as you’ve discovered. There are two ways to deal with rail gaps, depending on whether you need to keep the two sections of rail electrically separate or not.
If not, the answer is simple. Use a pencil-tipped, low-wattage soldering iron to gently heat the rails on both sides of the gap and flow a small amount of solder into the gap. This should work for gaps up to 1/16″ wide; any larger, and you should think about re-cutting a new piece of track to better fit the space. Be careful to not keep the soldering iron on the rails too long, as you don’t want to melt the plastic ties or their tiny spike heads that hold the rails in place. As soon as the solder flows into the gap, remove the heat and let it solidify. Then use some fine jeweler’s files and sanding sticks to remove any excess solder and shape the remainder to match the rail profile.
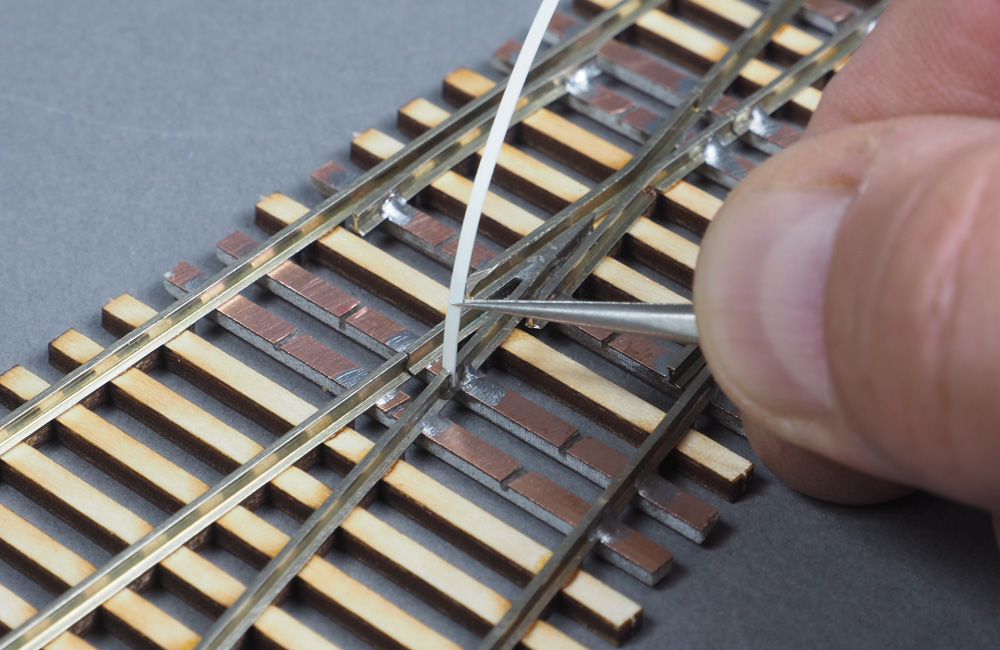
If you want the gap to remain electrically insulated, slip the end of a styrene strip into the gap. Pick a thickness that fits the gap fairly snugly, then apply a drop of cyanoacrylate adhesive (CA or “super glue”) to fix it in place. Let the glue cure, snip off the excess with a sprue nipper, then use the files and sanding sticks again to shape it to match the rail profile.
Just don’t forget to leave a small gap in your rails every 6 feet or so to allow for that benchwork contraction I mentioned earlier.
Send us your questions
Have a question about modeling, operation, or prototype railroads? Send it to us at AskTrains@Trains.com. Be sure to put “Ask MR” in the subject.