Q: I have a couple of questions about the benchwork construction of your Spartanburg Subdivision. How large did you cut the plywood sheet? Did you attach the 1x4s to the top of the plywood sheet, or at the sides? Where did the trim pieces go? How large was the sheet of foam you put in the middle of the frame? Where did the foam attach to the frame? And do you have any photos of the construction that you could share? – Joe Loll
A: The article on my N scale Southern Ry. Spartanburg Subdivision project layout was published in our October 2011 issue. Since I designed the layout to be stored under a child’s double bed, it was important to keep its height as shallow as possible. To accomplish this, I took the basic idea of an open-grid train table and flipped it on its head. Rather than stack plywood and extruded-foam insulation board on top of a wooden frame, I put the plywood on the bottom and the foam board inside the frame.
The plywood sheet and the foam sheet were both cut to the same dimensions: 3 feet by 5.5 feet (36 x 66 inches). These were surrounded by a frame of 1 x 4 lumber. The ends of these four boards were mitered at 45-degree angles so they would meet at a neat joint. I reinforced this joint with an L-brace on the inside, so the outside would be unmarred by nails. Since 1 x 4 dimensional lumber is actually 3/4″ thick, this means the outside dimensions of the frame came to 37.5″ x 67.5″.
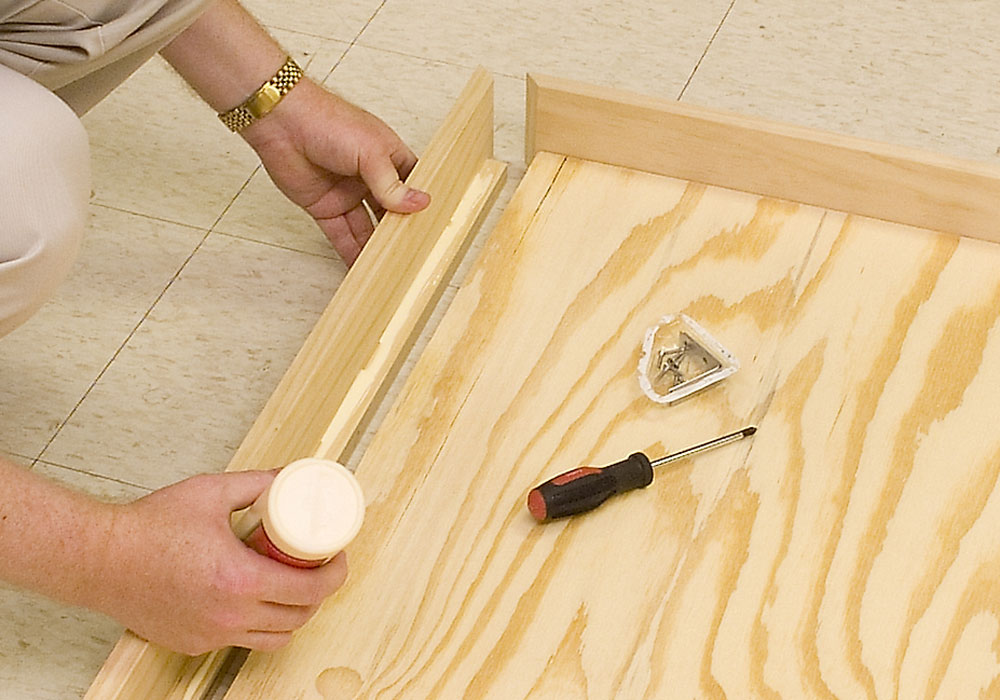
The 1/2” x 1/2” square trim pieces were glued and tacked inside the frame, at the bottom, in kind of a miniature L-girder. The trim pieces don’t lend much rigidity to the sides, but rather, give the plywood something to rest on and attach to. The plywood was glued inside the frame, on top of the trim pieces, as shown in the photo below. Two layers of foam board went on top of the plywood, also inside the foam. It was attached to the plywood with foam-safe adhesive caulk. The surface of the foam came up just short of the upper rim of the wood frame.
Send us your questions
Do you have a question about model railroading you’d like to see answered in Ask MR? Send it to associate editor Steven Otte at AskMR@MRmag.com.