


Whether you work from formal drawings or a rough sketch of a trackplan, how you organize the building of your railway may save you time and money. I’ve met several railroaders who hastily built their garden railways. Then they joined their local club, went on railway tours, and finally ripped out their track to start all over again with seasoned wisdom.
No organization gene? While you’re exploring the possibilities, we’ll get you started in this first part of “Design your railway” series, and set you up with tools: online resources for goal setting as well as a map-making method anyone can do with paper, pencil, and a tape measure. Your garden railway can be unique using tried-and-true techniques. This story takes you on a historical tour of Jerry and Alison Ogdens’ exemplary railway.
From start to evolution
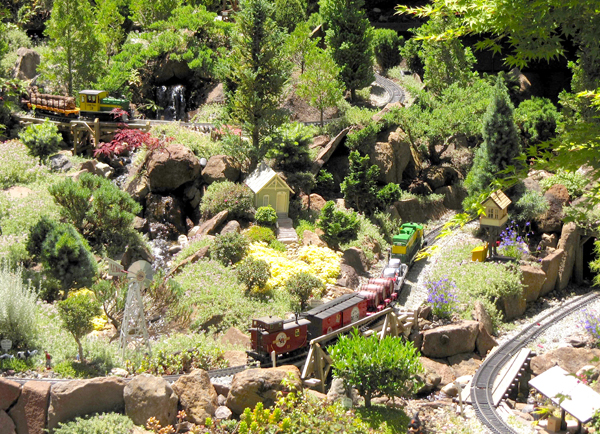
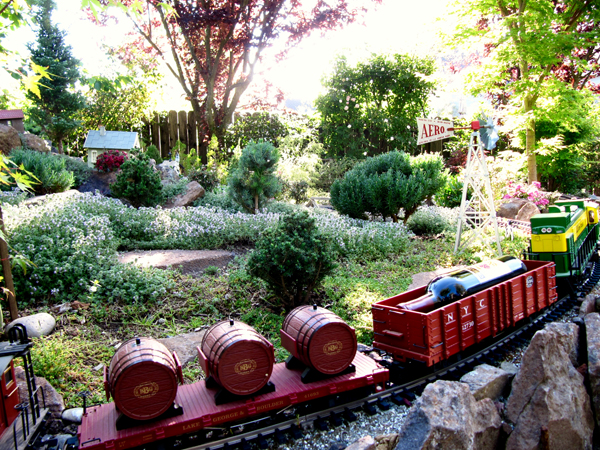
The Possum Creek Railroad (photo 1) used to be a lawn. Jerry and Master Gardener Alison couldn’t have imagined this countryside at first. Their project was built in sections by typical stages of development; our railway gardens are rarely finished but they evolve. Even the railroaders are transformed, as Jerry will tell you how he became the unexpected plant whisperer, regularly trimming the trees.
Plan with a grid
I might be “old school,” but I like 1/4″-grid graph paper. Until global-positioning systems become more finite, I’ll forego the computer-assisted-drawing (CAD) software and bring a pad of graph paper outdoors with a 1″-wide tape measure.
First, I carefully measure the perimeter of the yard, using fence posts, walkways, or other features as permanent benchmarks from which to plot points onto the grid of the paper. Later, these landmarks will help me find representative points on the ground for marker stakes. I often discover that the plan needs changes and pencil is erasable.
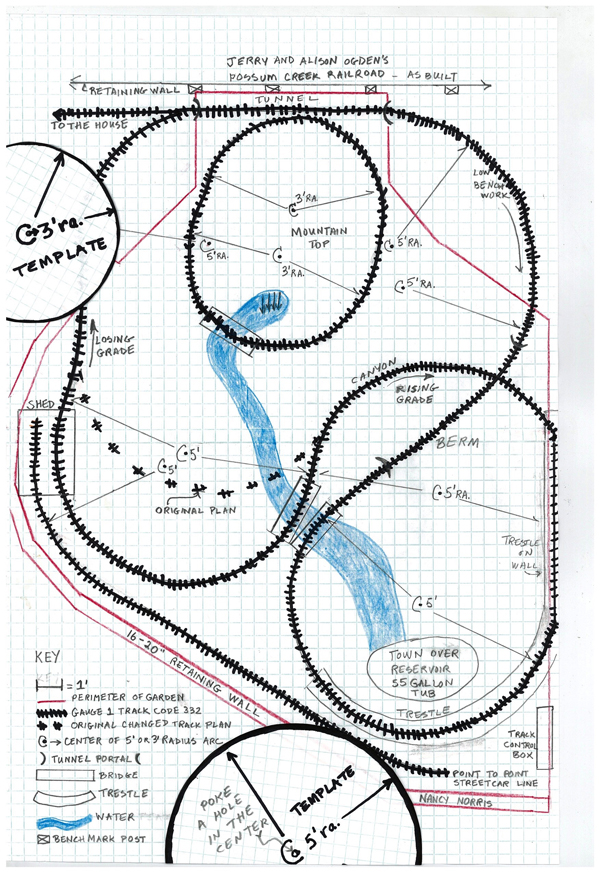
Photo 2 shows the Ogdens’ plan. It’s been redrawn “as built” for better visual understanding of the elements and their relationship to the yard’s perimeter. Before the plan was drawn, they built a raised planter box explicitly for the railroad, so the track needed to veer onto bridges over extended walls and benchwork in a few areas to afford the chosen maximum grades and minimum curve radius. In the front, left area, the map shows a change made to the plan—the train now travels over a longer run, thus allowing a shallower grade to get down to walkway level, where the siding comes in from the cellar.
Curves and clearance
Smooth curves are most critical for great-running trains—the biggest your yard can afford. I measure curves to the center of the track, but you could use one of the rails, if consistent. Here’s how to figure out how big a curve you will fit into your space. Cut circle templates from graph paper to represent various radius curves you’ve decided on (photo 2). This easy method lets you move the circle templates around on the graph paper (instead of on the ground) to find the needed curve without a cumbersome compass.
Poke a hole in the center of your circular paper template. When outlining the curve template on your plan, poke the pencil into the center hole, marking the graph paper underneath; this mark/point (labeled 5′, with an arrow toward the curve) will show exactly where the center stake will be placed. It will stay in the ground until all of the track of that curve is in place. I use a 5′-long string on the stake to mark the roadbed or just a tape measure for a short-length curve.
On trackplans of smaller railways, I usually use only the intended-radius curve(s) and straight lines. With only these two types, I’m able to install the track faster—it’s either my chosen curve or straight track. Making a 2′- to 4′-long template of the curve in plywood, cardboard, or plastic helps get the track bent accurately. It helps if this template is as wide as the clearance needed for your trains on the curve. This method requires that you use flex track, unless desired curves are available in sectional track.
Room for rooms
On your initial paper plan, leave clearance for any hardscape boulders or vertical flagstone needed to retain terraces, walls, and cliffs. This concept is where most CAD programs and track-plan books (for indoors) fail, because outdoors we need more space for unexpected erosion, footsteps, and retaining-rocks that are thicker than we’d like.
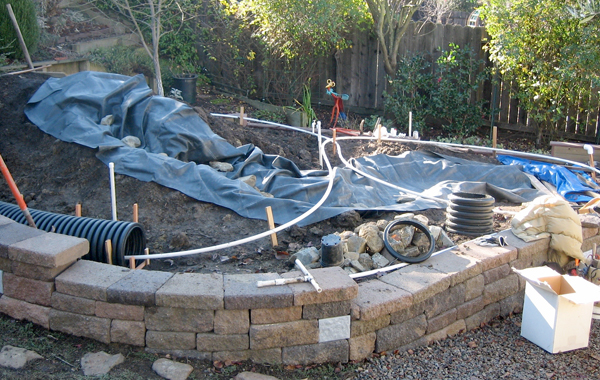
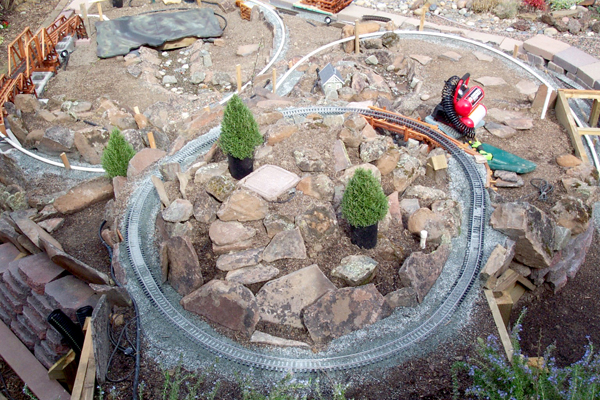
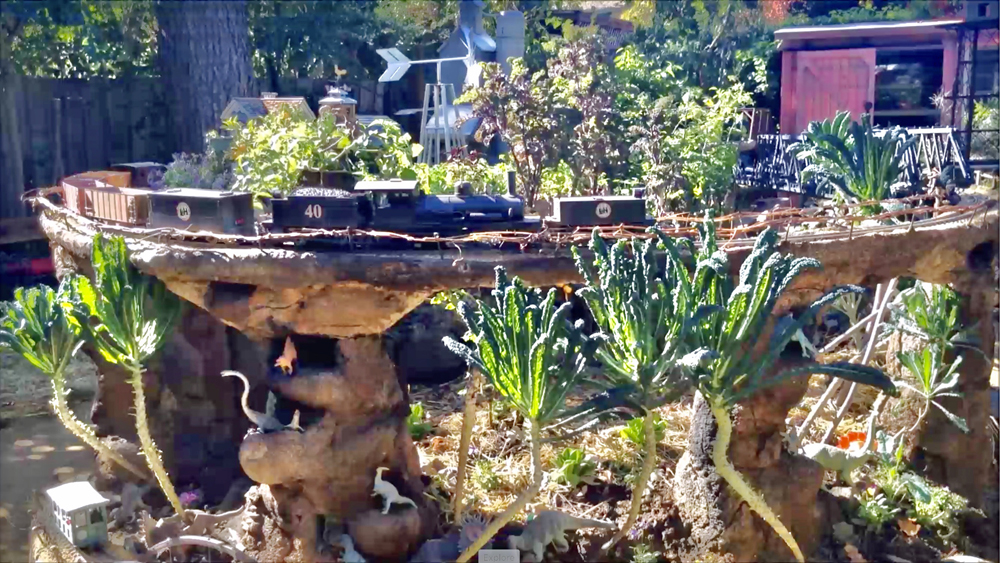
Aside from accurately plotting the trackplan, organize where the rest of the railway-garden elements go in broad strokes. Things change! Plan for the scale town to live where it’s easy to arrange all the figures and accessories. Water features need sky above to avoid leaf pile-up, as shown in Jerry and Alison Ogdens’ construction site (photo 3). Mountains can hide 1:1 structures. Industries need their own space for perceived action. Leave space for transformation as you experiment with what interests you most. Just after the hardscape was installed, photo 4 shows large expanses for dioramas or scenery. Easy groundcovers (less weeding) will fill in the landscape until we get that fancy structure built.
Genius of the place
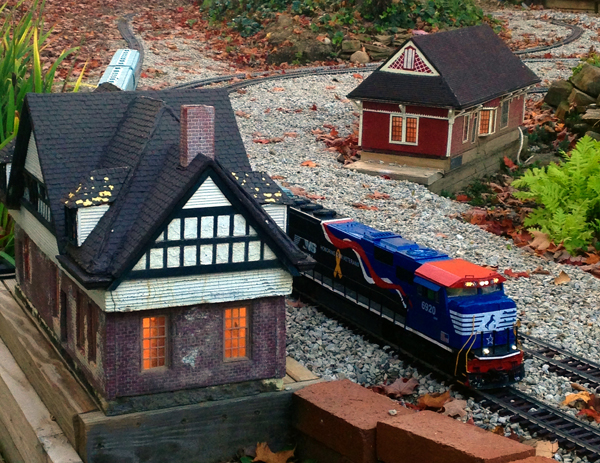
A good design is more than the sum of its parts—it’s a soulful thing that breathes life into the elements you install. In Italy this is called “genius locii,” the spirit of the place. Great designers, whether ancient or modern, have consulted the genius of the place to ask, “How can this garden fit into our climate’s landscape to enhance existing features and the needs of the community (us)?” Alison likes how her railway flows with the surrounding garden she so carefully designed, while Jerry likes how the railcars flow from his cellar to the backyard (photo 5).
At this railroad junction, stop, look, listen. Railway construction is no “airy-fairy” whim, but is built on facts and feelings you thoughtfully find. This first step is about seeing the big picture. With the foundation in place, details will follow in the next two parts of this design series.
What I like about a plan (especially a paper plan for jotting notes in the field) is being able to compare the various sections. The whole project can be broken down into bite-size chunks. I can work on the obvious parts that I know how to build and wait for the more elusive pieces to fall into place.
If I’m patient and give the process time, I will often wake up with the exact image showing how to complete something I’ve been puzzled about. So consult the genius of the place and prepare for answers.
Helpful websites will guide you through the maze of skill sets needed to build a garden railway.
Help at www.GardenRailways.com
• “Plan your railroad” in GR Oct. 2016, “Product reviews:” layout-design software RailModeller Pro, www.railmodeller.com
• “How to build a garden railroad” series by Don Parker (April, June, August, October, December 2010 GRs)
Model Railroader magazine website
Some of what applies to indoor or smaller scales is applicable outdoors on large-scale railways.
• “Get started” section is open to everyone: http://mrr.trains.com/beginners
What’s your style?
The Tucson Garden Railway Society site (tucsongrs.org) shares a PowerPoint outline that helps newcomers organize their plans. Newbies need to answer many questions. The descriptions below can help you figure out who you are (although you don’t yet know who you’ll become once you see all the options). Some of us fit into a blend of categories. (Used with permission from tucsongrs.org)
• Model Builder—wants to build models and needs a place to put them
• Train Engineer—likes running trains,switching and movement puzzles
• Dispatcher—likes to control operations and watch others operate
• Railfan—likes to watch the trains go around while socializing.
Regional gardening report
How have you planned your railway construction?
Gary Condry
Wooster, Ohio, Zone 5
Ongoing hobby
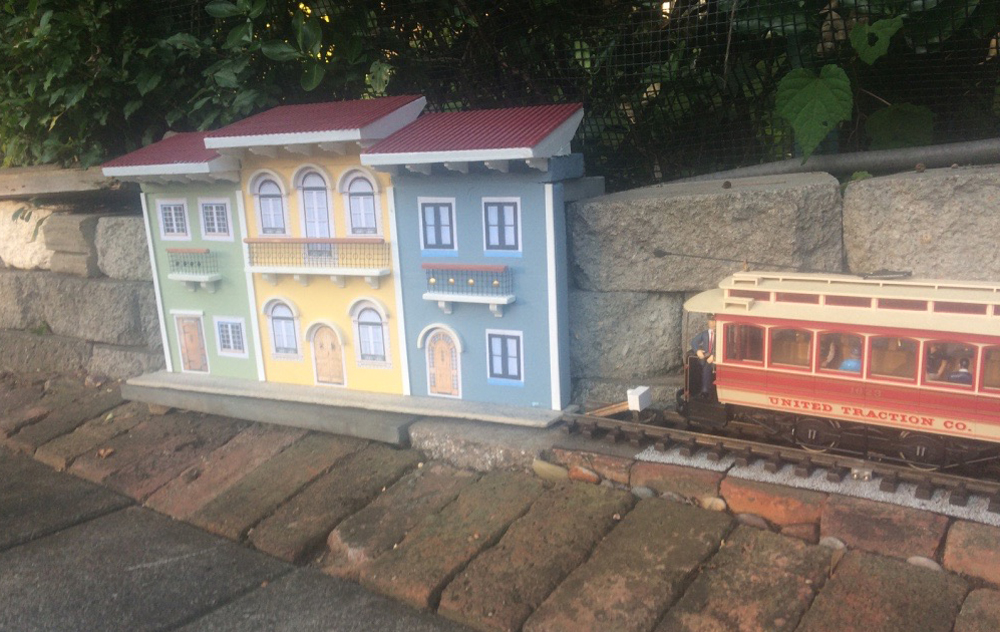
My goal was to have a historic model of early Wooster, Ohio, railroad scenes. Granted, I used some artistic license and compressed the town, but each building is an exact replica of a real one, either still here or lost to history. Now my trackplan has nine turnouts and over 100′ of track but it didn’t start that way. It started as a simple plan (a skewed oval of 25′ of track) on paper, not quite to scale. I knew what I wanted but I couldn’t afford to do it all at once.
Over the years I have added more track, more buildings, and four ponds. As I added new track, one idea would lead to even more. Because of limited space, I am working on my last few buildings. I will now enhance each building with scenes and dioramas with automation. I’ll have hobos at a flickering campfire, a working sawmill, a working gas well, and scenes at the three stations.


See Design your railway, part 2 at
https://www.trains.com/grw/how-to/projects/design-your-railway-focus-on-a-theme/#wait_approval
See Design your railway, part 3 at
https://www.trains.com/grw/how-to/projects/design-your-railway-part-3-detail-with-pairings/