My railroad is located in the last 12 feet at the end of my backyard and occupies an area about 12’ x 43’, with no hope for expansion. Although I’m generally happy with the 120’ of track in a folded dog bone configuration, I’m always looking for ways to add more track without making it look too crowded or illogical.
For instance, I carved out a little space to add a passing siding in front of the train station. That looks just about right for this railway. After that addition, no matter how much I racked my brain, I could not come up with a way to add more track to the railroad.
That changed one spring when I was cleaning the prior year’s overgrowth along the back fence. All of a sudden, with a nice clean path in front of the fence, I could see a single track running along this fence for a trolley that would go back and forth from one side of the railroad to the other.
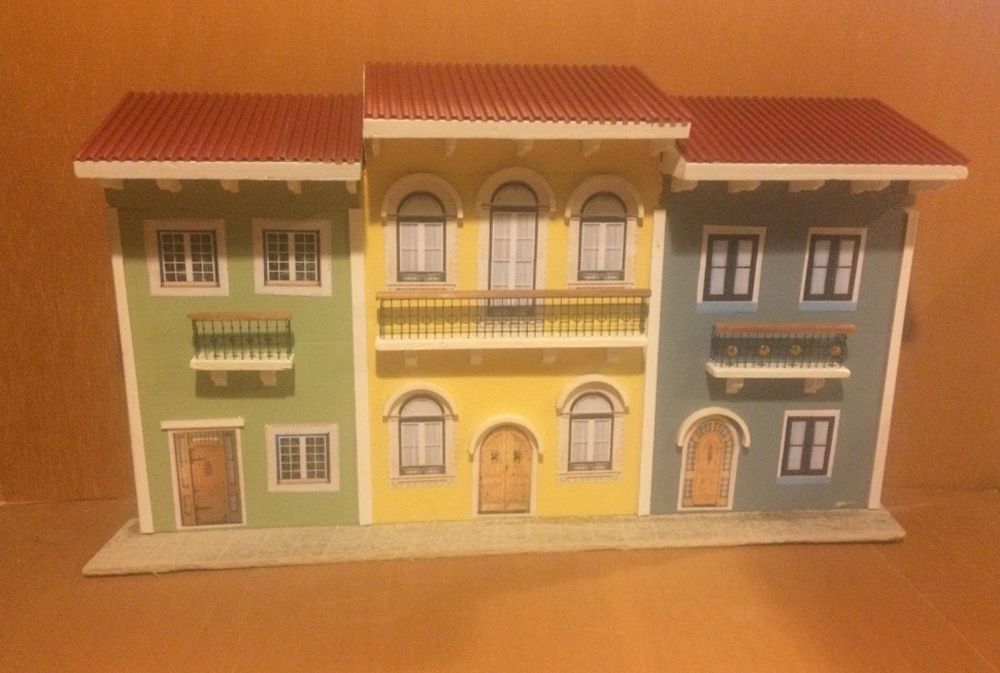
To give it a purpose, I built a couple of towns (one on each end) connected by the trolley to help commuters reach these towns. Because of the space limitations the towns needed to be 2-dimentional (mostly fronts) and would be leaning against the neighbor’s fence. To add interest to my railway, I used a European town style on one side, and a Spanish town style on the other side.
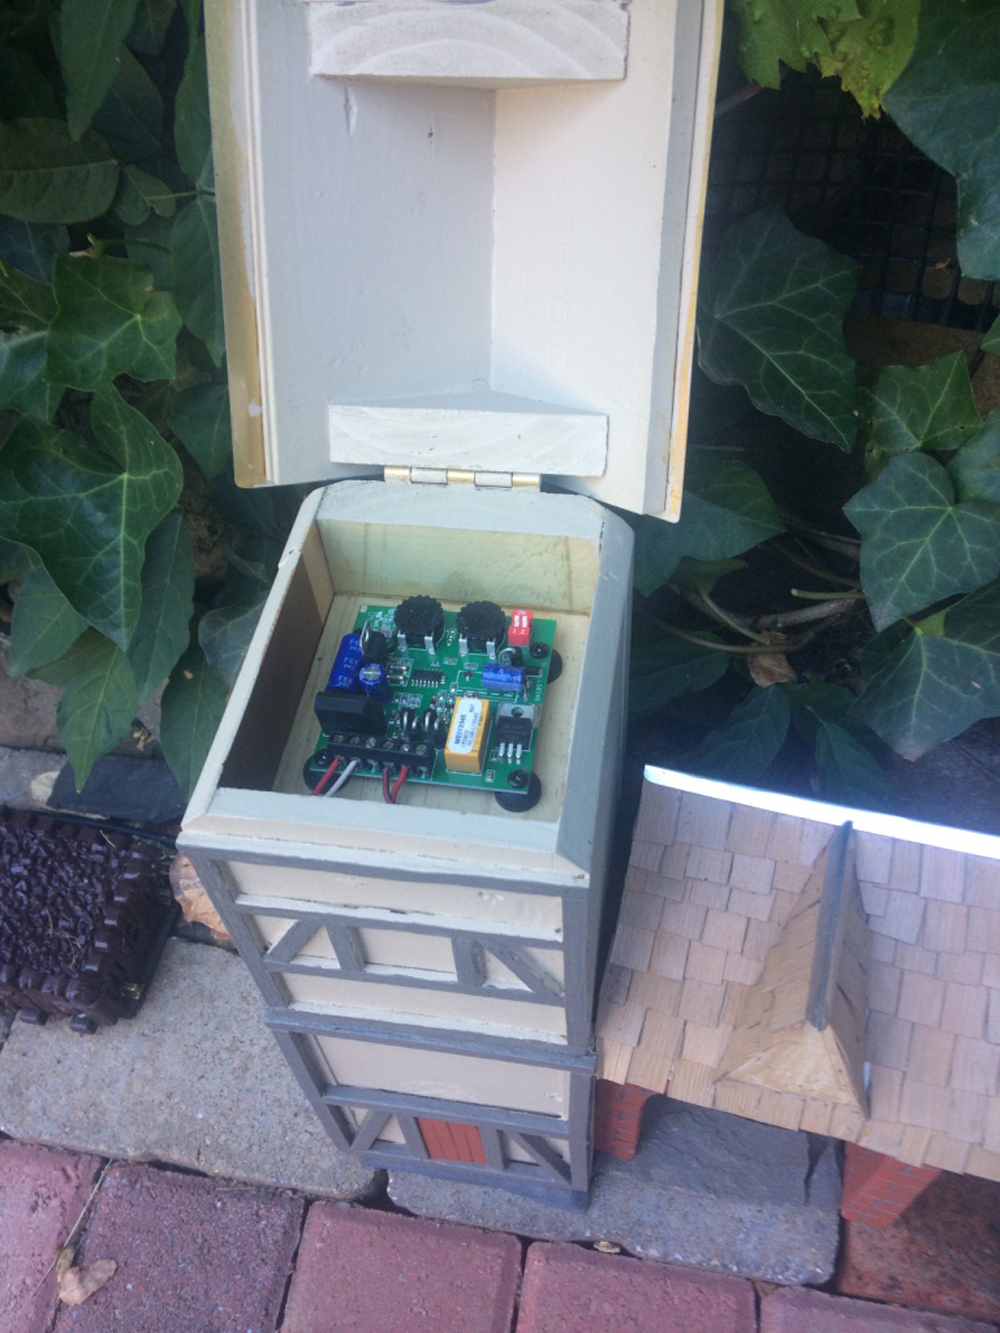
The first challenge for me was to set up the electronics for the automatic back-and-forth operation. To make things easy I purchased the LGB No. 10345 Shuttle Train Automatic Circuit Box.
The circuit comes installed in the interior of the familiar LGB No. 10310 Track Bumper. While this gives a level of protection, I was concerned about what my harsh northeast climate would do to it if left out year long. I did online research to see what others have done about to protect the electronics but all I could find were others with similar concerns, but no solutions.
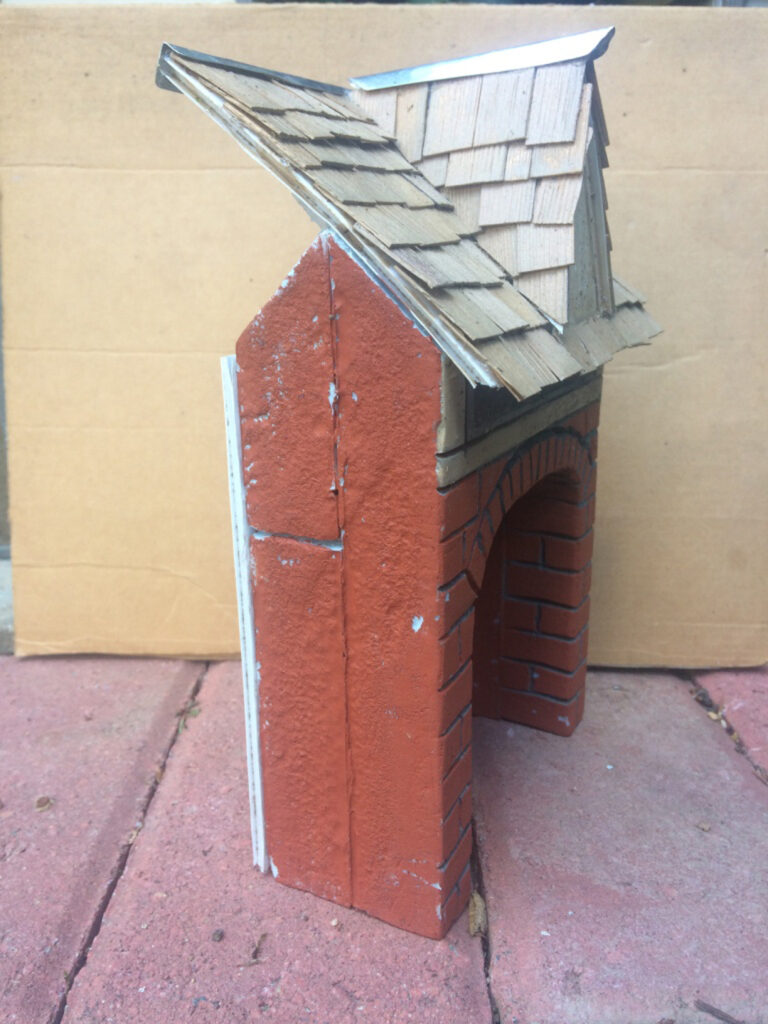
As I began to electrify this new track, I decided to use some of the buildings on the European town to house the electric connections and the electronic circuit board that controls the back-and-forth motion.
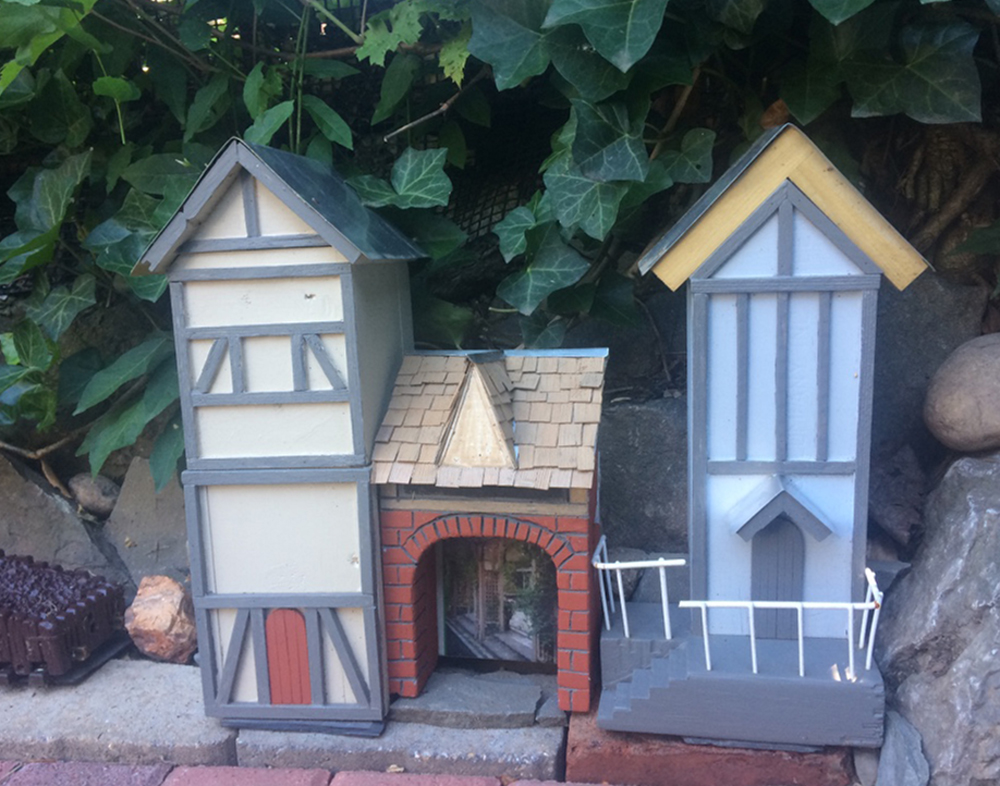
The building on the left houses the circuit board under the roof. The building on the right houses the 24-volt connection coming from the transformer in my shed. This places the connection and the circuit board 6 to 10 inches above ground, fending off most wet conditions.
The two structures at each end are only about 3.5” deep. The walls are made mostly from repurposed, ¼” thick cedar planks from a dismantled cedar closet, and the roofs are made from aluminum sheet. The small structure in the middle ties the two building together into a neat grouping. This one is only 2” deep, made mostly out of 1” blue insulation foam, with the stone detail carved with my soldering gun, and real cedar shingles. All buildings are painted with exterior latex paint.
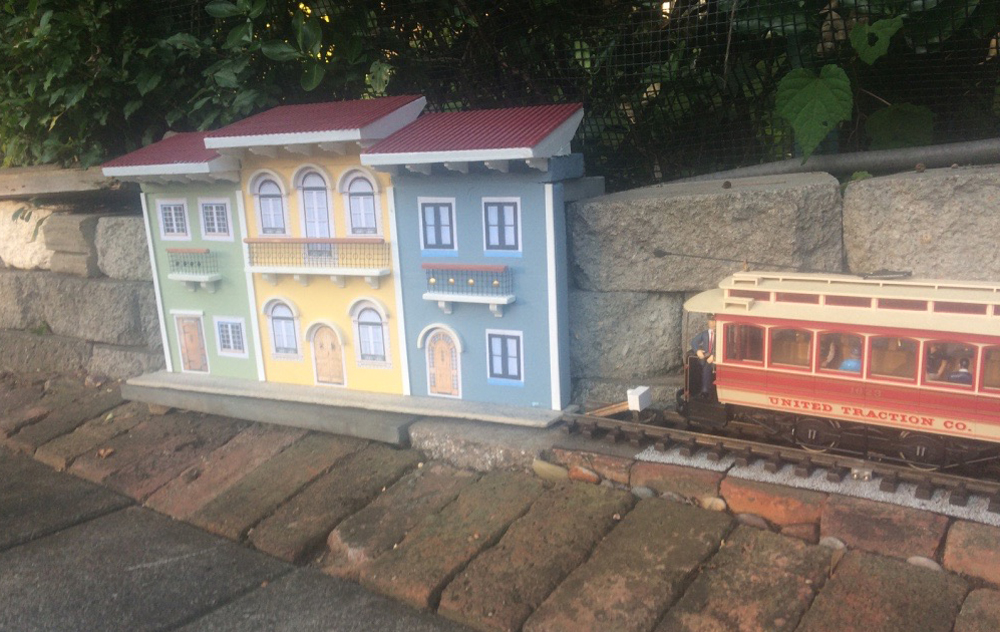
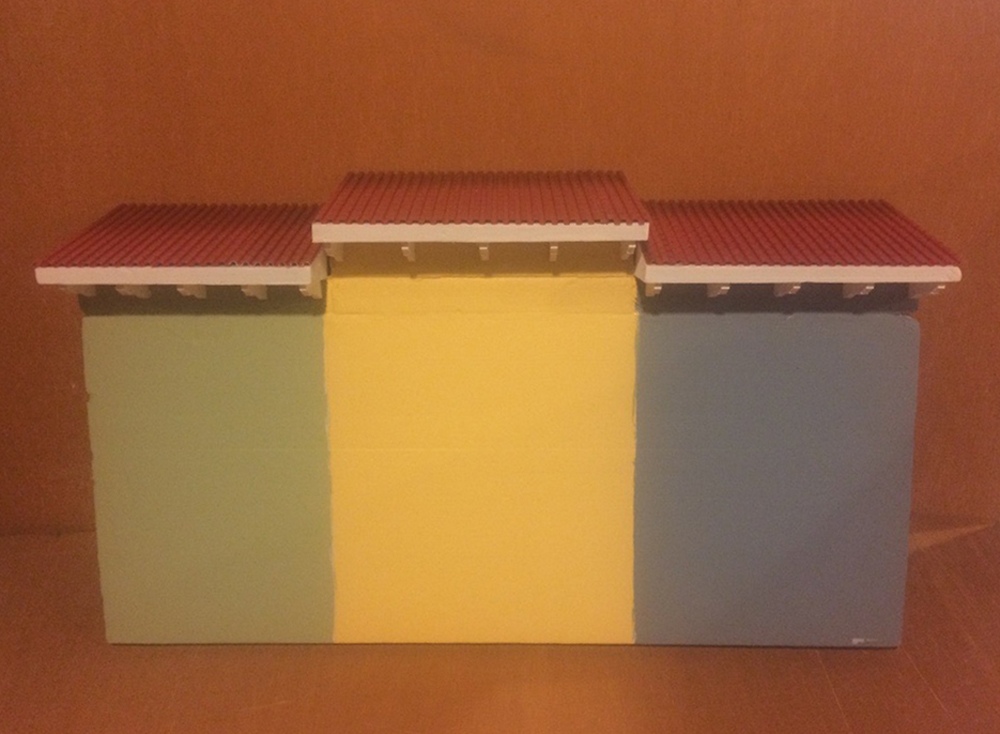
At the other end of the track, is the Spanish town, consisting of only three fronts of town houses.
Because of the harsh winters in New York, all my buildings must be weatherproof. Snow and ice wreak havoc with large scale structures that are not weatherproof. Because of this, the Spanish town was built primarily out of blue foam panels, which are usually used as insulation in construction projects. Besides being weatherproof, these foam panels are rigid enough to provide structural strength.
To downplay their shallow depth, I added a lot of detail to the front of the Spanish houses. Ornate balconies with brackets, interesting windows and doors designs, red tile roofs, etc. became the focal point of these houses to draw the eye to these details, and away from their structural “flatness.”
Building the structures
I started with a 24” x 24” piece of 1” thick blue insulation board (from your local building supply store). I cut this piece in half to obtain a 24” x 12” piece for the three houses. To make the group of houses more interesting, I gave the fronts different heights. The blue and green houses on each side of the group are 11” high, and the center house is 12” high.
Materials used:
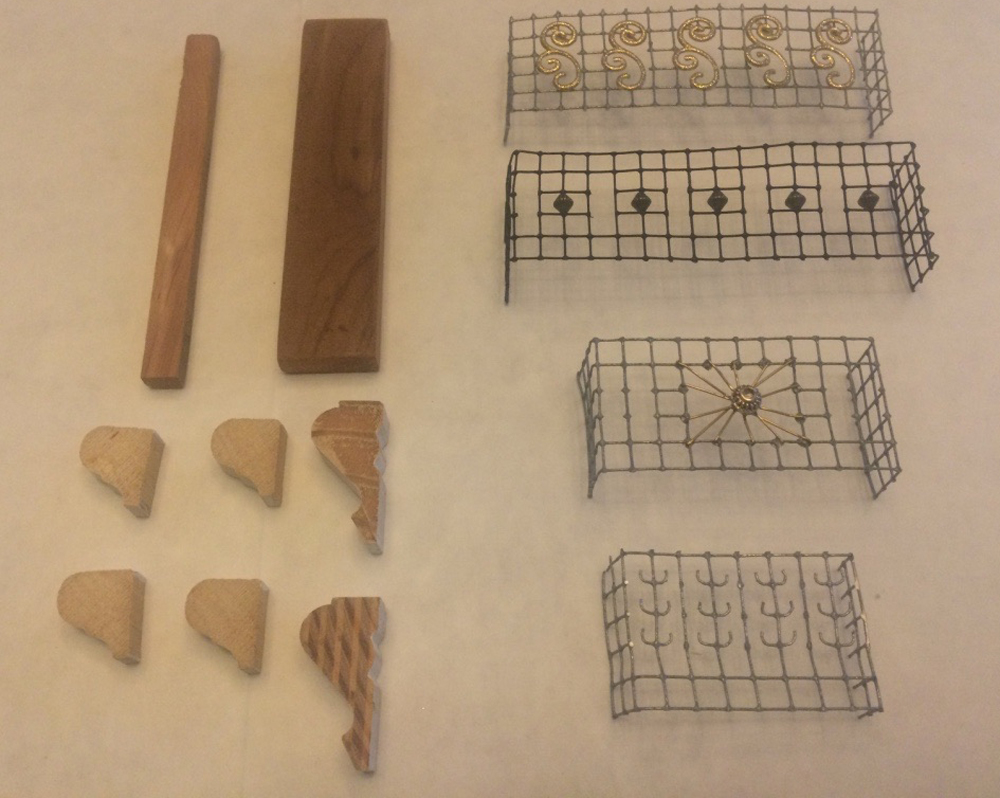
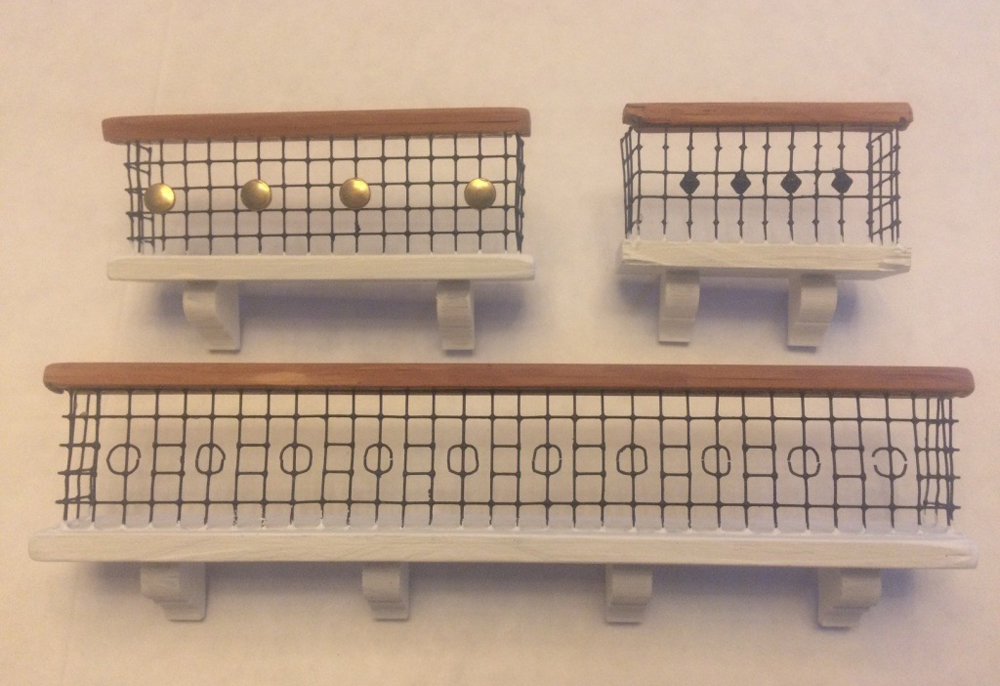
- To represent the red tiled roofs, I used corrugated styrene from the hobby store
- Supporting the “tile” roofs are wedges of rigid foam
- The arches for the round top windows and doors are ¼” slices of 2” PVC pipe, cut in half
- The “wrought iron” for the balconies came from ¼” wire fabric mesh
- The details on the “wrought iron” came from the bead store, where fashion jewelry materials are sold
- The balcony brackets, or corbels, are slices of molding
- The balcony base and handrail are pieces of ¼” cedar
- The ornate and detailed windows and doors are printed internet finds, trimmed, and protected with transparent packing tape
- Four, ¼” wide pieces of styrene divide and frame the three houses, and give the illusion of rainwater leaders coming from the roof
Building the main structure was very simple and straight forward. I cut the 24” X 24” foam in half, and using one of the halves, I trimmed 1” off the tops to form the two 11” high houses, leaving the center house the full 12”.
For the roofs, I cut three foam wedges, 8” wide, 3” deep, and glued them to the tops of the houses. After painting the three pieces of corrugated styrene red, I glued them to the roof wedges. Once these parts had dried, I glued corbels or brackets underneath the roof soffits.
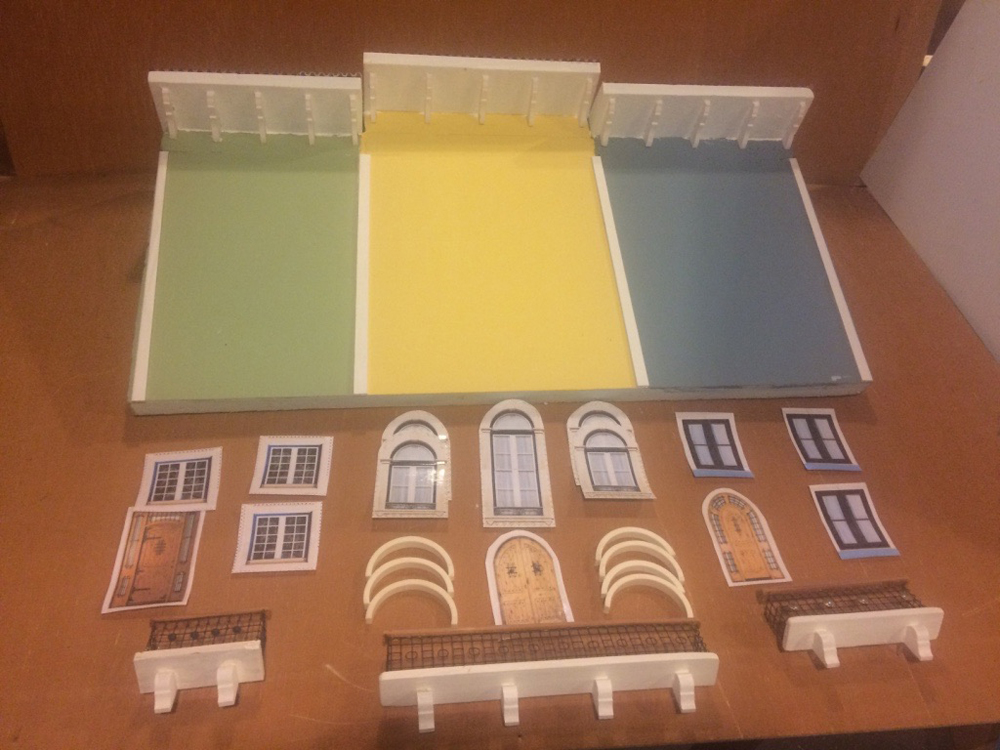
I glued all windows, doors, and balconies to the house fronts with clear silicon. I sprayed the whole structure with 2 coats of clear UV resistant paint, to give it additional protection from the elements.
I had a lot of fun building the balconies. As you can see, I had various models of “wrought iron” balcony fronts. I went with the simpler designs for these houses. I made the design of the large balcony by cutting and bending the wires to form the circles.
Once the houses were finished, I installed them at the end of the line to complete the project. The trolley now can complete its rounds with purpose and logic.

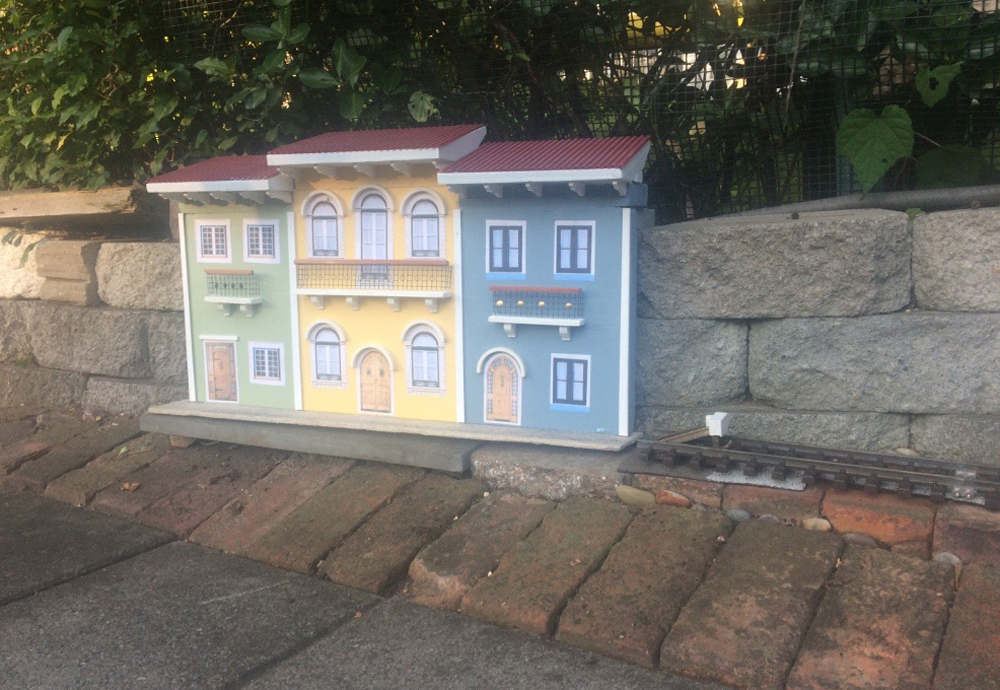
In my view, this new line not only adds a “logical” extension to the railway, but also provides additional depth of field, which fools the eye into thinking that the railway is larger that it really is.
Resources:
More about making corbels, p. 52